

php editor Xigua brings you how to use Revit curtain wall to make tile roof skillfully. As an important part of the building curtain wall design, the tile roof plays a vital role in the building's appearance design and function. In Revit software, through some simple settings and operations, the combination of tile roofs and curtain walls can be easily realized, injecting more fashion and beauty into the building. Below we will introduce in detail the specific method of using Revit curtain wall to skillfully make a tile roof.
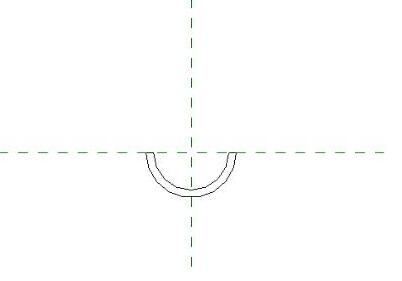
1. To build a tile family, open the metric outline-mullion family template and draw the tile outline.
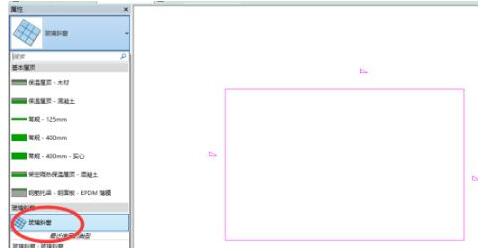
2. Create a new project, use trace roof to draw a rectangular pitched roof in the project, and change the attribute to glass sloped window,
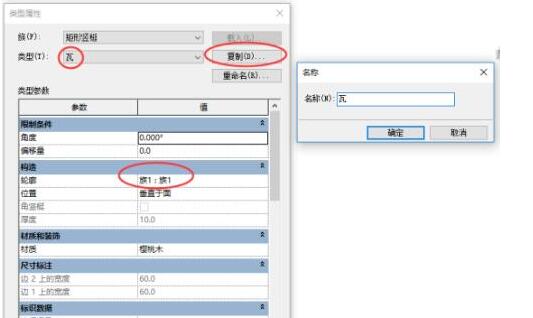
4. Load the tile family into the project, select mullions under the Building tab, edit the rectangular mullions, change the ** type to tile, and change the outline to family 1, which is the tile family.
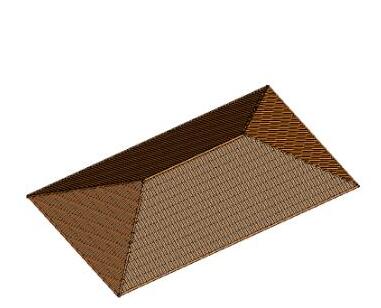
5. Select the glass inclined window, change the grid to fixed distance, grid 1 spacing to 200, grid 2 to 500, grid 1 mullions [Internal type 】Change to the tile you just created.

6. After clicking Confirm, the effect is as shown in the picture.
Meaning: When encountering numerous and simple component placements, you can create families quickly and cooperate with system components to quickly create, eliminating the complicated placement process and saving time.
The above is the detailed content of How to use Revit curtain wall to make tile roof. For more information, please follow other related articles on the PHP Chinese website!
 504 Gateway Time out causes and solutions
 How much is Dimensity 9000 equivalent to Snapdragon?
 vue common instructions
 How to sort in excel
 How to calculate the refund handling fee for Railway 12306
 How to solve the problem of invalid database object name
 What are the advantages of mongodb database
 oracle imp


![[Web front-end] Node.js quick start](https://img.php.cn/upload/course/000/000/067/662b5d34ba7c0227.png)


