
 Software Tutorial
Computer Software
How to add pictures to hbuilderx_hbuilderx tutorial to add pictures
Software Tutorial
Computer Software
How to add pictures to hbuilderx_hbuilderx tutorial to add pictures
How to add pictures to hbuilderx_hbuilderx tutorial to add pictures

php editor Yuzai brings you a tutorial on "How to add images to HBuilderX". HBuilderX is a very excellent front-end development tool and is widely welcomed by developers. However, it may be unfamiliar to some beginners. So how to add pictures in HBuilderX? In this article, we will introduce in detail how to add images to HBuilderX to help you better use this tool.
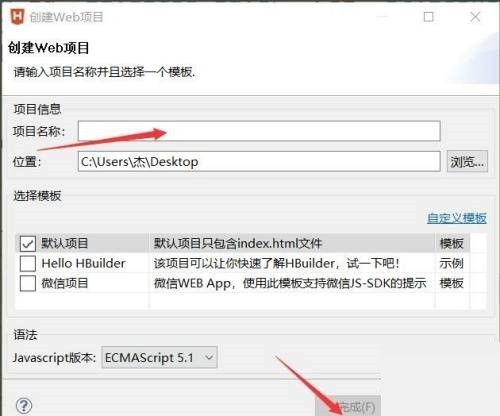
1. First, open HBuilder and right-click on the left side of HBuilder to create a new web project.
2. Then the project name can use camel case naming.
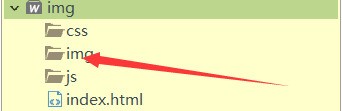
3. Pull the image into the img folder.
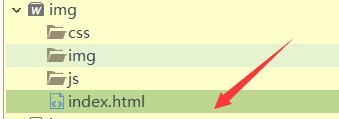
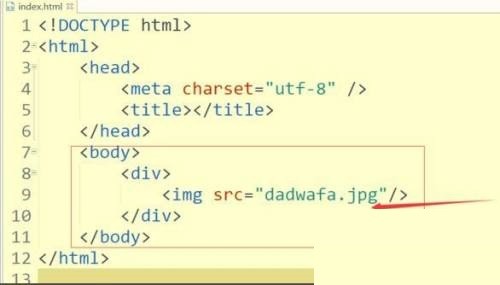
4. Then click index.html.
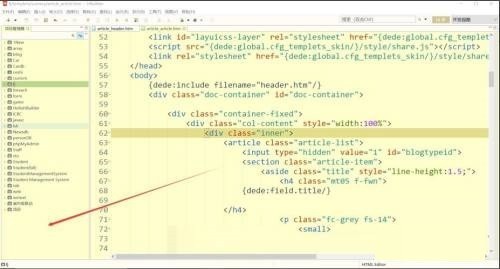
5. Then write the corresponding code in the body.
6. After finishing writing the code, save it and click the browser icon above to browse.

The above is the detailed content of How to add pictures to hbuilderx_hbuilderx tutorial to add pictures. For more information, please follow other related articles on the PHP Chinese website!

Hot AI Tools

Undresser.AI Undress
AI-powered app for creating realistic nude photos

AI Clothes Remover
Online AI tool for removing clothes from photos.

Undress AI Tool
Undress images for free

Clothoff.io
AI clothes remover

AI Hentai Generator
Generate AI Hentai for free.

Hot Article
Hot Tools

Notepad++7.3.1
Easy-to-use and free code editor

SublimeText3 Chinese version
Chinese version, very easy to use

Zend Studio 13.0.1
Powerful PHP integrated development environment

Dreamweaver CS6
Visual web development tools

SublimeText3 Mac version
God-level code editing software (SublimeText3)
Hot Topics
 1377
1377
 52
52

 eclipse project storage location
May 05, 2024 pm 07:36 PM
eclipse project storage location
May 05, 2024 pm 07:36 PM
Where Eclipse projects are stored depends on the project type and workspace settings. Java Project: Stored in the project folder within the workspace. Web project: stored in the project folder in the workspace, divided into multiple subfolders. Other project types: Files are stored in project folders within the workspace, and the organization may vary depending on the project type. The workspace location is located in "<home directory>/workspace" by default and can be changed through Eclipse preferences. To modify the project storage location, right-click the project and select the Resources tab in Properties.
 How to create a web project with vscode
Apr 03, 2024 am 03:48 AM
How to create a web project with vscode
Apr 03, 2024 am 03:48 AM
Steps to create a web project in Visual Studio Code: Create a project folder. Install HTML, CSS, and JavaScript extensions. Create an HTML file and add the necessary code. Create CSS files and add styles. Run the project using the http-server command.
 Best practices and common problem solutions for deploying web projects on Tomcat
Dec 29, 2023 am 08:21 AM
Best practices and common problem solutions for deploying web projects on Tomcat
Dec 29, 2023 am 08:21 AM
Best practices for deploying Web projects with Tomcat and solutions to common problems Introduction: Tomcat, as a lightweight Java application server, has been widely used in Web application development. This article will introduce the best practices and common problem solving methods for Tomcat deployment of web projects, and provide specific code examples to help readers better understand and apply. 1. Project directory structure planning Before deploying a Web project, we need to plan the directory structure of the project. Generally speaking, we can organize it in the following way
 Web project for data visualization using Node.js
Nov 08, 2023 pm 03:32 PM
Web project for data visualization using Node.js
Nov 08, 2023 pm 03:32 PM
Web projects that use Node.js to implement data visualization require specific code examples. With the advent of the big data era, data visualization has become a very important way of displaying data. By converting data into charts, graphs, maps and other forms, it can visually display the trends, correlations and distribution of data, helping people better understand and analyze the data. As an efficient and flexible server-side JavaScript environment, Node.js can well implement data visualization web projects. in the text,
 How to create a web project in eclipse
Jan 12, 2024 pm 02:51 PM
How to create a web project in eclipse
Jan 12, 2024 pm 02:51 PM
Steps for creating a web project in eclipse: 1. Install the appropriate plug-in; 2. Create a dynamic web project; 3. Enter the project name; 4. Select the appropriate server; 5. Configure server settings; 6. Create a Web module; 7. Configure the project Properties; 8. Complete the wizard; 9. Add necessary files and folders; 10. Write code; 11. Configure deployment descriptors; 12. Build and run the project. Detailed introduction: 1. Install appropriate plug-ins. Creating a Web project in Eclipse requires installing appropriate plug-ins, etc.
 In-depth exploration of the unlimited potential of Go language open source projects: five project outlines worth paying attention to
Jan 30, 2024 am 10:48 AM
In-depth exploration of the unlimited potential of Go language open source projects: five project outlines worth paying attention to
Jan 30, 2024 am 10:48 AM
In recent years, the Go language has become more and more widely used in the field of software development, attracting the attention and participation of many developers. Go language has become the language of choice for many developers due to its efficient performance, concise syntax and powerful concurrency features. In the Go language ecosystem, open source projects play a very important role, providing developers with a variety of excellent tools and libraries. This article will outline five noteworthy Go language open source projects to demonstrate the unlimited potential of Go language in the field of software development. GinGin is a Go-based
 Installation and use of WeChat mini program PHP SDK
Mar 27, 2024 am 09:33 AM
Installation and use of WeChat mini program PHP SDK
Mar 27, 2024 am 09:33 AM
Installation and use of WeChat Mini Program PHPSDK With the rapid development of the mobile Internet, WeChat Mini Program has become a new way for more and more companies to conduct business and promote products. WeChat Mini Program PHPSDK provides developers with convenient and fast development tools, which can greatly improve development efficiency. This article will introduce the installation and use of WeChat applet PHPSDK. 1. Install SDK 1. Download the project file on GitHub. WeChat applet PHPSDK is an open source project. Developers can download it on GitHub.
 How to deploy web projects in tomcat
Dec 28, 2023 pm 04:50 PM
How to deploy web projects in tomcat
Dec 28, 2023 pm 04:50 PM
Deployment steps: 1. Create a Web project; 2. Package the project as a WAR file; 3. Copy the WAR file to Tomcat's webapps directory; 4. Start the Tomcat server; 5. Access the deployed Web application; 6. Stop the Tomcat server . Detailed introduction: 1. Create a Web project: You need to create a Web project. A standard web project structure can be created using any IDE or manually. Make sure the project contains a WEB-INF directory, web.xml file, etc.
