

Java 中对文件的读写操作之比较_MySQL

Java 中对文件的读写操作之比较
作者:Jeru Liu
日期:November 29,2000
版本:1.0
纪念在chinaasp积分过一百呕心原创一篇(Java 中对文件的读写操作之比较)拿分好难呀,555~~~,不知道那些几千分的老妖们是怎么灌水的。
Java 对文件进行读写操作的例子很多,让初学者感到十分困惑,我觉得有必要将各种方法进行
一次分析,归类,理清不同方法之间的异同点。
一.在 JDK 1.0 中,通常是用 InputStream & OutputStream 这两个基类来进行读写操作的。
InputStream 中的 FileInputStream 类似一个文件句柄,通过它来对文件进行操作,类似的,在
OutputStream 中我们有 FileOutputStream 这个对象。
用FileInputStream 来读取数据的常用方法是:
FileInputStream fstream = new FileInputStream(args[0]);
DataInputStream in = new DataInputStream(fstream);
用 in.readLine() 来得到数据,然后用 in.close() 关闭输入流。
完整代码见 Example 1。
用FileOutputStream 来写入数据的常用方法是:
FileOutputStream out out = new FileOutputStream("myfile.txt");
PrintStream p = new PrintStream( out );
用 p.println() 来写入数据,然后用 p.close() 关闭输入。
完整代码见 Example 2。
二.在 JDK 1.1中,支持两个新的对象 Reader & Writer, 它们只能用来对文本文件进行操作,而
JDK1.1中的 InputStream & OutputStream 可以对文本文件或二进制文件进行操作。
用FileReader 来读取文件的常用方法是:
FileReader fr = new FileReader("mydata.txt");
BufferedReader br = new BufferedReader(fr);
用 br.readLing() 来读出数据,然后用br.close() 关闭缓存,用fr.close() 关闭文件。
完整代码见 Example 3。
用 FileWriter 来写入文件的常用方法是:
FileWriter fw = new FileWriter("mydata.txt");
PrintWriter out = new PrintWriter(fw);
在用out.print 或 out.println 来往文件中写入数据,out.print 和 out.println的唯一区别是后者写
入数据或会自动开一新行。写完后要记得 用out.close() 关闭输出,用fw.close() 关闭文件。
完整代码见 Example 4。
-------------------------------------------------------------- following is the source code of examples------------------------------------------------------
Example 1:
// FileInputDemo
// Demonstrates FileInputStream and DataInputStream
import java.io.*;
class FileInputDemo {
public static void main(String args[]) {
// args.length is equivalent to argc in C
if (args.length == 1) {
try {
// Open the file that is the first command line parameter
FileInputStream fstream = new FileInputStream(args[0]);
// Convert our input stream to a DataInputStream
DataInputStream in = new DataInputStream(fstream);
// Continue to read lines while there are still some left to read
while (in.available() !=0) {
// Print file line to screen
System.out.println (in.readLine());
}
in.close();
} catch (Exception e) {
System.err.println("File input error");
}
}
else
System.out.println("Invalid parameters");
}
}
Example 2:
// FileOutputDemo
// Demonstration of FileOutputStream and PrintStream classes
import java.io.*;
class FileOutputDemo
{
public static void main(String args[]) {
FileOutputStream out; // declare a file output object
PrintStream p; // declare a print stream object
try {
// connected to "myfile.txt"
out = new FileOutputStream("myfile.txt");
// Connect print stream to the output stream
p = new PrintStream( out );
p.println ("This is written to a file");
p.close();
} catch (Exception e) {
System.err.println ("Error writing to file");
}
}
}
Example 3:
// FileReadTest.java
// User FileReader in JDK1.1 to read a file
import java.io.*;
class FileReadTest {
public static void main (String[] args) {
FileReadTest t = new FileReadTest();
t.readMyFile();
}
void readMyFile() {
String record = null;
int recCount = 0;
try {
FileReader fr = new FileReader("mydata.txt");
BufferedReader br = new BufferedReader(fr);
record = new String();
while ((record = br.readLine()) != null) {
recCount++;
System.out.println(recCount + ": " + record);
}
br.close();
fr.close();
} catch (IOException e) {
System.out.println("Uh oh, got an IOException error!");
e.printStackTrace();
}
}
}
Example 4:
// FileWriteTest.java
// User FileWriter in JDK1.1 to writer a file
import java.io.*;
class FileWriteTest {
public static void main (String[] args) {
FileWriteTest t = new FileWriteTest();
t.WriteMyFile();
}
void WriteMyFile() {
try {
FileWriter fw = new FileWriter("mydata.txt");
PrintWriter out = new PrintWriter(fw);
out.print(“hi,this will be wirte into the file!”);
out.close();
fw.close();
} catch (IOException e) {
System.out.println("Uh oh, got an IOException error!");
e.printStackTrace();
}
}
}

Hot AI Tools

Undresser.AI Undress
AI-powered app for creating realistic nude photos

AI Clothes Remover
Online AI tool for removing clothes from photos.

Undress AI Tool
Undress images for free

Clothoff.io
AI clothes remover

Video Face Swap
Swap faces in any video effortlessly with our completely free AI face swap tool!

Hot Article
Hot Tools

Notepad++7.3.1
Easy-to-use and free code editor

SublimeText3 Chinese version
Chinese version, very easy to use

Zend Studio 13.0.1
Powerful PHP integrated development environment

Dreamweaver CS6
Visual web development tools

SublimeText3 Mac version
God-level code editing software (SublimeText3)
Hot Topics
 1386
1386
 52
52

 How to enable nfc function on Xiaomi Mi 14 Pro?
Mar 19, 2024 pm 02:28 PM
How to enable nfc function on Xiaomi Mi 14 Pro?
Mar 19, 2024 pm 02:28 PM
Nowadays, the performance and functions of mobile phones are becoming more and more powerful. Almost all mobile phones are equipped with convenient NFC functions to facilitate users for mobile payment and identity authentication. However, some Xiaomi 14Pro users may not know how to enable the NFC function. Next, let me introduce it to you in detail. How to enable nfc function on Xiaomi 14Pro? Step 1: Open the settings menu of your phone. Step 2: Find and click the "Connect and Share" or "Wireless & Networks" option. Step 3: In the Connection & Sharing or Wireless & Networks menu, find and click "NFC & Payments". Step 4: Find and click "NFC Switch". Normally, the default is off. Step 5: On the NFC switch page, click the switch button to switch it to on.
 F5 refresh key not working in Windows 11
Mar 14, 2024 pm 01:01 PM
F5 refresh key not working in Windows 11
Mar 14, 2024 pm 01:01 PM
Is the F5 key not working properly on your Windows 11/10 PC? The F5 key is typically used to refresh the desktop or explorer or reload a web page. However, some of our readers have reported that the F5 key is refreshing their computers and not working properly. How to enable F5 refresh in Windows 11? To refresh your Windows PC, just press the F5 key. On some laptops or desktops, you may need to press the Fn+F5 key combination to complete the refresh operation. Why doesn't F5 refresh work? If pressing the F5 key fails to refresh your computer or you are experiencing issues on Windows 11/10, it may be due to the function keys being locked. Other potential causes include the keyboard or F5 key
 What to do if the 0x80004005 error code appears. The editor will teach you how to solve the 0x80004005 error code.
Mar 21, 2024 pm 09:17 PM
What to do if the 0x80004005 error code appears. The editor will teach you how to solve the 0x80004005 error code.
Mar 21, 2024 pm 09:17 PM
When deleting or decompressing a folder on your computer, sometimes a prompt dialog box "Error 0x80004005: Unspecified Error" will pop up. How should you solve this situation? There are actually many reasons why the error code 0x80004005 is prompted, but most of them are caused by viruses. We can re-register the dll to solve the problem. Below, the editor will explain to you the experience of handling the 0x80004005 error code. Some users are prompted with error code 0X80004005 when using their computers. The 0x80004005 error is mainly caused by the computer not correctly registering certain dynamic link library files, or by a firewall that does not allow HTTPS connections between the computer and the Internet. So how about
 How to transfer files from Quark Cloud Disk to Baidu Cloud Disk?
Mar 14, 2024 pm 02:07 PM
How to transfer files from Quark Cloud Disk to Baidu Cloud Disk?
Mar 14, 2024 pm 02:07 PM
Quark Netdisk and Baidu Netdisk are currently the most commonly used Netdisk software for storing files. If you want to save the files in Quark Netdisk to Baidu Netdisk, how do you do it? In this issue, the editor has compiled the tutorial steps for transferring files from Quark Network Disk computer to Baidu Network Disk. Let’s take a look at how to operate it. How to save Quark network disk files to Baidu network disk? To transfer files from Quark Network Disk to Baidu Network Disk, you first need to download the required files from Quark Network Disk, then select the target folder in the Baidu Network Disk client and open it. Then, drag and drop the files downloaded from Quark Cloud Disk into the folder opened by the Baidu Cloud Disk client, or use the upload function to add the files to Baidu Cloud Disk. Make sure to check whether the file was successfully transferred in Baidu Cloud Disk after the upload is completed. That's it
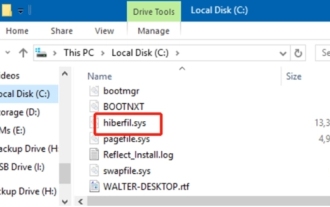 What is hiberfil.sys file? Can hiberfil.sys be deleted?
Mar 15, 2024 am 09:49 AM
What is hiberfil.sys file? Can hiberfil.sys be deleted?
Mar 15, 2024 am 09:49 AM
Recently, many netizens have asked the editor, what is the file hiberfil.sys? Can hiberfil.sys take up a lot of C drive space and be deleted? The editor can tell you that the hiberfil.sys file can be deleted. Let’s take a look at the details below. hiberfil.sys is a hidden file in the Windows system and also a system hibernation file. It is usually stored in the root directory of the C drive, and its size is equivalent to the size of the system's installed memory. This file is used when the computer is hibernated and contains the memory data of the current system so that it can be quickly restored to the previous state during recovery. Since its size is equal to the memory capacity, it may take up a larger amount of hard drive space. hiber
 How to use TikTok on Huawei Pocket2 remotely?
Mar 18, 2024 pm 03:00 PM
How to use TikTok on Huawei Pocket2 remotely?
Mar 18, 2024 pm 03:00 PM
Sliding the screen through the air is a feature of Huawei that is highly praised in the Huawei mate60 series. This feature uses the laser sensor on the phone and the 3D depth camera of the front camera to complete a series of functions that do not require The function of touching the screen is, for example, to use TikTok from a distance. But how should Huawei Pocket 2 use TikTok from a distance? How to take screenshots from the air with Huawei Pocket2? 1. Open the settings of Huawei Pocket2 2. Then select [Accessibility]. 3. Click to open [Smart Perception]. 4. Just turn on the [Air Swipe Screen], [Air Screenshot], and [Air Press] switches. 5. When using it, you need to stand 20~40CM away from the screen, open your palm, and wait until the palm icon appears on the screen.
 Linux Deploy operation steps and precautions
Mar 14, 2024 pm 03:03 PM
Linux Deploy operation steps and precautions
Mar 14, 2024 pm 03:03 PM
LinuxDeploy operating steps and precautions LinuxDeploy is a powerful tool that can help users quickly deploy various Linux distributions on Android devices, allowing users to experience a complete Linux system on their mobile devices. This article will introduce the operating steps and precautions of LinuxDeploy in detail, and provide specific code examples to help readers better use this tool. Operation steps: Install LinuxDeploy: First, install
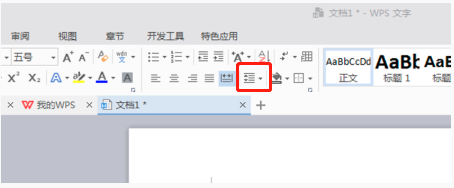 How to set line spacing in WPS Word to make the document neater
Mar 20, 2024 pm 04:30 PM
How to set line spacing in WPS Word to make the document neater
Mar 20, 2024 pm 04:30 PM
WPS is our commonly used office software. When editing long articles, the fonts are often too small to be seen clearly, so the fonts and the entire document are adjusted. For example: adjusting the line spacing of the document will make the entire document very clear. I suggest that all friends learn this operation step. I will share it with you today. The specific operation steps are as follows, come and take a look! Open the WPS text file you want to adjust, find the paragraph setting toolbar in the [Start] menu, and you will see the small line spacing setting icon (shown as a red circle in the picture). 2. Click the small inverted triangle in the lower right corner of the line spacing setting, and the corresponding line spacing value will appear. You can choose 1 to 3 times the line spacing (as shown by the arrow in the figure). 3. Or right-click the paragraph and it will appear.
