
php editor Xinyi will share with you today how to cancel the folding of the taskbar and the method of canceling the folding of the taskbar under the desktop in Win10. In Win10 system, expanding and collapsing the taskbar is a common operation requirement, but sometimes it may be operated incorrectly or needs to be personalized. Knowing how to cancel the folding effect of the taskbar can better improve the ease of use of the system. Through the following methods, you can easily expand and collapse the taskbar to meet your personalized setting needs.
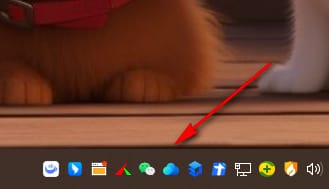
1. First, you can see that the taskbar is folded in the lower right corner of the computer.
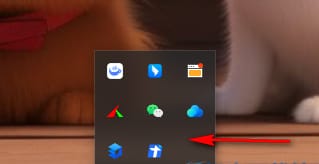
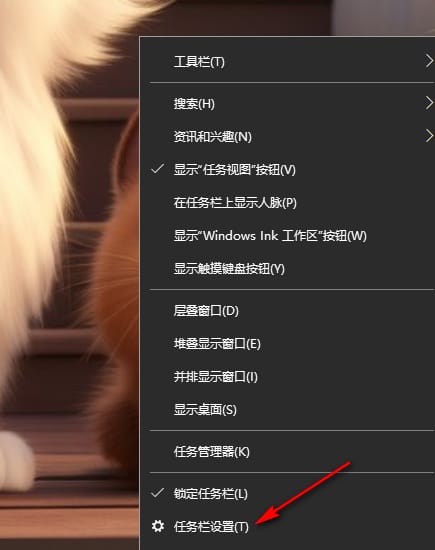
#2. Then we right-click on a blank space on the taskbar, and click the [Taskbar Settings] option in the pop-up menu option to enter.
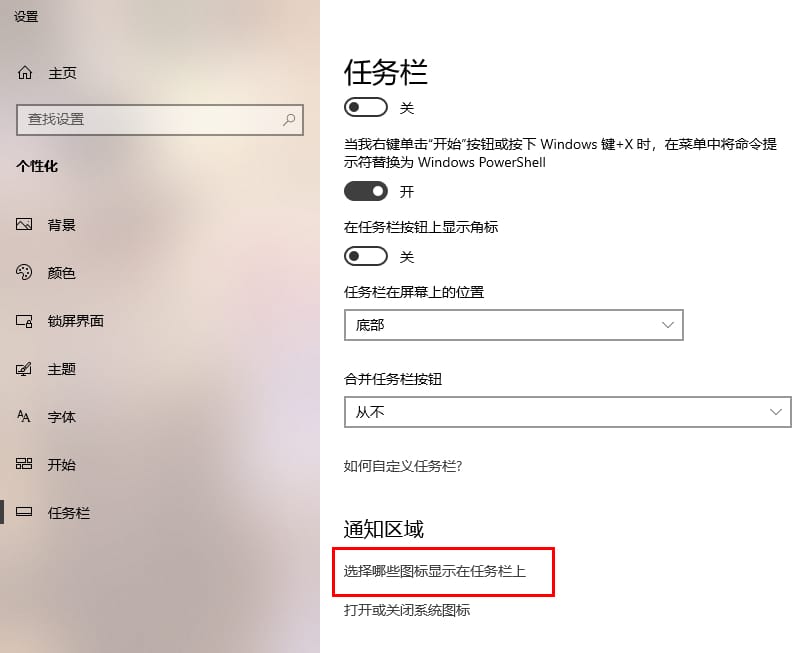
#3. After we enter the page, scroll directly to find the [Select which icons to display on the taskbar] option and click it to enter.
#4. After entering the page, we need to click on the [Always show all icons in the notification area] option to enable it.
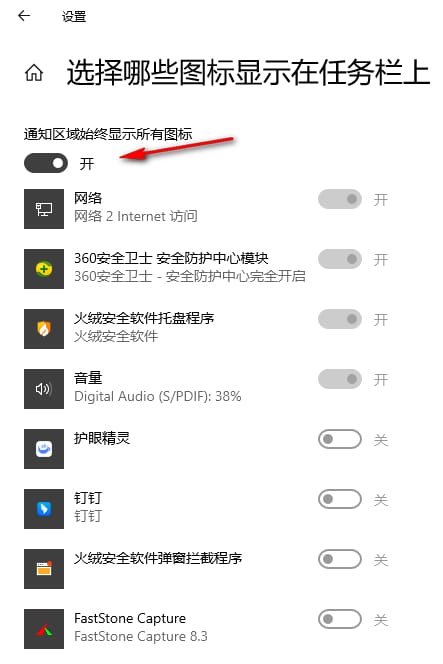
#5. At this time, let’s check that all the icons in the taskbar position in the lower right corner have been displayed, as shown in the figure.
The above is the detailed content of How to cancel the folding of the taskbar in Win10 How to cancel the folding of the taskbar under the desktop in Win10. For more information, please follow other related articles on the PHP Chinese website!
 win10 bluetooth switch is missing
 Why do all the icons in the lower right corner of win10 show up?
 The difference between win10 sleep and hibernation
 Win10 pauses updates
 What to do if the Bluetooth switch is missing in Windows 10
 win10 connect to shared printer
 Clean up junk in win10
 How to share printer in win10


