
php editor Apple introduces you the graphic process of using Android Studio to create a remote switch branch Git. Android Studio is a popular Android development tool, and version control combined with Git is a common operation in development. This article will provide detailed guidance on how to use Git to remotely switch branches in Android Studio to help developers manage project code more efficiently.
1. Open Android Studio and click the option of the branch button at the bottom of the software.
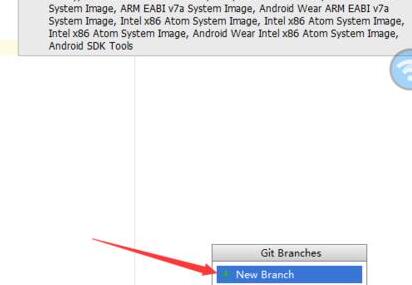
2. In the interface that pops up a small window of Git branches, click [new branch] to create a new branch.
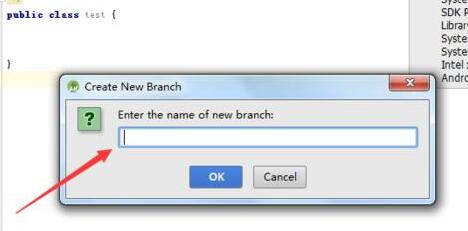
3. When creating new branch, you need to enter the nickname of the branch. After entering the nickname, click [ok].
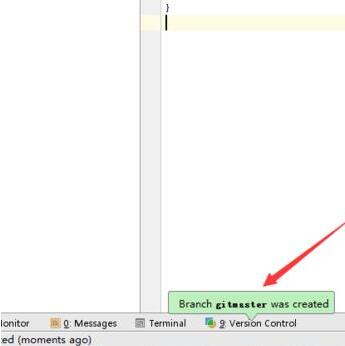
4. The prompt message you can see is that the branch was created successfully.
5. Create a remote warehouse branch. In the git branches window that pops up, renote branches is the remote branch category and select one of the branches.
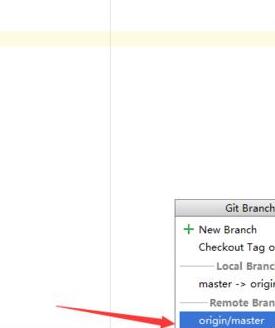
6. A lower-level menu will pop up, select the option [checkout as new local branch].
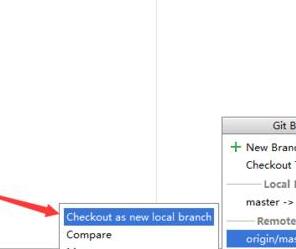
7. Enter the remote nickname in the input box. If the remote branch exists, it will be renamed. Click [ok].
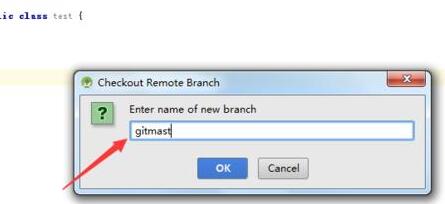
8. At this point, you can see the prompt message that the remote branch was successfully created.

The above is the detailed content of Android Studio creates a graphic process method for remotely switching branches git. For more information, please follow other related articles on the PHP Chinese website!


