如何使用Photoshop快速精修玻璃材质的化妆瓶
Jun 01, 2016 pm 02:24 PM今天小编教大家使用Photoshop快速精修玻璃材质的化妆瓶,教程不算复杂,喜欢的朋友可以一起来学习
修图的重点就是要善于分析,从初片中分析产品的构造、光影及不足之处等;然后分段分层把各部分勾出轮廓,并填充色块;最后逐一渲染颜色,细化光影即可。
原图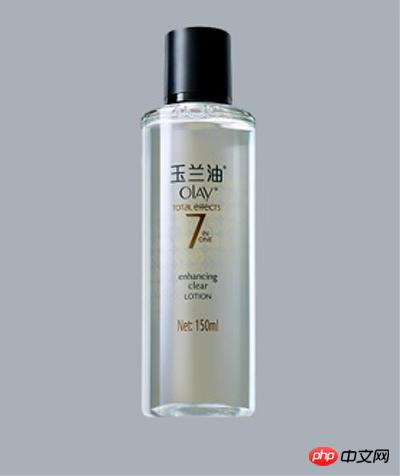
最终效果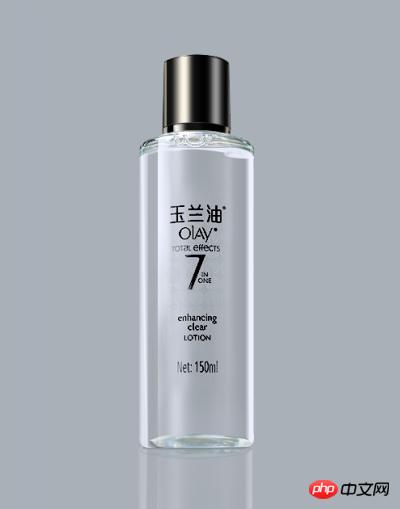
1、分析修图产品。 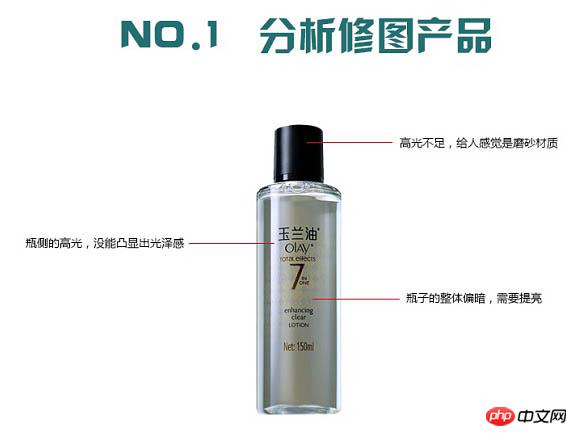
2、填充固有色。
按照瓶子的轮廓,用钢笔工具勾勒外形,并填充固有色。 
3、画瓶盖。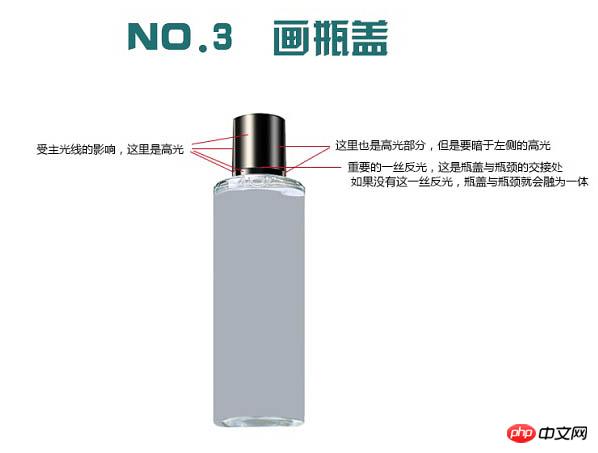
4、画瓶身。
5、画投影。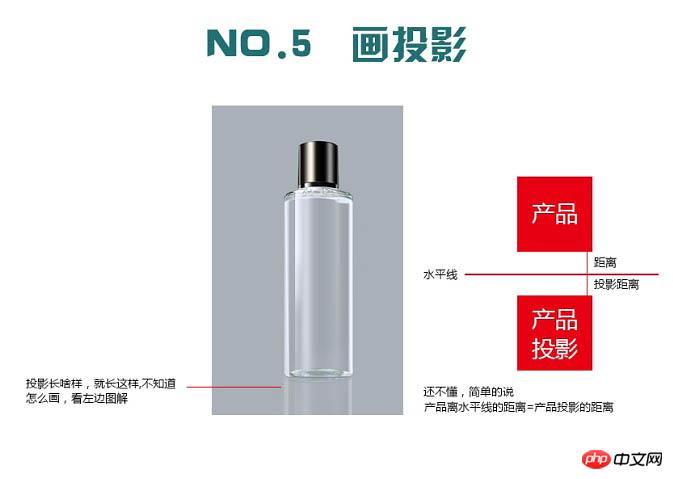
6、添加产品文案。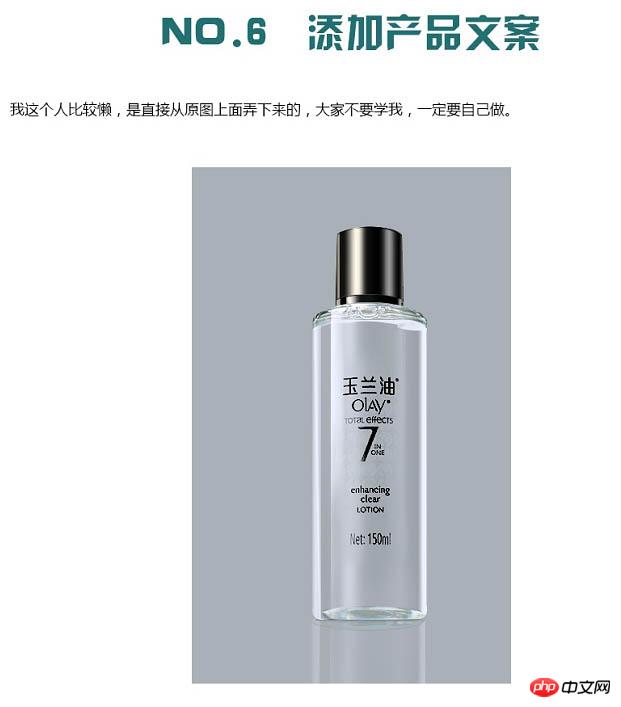
最终效果: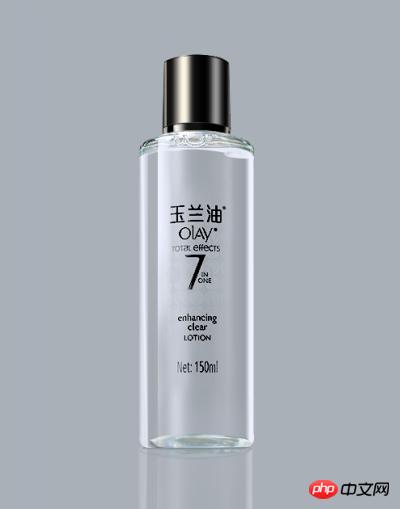

Hot Article

Hot tools Tags

Hot Article

Hot Article Tags

Notepad++7.3.1
Easy-to-use and free code editor

SublimeText3 Chinese version
Chinese version, very easy to use

Zend Studio 13.0.1
Powerful PHP integrated development environment

Dreamweaver CS6
Visual web development tools

SublimeText3 Mac version
God-level code editing software (SublimeText3)

Hot Topics
 Corning Gorilla Glass starts localized production at its Chongqing factory and will enter formal mass production early next year
Dec 19, 2023 am 08:03 AM
Corning Gorilla Glass starts localized production at its Chongqing factory and will enter formal mass production early next year
 The interior of iPhone 15 Pro will be redesigned and repair costs are expected to be reduced
Aug 01, 2023 am 09:41 AM
The interior of iPhone 15 Pro will be redesigned and repair costs are expected to be reduced
 iPhone 15 Pro and Pro Max glass back cover repair costs significantly reduced by 66%
Sep 18, 2023 pm 09:09 PM
iPhone 15 Pro and Pro Max glass back cover repair costs significantly reduced by 66%
 OnePlus Ace 3 Pro titanium mirror silver real machine announced for the first time: the first liquid metal glass process
Jun 22, 2024 pm 01:15 PM
OnePlus Ace 3 Pro titanium mirror silver real machine announced for the first time: the first liquid metal glass process
 The longest and largest in the world! The 'King of Glass” was born in Zibo, China: 26 meters long, 3.66 meters wide, and 95 square meters in area
Jul 23, 2024 am 11:46 AM
The longest and largest in the world! The 'King of Glass” was born in Zibo, China: 26 meters long, 3.66 meters wide, and 95 square meters in area
 Should mobile phones be made of ceramic or glass? Honor Zhao Ming joked: Durability and scratch resistance are the key
Mar 19, 2024 pm 07:40 PM
Should mobile phones be made of ceramic or glass? Honor Zhao Ming joked: Durability and scratch resistance are the key
 Rare in the same category! OnePlus Ace 3V is equipped with a glass back cover: 3D good feel
Mar 23, 2024 pm 09:16 PM
Rare in the same category! OnePlus Ace 3V is equipped with a glass back cover: 3D good feel
 Vivo S19 Pro is equipped with King Kong Shield double anti-glass for the first time: the anti-fall performance is improved by 150%
May 31, 2024 pm 10:03 PM
Vivo S19 Pro is equipped with King Kong Shield double anti-glass for the first time: the anti-fall performance is improved by 150%


