 Software Tutorial
 Office Software
 How to batch import pictures in Excel_How to batch import pictures in Excel
How to batch import pictures in Excel_How to batch import pictures in Excel
1. First, we select the entire table and adjust the column width and row height of the table.
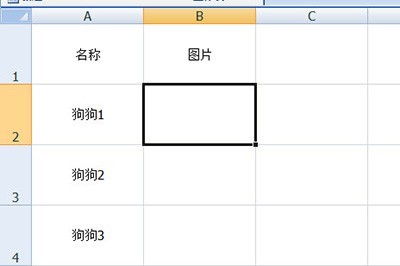
2. Then click [Insert]-[Picture] to select and insert all the imported pictures.

3. Then set the size and width of the image in the image settings bar above.
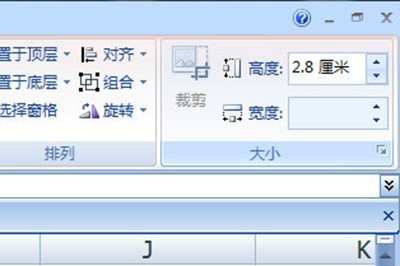
4. Then insert the picture first in the last unit. And select all the pictures again, select [Align]-[Left Align] in the [Arrange] column, so that all the pictures will be arranged neatly.
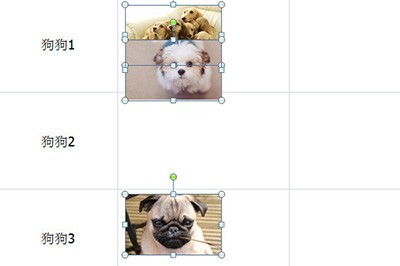
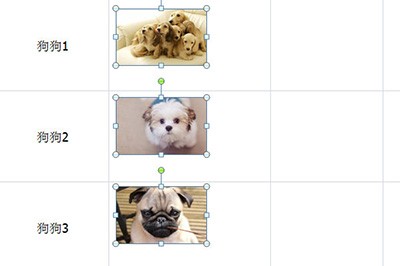
5. In the last step, click [Align]-[Vertical Distribution] again. In this way, all the pictures will be neatly moved to their own cells, without you having to manually move them. Drag them one by one.
The above is the detailed content of How to batch import pictures in Excel_How to batch import pictures in Excel. For more information, please follow other related articles on the PHP Chinese website!

Hot AI Tools

Undresser.AI Undress
AI-powered app for creating realistic nude photos

AI Clothes Remover
Online AI tool for removing clothes from photos.

Undress AI Tool
Undress images for free

Clothoff.io
AI clothes remover

Video Face Swap
Swap faces in any video effortlessly with our completely free AI face swap tool!

Hot Article

Hot Tools

Notepad++7.3.1
Easy-to-use and free code editor

SublimeText3 Chinese version
Chinese version, very easy to use

Zend Studio 13.0.1
Powerful PHP integrated development environment

Dreamweaver CS6
Visual web development tools

SublimeText3 Mac version
God-level code editing software (SublimeText3)

Hot Topics
 1393
1393
 52
52
 1207
1207
 24
24
 What are the top ten virtual currency trading platforms? Ranking of the top ten virtual currency trading platforms in the world
Feb 20, 2025 pm 02:15 PM
With the popularity of cryptocurrencies, virtual currency trading platforms have emerged. The top ten virtual currency trading platforms in the world are ranked as follows according to transaction volume and market share: Binance, Coinbase, FTX, KuCoin, Crypto.com, Kraken, Huobi, Gate.io, Bitfinex, Gemini. These platforms offer a wide range of services, ranging from a wide range of cryptocurrency choices to derivatives trading, suitable for traders of varying levels.
 Do I need to use flexbox in the center of the Bootstrap picture?
Apr 07, 2025 am 09:06 AM
There are many ways to center Bootstrap pictures, and you don’t have to use Flexbox. If you only need to center horizontally, the text-center class is enough; if you need to center vertically or multiple elements, Flexbox or Grid is more suitable. Flexbox is less compatible and may increase complexity, while Grid is more powerful and has a higher learning cost. When choosing a method, you should weigh the pros and cons and choose the most suitable method according to your needs and preferences.
 Top 10 cryptocurrency trading platforms, top ten recommended currency trading platform apps
Mar 17, 2025 pm 06:03 PM
The top ten cryptocurrency trading platforms include: 1. OKX, 2. Binance, 3. Gate.io, 4. Kraken, 5. Huobi, 6. Coinbase, 7. KuCoin, 8. Crypto.com, 9. Bitfinex, 10. Gemini. Security, liquidity, handling fees, currency selection, user interface and customer support should be considered when choosing a platform.
 How to adjust Sesame Open Exchange into Chinese
Mar 04, 2025 pm 11:51 PM
How to adjust Sesame Open Exchange to Chinese? This tutorial covers detailed steps on computers and Android mobile phones, from preliminary preparation to operational processes, and then to solving common problems, helping you easily switch the Sesame Open Exchange interface to Chinese and quickly get started with the trading platform.
 Top 10 virtual currency trading platforms 2025 cryptocurrency trading apps ranking top ten
Mar 17, 2025 pm 05:54 PM
Top Ten Virtual Currency Trading Platforms 2025: 1. OKX, 2. Binance, 3. Gate.io, 4. Kraken, 5. Huobi, 6. Coinbase, 7. KuCoin, 8. Crypto.com, 9. Bitfinex, 10. Gemini. Security, liquidity, handling fees, currency selection, user interface and customer support should be considered when choosing a platform.
 How to calculate c-subscript 3 subscript 5 c-subscript 3 subscript 5 algorithm tutorial
Apr 03, 2025 pm 10:33 PM
The calculation of C35 is essentially combinatorial mathematics, representing the number of combinations selected from 3 of 5 elements. The calculation formula is C53 = 5! / (3! * 2!), which can be directly calculated by loops to improve efficiency and avoid overflow. In addition, understanding the nature of combinations and mastering efficient calculation methods is crucial to solving many problems in the fields of probability statistics, cryptography, algorithm design, etc.
 How to implement adaptive layout of Y-axis position in web annotation?
Apr 04, 2025 pm 11:30 PM
The Y-axis position adaptive algorithm for web annotation function This article will explore how to implement annotation functions similar to Word documents, especially how to deal with the interval between annotations...
 What are the safe and reliable digital currency platforms?
Mar 17, 2025 pm 05:42 PM
A safe and reliable digital currency platform: 1. OKX, 2. Binance, 3. Gate.io, 4. Kraken, 5. Huobi, 6. Coinbase, 7. KuCoin, 8. Crypto.com, 9. Bitfinex, 10. Gemini. Security, liquidity, handling fees, currency selection, user interface and customer support should be considered when choosing a platform.


