
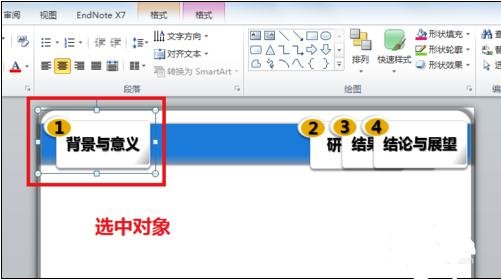
Open the PPT document that needs to be edited, find the slide that needs to be edited, and select the object that needs to be animated
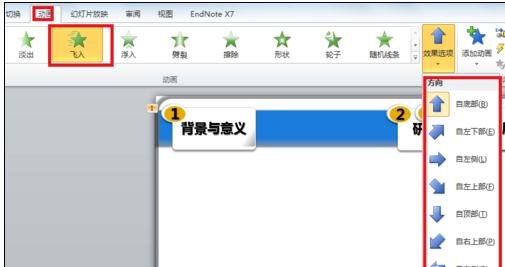
Click the animation in the menu bar and select the [Fly In] animation effect , click the effect option on the right at this time, and there will be many flying directions to choose from, but if these directions cannot meet our needs, we need to customize them at this time
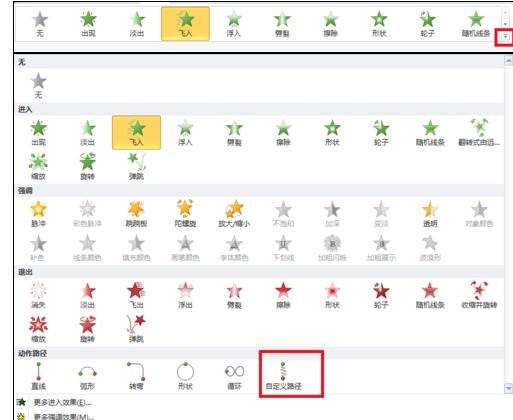
Click the drop-down arrow menu next to the animation option. A large dialog box will pop up. Select the custom animation path below

The mouse will turn into a cross. Hold down the left button, draw the path for animation playback on the screen, and click enter. At this time, you can see that the selected object will move according to the drawn path
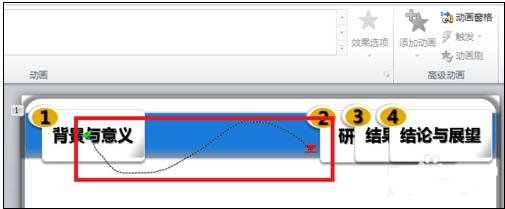
Click on the drawn path, and you will see a series of small circles appear on the edge of the path. At this time, you can modify the path, such as zooming in, moving up and down, etc. until you achieve the most satisfactory effect

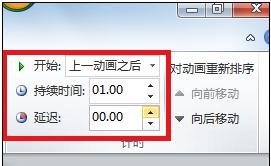
After setting the path, you can also set the animation time through the timing bar in the upper right corner of the animation menu
The above is the detailed content of ppt2013 graphic method of drawing animated flight path. For more information, please follow other related articles on the PHP Chinese website!
 How to light up Douyin close friends moment
 microsoft project
 What is phased array radar
 How to use fusioncharts.js
 Yiou trading software download
 The latest ranking of the top ten exchanges in the currency circle
 What to do if win8wifi connection is not available
 How to recover files emptied from Recycle Bin


