

How to set timer in ppt2013

How to make PPT automatically time? Want to know how to set the timer in ppt2013? PHP editor Yuzai brings you a detailed operation guide to help you master this technique easily and make your slideshow more professional and efficient!
What we are talking about here is not the rehearsal timing, which is not automatically controlled during preview playback, but the stopwatch timer, with different purposes and different methods.

Operation method one
Use FLASH to create a countdown effect, and then import it into ppt for direct use. This requires everyone to make animations.

First, enter FLASH and use the circle drawing tool to draw the outer frame of a clock, then write numbers on the inside, and adjust the length of time according to the countdown requirements. Here it is set to 10 seconds.

It’s just a countdown. You don’t need to set up the animation. It just automatically plays the set number at a certain number of frames, which is a countdown effect. Of course, it can also be made with a function.
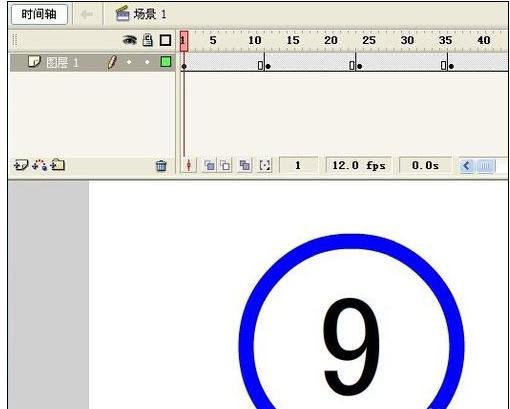
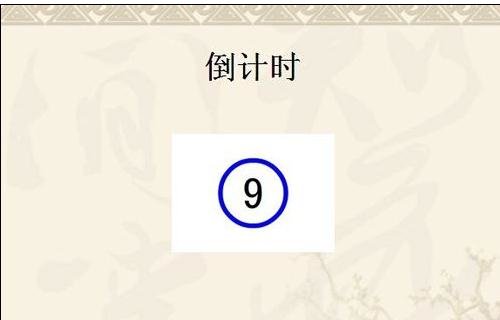
After you are done, you need to export the file and turn it into a ppt that can be called. Click the [File] menu - [Export] - [Export Video]. Remember to use GIF format.
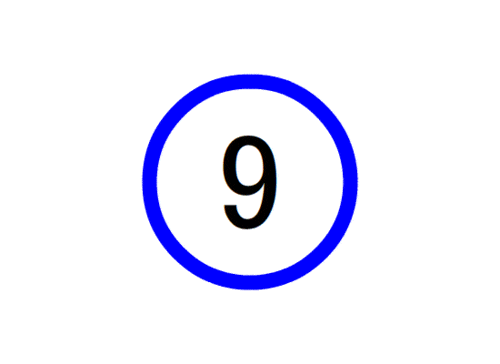
After opening the ppt, click [Insert] - [Picture] - [From File], select the file just now and call it in as shown below. The effect can be achieved when playing the ppt .
Operation method two
Make it directly with ppt. Here you can select pictures or text. The picture is to make a picture corresponding to the number and play the picture. The text can also achieve the same purpose by setting the appearance effect of the text.
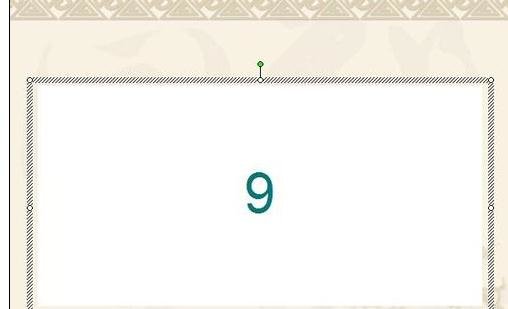
Set as a picture, and overlay the pictures prepared in advance. Set it to text, insert a rectangle, add text and set a number, then copy and paste to create multiple rectangles with numbers. Adjust them according to your requirements, as long as the numbers can be displayed in sequence.
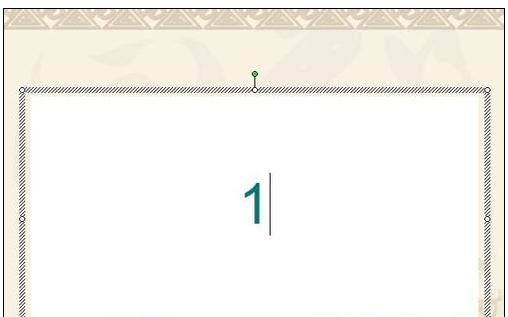
Click [Draw] on the [Drawing] toolbar - [Align or Distribute] - [Horizontal Center] and set it to vertical center. The purpose is to make the countdown appear to be counting in place. Adjust the display effect in the [Custom Animation] task pane.

Any method can be achieved, and the timer imported from the Internet can also be achieved.
The above is the detailed content of How to set timer in ppt2013. For more information, please follow other related articles on the PHP Chinese website!

Hot AI Tools

Undresser.AI Undress
AI-powered app for creating realistic nude photos

AI Clothes Remover
Online AI tool for removing clothes from photos.

Undress AI Tool
Undress images for free

Clothoff.io
AI clothes remover

AI Hentai Generator
Generate AI Hentai for free.

Hot Article
Hot Tools

Notepad++7.3.1
Easy-to-use and free code editor

SublimeText3 Chinese version
Chinese version, very easy to use

Zend Studio 13.0.1
Powerful PHP integrated development environment

Dreamweaver CS6
Visual web development tools

SublimeText3 Mac version
God-level code editing software (SublimeText3)
Hot Topics
 1377
1377
 52
52

 How to center images in html web pages
Apr 05, 2024 pm 12:18 PM
How to center images in html web pages
Apr 05, 2024 pm 12:18 PM
In HTML, there are two ways to center-align an image: use CSS: margin: 0 auto; to center the image horizontally, and display: block; to make it occupy the entire width. Use the HTML: <center> element to center the image horizontally, but it is less flexible and does not comply with the latest web standards.
 How to adjust text position in dreamweaver
Apr 09, 2024 am 02:24 AM
How to adjust text position in dreamweaver
Apr 09, 2024 am 02:24 AM
Adjusting the text position in Dreamweaver can be completed by the following steps: Select the text and use the text position adjuster to make horizontal adjustments: left alignment, right alignment, center alignment; 2. Make vertical adjustments: top alignment, bottom alignment, vertical center; 3. Press Shift key and use the arrow keys to fine-tune the position; 4. Use shortcut keys to quickly align: left alignment (Ctrl/Cmd + L), right alignment (Ctrl/Cmd + R), center alignment (Ctrl/Cmd + C).
 How to center the text box in html
Apr 22, 2024 am 10:33 AM
How to center the text box in html
Apr 22, 2024 am 10:33 AM
There are many ways to center the HTML text box: text input box: use the CSS code input[type="text"] { text-align: center; } text area: use the CSS code textarea { text-align: center; } horizontal centering: Use the text-align: center style on the text box parent element to center it vertically: use the vertical-align attribute input[type="text"] { vertical-align: middle; }Flexbox: use display:
 How to center ul content in css
Apr 26, 2024 pm 12:24 PM
How to center ul content in css
Apr 26, 2024 pm 12:24 PM
Center UL content in CSS: Use the text-align property: Set the alignment of text, including the content of list items. Use the margin attribute: Set the left and right margins of the element, and use margin: auto to achieve horizontal centering. Use the display attribute: Set the element to inline-block, then center it vertically using text-align: center. Use flexbox properties: Horizontal and vertical centering through justify-content: center and align-items: center.
 Analysis and solutions to the causes of misaligned typography in WordPress
Mar 05, 2024 am 11:45 AM
Analysis and solutions to the causes of misaligned typography in WordPress
Mar 05, 2024 am 11:45 AM
Analysis of causes and solutions to misaligned typography in WordPress When building a website using WordPress, you may encounter misaligned typography, which will affect the overall beauty and user experience of the website. There are many reasons for typography misalignment, which may be caused by theme compatibility issues, plug-in conflicts, CSS style conflicts, etc. This article will analyze common causes of misaligned typography in WordPress and provide some solutions, including specific code examples. 1. Reason Analysis Theme Compatibility Issues: Some WordPress
 How to center the frame in html
Apr 22, 2024 am 10:45 AM
How to center the frame in html
Apr 22, 2024 am 10:45 AM
There are four ways to center the HTML frame: margin: 0 auto;: Center the frame horizontally. text-align: center;: Center the frame content horizontally. display: flex; align-items: center;: Center the frame vertically. position: absolute; top: 50%; left: 50%; transform: translate(-50%, -50%);: Uses CSS transforms to position the frame in the center of the fixed-size frame's container.
 How to center the font in sublime
Apr 03, 2024 am 10:21 AM
How to center the font in sublime
Apr 03, 2024 am 10:21 AM
Methods to align text in Sublime Text include: using shortcut keys (paragraph: Ctrl + Alt + C, single line: Ctrl + Alt + E), using the "Align" option on the menu bar, and installing alignment plug-ins (such as AlignTab, Alignment Plugin ), or manual alignment (centered: fills spaces, justified: creates borders).
 How to put the image in the middle with css
Apr 25, 2024 am 11:51 AM
How to put the image in the middle with css
Apr 25, 2024 am 11:51 AM
There are three main ways to center an image in CSS: using display: block; and margin: 0 auto;. Use flexbox layout or grid layout and set align-items or justify-content to center. Use absolute positioning, set top and left to 50%, and apply transform: translate(-50%, -50%);.
