

Photoshop结合AI制作超逼真的立体复古收音机

这篇教程是向脚本之家的朋友分享Photoshop结合AI制作超逼真的立体复古收音机方法,教程制作出来的收音机非常逼真,很值得大家学习,推荐到脚本之家,大家快快来学习吧
内发光,正常,透明度75%,柔和,边缘,大小18px~
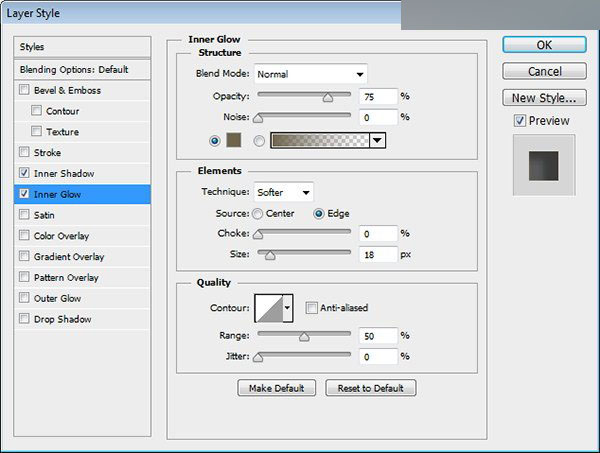
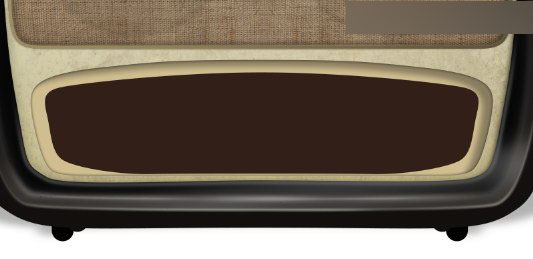
效果如下图所示哦~
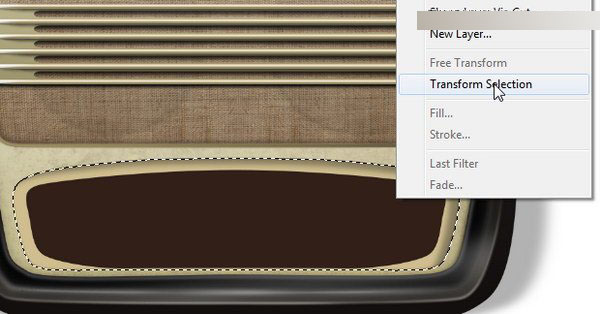
步骤71
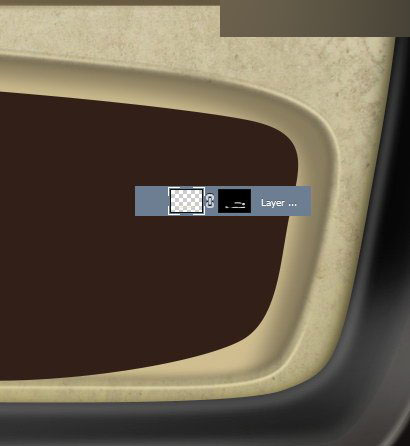
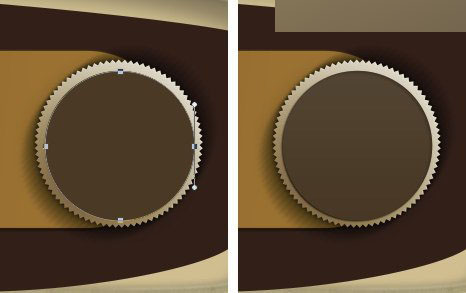
双击如图所示的图形,调出选区,然后改变形状~
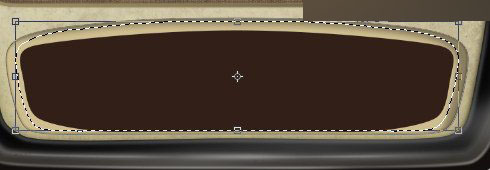
按住ALT+SHIFT然后将形状拖动变形,直到你的形状和我们图里所示这有~=W=
步骤73
给图像添加蒙版,这样不需要的地方就会被隐藏~

步骤74
打开滤镜>模糊>高斯模糊~
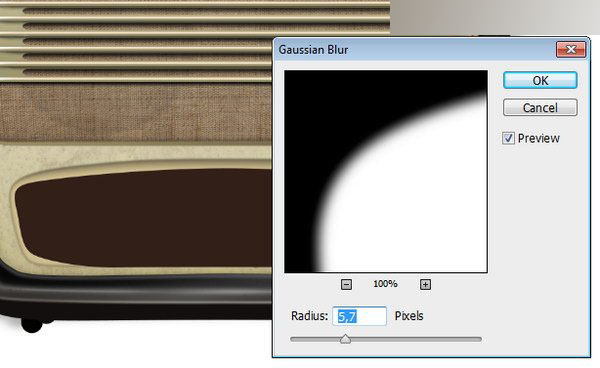
边缘就会被软化~
步骤75
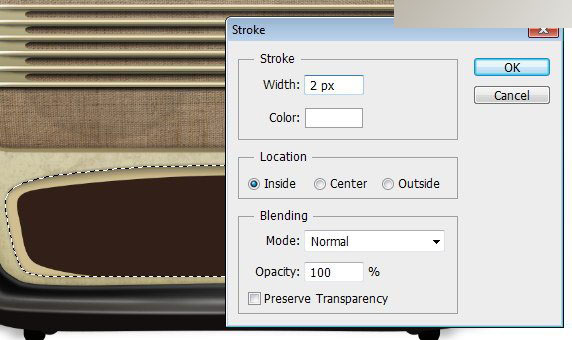
选择图层蒙版,调出选区,然后新增图层,编辑>描边,使用白色,2px~
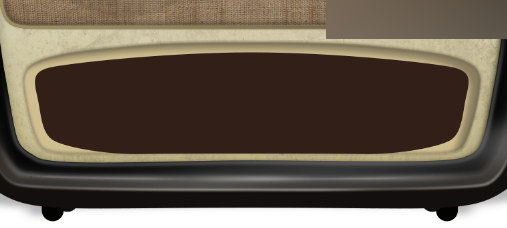
然后我们制作好的线条就和下面的图一样了~

步骤76
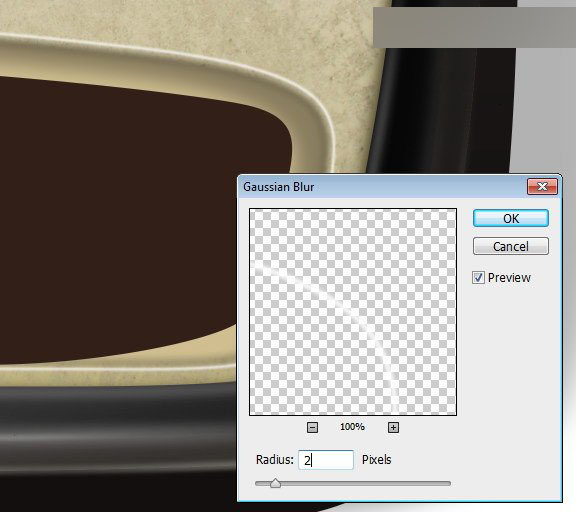
在进行一下高斯模糊2px,将线条软化下~
步骤77
添加蒙版 ,用黑色软化笔擦拭 一下下!
步骤78
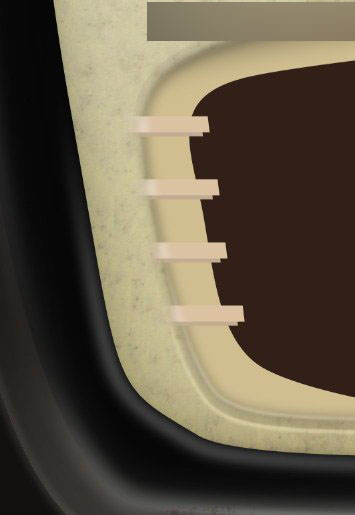
再添加左右两边小的矩形选框,使用#d2bd8e填充它们~
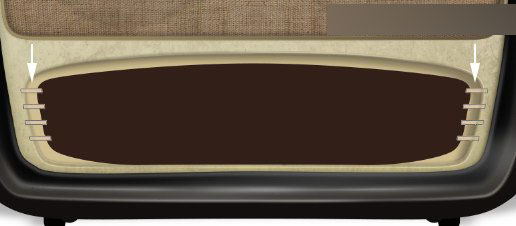
步骤79
添加蒙版然后擦拭一下边缘~


步骤80
左边也一样,添加蒙版,进行擦拭~

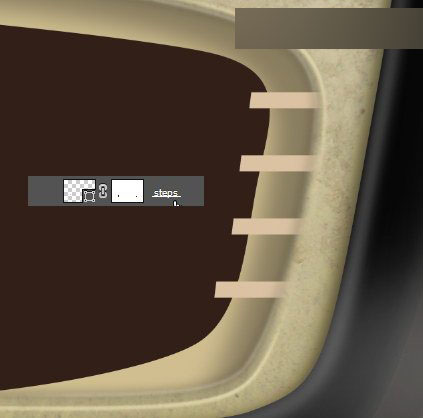
步骤81
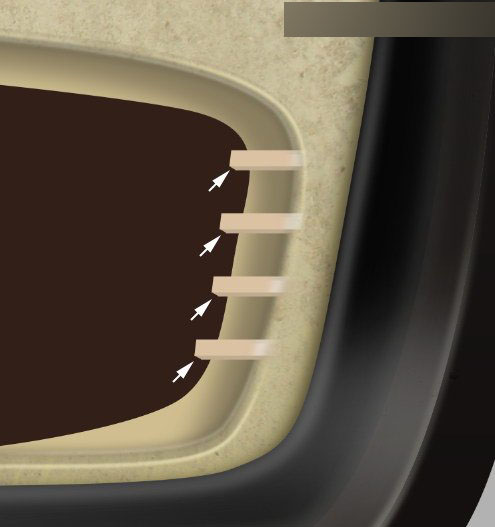
在右边复制一次矩形,然后放置在原来的矩形的下方,移动一些 ,也可以改变下颜色~相当于阴影哦~
步骤82
左边也一样~
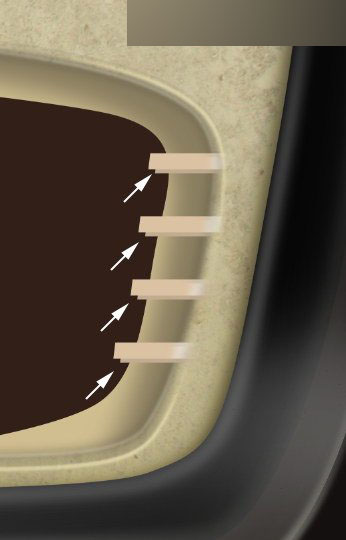
步骤83
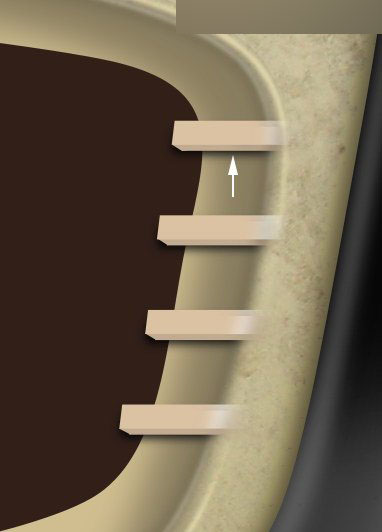
为了让图形看上去更完美,画一个小的三角形,放置在两个上下的矩形之间哦~

步骤84
添加新的图层,画一些阴影~

步骤85
现在~我们来添加圆角矩形,设置颜色为#976e30~=O=

步骤86
添加新的图层然后添加渐变映射~改变图层混合模式为叠加,透明度改为3%
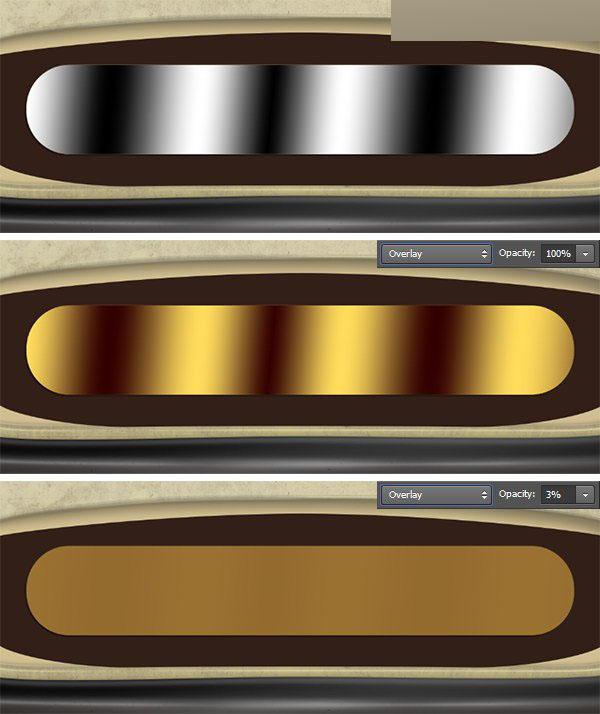
步骤87
现在打开两个矩形,改变颜色为 #4e3315~
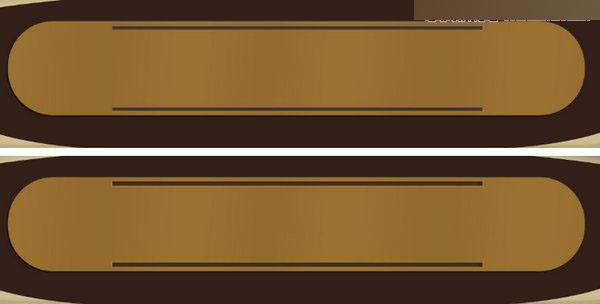
步骤88
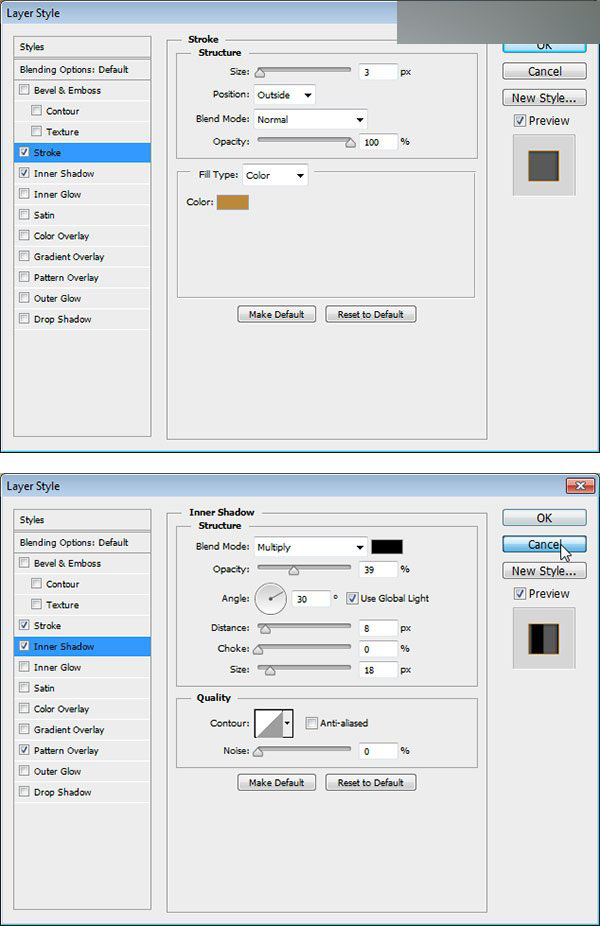
给两个矩形添加图层样式~描边-大小3px,外部,正常~内阴影-正片叠底,透明度39%,角度30°~距离8px,大小16px~
步骤89
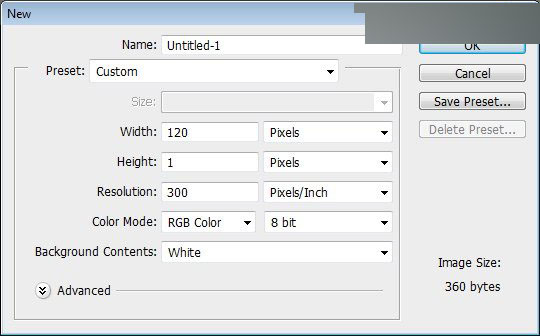
现在我们来新建文件,大小为120 × 1px哦 ~
步骤90
添加新的图层并隐藏背景图层~然后填充图层的一半为黑色~
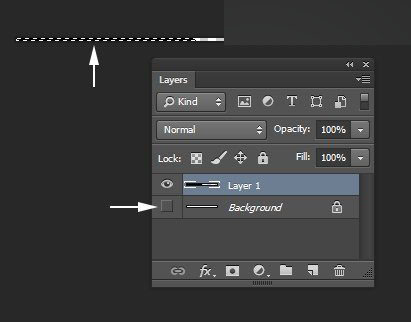
步骤91
全选后,编辑>定义图案~

步骤92
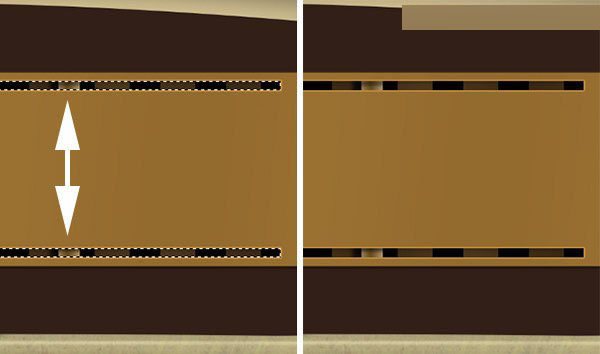
回到收音机文件~然后在两个上下的矩形里打开图层样式,选择图案叠加,选择我们刚刚做好的图案哦~
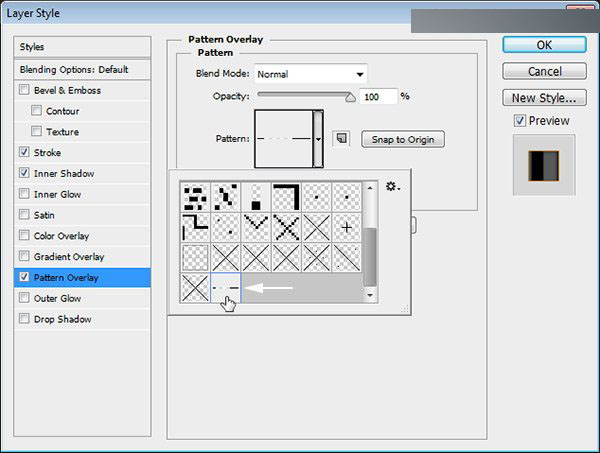
效果如图所示~

步骤93
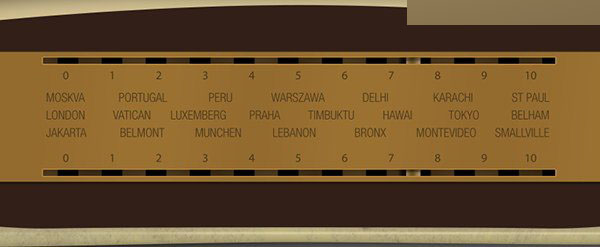
新建图层,Ctrl+单击选择矩形,调出选区,画一个矩形内的图形~这将会变成射频指标。
步骤94
我们一定要记住放置好文字哦~
步骤95
按钮。现在我们把按钮填充颜色为#af9f7b,然后打开图层样式~
渐变叠加-叠加-无仿色,线性,角度63°~范围106%
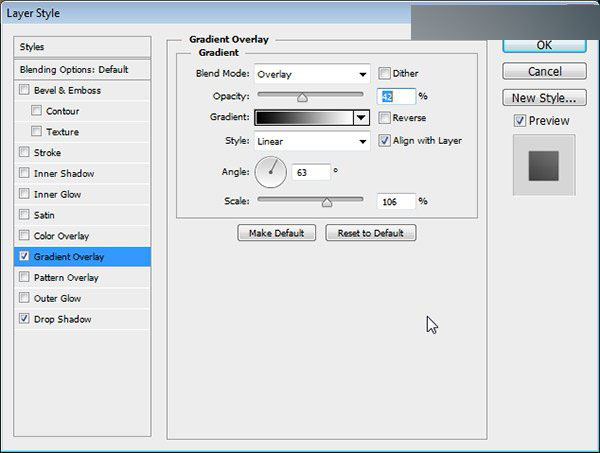
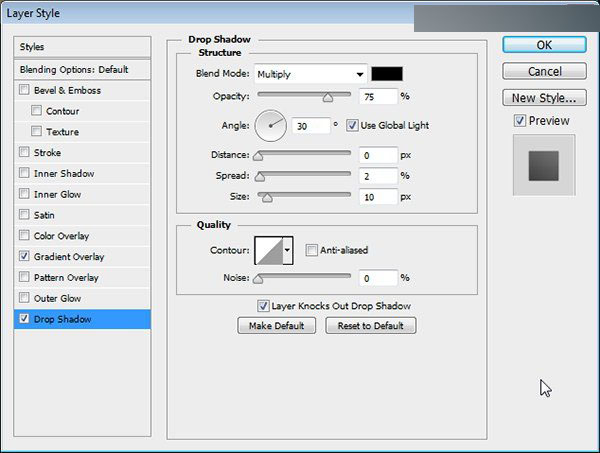
投影-正片叠底,透明度75%,角度30°,扩展2%,大小10px~
步骤96
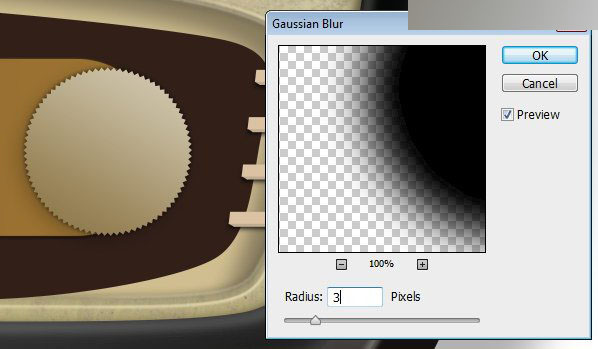
Ctrl+单击按钮,做出选区,然后新建图层并填充黑色,把黑色的按钮图层放在金属质感按钮图层后面,接下来我们用黑色按钮图层做按钮的阴影哦~

步骤97
高斯模糊黑色阴影,大概3px~
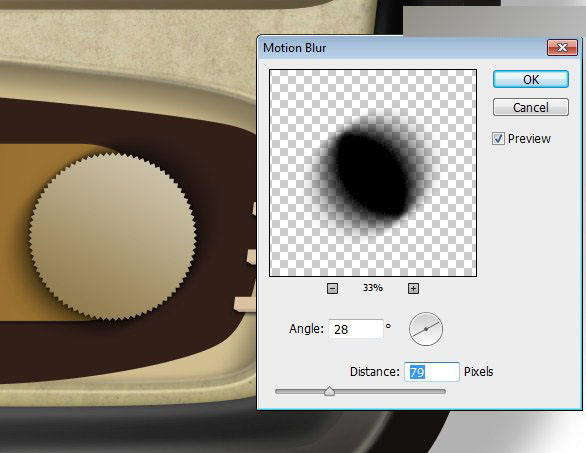
步骤98
为了让阴影看上去更加的真实,我们再来复制一次阴影,然后用动感模糊把阴影扩大,大概79px~角度改变为28°~
步骤99
然后我们就用用软橡皮擦工具擦拭去一些不需要的部分~
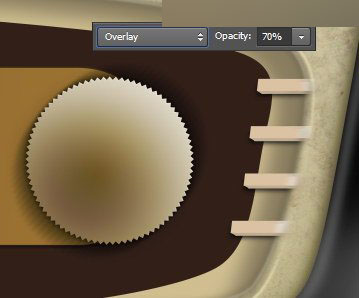
添加一个新的图层在金属质感按钮上方,用黑色软笔刷工具画一下,画得和下面的图差不多就可以啦~

步骤101
改变图层混合模式为叠加,记得要把透明度改变为70%哦~\(^o^)/~
步骤102
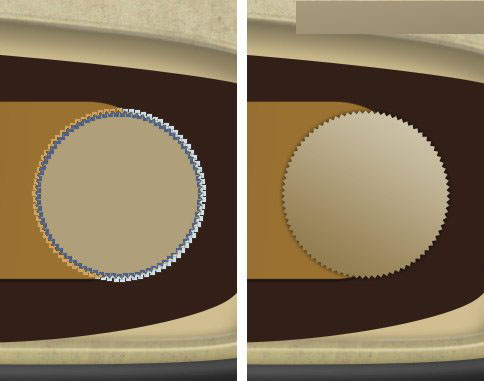
再打开里面的圆,填充颜色 #4a3925,之后我们就来添加图层样式啦~
内阴影=正片叠底-透明度23%,角度30°,距离6px,大小6px~
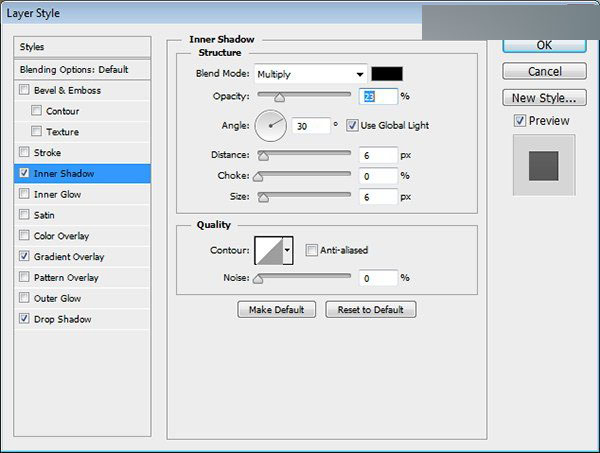
渐变叠加-正常,透明度5%,线性,角度90°

投影-正片叠底,透明度75%,角度30°,距离2px,大小2px
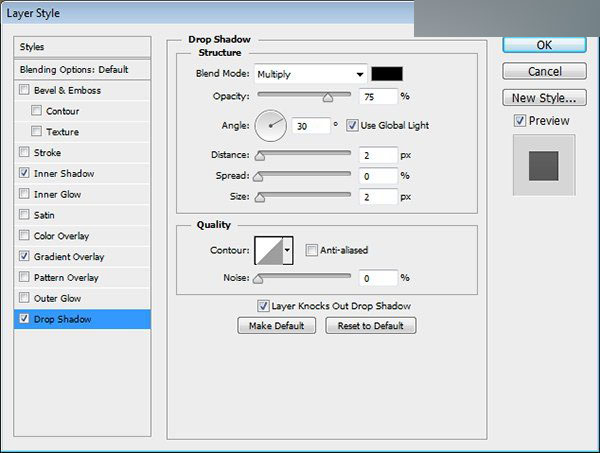
步骤103
再把更小的圆形打开,填充颜色为#c2b592,一样也要打开图层样式~

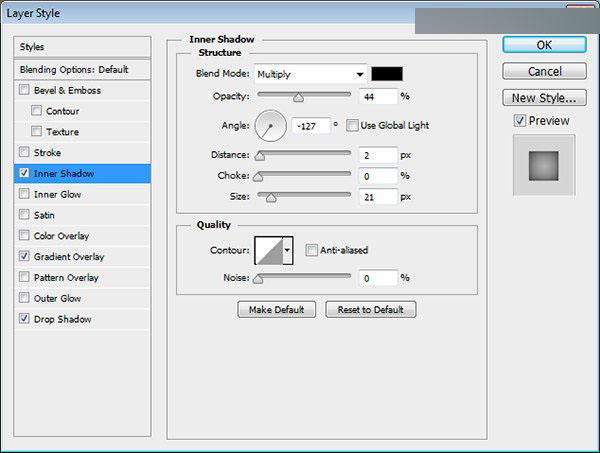
内阴影-正片叠底,透明度44%,角度-127°,距离2px,大小21px~
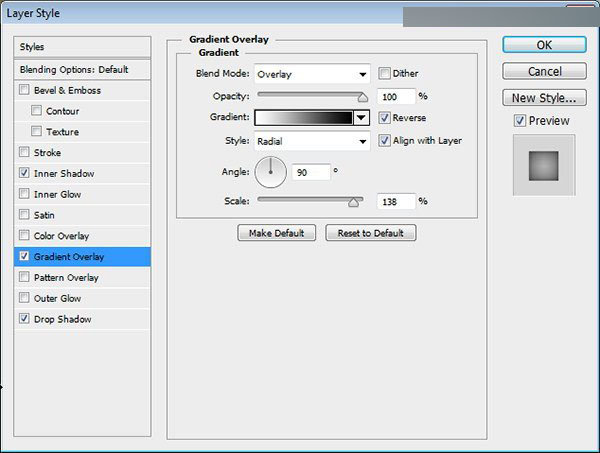
渐变叠加-叠加,透明度100%,径向,反相,与图层对齐,角度90°,范围138%~
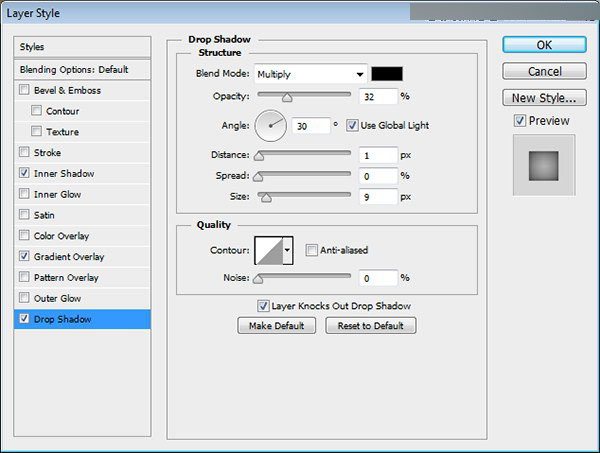
投影-正片叠底,透明度32%,角度30°,距离1px,大小9px
步骤104
在图层最顶层新建一个图层然后改变其混合模式为叠加,按住Ctrl + Alt + G变城剪切蒙版~然后用软黑色画笔在边缘处画一些阴影哦~
步骤105
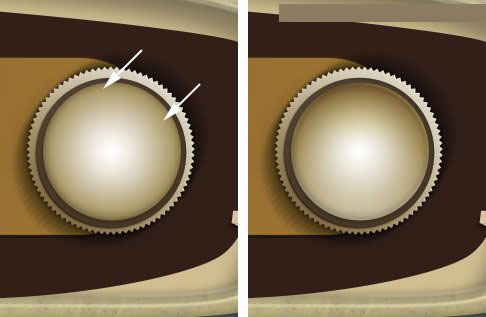
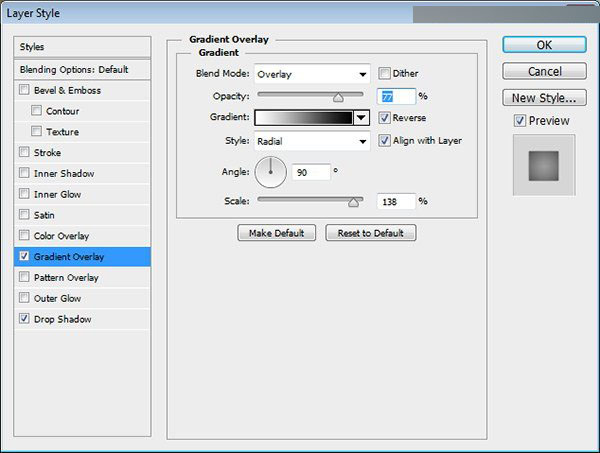
再把另一个圆打开,用颜色 #c2b592填充它,再在图层样式里应用渐变叠加和投影~
渐变叠加-叠加,透明度77%,径向 ,角度90°,范围138%
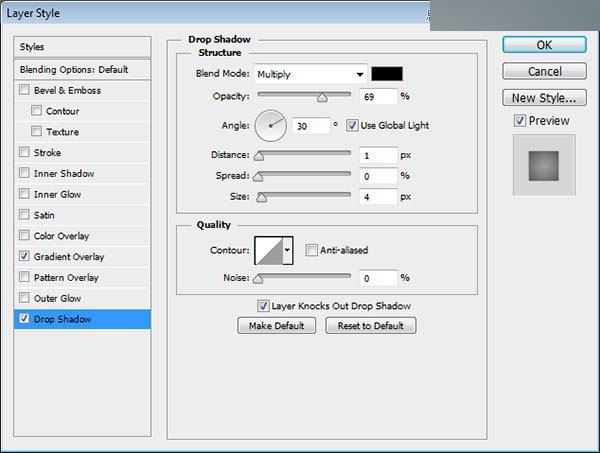
投影-正片叠底,透明度69%,角度30°,使用全局光 ,然后距离1px,大小4px~
步骤106
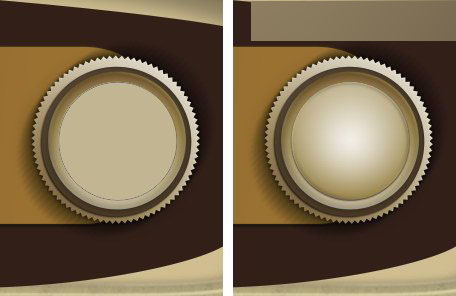
现在我们来处理最小的圆,填充颜色为#553b20,来来来,还是来打开图层样式!=W=

渐变叠加-正常,透明度30%,径向,角度90°,范围130%~

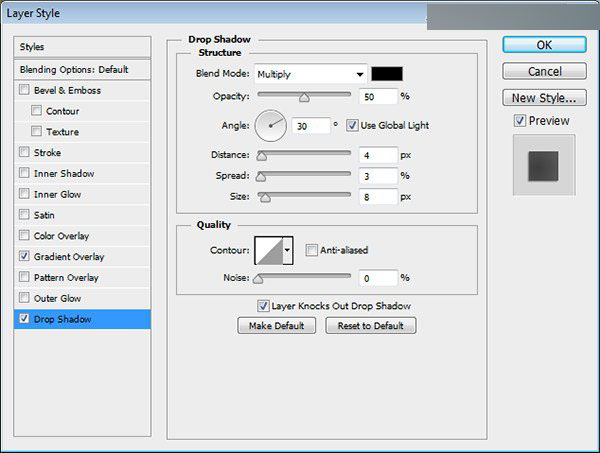
投影-正片叠底,透明度50%,角度30°,使用全局光,距离4px,扩展3px,大小8px啦~
步骤107
再在最顶层新建一个图层,设置为剪贴蒙版,然后改变图层混合模式为叠加,咱们还是用软黑色画笔和白色画笔画出高光与阴影~一直画到看上去很真实为止哟~︿( ̄︶ ̄)︿
步骤108
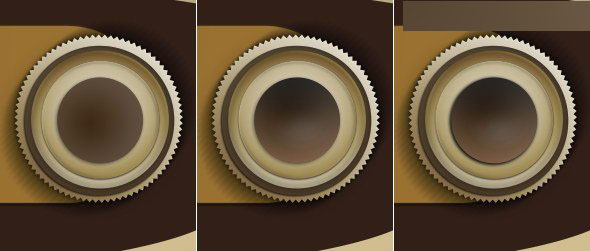
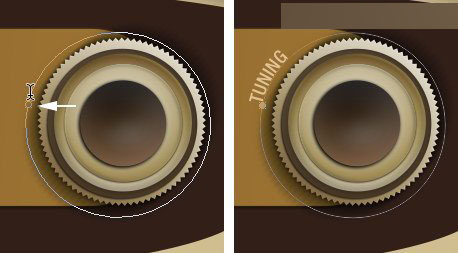
现在我们差不多做完按钮这部分了,不过还没完~
我们还要用椭圆工具画一个圆形轨道。 点击路径添加文字工具 加上一个文字logo~
步骤109
现在我们把做好的按钮复制一次 ,然后放置到左边,别忘了要旋转调整一下角度哟~哇咔咔

步骤110
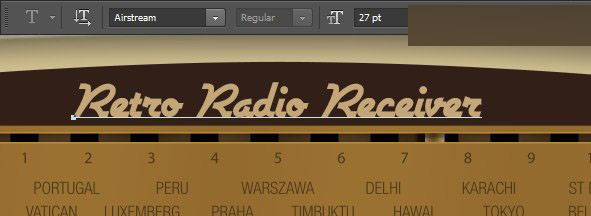
收音机LOGO。这一步就来添加收音机的logo了!哈哈,快完成了!使用Airstream字体,打上文字,颜色为#caad85~
步骤111
用圆角矩形工具画一个圆角矩形,然后放置在按钮后面,描边颜色与文字的颜色一样!描边设置为3pt~
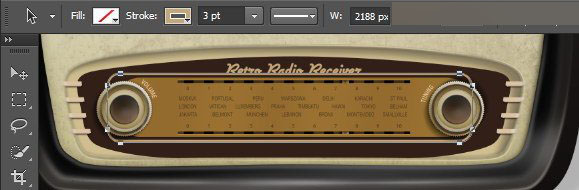
步骤112
为了使文字能够显现在线条上,在线条图层上添加一个蒙版然后用黑色硬笔刷擦拭线条~咱们一定要擦拭地让文字和线条看上去是一体的~
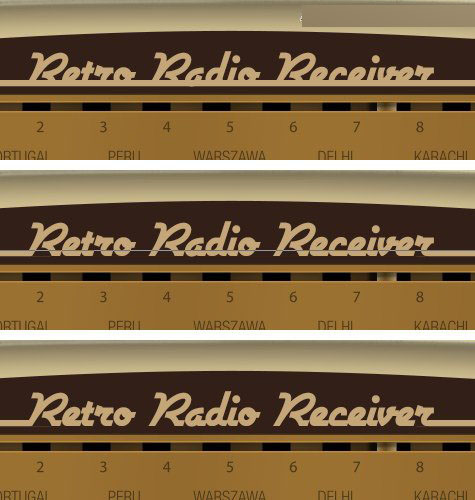
步骤113
制作背景和阴影。这里我们要打开皮革纹理素材,然后放置在收音机和阴影的后面~

步骤114
现在我们来给背景添加一些纹理,让整体看上去更好看些~
步骤115
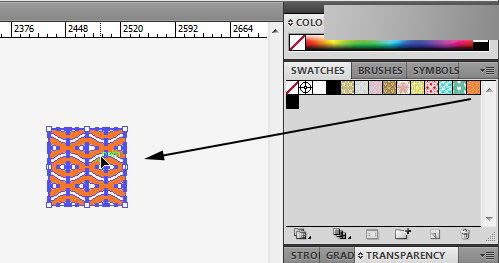
把图案文件打开,然后编辑>定为图案就可以啦~
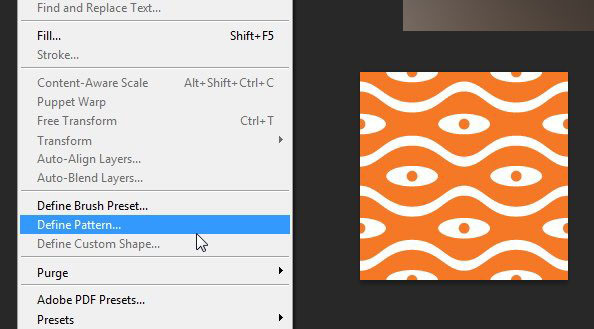
步骤116
这里我们还是要给图案取个名字,木有名字,以后是不好找到它滴~
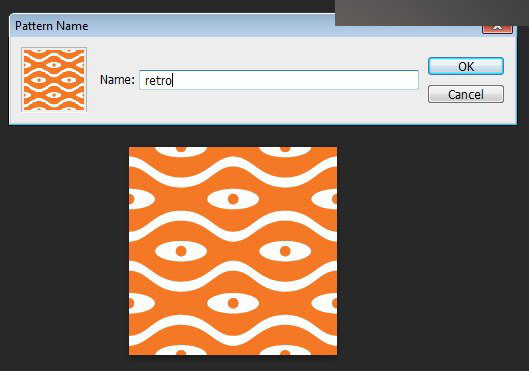
步骤117
这里我们新建一个图层,然后填充图案纹理~
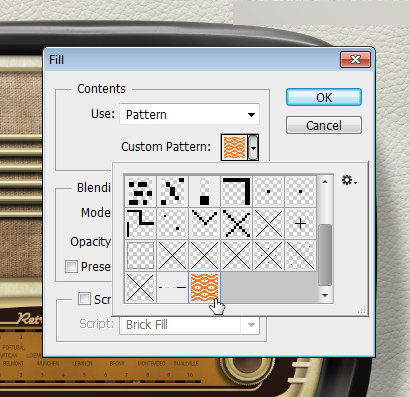
填充后的效果就是这样的~

步骤118
现在咱们在纹理图层上方新建黑白渐变来调整图层!参数值如下图所示哦~

步骤119
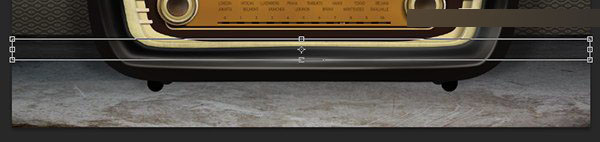
在收音机下方新建一个图层,然后添加黑白渐变!

步骤120
然后改变渐变图层的混合模式为正片叠底~

步骤 121
添加混泥土地板素材~

在后边再添加一张混泥土纹理素材
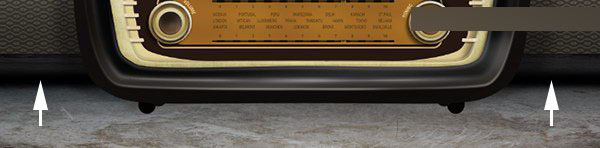
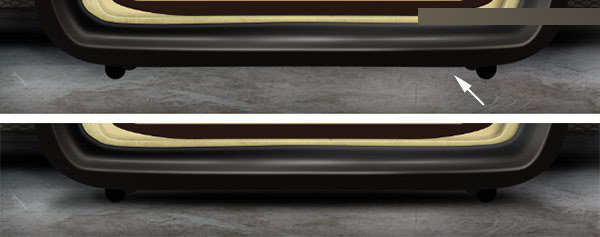
步骤123
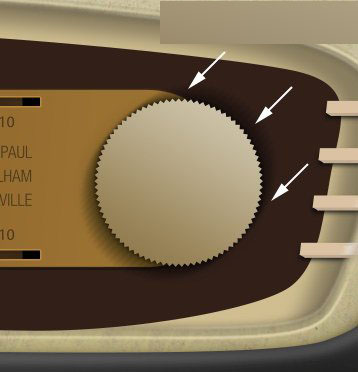
然后用黑色软笔刷在箭头所示的地方画一些黑色,让墙和地板更好的结合在一起♪(^∇^*)
步骤124
现在我们再来新建一个图层,用黑色软笔刷画一下收音机的阴影~
步骤125
现在我们再来一个新图层,然后填充灰白色径向渐变~

步骤127
改变灰白径向渐变的图层混合模式为正片叠底,并且一定一定要把透明度降低!!!大概是10%哟~哈哈

步骤127
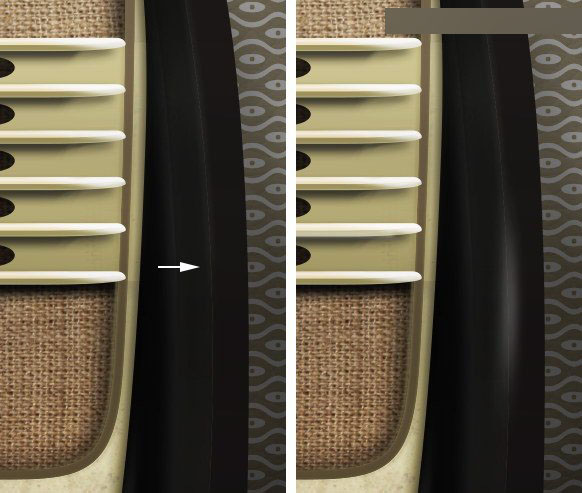
我们为了让高光、阴影是非常现实的。 我们可以来添加不规则阴影。 首先得新建一个图层,然后使用画笔工具画几个黑色线条。

步骤128
将线条进行高斯模糊,半径大概为1234~

步骤129
适当的降低一下黑色线条阴影的透明度就可以啦~<( ̄ˇ ̄)/

步骤130
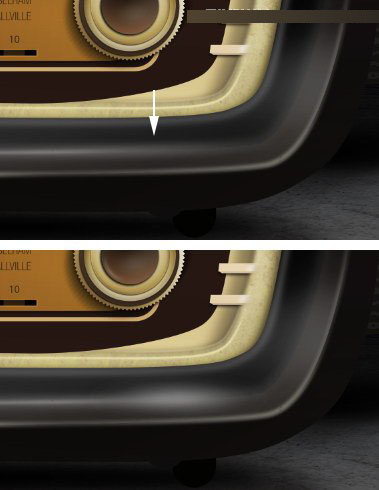
高光。为了让收音机更加真实,现在我们来绘制一些白色的高光,并用高斯模糊这些高光一下~
这里也要添加高光哦!
搞定,最终效果图:

教程结束,以上就是Photoshop结合AI制作超逼真的立体复古收音机过程,有兴趣的朋友可以跟着教程来学习!
上一页 1 2下一页阅读全文

Hot AI Tools

Undresser.AI Undress
AI-powered app for creating realistic nude photos

AI Clothes Remover
Online AI tool for removing clothes from photos.

Undress AI Tool
Undress images for free

Clothoff.io
AI clothes remover

Video Face Swap
Swap faces in any video effortlessly with our completely free AI face swap tool!

Hot Article
Hot Tools

Notepad++7.3.1
Easy-to-use and free code editor

SublimeText3 Chinese version
Chinese version, very easy to use

Zend Studio 13.0.1
Powerful PHP integrated development environment

Dreamweaver CS6
Visual web development tools

SublimeText3 Mac version
God-level code editing software (SublimeText3)
Hot Topics
 1386
1386
 52
52

 How to solve the complexity of WordPress installation and update using Composer
Apr 17, 2025 pm 10:54 PM
How to solve the complexity of WordPress installation and update using Composer
Apr 17, 2025 pm 10:54 PM
When managing WordPress websites, you often encounter complex operations such as installation, update, and multi-site conversion. These operations are not only time-consuming, but also prone to errors, causing the website to be paralyzed. Combining the WP-CLI core command with Composer can greatly simplify these tasks, improve efficiency and reliability. This article will introduce how to use Composer to solve these problems and improve the convenience of WordPress management.
 How to solve SQL parsing problem? Use greenlion/php-sql-parser!
Apr 17, 2025 pm 09:15 PM
How to solve SQL parsing problem? Use greenlion/php-sql-parser!
Apr 17, 2025 pm 09:15 PM
When developing a project that requires parsing SQL statements, I encountered a tricky problem: how to efficiently parse MySQL's SQL statements and extract the key information. After trying many methods, I found that the greenlion/php-sql-parser library can perfectly solve my needs.
 How to solve complex BelongsToThrough relationship problem in Laravel? Use Composer!
Apr 17, 2025 pm 09:54 PM
How to solve complex BelongsToThrough relationship problem in Laravel? Use Composer!
Apr 17, 2025 pm 09:54 PM
In Laravel development, dealing with complex model relationships has always been a challenge, especially when it comes to multi-level BelongsToThrough relationships. Recently, I encountered this problem in a project dealing with a multi-level model relationship, where traditional HasManyThrough relationships fail to meet the needs, resulting in data queries becoming complex and inefficient. After some exploration, I found the library staudenmeir/belongs-to-through, which easily installed and solved my troubles through Composer.
 How to solve the problem of PHP project code coverage reporting? Using php-coveralls is OK!
Apr 17, 2025 pm 08:03 PM
How to solve the problem of PHP project code coverage reporting? Using php-coveralls is OK!
Apr 17, 2025 pm 08:03 PM
When developing PHP projects, ensuring code coverage is an important part of ensuring code quality. However, when I was using TravisCI for continuous integration, I encountered a problem: the test coverage report was not uploaded to the Coveralls platform, resulting in the inability to monitor and improve code coverage. After some exploration, I found the tool php-coveralls, which not only solved my problem, but also greatly simplified the configuration process.
 How to solve the complex problem of PHP geodata processing? Use Composer and GeoPHP!
Apr 17, 2025 pm 08:30 PM
How to solve the complex problem of PHP geodata processing? Use Composer and GeoPHP!
Apr 17, 2025 pm 08:30 PM
When developing a Geographic Information System (GIS), I encountered a difficult problem: how to efficiently handle various geographic data formats such as WKT, WKB, GeoJSON, etc. in PHP. I've tried multiple methods, but none of them can effectively solve the conversion and operational issues between these formats. Finally, I found the GeoPHP library, which easily integrates through Composer, and it completely solved my troubles.
 Solve CSS prefix problem using Composer: Practice of padaliyajay/php-autoprefixer library
Apr 17, 2025 pm 11:27 PM
Solve CSS prefix problem using Composer: Practice of padaliyajay/php-autoprefixer library
Apr 17, 2025 pm 11:27 PM
I'm having a tricky problem when developing a front-end project: I need to manually add a browser prefix to the CSS properties to ensure compatibility. This is not only time consuming, but also error-prone. After some exploration, I discovered the padaliyajay/php-autoprefixer library, which easily solved my troubles with Composer.
 git software installation tutorial
Apr 17, 2025 pm 12:06 PM
git software installation tutorial
Apr 17, 2025 pm 12:06 PM
Git Software Installation Guide: Visit the official Git website to download the installer for Windows, MacOS, or Linux. Run the installer and follow the prompts. Configure Git: Set username, email, and select a text editor. For Windows users, configure the Git Bash environment.
 How to solve the problem of virtual columns in Laravel model? Use stancl/virtualcolumn!
Apr 17, 2025 pm 09:48 PM
How to solve the problem of virtual columns in Laravel model? Use stancl/virtualcolumn!
Apr 17, 2025 pm 09:48 PM
During Laravel development, it is often necessary to add virtual columns to the model to handle complex data logic. However, adding virtual columns directly into the model can lead to complexity of database migration and maintenance. After I encountered this problem in my project, I successfully solved this problem by using the stancl/virtualcolumn library. This library not only simplifies the management of virtual columns, but also improves the maintainability and efficiency of the code.
