
PPT 2013 Grid Split Effect Production Steps Do you want to split PPT 2013 slides into a grid pattern? PHP editor Strawberry has carefully prepared detailed steps to solve this problem for you. Through this article, you will learn how to easily create a mesh split effect to make your slides more beautiful and professional.
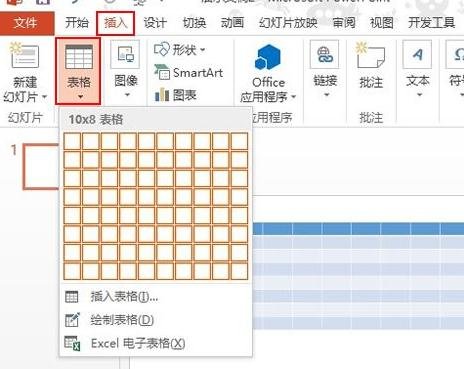
Start ppt2013, click the menu bar--Insert--Table, and insert a 10×8 table.
Set table image background fill
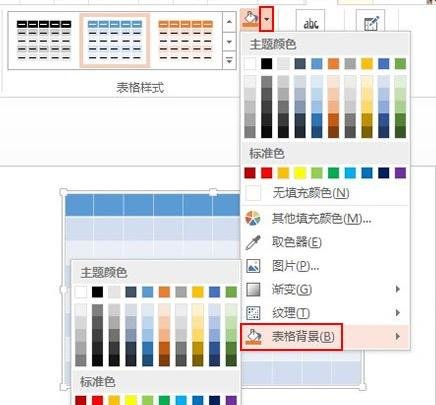
Select the table, click the fill button in the design tab, and select "Table Background"--" from the drop-down menu picture".
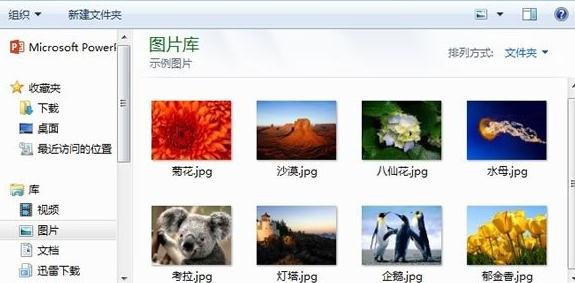
Select a beautiful picture in the local material library and double-click to insert it into the table.
I didn’t see the picture at this time, don’t worry, here you need to click the small triangle symbol next to the fill button and select the no fill color.
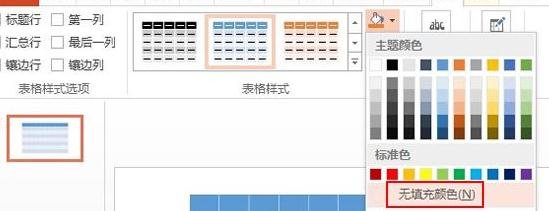
The picture is now added to the table as the background.
Add a mesh border
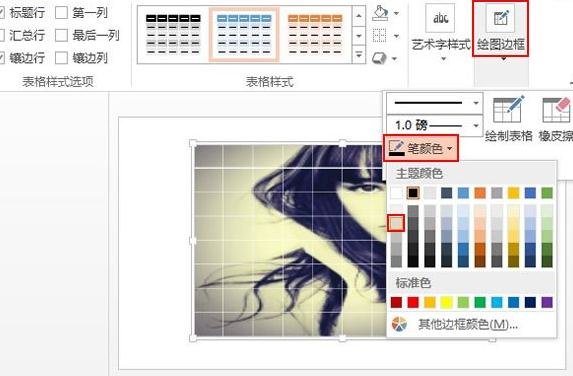
Click Drawing Border--Pen Color under the Design tab, select the White, Background 1, Dark 15% option.
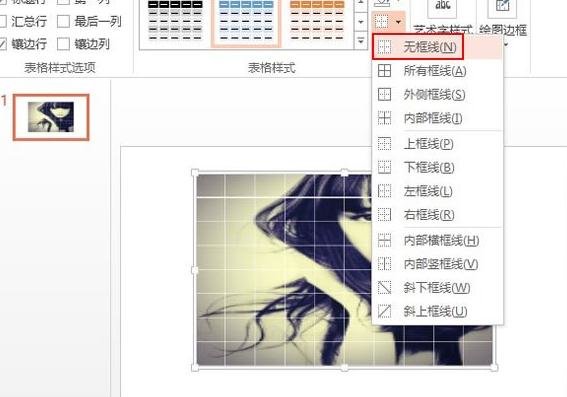
Click the border button and set it to no border first.
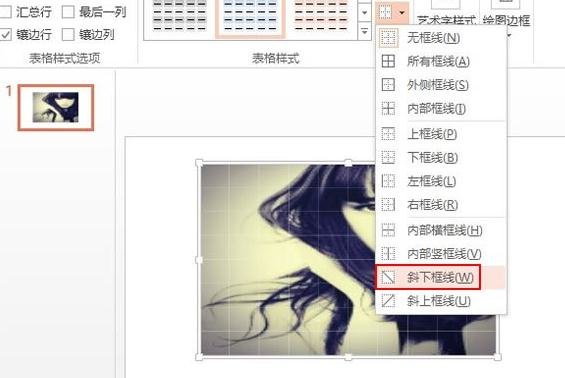
is set to a diagonal lower border, as shown in the picture.
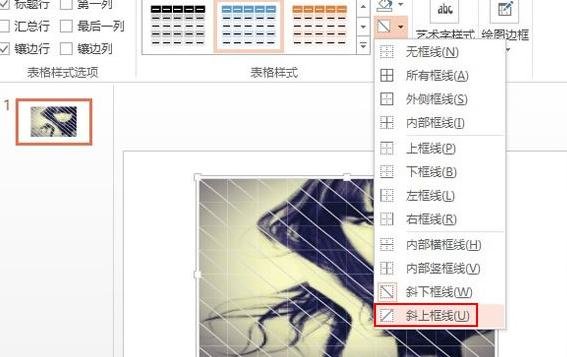
Finally set it to the diagonal upper border
The above is the detailed content of Steps to create mesh segmentation effect in ppt2013. For more information, please follow other related articles on the PHP Chinese website!


