

利用ps超简单制作逼真的纹身效果
Mar 19, 2017 am 11:32 AM今天为大家详细介绍利用ps超简单制作逼真的纹身效果方法,教程很不错,很简单,喜欢的朋友可以跟着教程来学习吧!
素材:
一张纹身图 背景尽量为白色
一张需要纹身的肌肉
方法/步骤
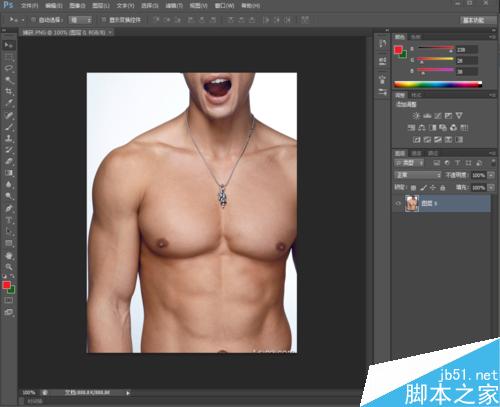
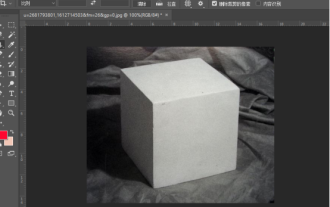
1、首先打开需要纹身的肌肉照片
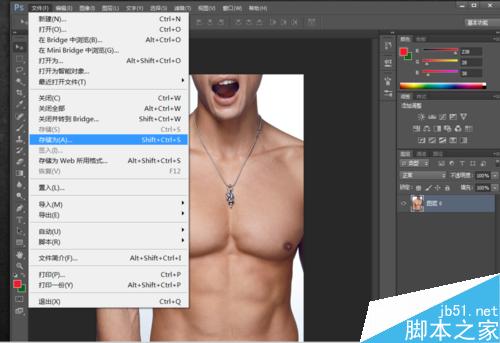
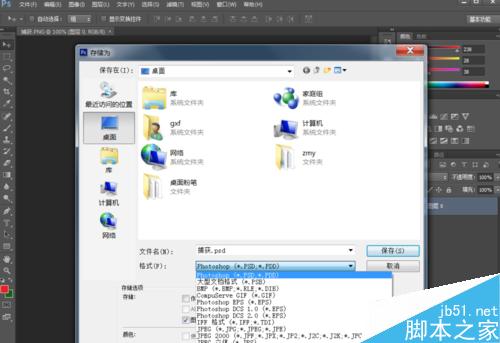
2、点击 菜单栏/文件/存储为/选择psd格式(存放在桌面上--方便找)
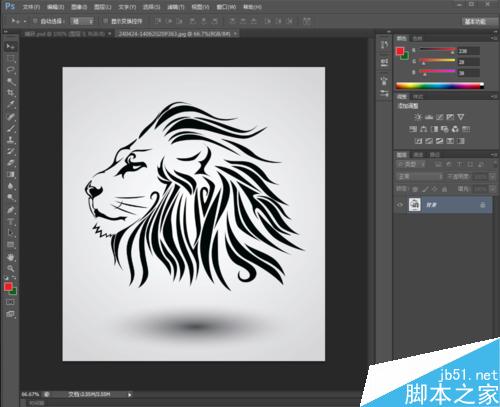
3、打开纹身图片
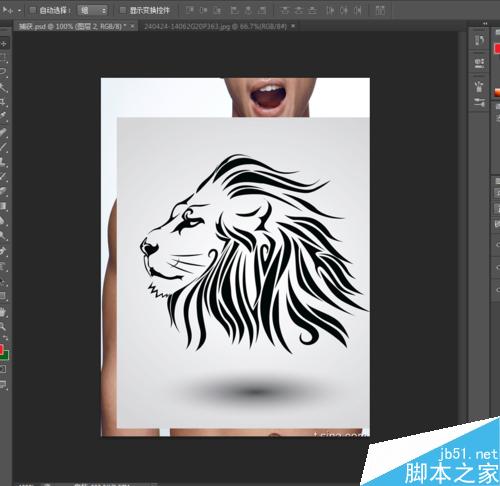
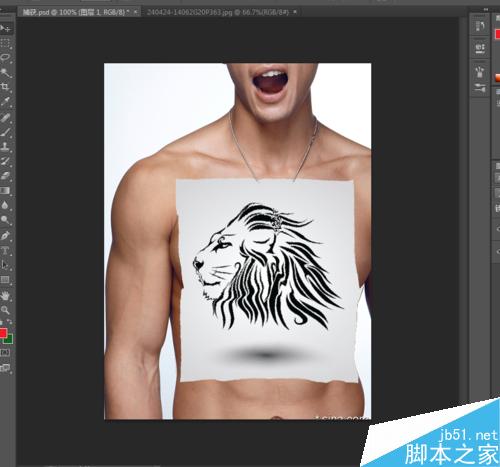
4、将纹身图片拖拽到肌肉图上(注意纹身在上)
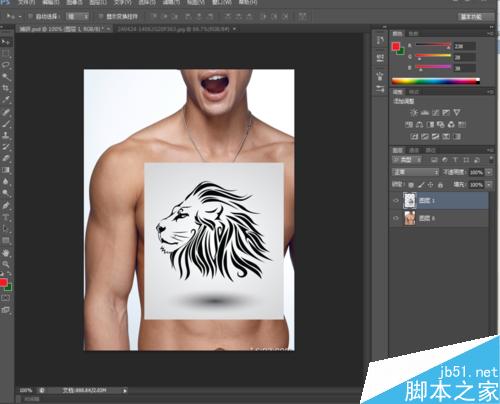
5、按下ctrl+t自由变换 选择合适的地方
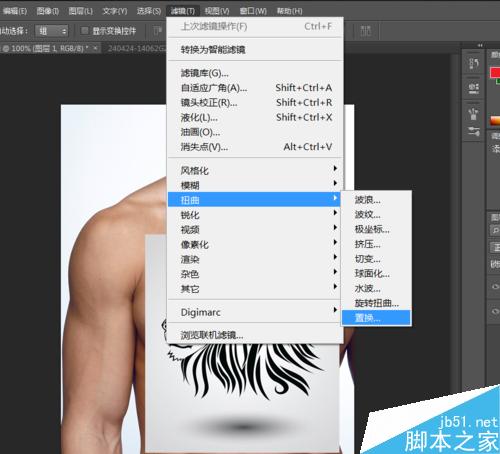
6、在图层面板选中纹身图层,点击菜单栏/滤镜/扭曲/置换
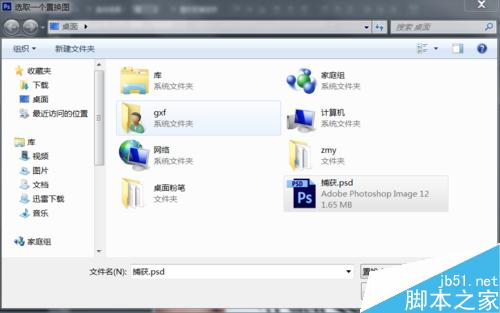
然后选择刚才保存的psd格式的肌肉图
置换后的效果如图
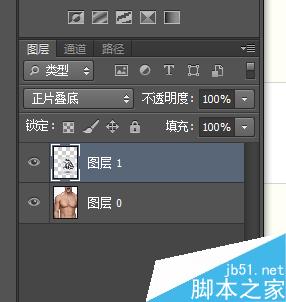
7、在图层面板选择正片叠底
8、用橡皮擦拆掉不合适的地方
擦过之后效果如下图

9、此时还有些阴影,没关系继续做一些调整
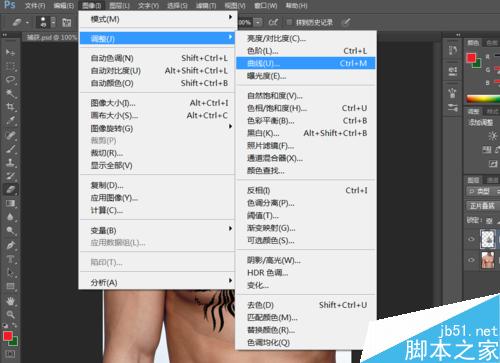
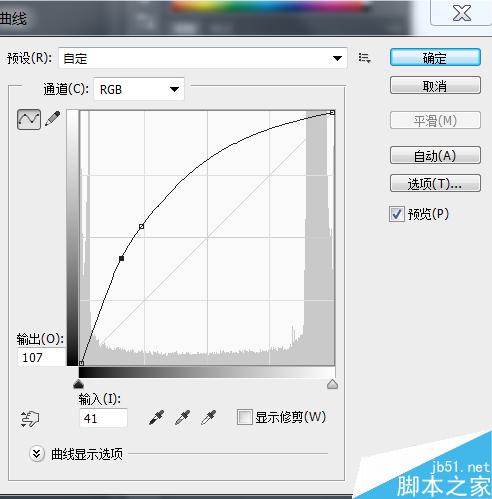
打开菜单栏/图像/调整/曲线--向上调整增加他的亮度(自己看情况调整)-我的如下图
10、最终效果

以上就是利用ps超简单制作逼真的纹身效果方法介绍,大家学会了吗?喜欢的朋友可以自己尝试一下哦!

Hot Article

Hot tools Tags

Hot Article

Hot Article Tags

Notepad++7.3.1
Easy-to-use and free code editor

SublimeText3 Chinese version
Chinese version, very easy to use

Zend Studio 13.0.1
Powerful PHP integrated development environment

Dreamweaver CS6
Visual web development tools

SublimeText3 Mac version
God-level code editing software (SublimeText3)
Hot Topics


 ps serial number cs5 permanently free 2020
Jul 13, 2023 am 10:06 AM
ps serial number cs5 permanently free 2020
Jul 13, 2023 am 10:06 AM
ps serial number cs5 permanently free 2020

 Introduction to the process of extracting line drawings in PS
Apr 01, 2024 pm 12:51 PM
Introduction to the process of extracting line drawings in PS
Apr 01, 2024 pm 12:51 PM
Introduction to the process of extracting line drawings in PS
 How to automate tasks using PowerShell
Feb 20, 2024 pm 01:51 PM
How to automate tasks using PowerShell
Feb 20, 2024 pm 01:51 PM
How to automate tasks using PowerShell
 What should I do if the PS interface font is too small?
Dec 01, 2022 am 11:31 AM
What should I do if the PS interface font is too small?
Dec 01, 2022 am 11:31 AM
What should I do if the PS interface font is too small?
 What to do if ps installation cannot write registry value error 160
Mar 22, 2023 pm 02:33 PM
What to do if ps installation cannot write registry value error 160
Mar 22, 2023 pm 02:33 PM
What to do if ps installation cannot write registry value error 160

 How to use ps vanishing point - how to use ps vanishing point
Mar 05, 2024 am 09:00 AM
How to use ps vanishing point - how to use ps vanishing point
Mar 05, 2024 am 09:00 AM
How to use ps vanishing point - how to use ps vanishing point
