
In office scenarios, how to set the header and footer in WPS Office 2016 is a frequently encountered problem. As an excellent office software, WPS Office 2016 provides complete header and footer setting functions. In order to help you solve this problem easily, PHP editor Xiaoxin will bring a detailed tutorial on how to set headers and footers in WPS Office 2016.
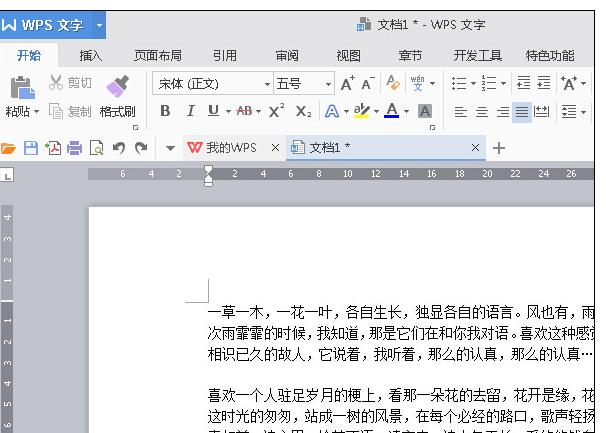
1. Open the WPS document into which a personalized header needs to be inserted.
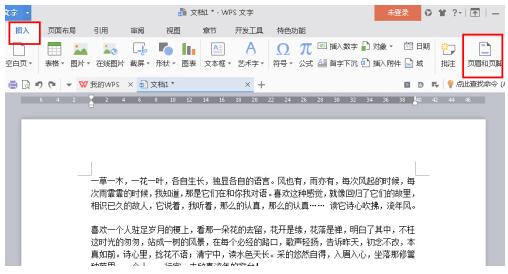
2. Click [Insert] on the toolbar and click [Header and Footer].
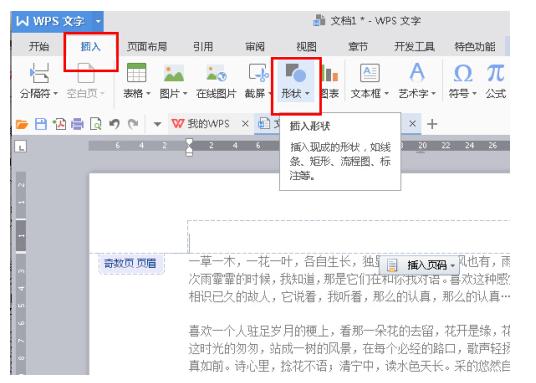
3. Then click [Insert] → [Shape], we can insert the graphic shape we want in the header.
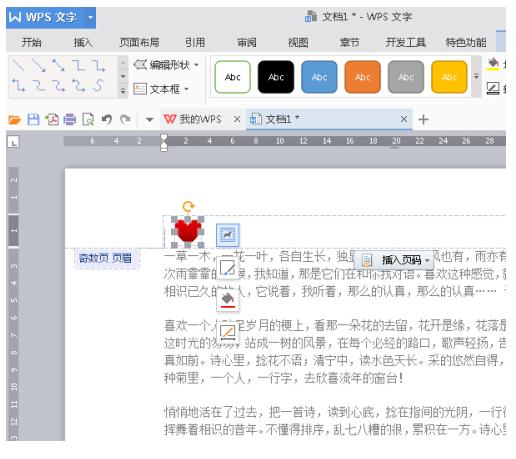
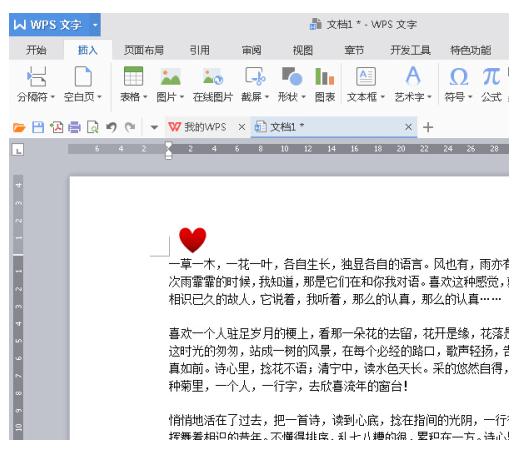
4. The effect after insertion is as shown below.

5. We can select the shape and an edit box will appear. We can modify it as needed or right-click the shape and select [Format Object].
6. After modification, close the header and footer operation selection to see the effect after insertion.
The above is the detailed content of Introduction to how to set headers and footers in WPS Office 2016. For more information, please follow other related articles on the PHP Chinese website!


