PS绘制一张酷炫霸气的暗黑3壁纸
暴雪游戏迷来收!这一期换换口味,教同学们绘制一张暗黑3的壁纸,教程适合熟悉基础操作的同学进阶练习用,背景与图腾的绘制很考验基础功夫,想挑战的新手也欢迎来试一下,周末别偷懒,一日不练就生疏哟
这一期换换口味,绘制一张暗黑3的壁纸。暴雪的游戏真的很经典,我几乎玩过它出品的每一款游戏,除了那个胎死腹中的《ghost》。
这个桌面的看上去很复杂,其实认真分析一下很简单。有人估计会认为字效有难度,其实那是最好做的,一般的图层样式就可以实现,我认为有难度的倒是背景,需要好几个素材的叠加才有这样的效果。还有就是字效后面的图腾,那个没什么难度,是个体力活,用好钢笔就可以把它描出来,当然得加一点斜面浮雕。
按惯例先上我绘制完成的效果:

新建一个符合屏幕显示大小的新画布,这个尺寸是我的显示器大小,大家可以无视。

新建一层,填充径向渐变。
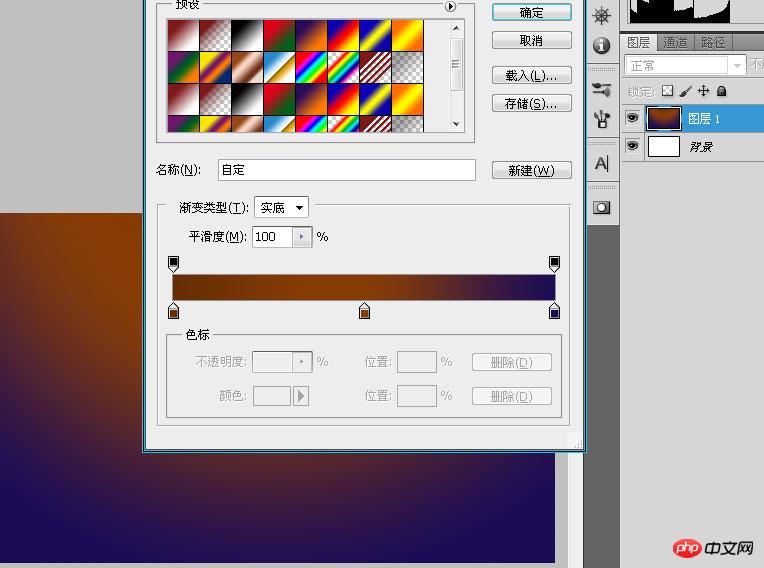
添加一个曲线调整层,让左上角和右上角以及下面的中心位置的色调暗一点。如果你不知道怎么添加曲线调整层,我建议你先去熟悉PS的一些基础知识,因为后面还有更多的功能估计你使用起来也不大熟练。
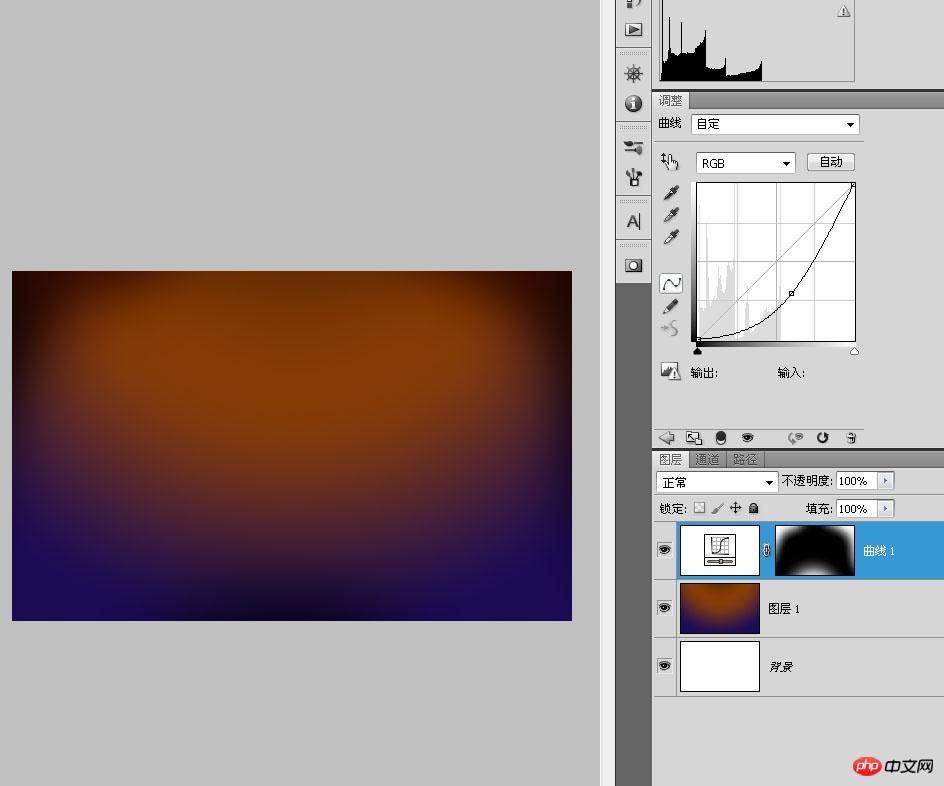
再新建一层,添加“云彩”,把云彩层的透明度调到40%左右,图层混合模式改为“叠加”。

继续添加一个曲线调整成让云彩暗一些,这个调整层只针对“云彩”起作用,所以要剪贴蒙版。

按D恢复前景色和背景色,添加云彩。多按几次CTRL+F,直到找到合适的云彩分布。用这个云彩制作背景上类似地图状的东西。

调整阈值的参数。这里没有硬性规定必须要多少数值,只要你绝对看着舒服就行。
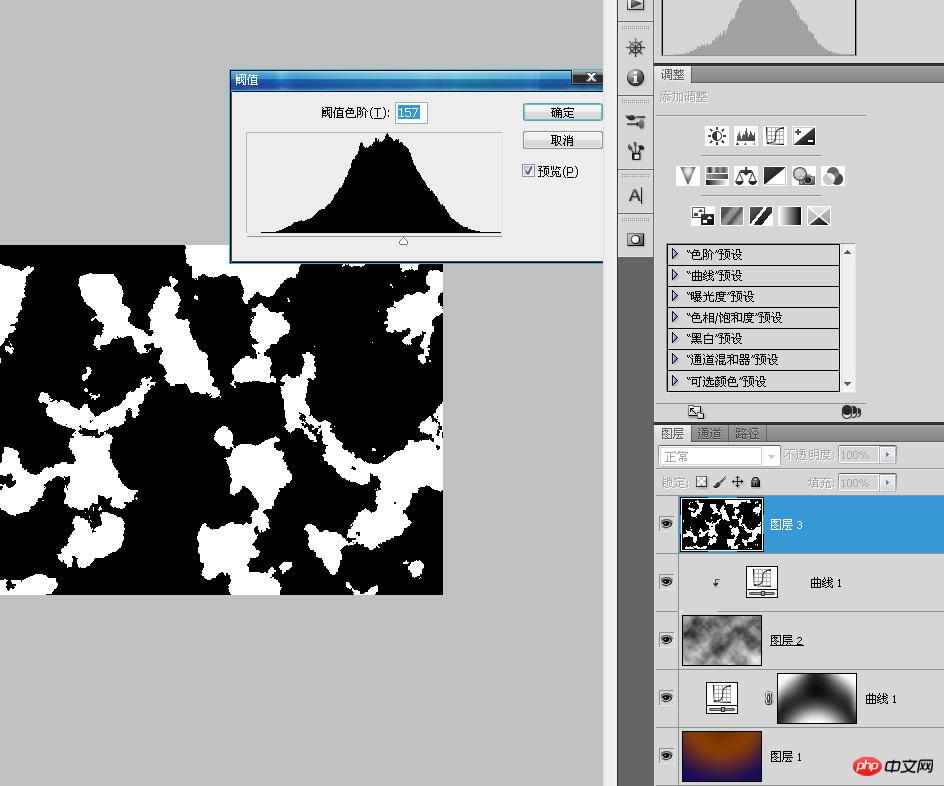
裁剪你认为最喜欢的一部分,调整好位置和大小,不用理会我的那层原始云彩。其实那个原材料层也可以直接删掉算了。

添加一条左右居中的参考线,用矩形选框选择右边多余的部分删除。

CTRL+A选择全部,CTRL+ALT+T,水平复制。

把这个层的混合模式改为“正片叠底”,同时降低它的透明度。

拜google恩赐。我找到一张锈迹斑斑的图片来强化背景。
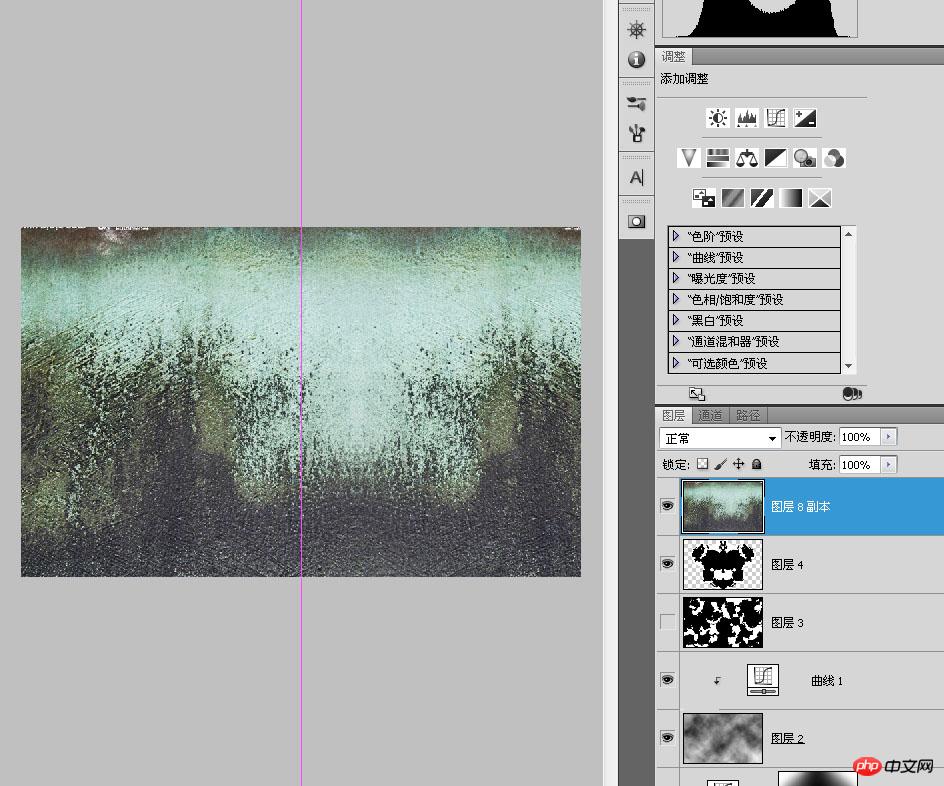
把这个锈迹层的混合模式改为“叠加”,透明度调至28%,其实29和27也没什么区别,最后加一个蒙版把上面的LOGO和边线遮盖掉。

CTRL+A全选,CTRL+ALT+T复制垂直翻转,上面也需要一点点锈迹,由于边线和LOGO都在画布的中间位置,所以蒙版不用做什么改动。

用“泼溅”做关键词在baidu找到一张素材。

裁剪复制一部分,只要那些散落的小点。

图层混合模式改为“正片叠底”,透明度降低,用蒙版把那些面积过大的部分涂掉。
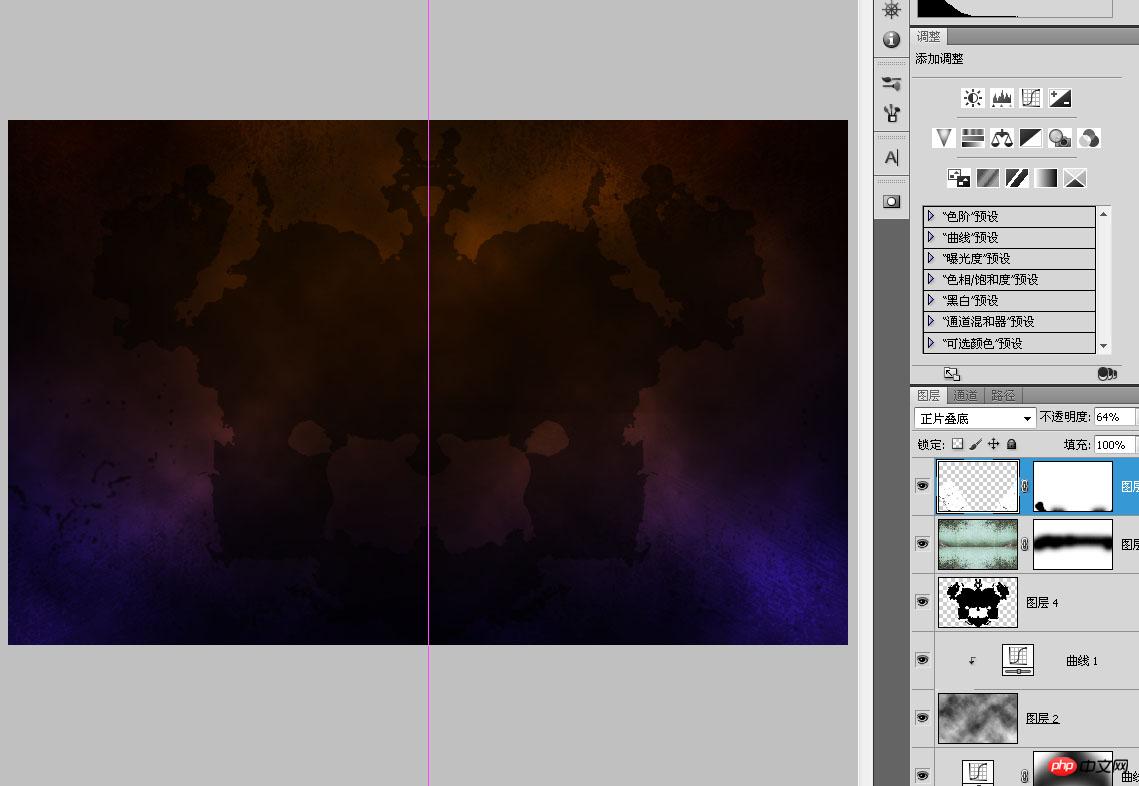
在画布的三分之一位置添加一条水平的参考线,以参考线交叉点为中心用椭圆矢量工具按原图大小画一组路径,主意是是路径不是形状。
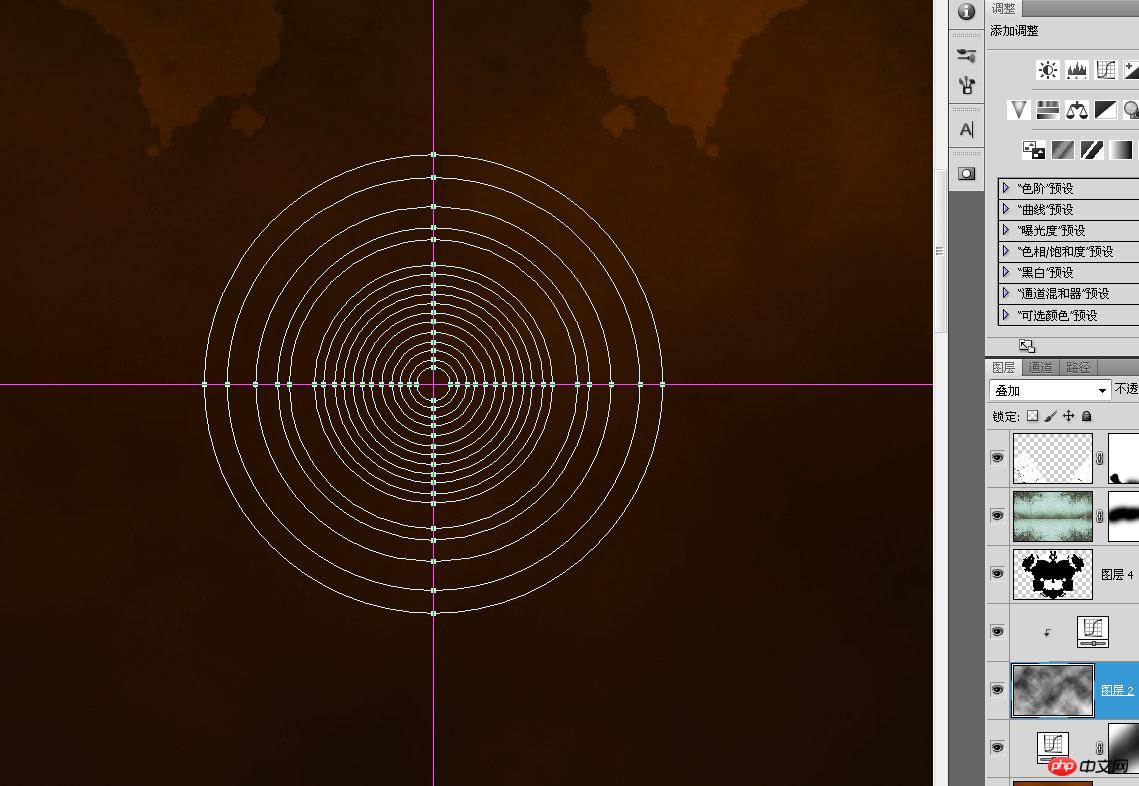
新建一层,把那些路径转为3个像素宽的描边,添加一点斜面浮雕和渐变效果,让这些圆圈看起来有点“立体感”。

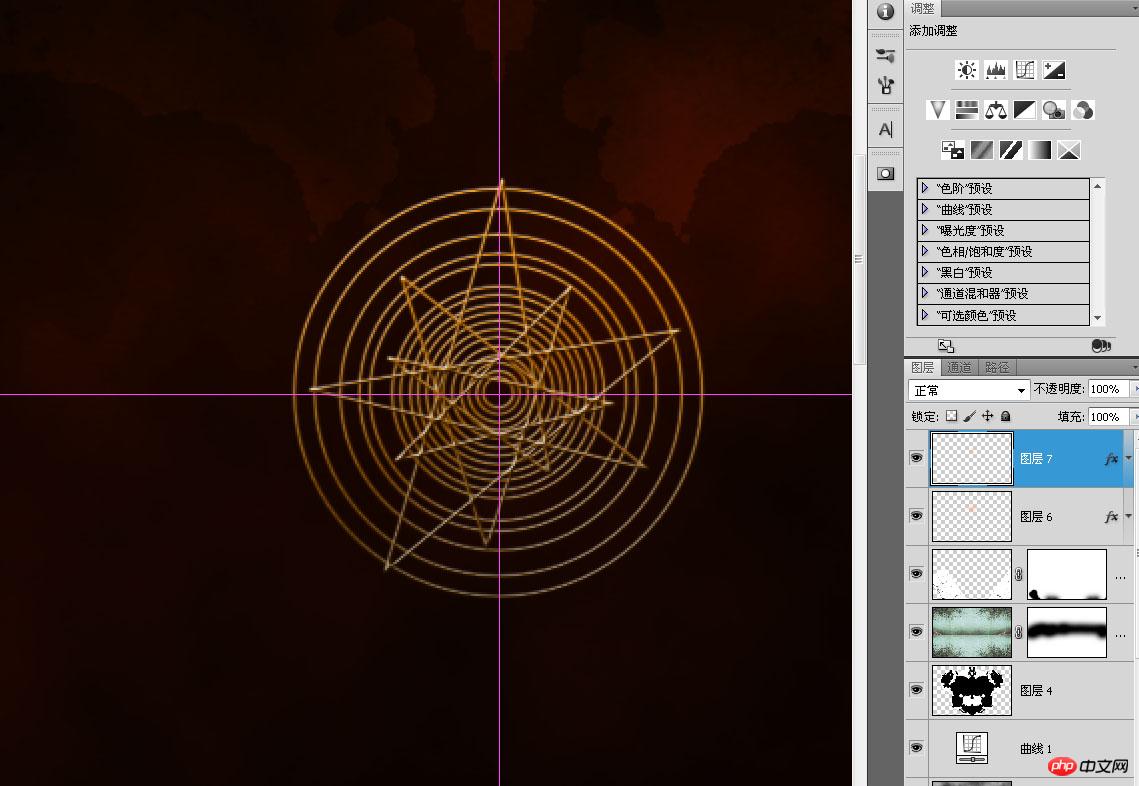
用钢笔画个杂乱的星星,复制圆圈的图层样式粘贴进来,其实合并这两个层后再添加图层样式也可以。
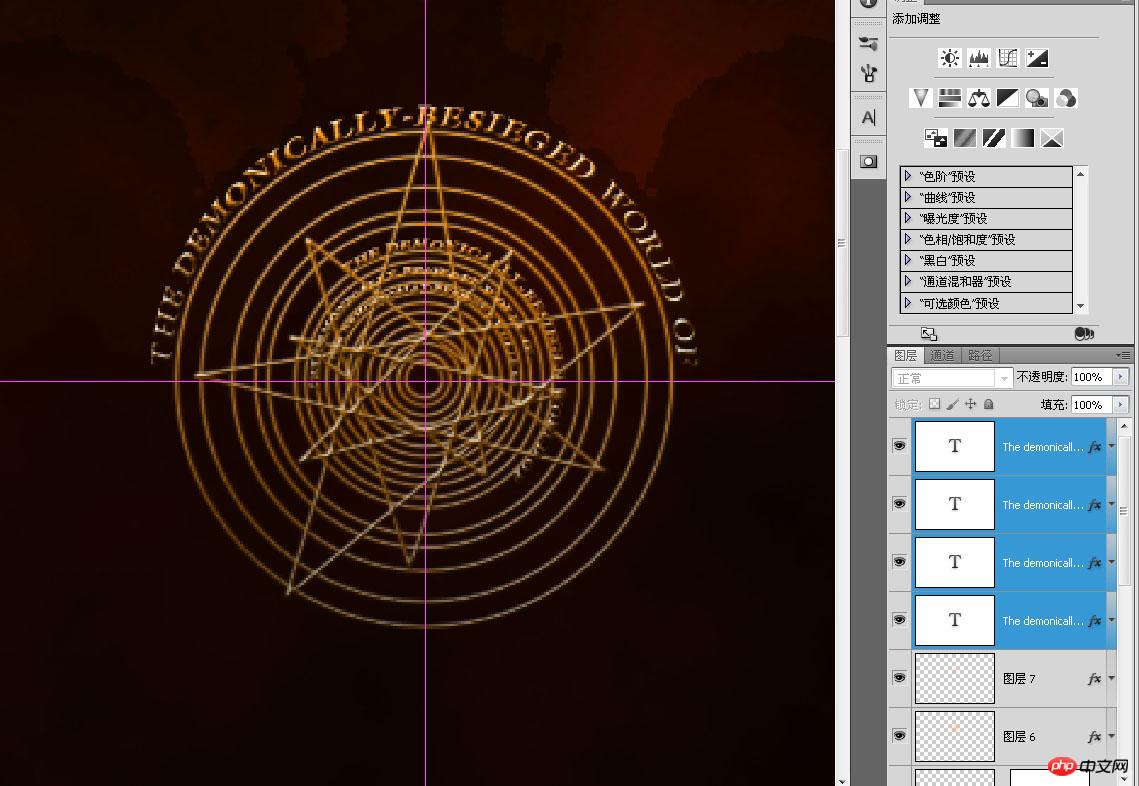
复制圆圈的路径胡乱添加一些莫名其妙的文本,不会有人注意到底是什么意思,没关系。同样粘贴图层样式,这样这个图腾的内容丰富多了。
这个比较花工夫,但是不具什么技术性,就像骑车一样,熟能生巧,所以不要问怎么用钢笔画这个图腾之类的问题了。
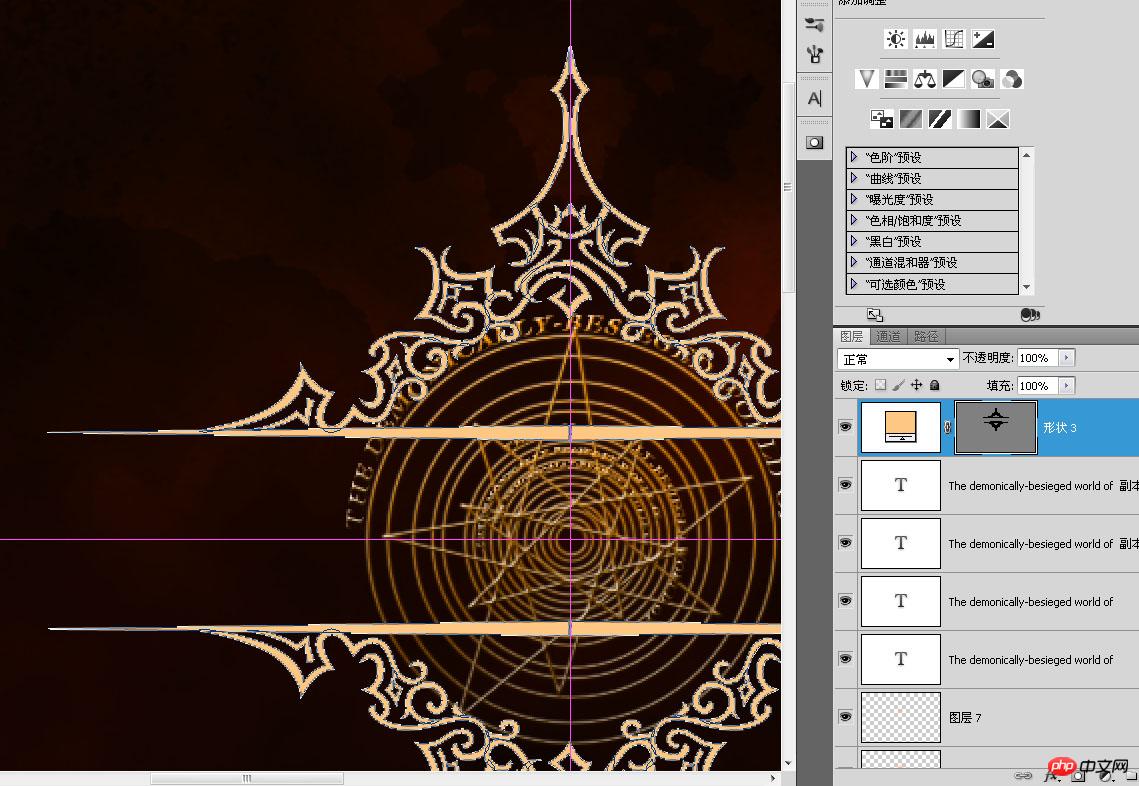
复制圆圈的图层样式粘贴进来。

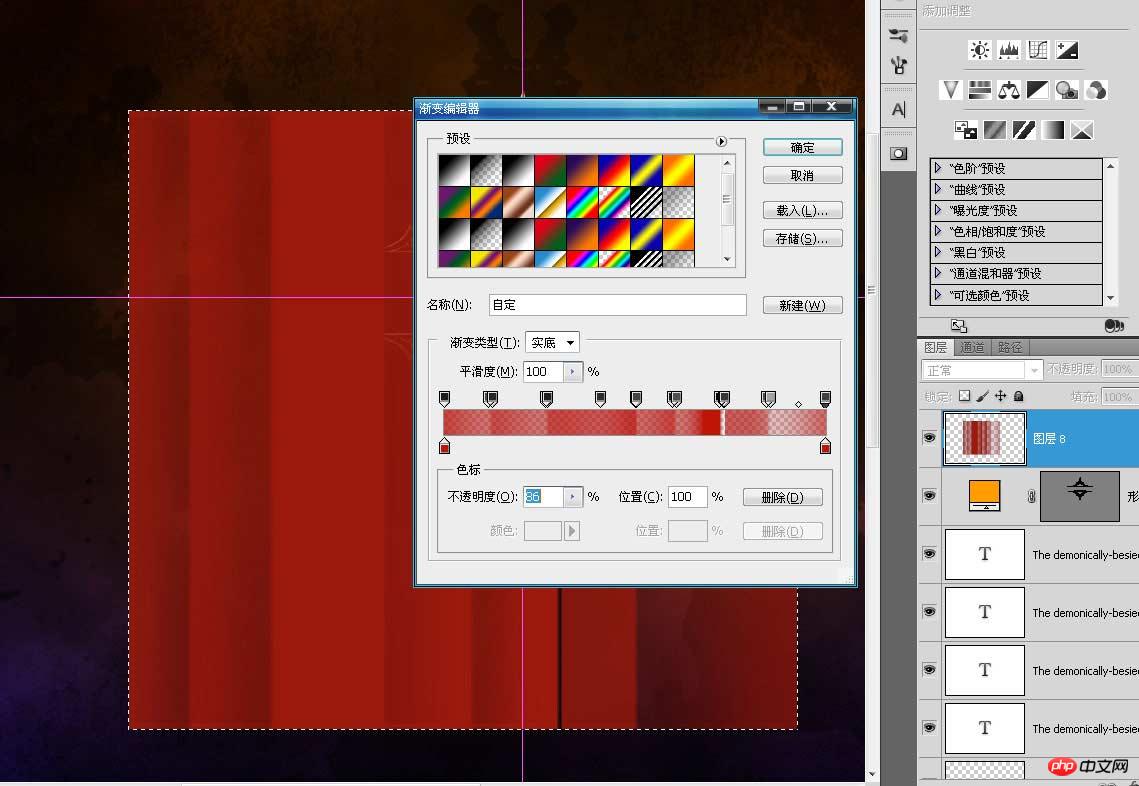
新建一层,弄一个渐变,这个渐变有点变态,要有耐心。
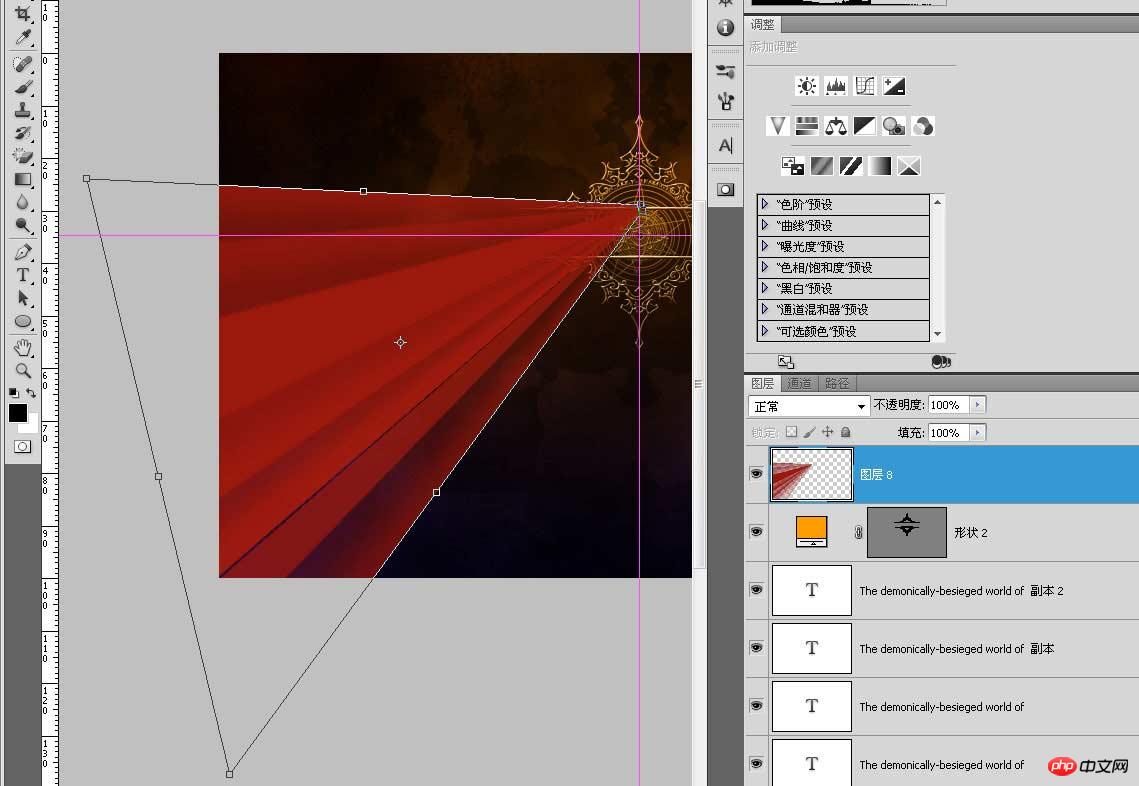
CTRL+T,以参考线的交叉点为放射中心,模拟原图两边红色的“发光”效果。
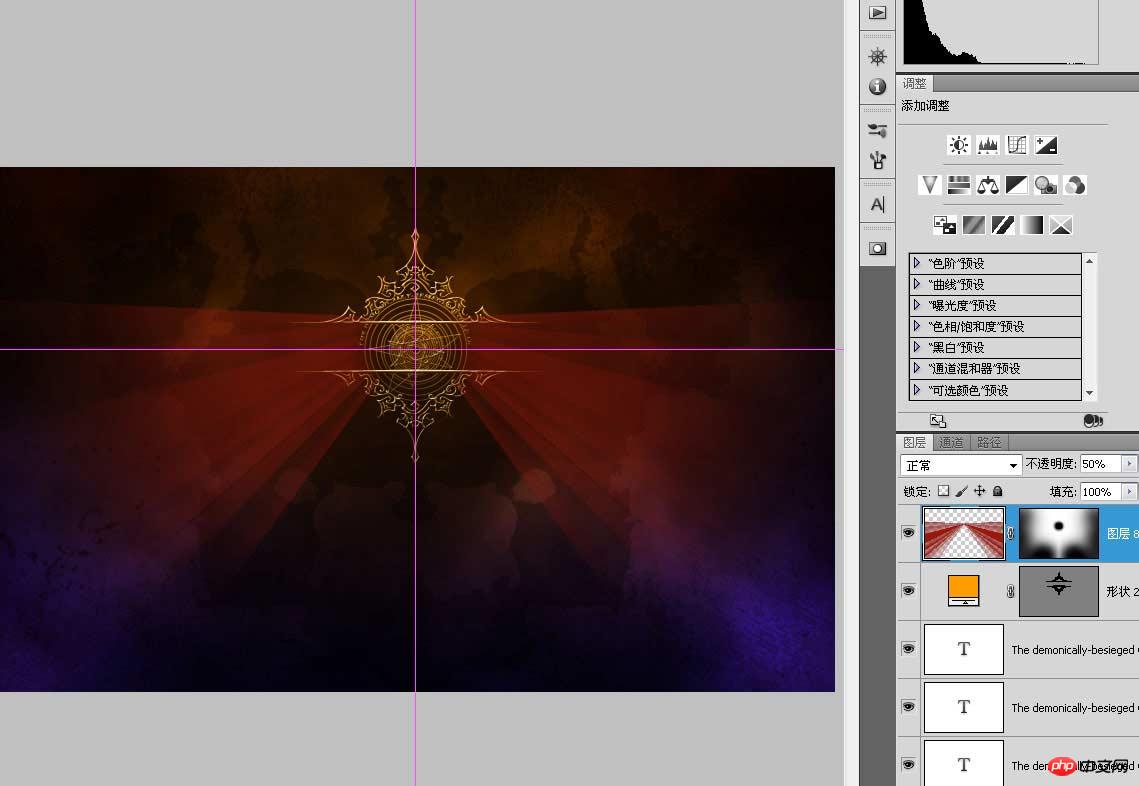
CTRL+A全选中,CTRL+ALT+T水平翻转复制。

透明度调至38%,添加蒙版,把“红色闪光”的两边及图腾中间涂黑,其实蒙版也可以翻转复制,画好一边后选中复制翻转到另外一边,这样就能保证两头绝对对称。
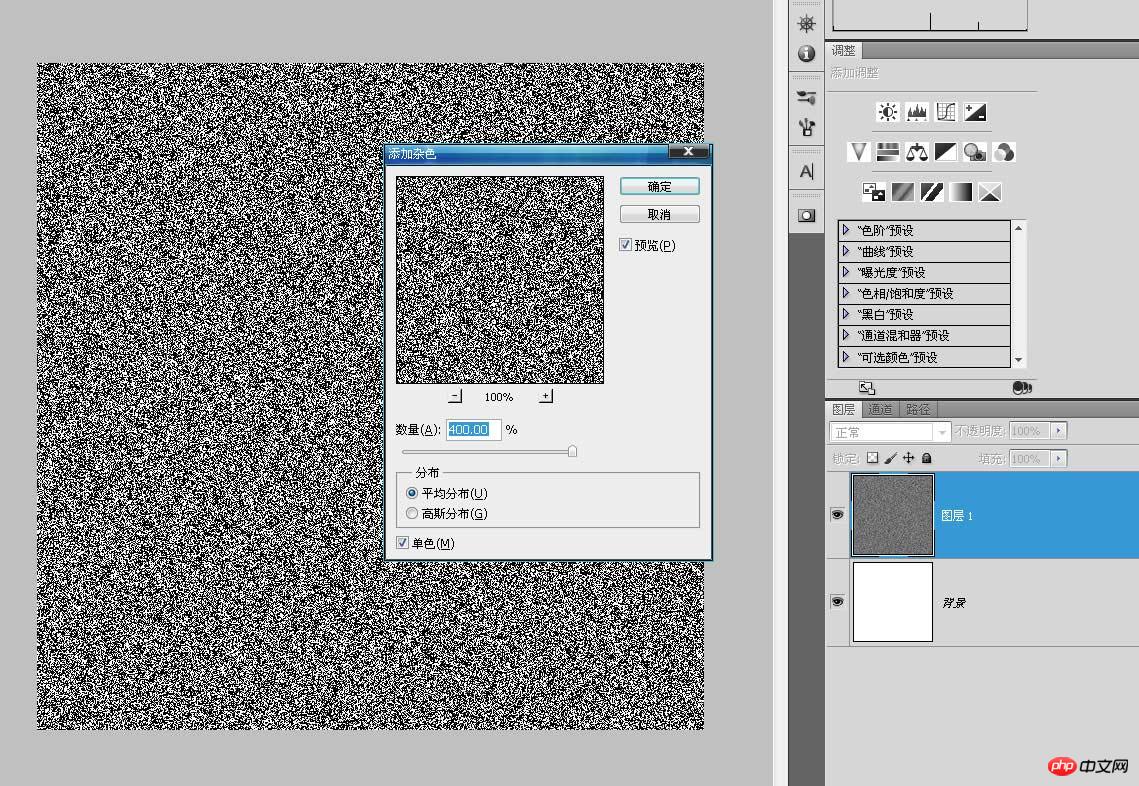
下面制作图腾周围发光的效果,重新创建一个400*400的新画布,新建一层,按D恢复前景色和背景色,填充杂色,用最大的参数,选择单色。
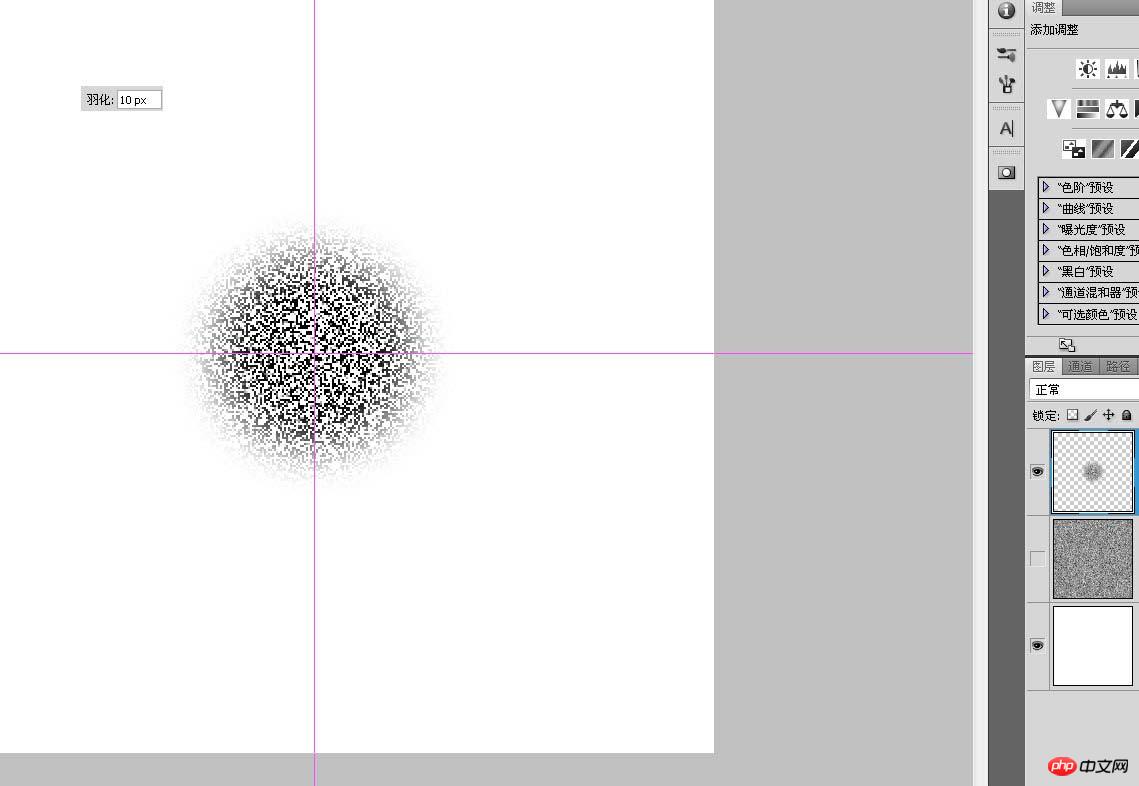
布置两条垂直左右居中的参考线,用羽化范围为10个像素的椭圆选框工具以参考线的交叉点为中心拉出一个大小为260左右的选区,CTRL+J复制图层。
径向模糊,如果效果不是很明显,可以再重复一次。

进入通道,复制任意一个通道,ctrl+i反色。

CTRL+鼠标左键复制选区,回到图层后新建一层,填充任意颜色。
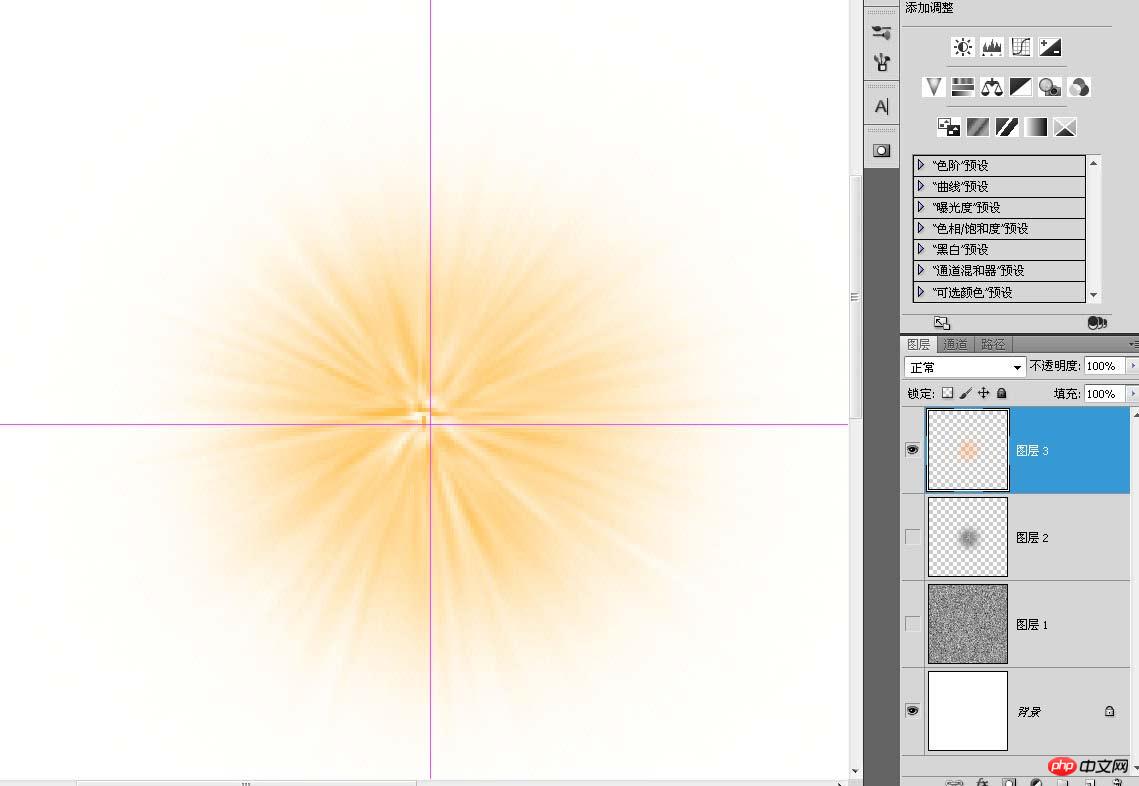
将这个层复制到海报中。

CTRL+T把这个发光体放大到跟图腾差不多大小。
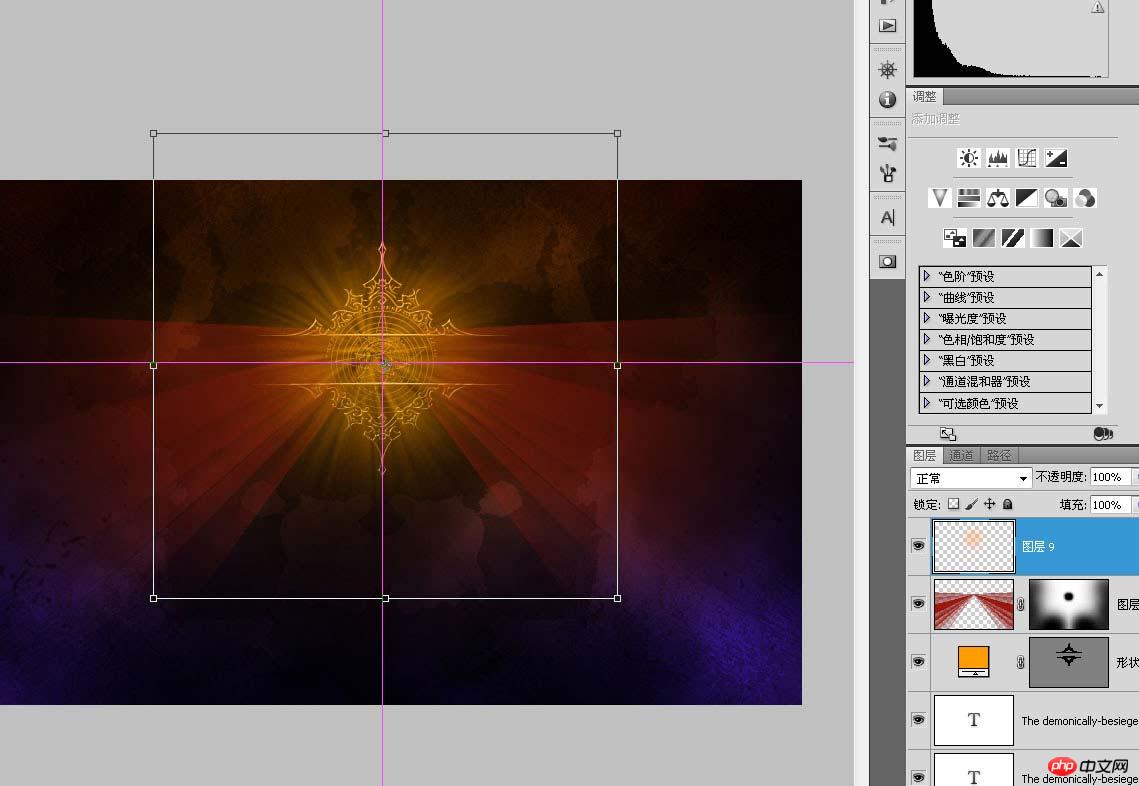
复制一层,高斯模糊20左右,透明度减至40%。

将这两个层合并,把图层混合模式改为“强光”。

打开图层上面的“锁定透明像素”按钮,选择一个跟左右渐变发光颜色差不多的红色,用矩形选框工具框出发光体下面三分之二的范围,填充红色。这个选框要竟可能的大一点,因为我不能判断这些发光的余晖的边界究竟在什么位置。

添加一个模板,将图腾中间的发光涂黑。
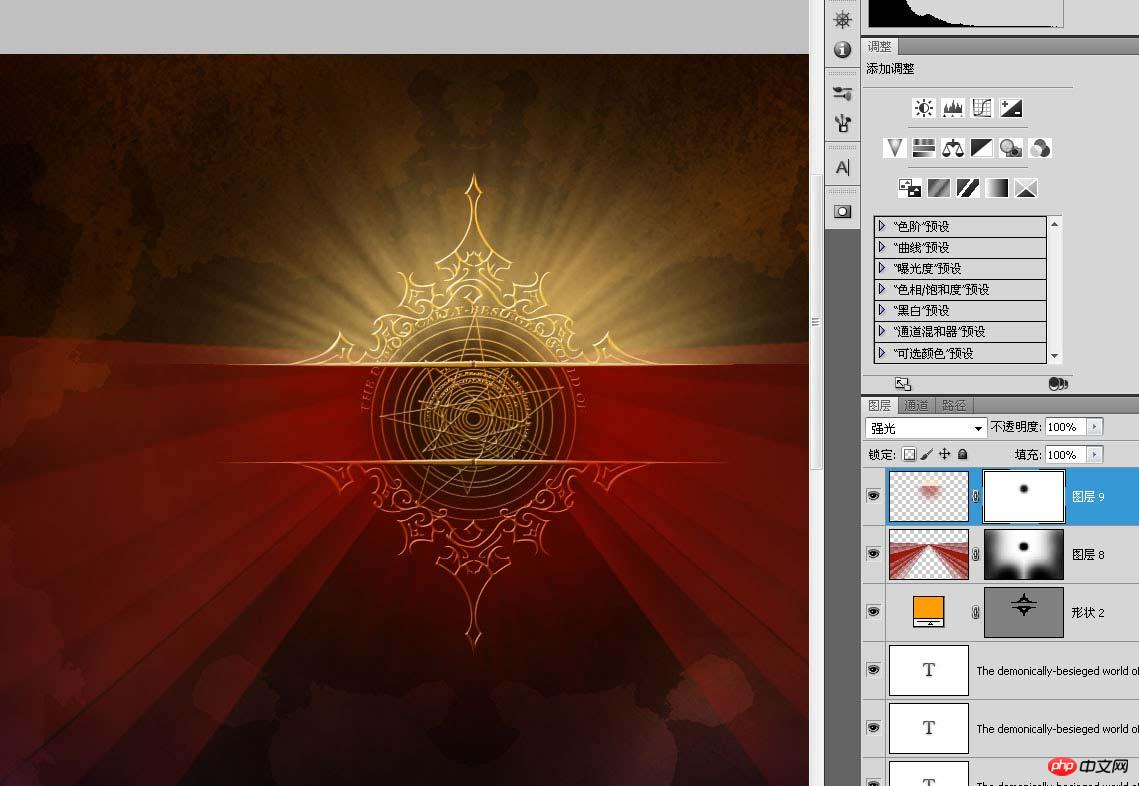
用矩形选框拉出一个跟图腾中间空格大小一样的选框,挑选大点的画笔选取黑色,将上下两头涂上一点,最好把透明度和流量调低点,以更好的把握。
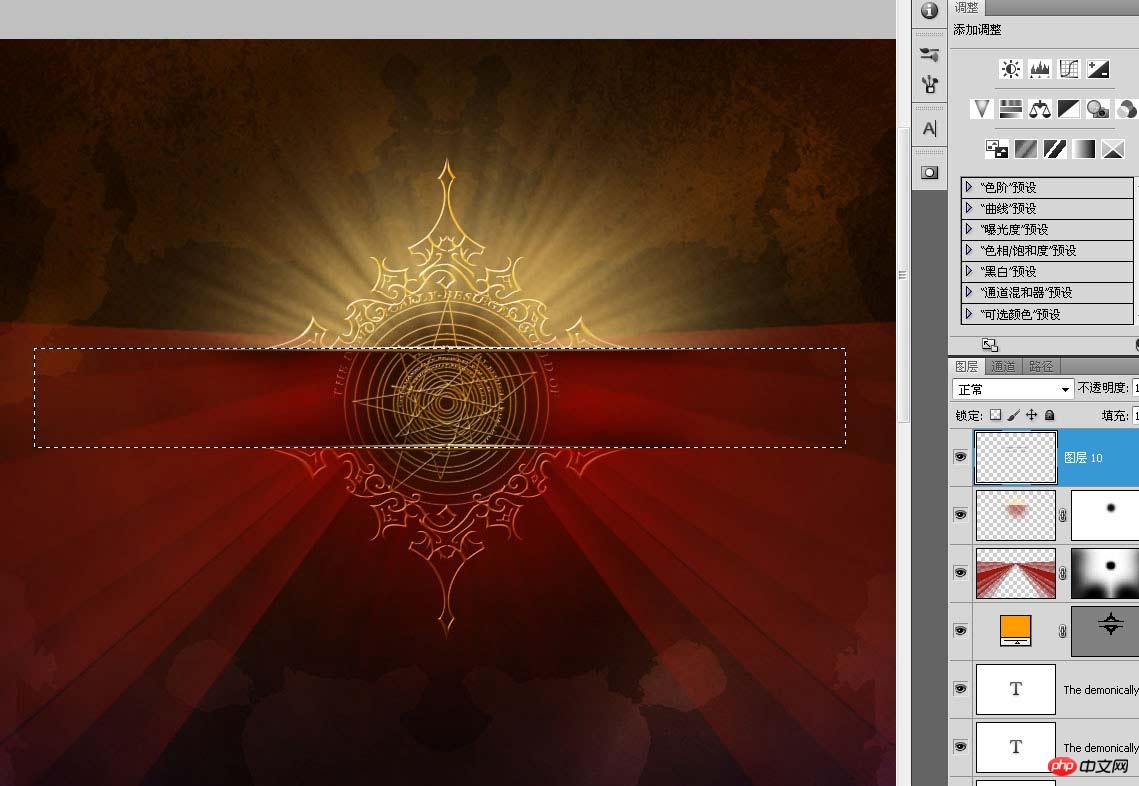
给图腾的矢量形状层添加一个模板。也将中间的两根横条遮盖掉一点,注意别把周围的图案影响到。

绘制字体,素材已打包到微盘,本文稍微做了一点修改。
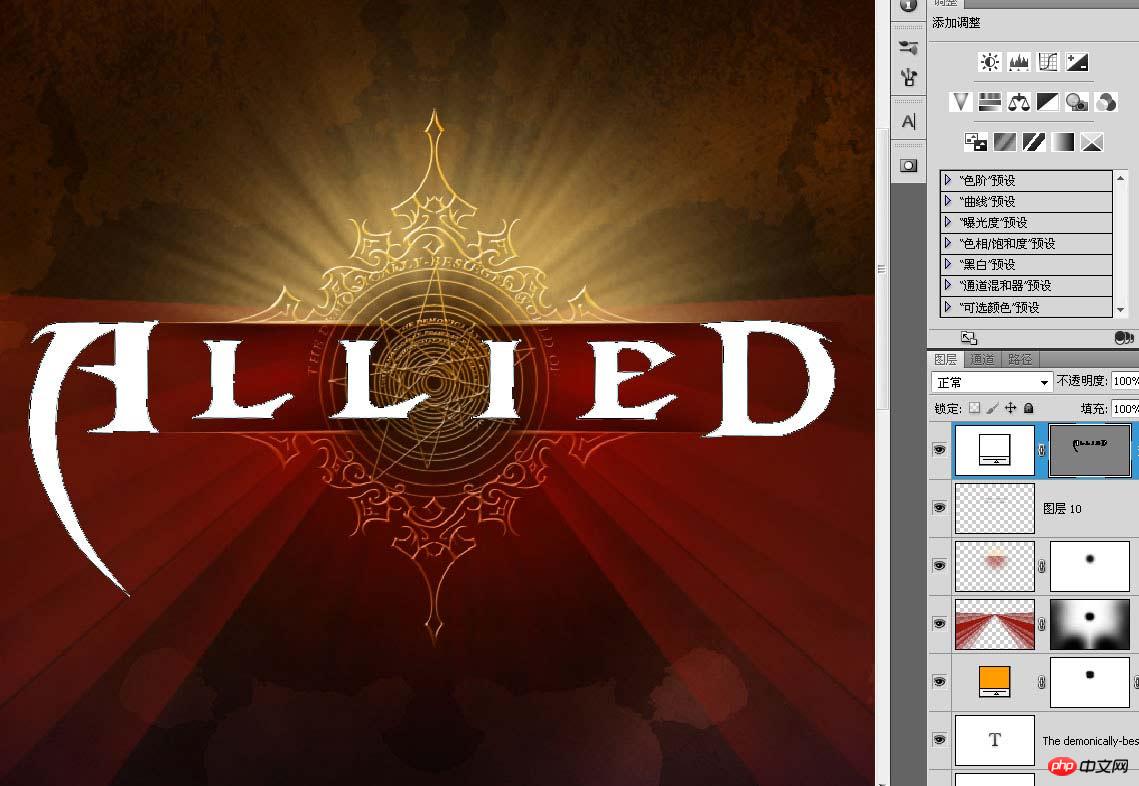
给allied增加一个边宽为3个像素的深红色描边。
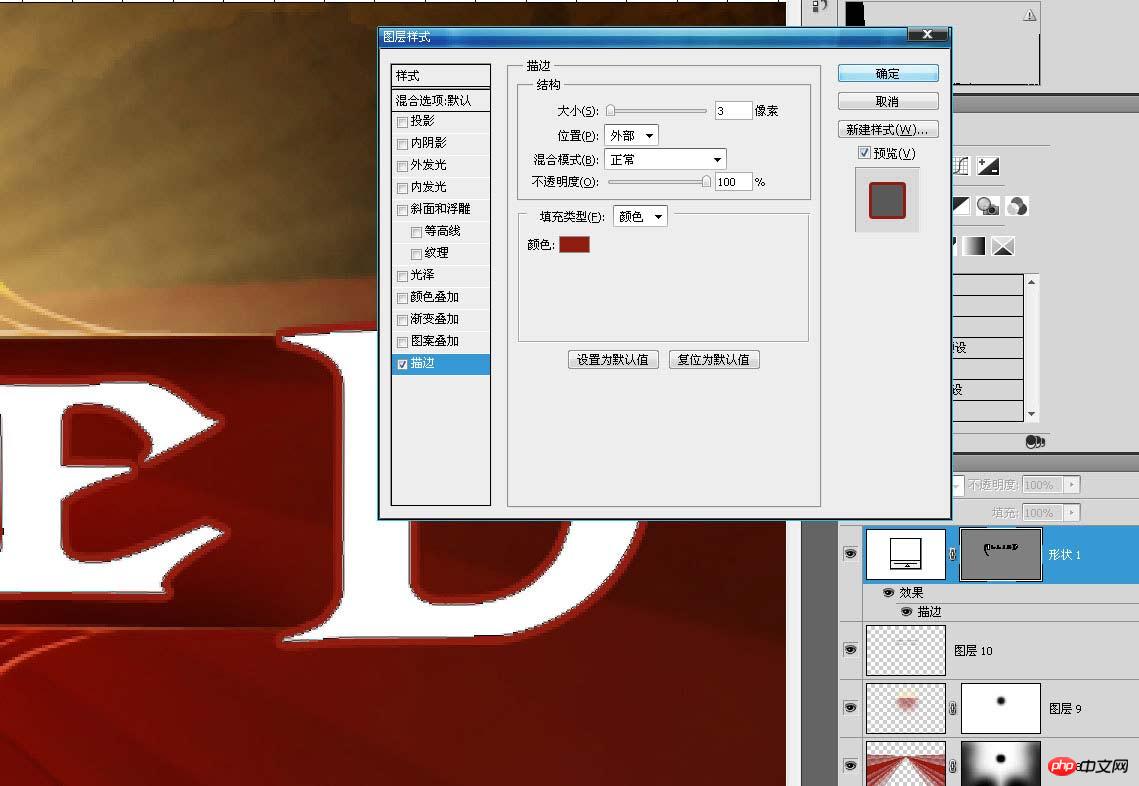
点击“图层-图层样式-创建图层”,把描边从字体的图层样式里分离出来。
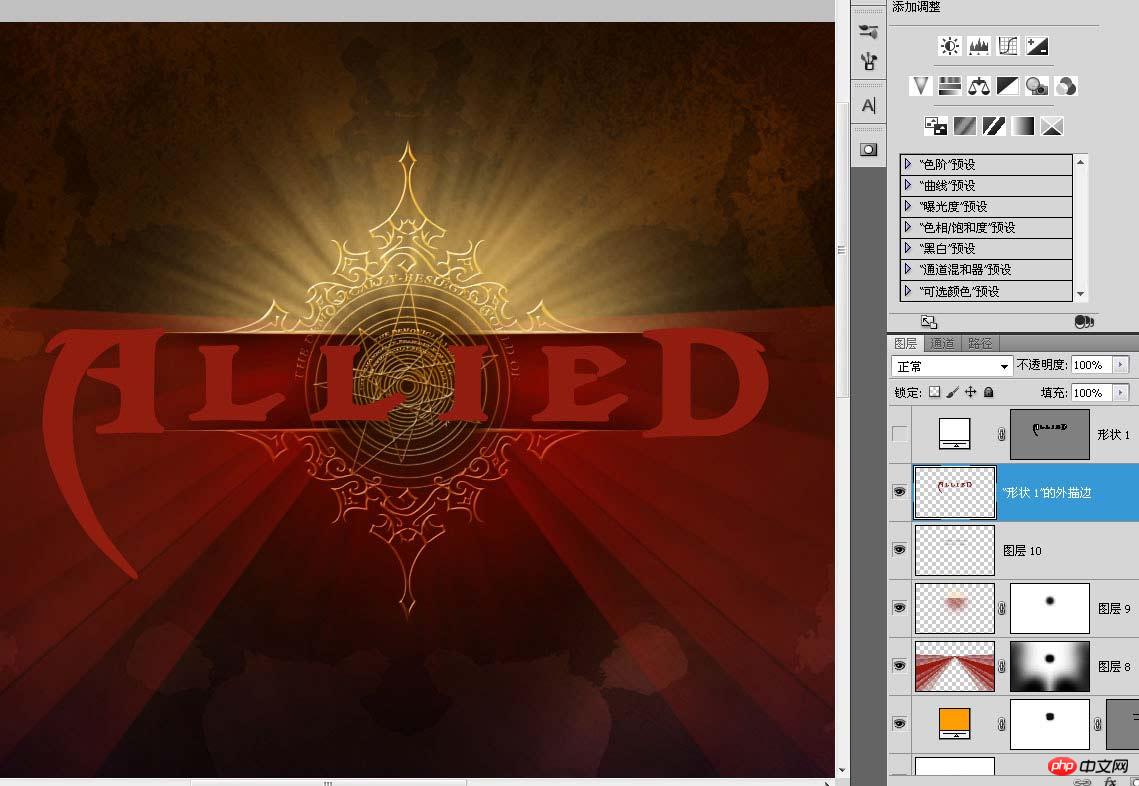
单独修改一下这个描边层,将那些圆角的地方修正成直角,还有字体尖头,可以用钢笔描出路径转成选区填充原来的颜色。

给这个描边层添加内发光和外发光。
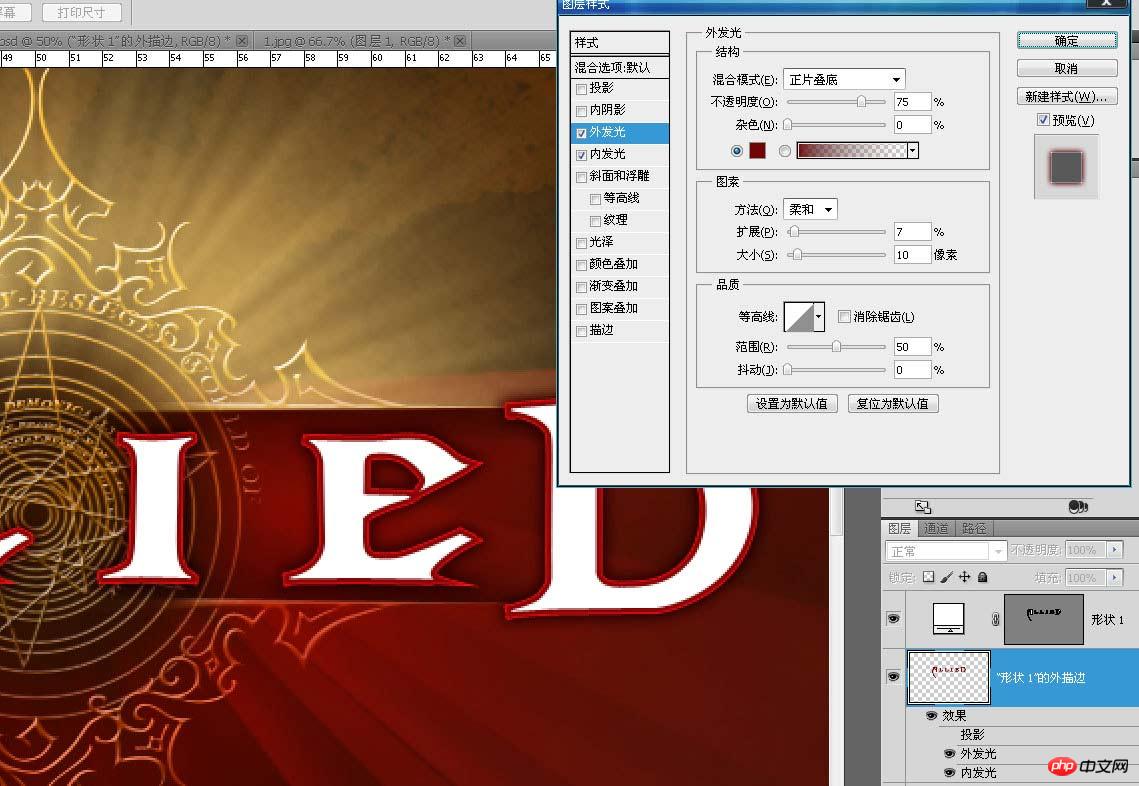
鉴于篇幅的关系,我在这个allied的图层样式不做更多详细讲解,不过你对图层样式比较熟悉的话看右边的图层里的样式清单就明白个大概。
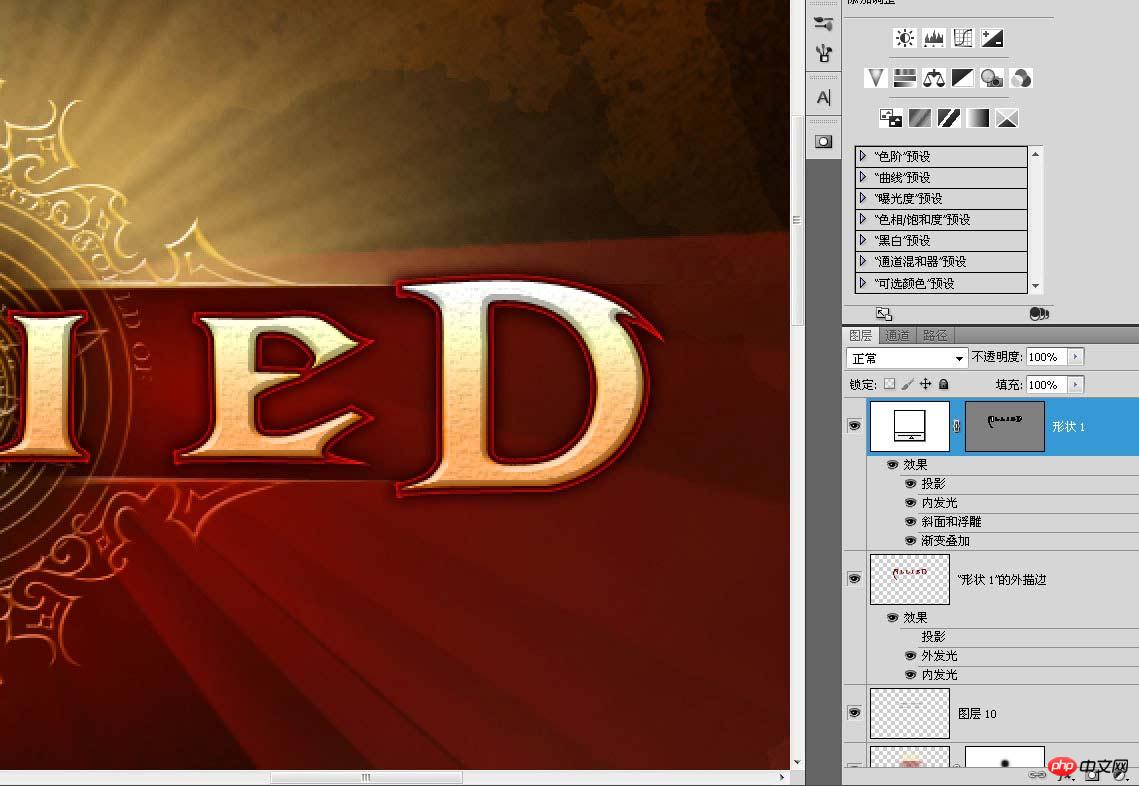
把“混合选项”里的“图层模板隐藏效果”勾上。

用小一点的画笔在allied上画一些缺口,让这个字效带着点久经岁月腐蚀的味道。

接着我还画了一个带有中国元素的花纹,这个用来深化allied的效果。
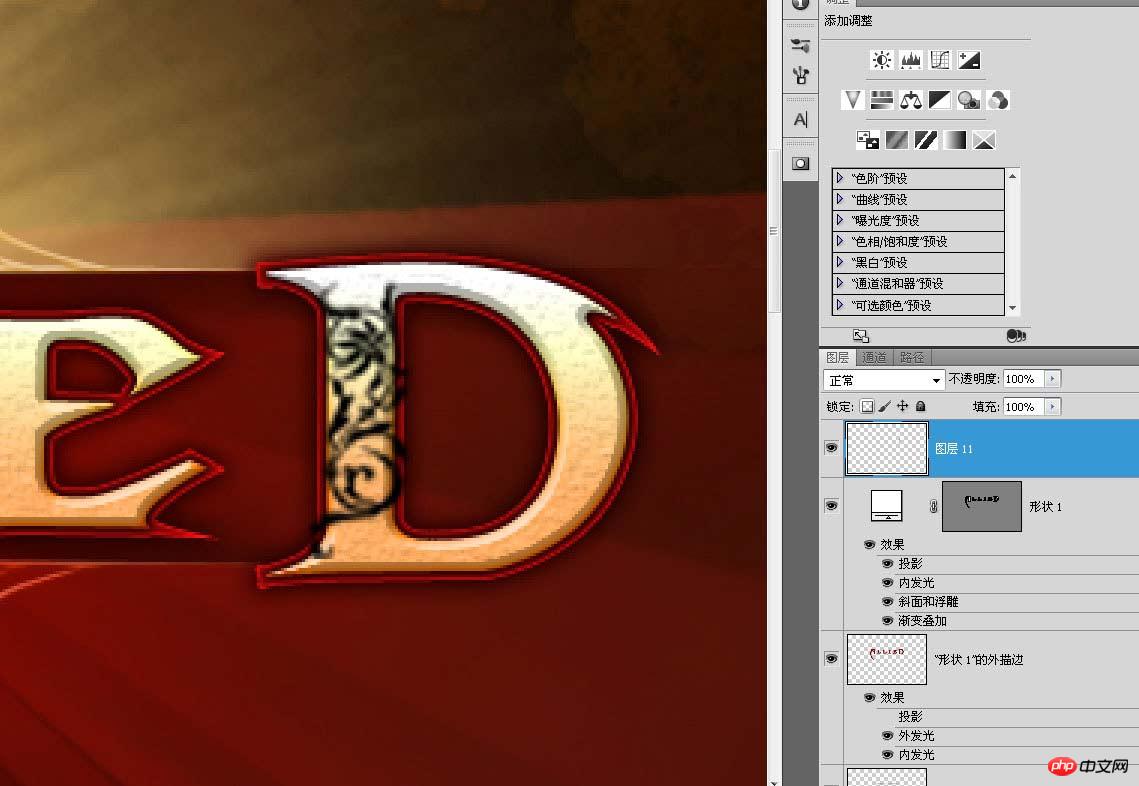
利用移动复制功能把这个花纹布置到是有的字母竖条上,有圆弧的地方可以用变形调整一下

双击这个图层打开图层样式,只简单的添加一个斜面浮雕,模拟allied字效上雕琢的效果。

添加一个模板,把这个花纹超出描边的部分遮盖掉。

用画笔点几下,这个将用来制作allied背后的三条竖条。
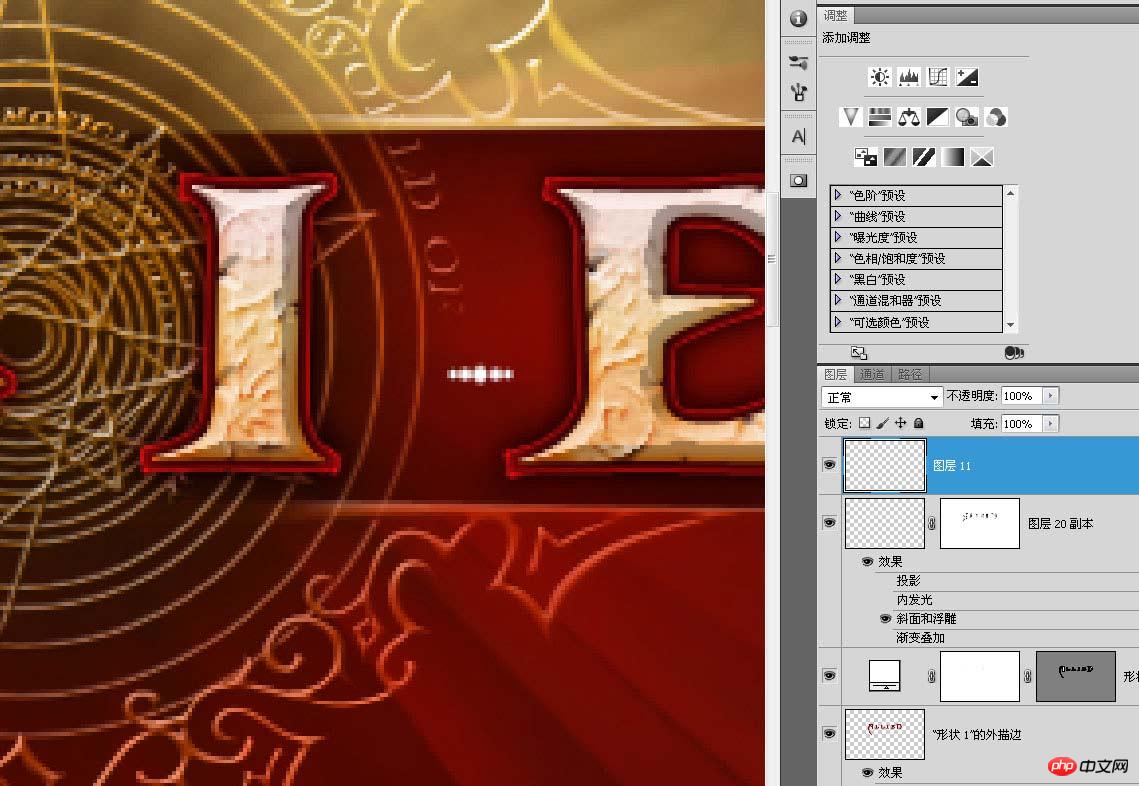
CTRL+T垂直拉伸。
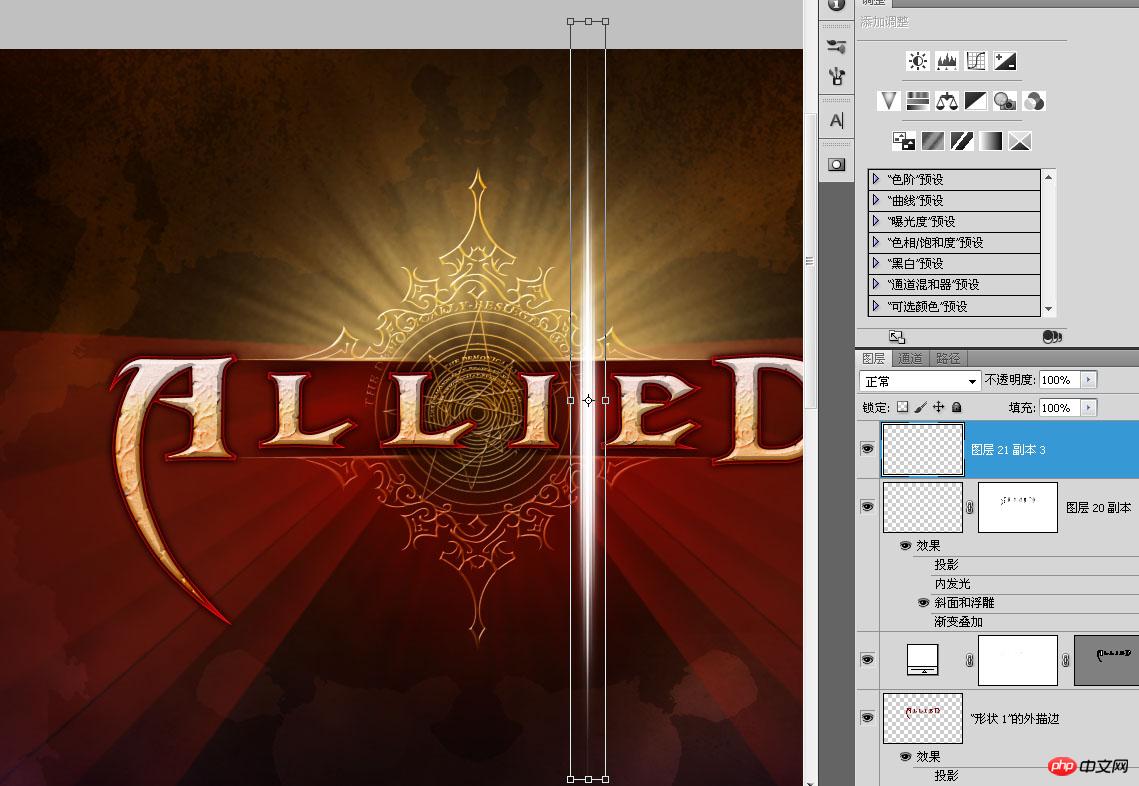
水平方向复制三条,中间的那条稍微大一点。

添加一个渐变效果。

复制一层,单独把水平方向缩小。

打开“锁定透明像素”,填充金黄色。
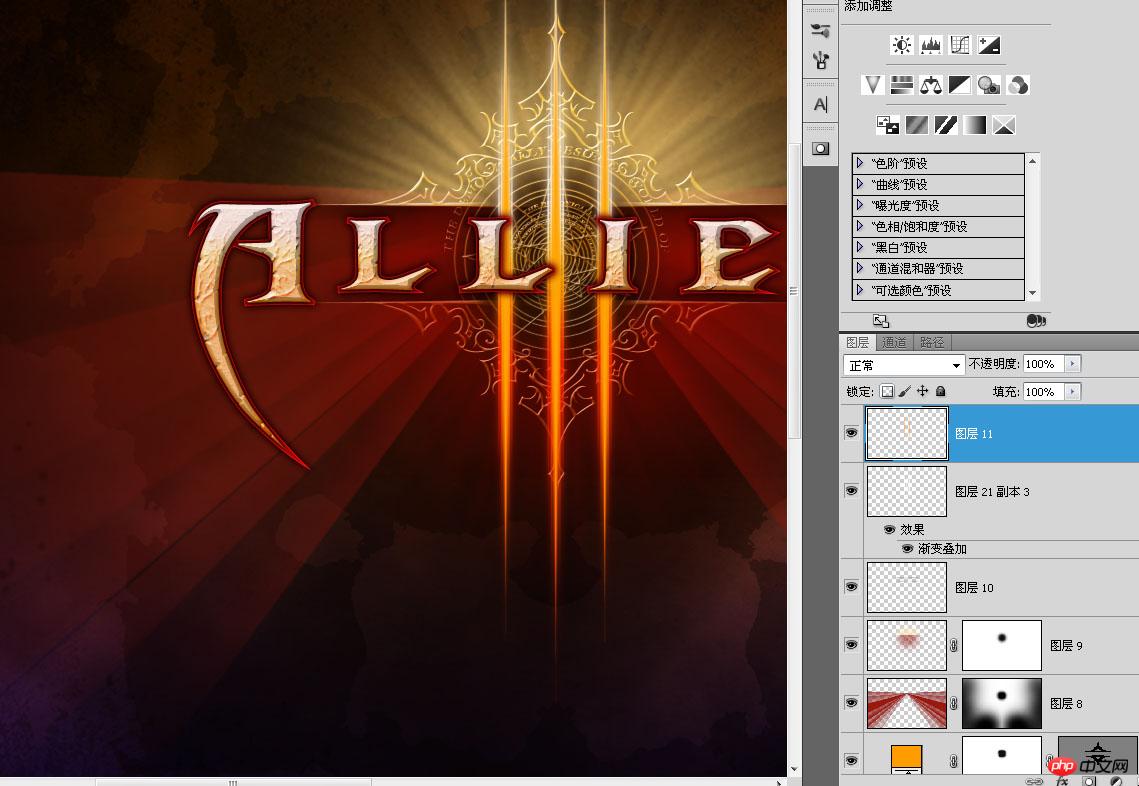
添加蒙版,把上半部分遮盖掉。
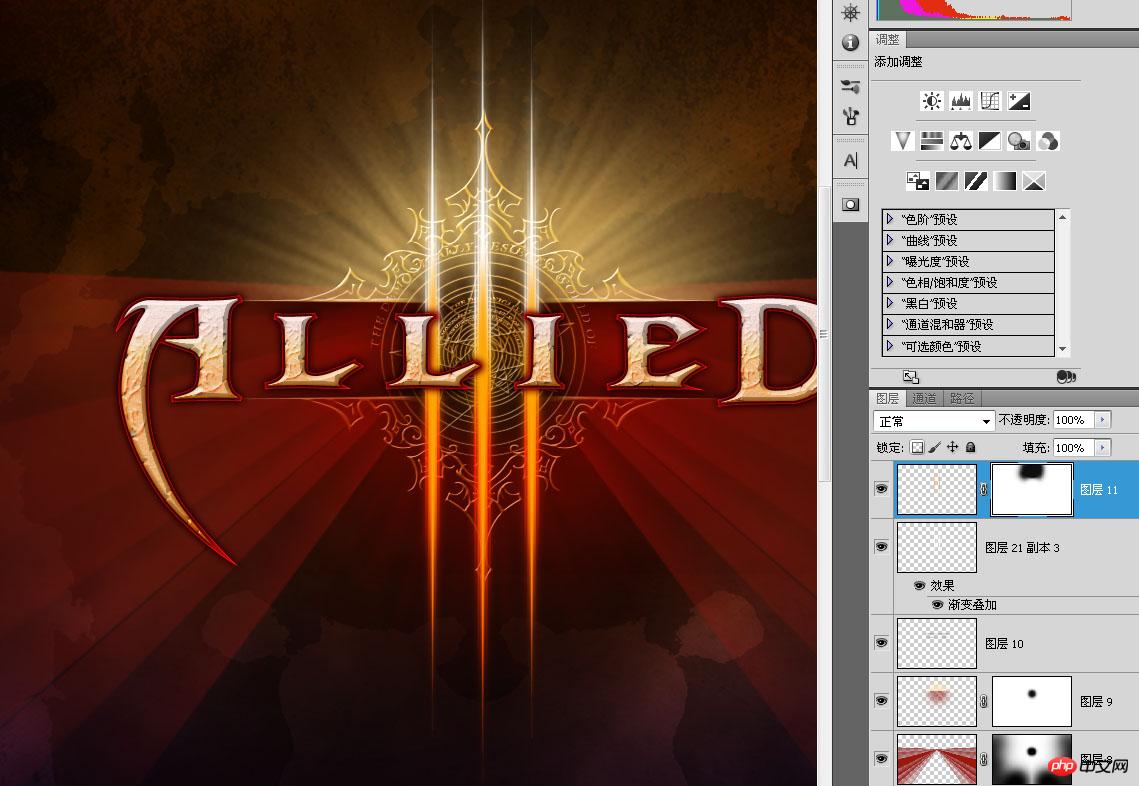
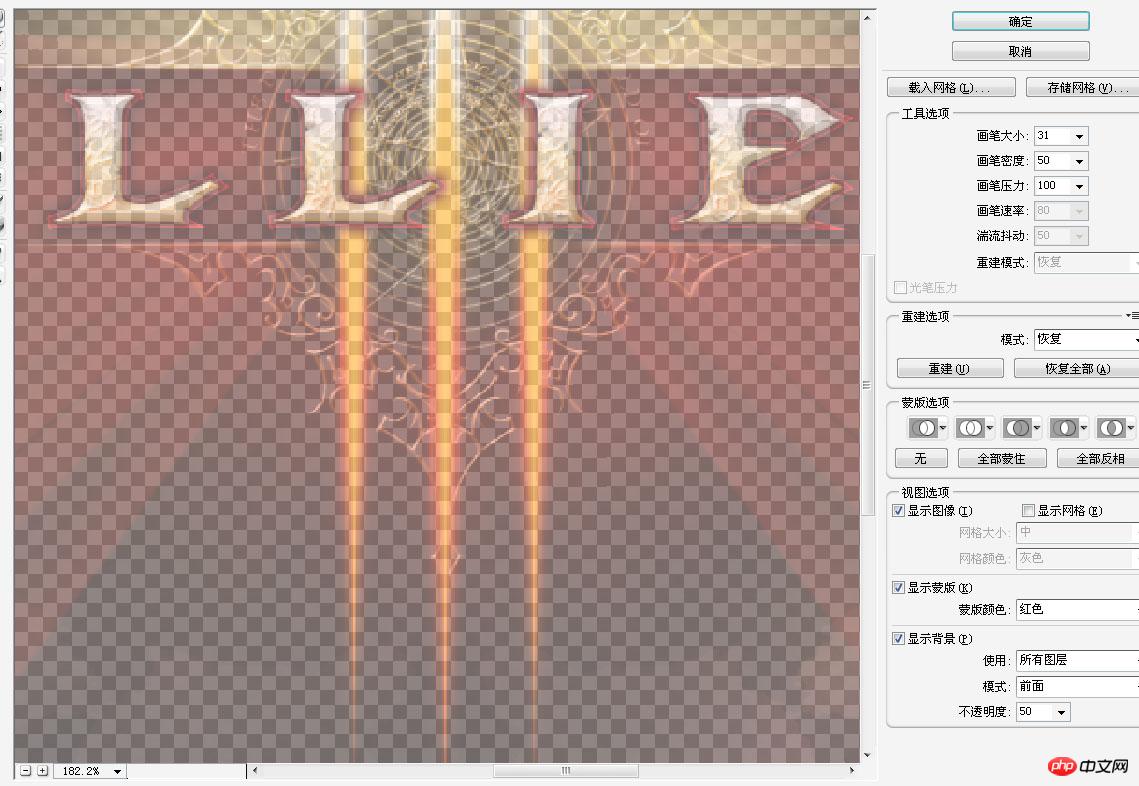
用“液化”把下面的弄出一点扭曲的效果。
完成咯!最终效果:

教程结束,以上就是PS绘制一张酷炫霸气的暗黑3壁纸方法,希望能对大家有所帮助!

Hot AI Tools

Undresser.AI Undress
AI-powered app for creating realistic nude photos

AI Clothes Remover
Online AI tool for removing clothes from photos.

Undress AI Tool
Undress images for free

Clothoff.io
AI clothes remover

AI Hentai Generator
Generate AI Hentai for free.

Hot Article

Hot Tools

Notepad++7.3.1
Easy-to-use and free code editor

SublimeText3 Chinese version
Chinese version, very easy to use

Zend Studio 13.0.1
Powerful PHP integrated development environment

Dreamweaver CS6
Visual web development tools

SublimeText3 Mac version
God-level code editing software (SublimeText3)

Hot Topics
 How to turn off automatic wallpaper change in Win11? Introduction to closing methods
Apr 24, 2024 pm 05:43 PM
Some win11 users find that their desktop wallpaper always changes automatically, but you don't like to change wallpapers often, so how do you turn off automatic wallpaper change? Let’s take a look at the relevant introduction! To turn off the automatic wallpaper change function of Win11, you can follow the steps below: 1. Open the "Settings" application. You can find it by searching for "Settings" in the Start menu. 2. In the "Settings" window, click the "Personalization" option on the left. 3. In the "Personalization" window, select the "Background" option on the left. 4. Under the "Background" option, find the switch button next to "Picture" under "Background". 5. Switch the switch button to the off state, so that the automatic wallpaper change function of Win11 can be turned off. After closing
 Where are themes located in Windows 11?
Aug 01, 2023 am 09:29 AM
Windows 11 has so many customization options, including a range of themes and wallpapers. While these themes are aesthetic in their own way, some users still wonder where they stand in the background on Windows 11. This guide will show you the different ways to access the location of your Windows 11 theme. What is the Windows 11 default theme? The default theme background of Windows 11 is an abstract royal blue flower blooming with a sky blue background. This background is one of the most popular, thanks to the anticipation before the release of the operating system. However, the operating system also comes with a range of other backgrounds. Therefore, you can change the Windows 11 desktop theme background at any time. Themes are stored in Windo
 Where is the Win11 background image stored?
Dec 27, 2023 am 11:59 AM
The win11 system has updated a lot of new wallpapers for everyone, so many users are curious about which folder the win11 wallpapers are in and want to open them to see the wallpapers inside. Therefore, we have brought a tutorial so that you can enter and view the wallpapers. . Which folder is the win11 wallpaper in: 1. The system comes with wallpaper: 1. First enter my computer, and then open the path: C:\Windows\Web\Wallpaper. 2. Then enter the windows folder and you can see the wallpapers that come with the system. 2. User-saved wallpapers: 1. Wallpapers installed by users will be saved in: C:\Users (user)\xx (current user name)\AppData\Local\Microso
 ps serial number cs5 permanently free 2020
Jul 13, 2023 am 10:06 AM
PS serial numbers cs5 permanent free 2020 include: 1. 1330-1384-7388-4265-2355-8589 (Chinese); 2. 1330-1409-7892-5799-0412-7680 (Chinese); 3. 1330-1616-1993 -8375-9492-6951 (Chinese); 4. 1330-1971-2669-5043-0398-7801 (Chinese), etc.
 How to restore the default wallpaper in win10? One trick to quickly restore the default wallpaper in Windows 10 system
Jun 02, 2024 pm 02:07 PM
In Windows 10 system, if you want to return to the system default wallpaper, you can follow the following steps: 1. Right-click a blank space on the desktop and select Personalize in the pop-up menu. 2. This will open the Personalization window in Settings. In the left menu, click Background. 3. Under the "Background" settings, find and click the drop-down menu next to "Choosepicture", and then select Windows Default (Windows Default) or directly select a picture that looks like the default wallpaper in the picture preview below ( if there are multiple options). 4. If your system has multiple versions
 How to show the time under the lock screen wallpaper on iPhone
Dec 18, 2023 am 11:27 AM
Depth Effect is a cool lock screen feature on iOS where part of the wallpaper covers the digital clock. This basically provides a mirage-like effect where the wallpaper appears to be interacting with lock screen elements. In this article, we will explain what the depth effect is all about and how to get the lock screen time/clock behind wallpaper on iPhone. What is the depth effect on iPhone lock screen? Depth effect adds multiple layers of depth to your wallpaper. When you apply a lock screen wallpaper, iOS uses the iPhone's neural network engine to detect depth information in the image you apply. If successful, your iPhone will be able to separate the subject you want to focus on from other elements of the wallpaper. Once a subject is detected, the depth of field effect will
 'Genshin Impact' version 4.4 wallpaper released, Xianyun and Jiaming have their own characteristics
Feb 24, 2024 pm 05:46 PM
"Genshin Impact" brings players the computer and mobile phone wallpapers of the 4.4 version of the game's promotional images. Players can choose to use them according to their own needs~
 iOS 17: How to use Live Photos as lock screen wallpaper on iPhone
Sep 21, 2023 am 10:33 AM
In the latest version of iOS17, Apple has integrated a new feature where you can use LivePhotos to decorate your iPhone’s lock screen background. The fascinating aspect is that these live photos come to life every time you light up your iPhone's display. Here's how to use Live Photos as your lock screen wallpaper on an iPhone running iOS 17. How to Apply Live Photos as Lock Screen Wallpaper on iPhone Required: iOS17 Update. (Check Settings > under General >Software Update). You can apply live photos you capture on your iPhone as its lock screen wallpaper in iOS17. Lock screen when using live photo as wallpaper


