How to draw a 2.d hourglass illustration using Photoshop
Want to draw a 2D hourglass illustration in Photoshop? Don't hesitate any longer! This article will guide you step by step through the process, from creating a canvas to drawing shapes and applying textures. Whether you're a beginner or an experienced artist, this tutorial will give you all the information you need to create a stunning hourglass illustration with ease.
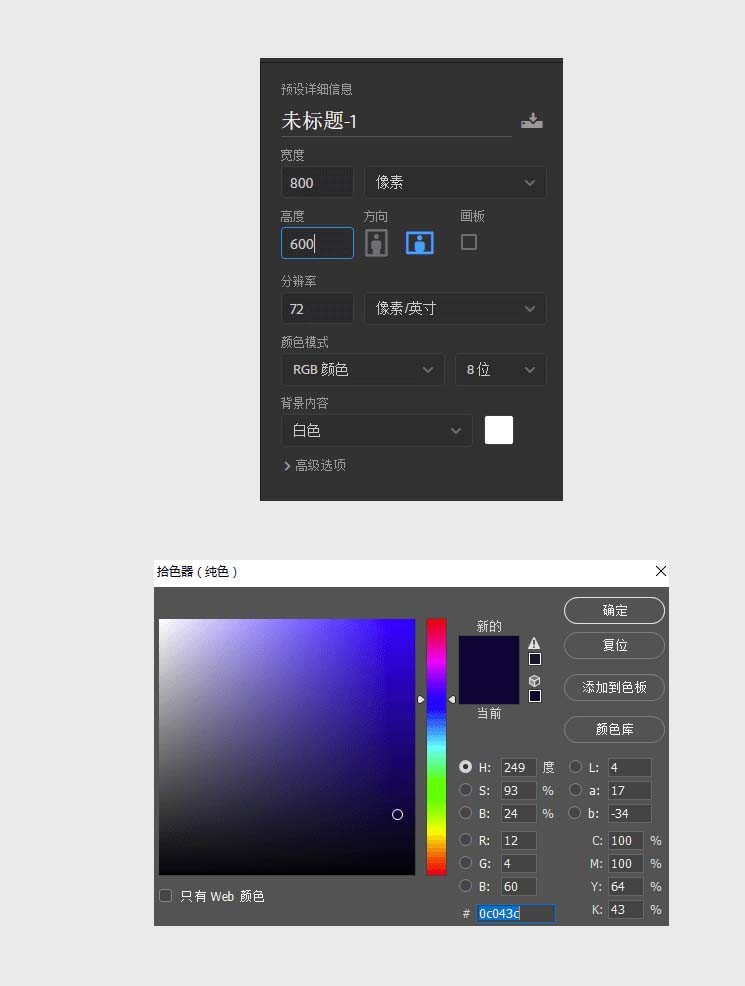
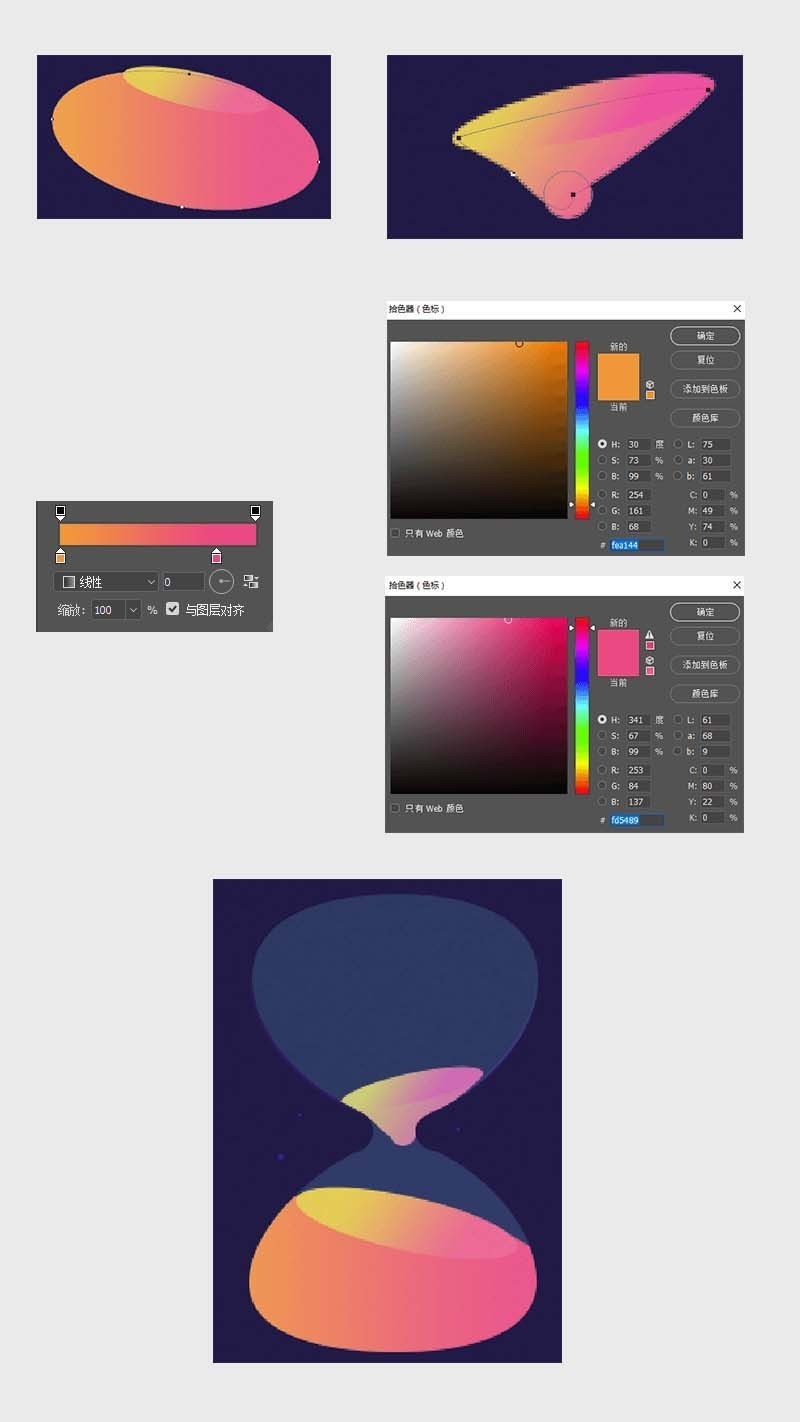
1. Create a new canvas of 600*800px, and then draw a rectangle as the background color. The fill color is as follows:
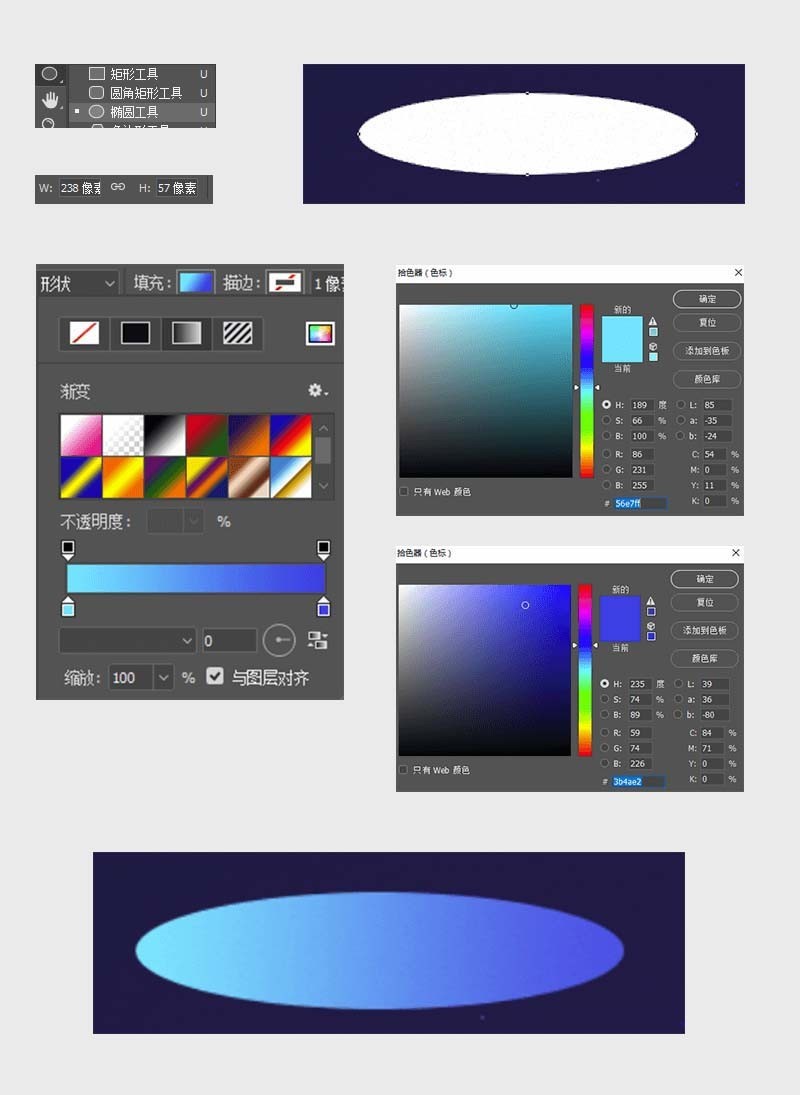
2. Make the top of the hourglass and use the Ellipse tool to draw it. So round, here’s another gradient color parameter as follows:.
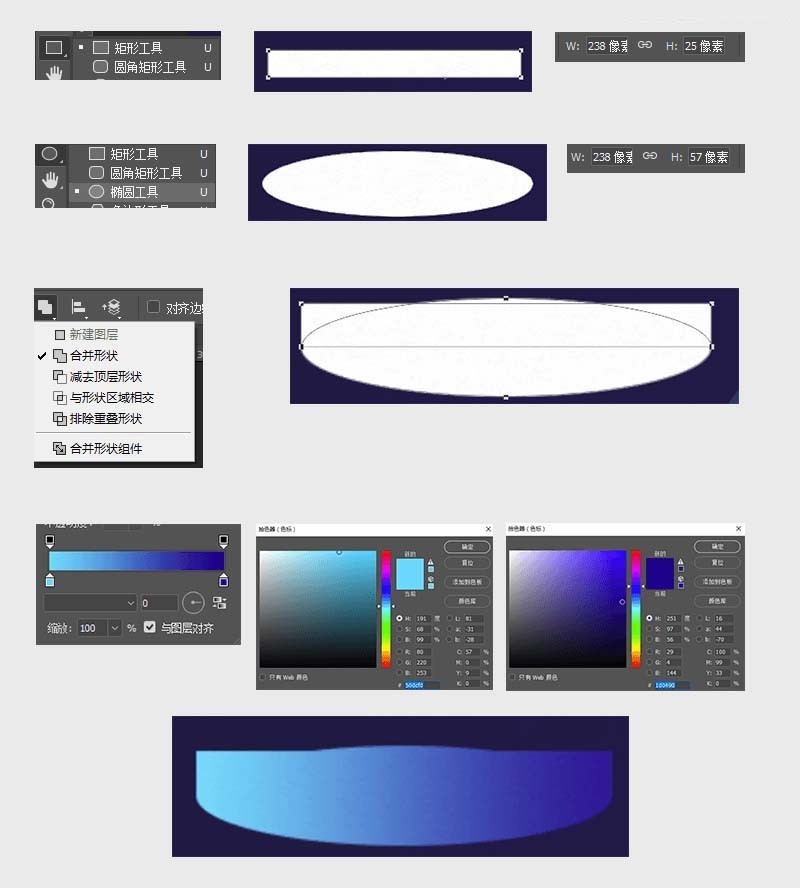
3. Rectangle tool and ellipse tool make the bottom shape of the upper part of the hourglass. Here you need to pay attention to the width of the rectangle and circle and then perform Boolean operations (first select the two layers Ctrl E to merge, Then merge the layers) and add gradient. The relevant parameters are as follows:.
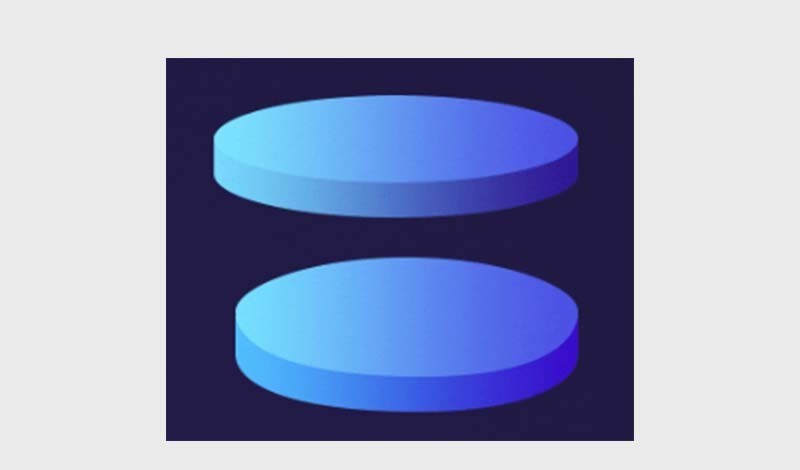
4. Place the shape obtained in step 2 on top of the layer in step 3, and then wrap it up. The top of the hourglass is ready, and then we repeat the above operation. You can get the bottom of the hourglass (the parameters at the bottom will change a little because the hourglass is tilted, so you can modify the specific parameters according to your own feelings).
5. Make the pillars of the hourglass. Use a rectangular rounded corner to maximize it and add a gradient. The relevant parameters are as follows:
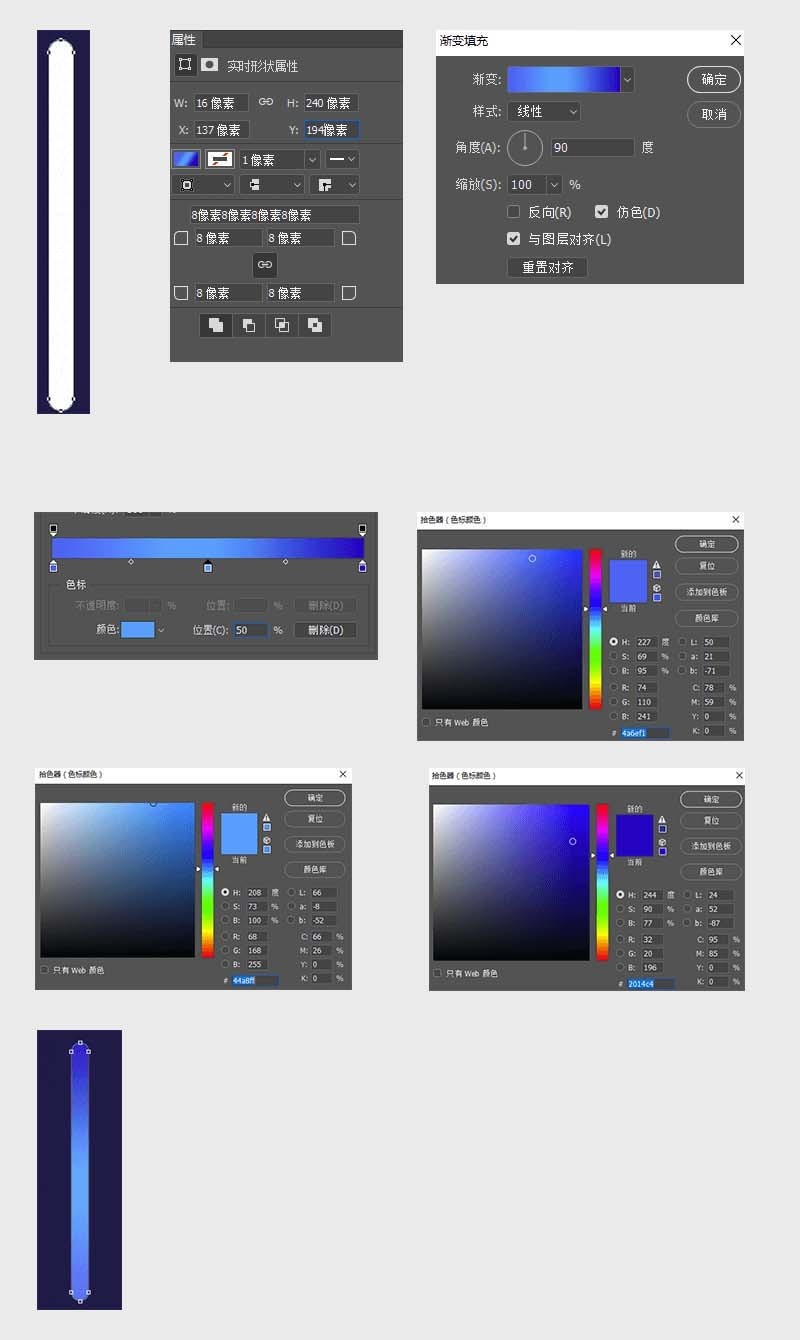
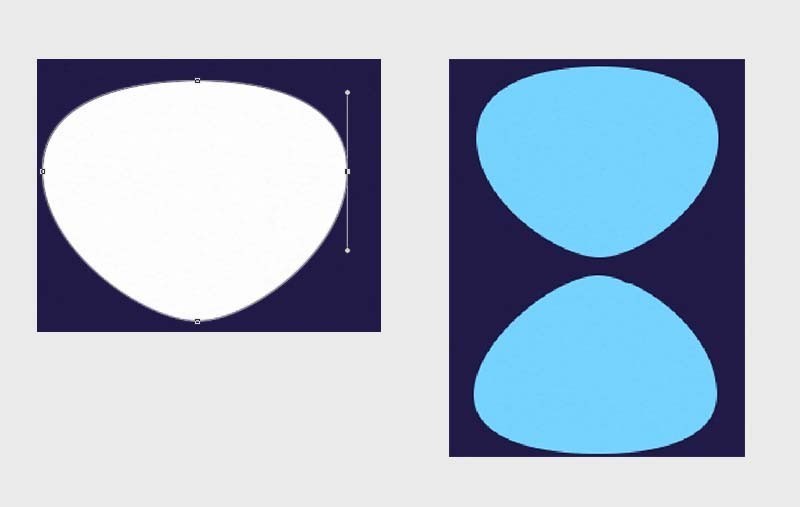
6. Make an hourglass For the glass, use the Ellipse tool to make the upper part. Add the color #52d5fe. Here you need to copy one more layer. Similarly, make the lower part
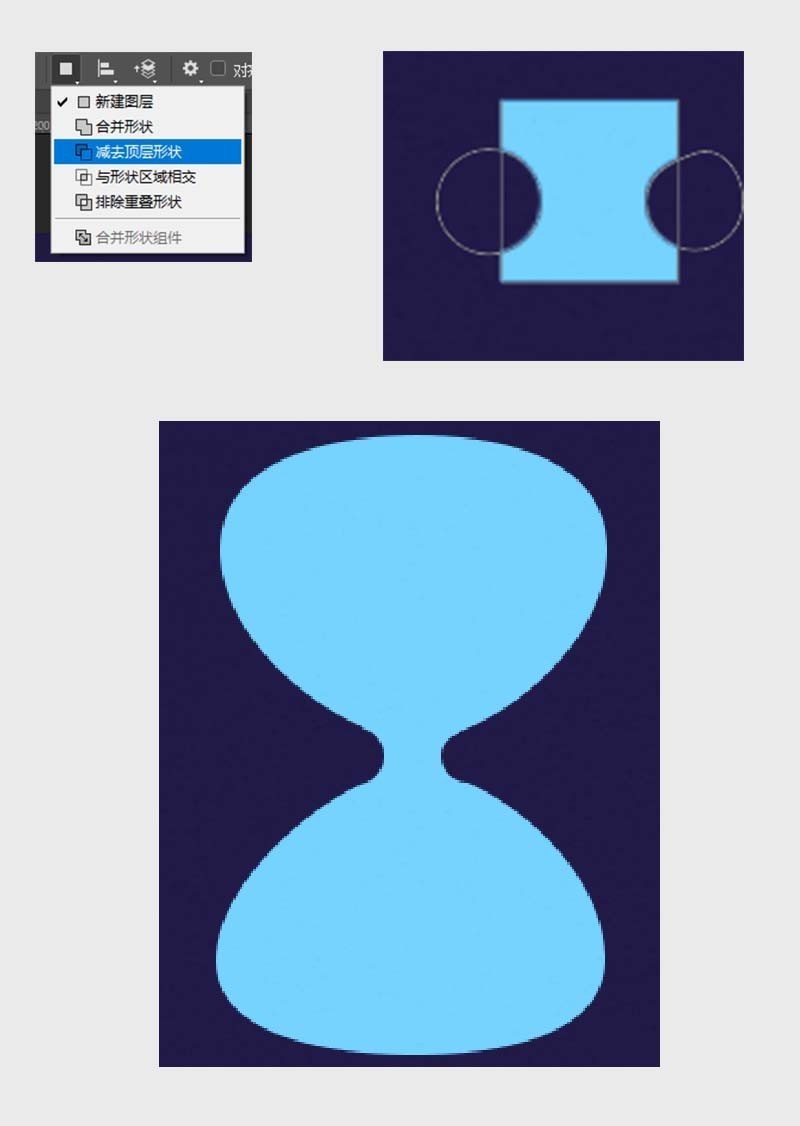
7. When making the middle link part, use an ellipse here. Perform Boolean operations with the rectangle (here, subtract the top layer!) Merge the layers from the previous step and this step, adjust the position
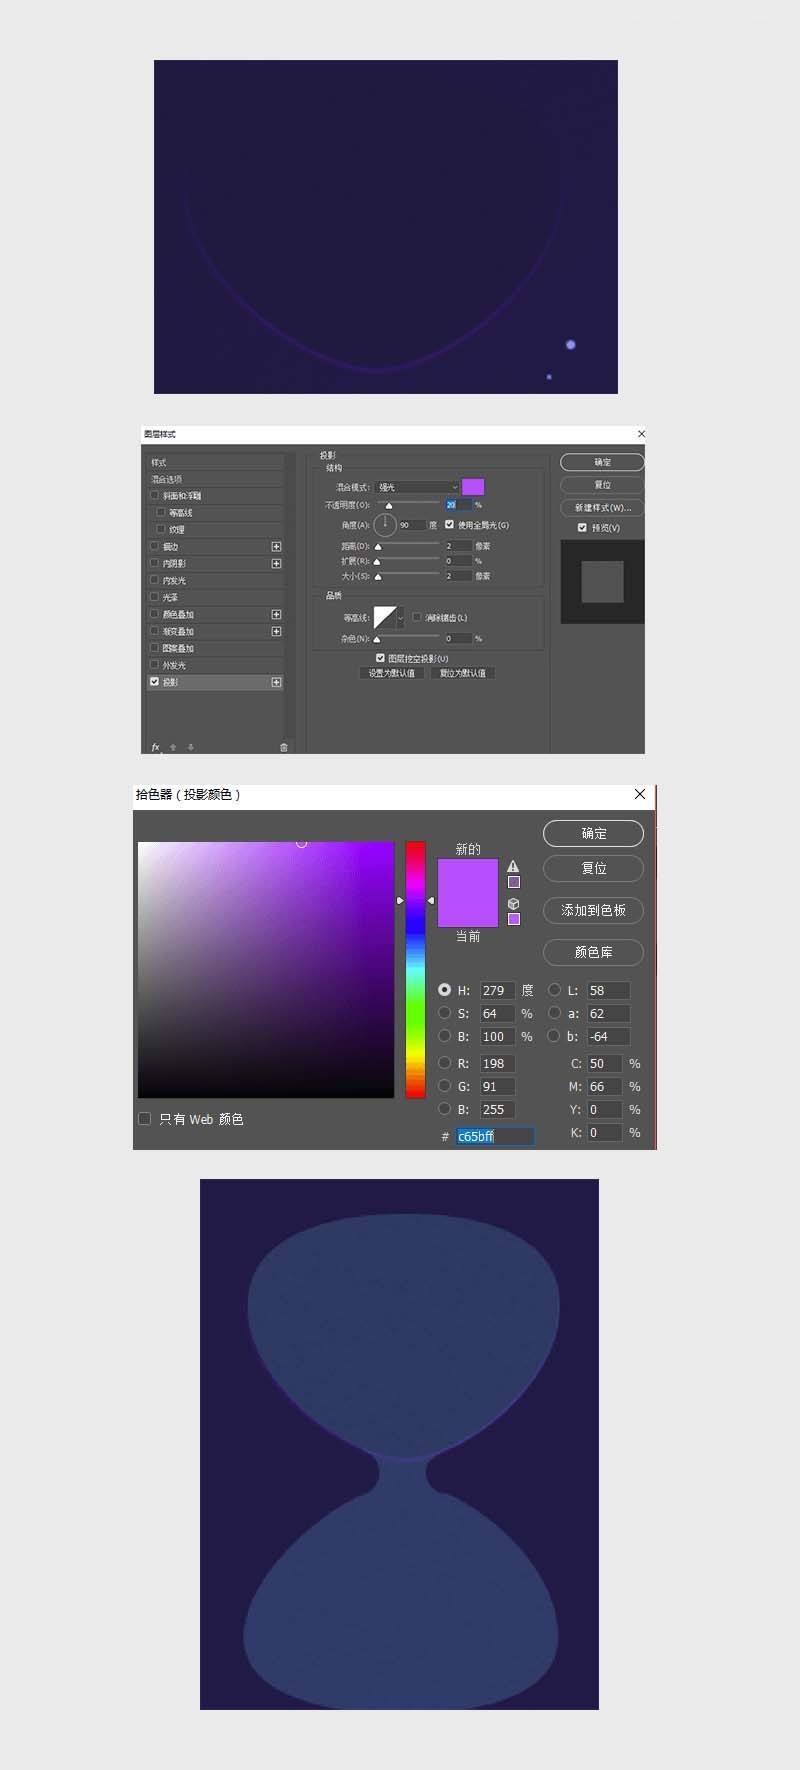
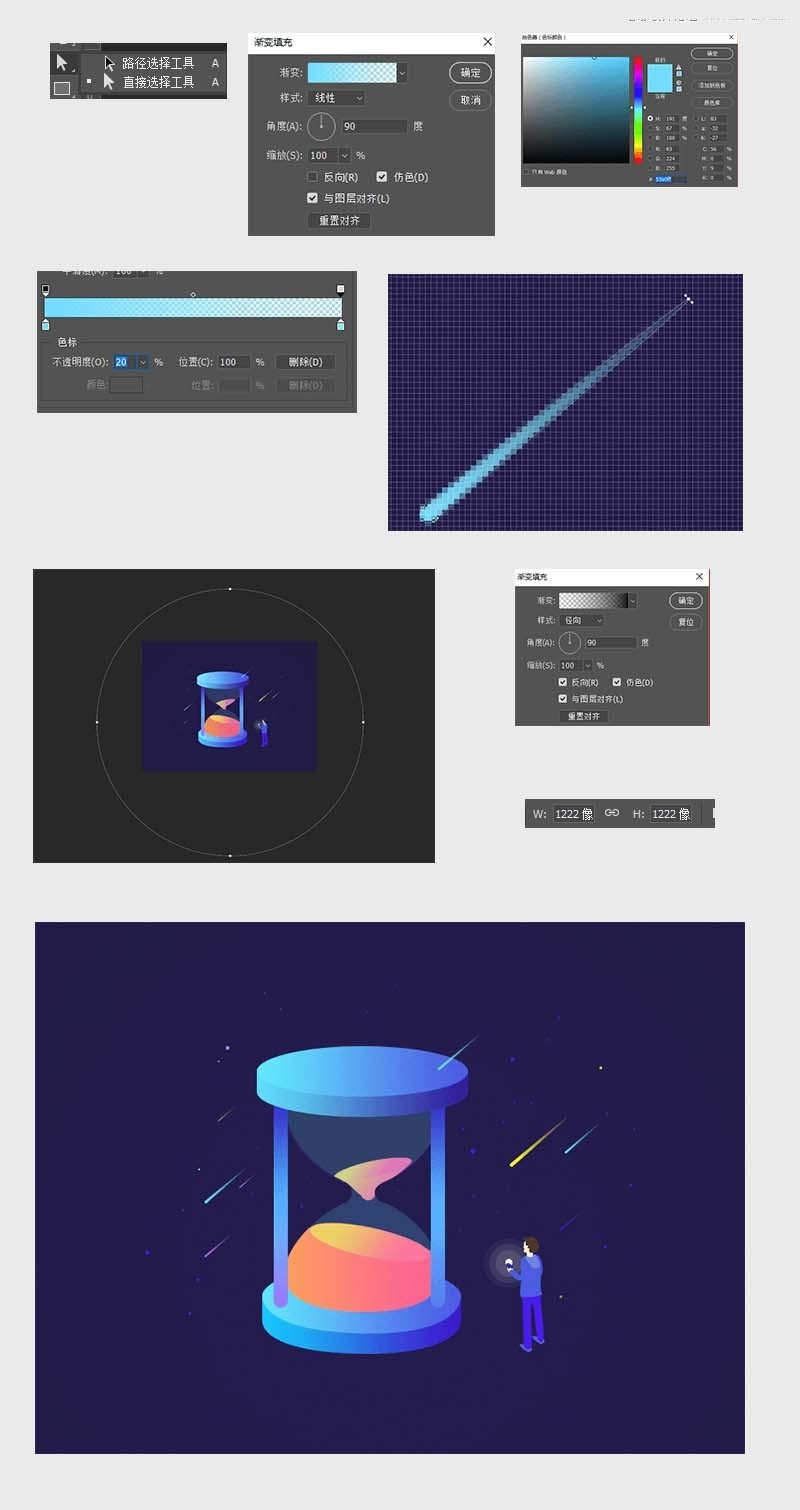
8. Reduce the transparency to 20%, and then copy Add a background color to the circle and increase the shadow effect
9. Make the sand inside, use the Ellipse tool to make a basic shape, and then use Xiaobai to adjust the shape (it doesn’t have to be too perfect here) to make a group , add a gradient color (the color needs to be fine-tuned), then use the hourglass glass to make a selection, apply a clipping mask to the sand group, and then adjust the shape accurately.
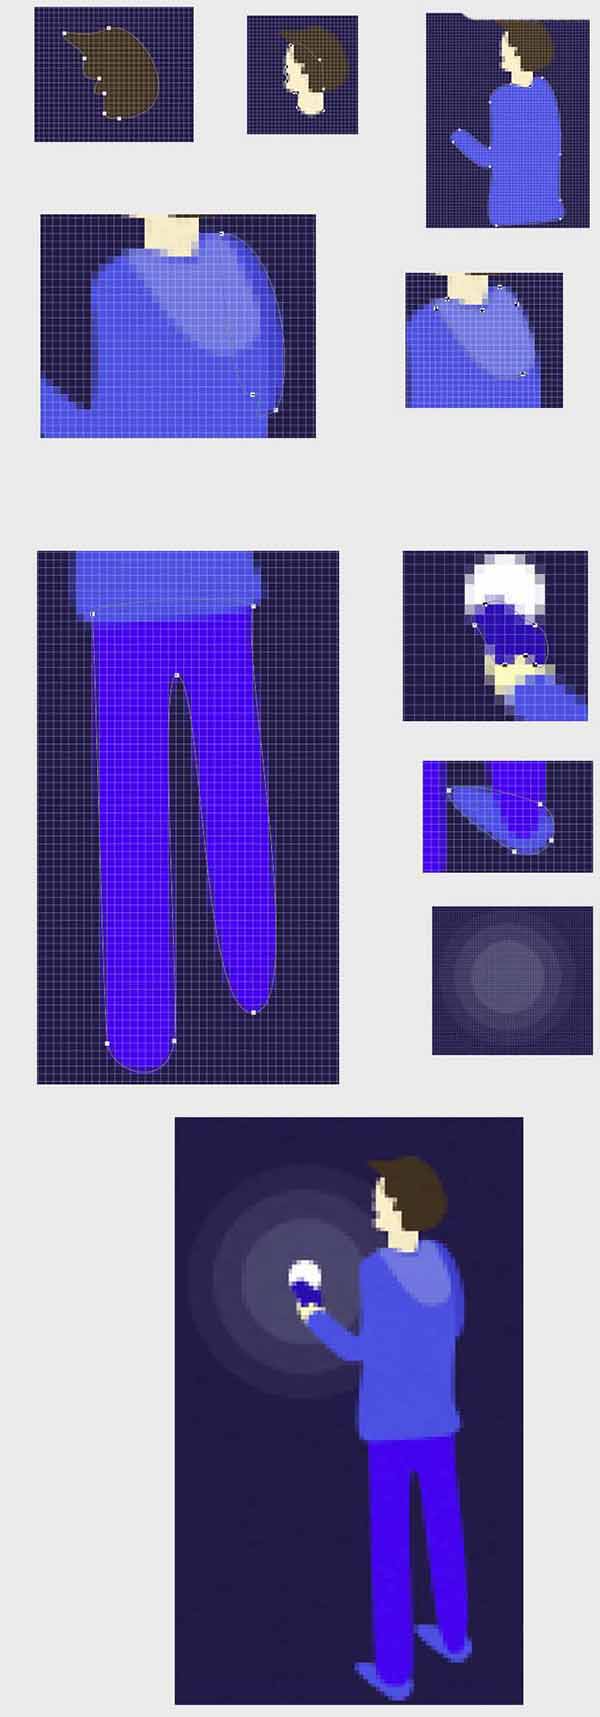
10. Use the pen tool to outline the character. The colors of each part are: skin #fff1cb, hair #37210c, clothes #394ce0, pants #3704ec, shoes 3b4ce1
11. Finally, to make a meteor, use the Ellipse tool to draw a 3px circle, and then use Xiaobai to stretch a point to get the effect of a meteor. Make an opacity gradient in the color. You can try multiple colors. , but don’t be too fancy, add some 4px, 2px stars in the middle, and finally add a black radial gradient to the background, and the whole work will be OK!
The above is the detailed content of How to draw a 2.d hourglass illustration using Photoshop. For more information, please follow other related articles on the PHP Chinese website!

Hot AI Tools

Undresser.AI Undress
AI-powered app for creating realistic nude photos

AI Clothes Remover
Online AI tool for removing clothes from photos.

Undress AI Tool
Undress images for free

Clothoff.io
AI clothes remover

Video Face Swap
Swap faces in any video effortlessly with our completely free AI face swap tool!

Hot Article

Hot Tools

Notepad++7.3.1
Easy-to-use and free code editor

SublimeText3 Chinese version
Chinese version, very easy to use

Zend Studio 13.0.1
Powerful PHP integrated development environment

Dreamweaver CS6
Visual web development tools

SublimeText3 Mac version
God-level code editing software (SublimeText3)

Hot Topics
 1664
1664
 14
14
 1423
1423
 52
52
 1317
1317
 25
25
 1268
1268
 29
29
 1243
1243
 24
24
 How much does Microsoft PowerToys cost?
Apr 09, 2025 am 12:03 AM
Microsoft PowerToys is free. This collection of tools developed by Microsoft is designed to enhance Windows system functions and improve user productivity. By installing and using features such as FancyZones, users can customize window layouts and optimize workflows.


