PS给文字填充漂亮的花的背景
如果只是单纯的文字,是不是看起来很单调无味呢?
所以,小编在这里给大家一种方法,用花的背景来填充文字,给文字加上特效,很漂亮的哦!
赶快来跟小编一起试试吧!美美哒,你值得拥有!
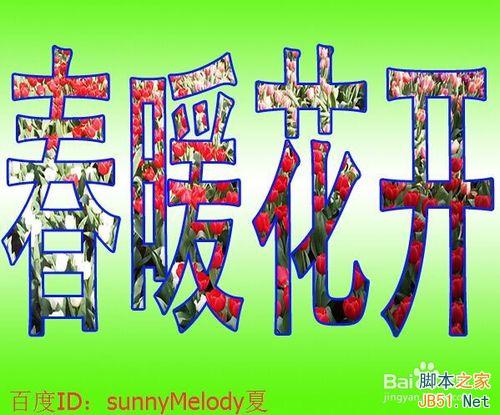
文字特效步骤:
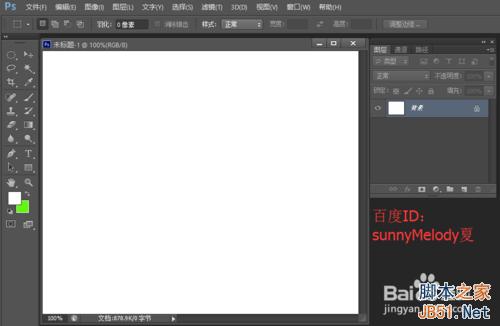
1、打开ps的软件,按Ctrl+N快捷键新建一个600*500的画布。点击前景色,将前景色设置为白色;再点击背景色,将背景色设置为绿色。
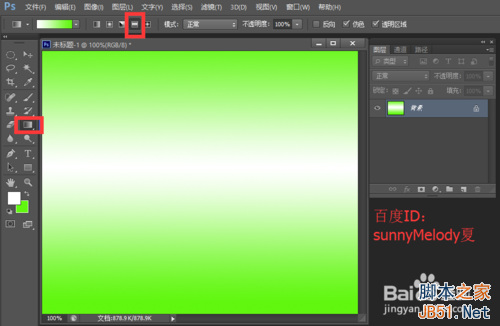
2、选择渐变工具,再选择属性栏中的对称渐变。将鼠标放在画布的正中央竖直向上或者竖直向下拉出一个渐变,背景我们就做好了。如下图所示:
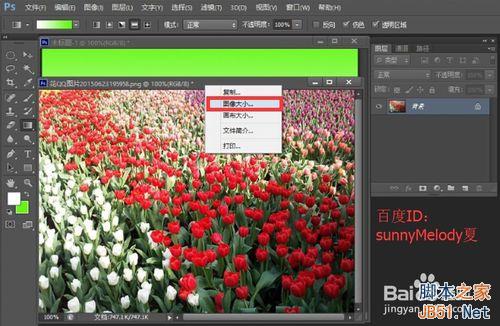
3、双击ps中的灰色部分,打开你将用来填充文字的花朵图片,这里小编的图片来源于网络,对此表示感谢。如果打开的花朵图片过大,右键单击图片名称部分,找到图像大小,将高度调小一点,设置为600。
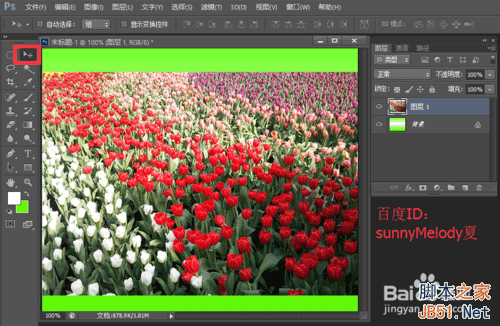
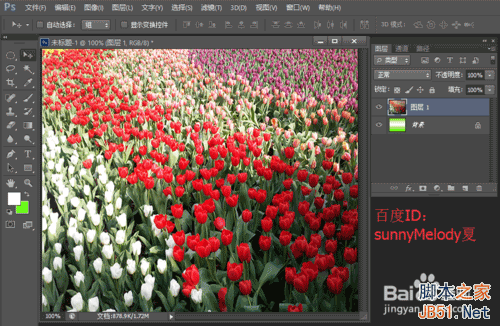
4、选择移动工具,将花朵图片拖到背景层当中,再关闭原来的花朵图片。我们再来调整花朵图片,按Ctrl+T快捷键,对花朵进行变换,使花朵覆盖背景层,变化好后,按enter键确认变换。
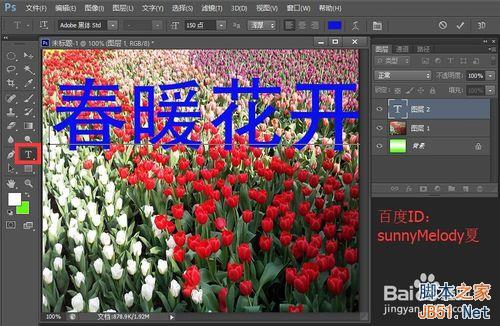
5、先选择横排文字工具,选择自己喜欢的一种字体,将字号设置大点,这里小编选择150点,最后在图片上打上你想要的字,这里以“春暖花开”为例。
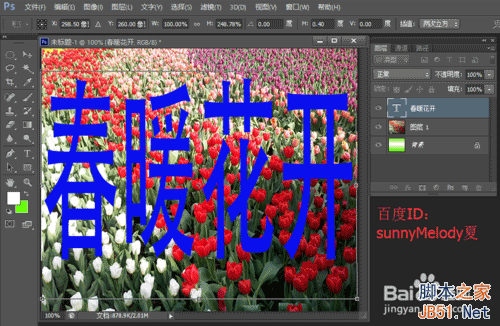
6、我们再来调整文字的大小,按按Ctrl+T快捷键,对文字进行变换,将文字变大一点,调整变换好后,按enter键确认变换。
7、这一步很重要,我们来做特效。先将文字层拖到图层1与背景层之间,选中文字层,再按Alt键,将鼠标移到文字层与图层1之间,出现一个向下的小方框,点击一下,效果就出来了。(注意:这里是将文字层先盖住,再选中文字层,按Alt键变换,文字就出来了。)
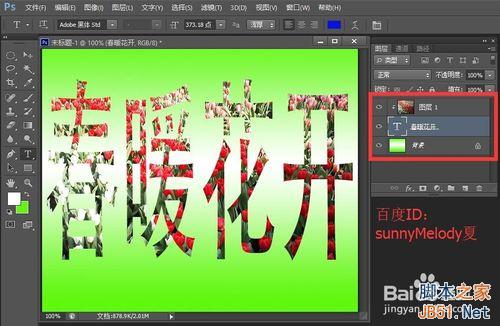
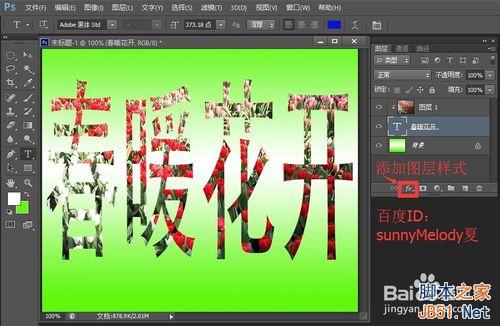
8、如果你不满意,可以选中文字层移动文字,你也可以选中花朵层移动花朵的位置,这个是可以自由调节的,很方便。我们再来给文字加个样式,选中文字层,点击下方的添加图层样式图标,选中描边样式。
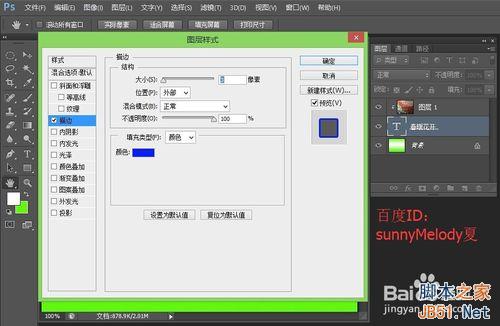
9、设置描边颜色,点击颜色的小方框,我们设置一个蓝色的描边,再点击确定。
10、让我们来看下效果图吧。
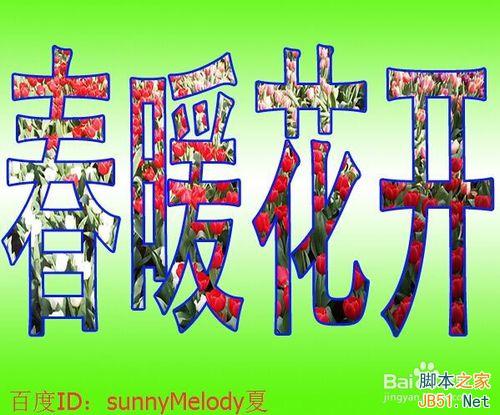
怎么样,是不是很漂亮呢!
小伙伴们也可以给文字填充其他的图片,不一定是花朵哦,你想填充什么就可以填充什么。
以上就是PS给文字填充漂亮的花的背景方法介绍,希望能对大家有所帮助!

Hot AI Tools

Undresser.AI Undress
AI-powered app for creating realistic nude photos

AI Clothes Remover
Online AI tool for removing clothes from photos.

Undress AI Tool
Undress images for free

Clothoff.io
AI clothes remover

AI Hentai Generator
Generate AI Hentai for free.

Hot Article

Hot Tools

Notepad++7.3.1
Easy-to-use and free code editor

SublimeText3 Chinese version
Chinese version, very easy to use

Zend Studio 13.0.1
Powerful PHP integrated development environment

Dreamweaver CS6
Visual web development tools

SublimeText3 Mac version
God-level code editing software (SublimeText3)

Hot Topics
 How to make round pictures and text in ppt
Mar 26, 2024 am 10:23 AM
First, draw a circle in PPT, then insert a text box and enter text content. Finally, set the fill and outline of the text box to None to complete the production of circular pictures and text.
 How to add dots to text in word?
Mar 19, 2024 pm 08:04 PM
When we create Word documents on a daily basis, we sometimes need to add dots under certain words in the document, especially when there are test questions. To highlight this part of the content, the editor will share with you the tips on how to add dots to text in Word. I hope it can help you. 1. Open a blank word document. 2. For example, add dots under the words "How to add dots to text". 3. We first select the words "How to add dots to text" with the left mouse button. Note that if you want to add dots to that word in the future, you must first use the left button of the mouse to select which word. Today we are adding dots to these words, so we have chosen several words. Select these words, right-click, and click Font in the pop-up function box. 4. Then something like this will appear
 How to automate tasks using PowerShell
Feb 20, 2024 pm 01:51 PM
If you are an IT administrator or technology expert, you must be aware of the importance of automation. Especially for Windows users, Microsoft PowerShell is one of the best automation tools. Microsoft offers a variety of tools for your automation needs, without the need to install third-party applications. This guide will detail how to leverage PowerShell to automate tasks. What is a PowerShell script? If you have experience using PowerShell, you may have used commands to configure your operating system. A script is a collection of these commands in a .ps1 file. .ps1 files contain scripts executed by PowerShell, such as basic Get-Help
 Introduction to the process of extracting line drawings in PS
Apr 01, 2024 pm 12:51 PM
1. Open the software and import a piece of material, as shown in the picture below. 2. Then ctrl+shift+u to remove color. 3. Then press ctrl+J to copy the layer. 4. Then reverse ctrl+I, and then set the layer blending mode to Color Dodge. 5. Click Filter--Others--Minimum. 6. In the pop-up dialog box, set the radius to 2 and click OK. 7. Finally, you can see the line draft extracted.
 How to modify text on pictures
Aug 29, 2023 am 10:29 AM
Modifying the text on the image can be done by using image editing software, online tools or screenshot tools. The specific steps are: 1. Open the picture editing software and import the picture that needs to be modified; 2. Select the text tool; 3. Click the text area on the picture to create a text box; 4. Enter the text you want in the text box. 5. If you just want to delete the text on the picture, you can use the eraser tool or the selection tool to select and delete the text area.
 Golang Image Processing: Learn How to Add Watermarks and Text
Aug 17, 2023 am 08:41 AM
Golang Image Processing: Learn How to Add Watermarks and Text Quotes: In the modern era of digitalization and social media, image processing has become an important skill. Whether for personal use or business operations, adding watermarks and text are common needs. In this article, we will explore how to use Golang for image processing and learn how to add watermarks and text. Background: Golang is an open source programming language known for its concise syntax, efficient performance and powerful concurrency capabilities. it has become the subject of many developments
 Win11 new version of drawing: remove background with one click to realize cutout function
Sep 15, 2023 pm 10:53 PM
Microsoft invites WindowsInsider project members in the Canary and Dev channels to test and experience the new Paint application. The latest version number is 11.2306.30.0. The most noteworthy new feature of this version update is the one-click cutout function. Users only need to click once to automatically eliminate the background and highlight the main body of the picture, making it easier for users to perform subsequent operations. The whole step is very simple. The user imports the picture in the new layout application, and then clicks the "removebackground" button on the toolbar to delete the background in the picture. The user can also use a rectangle to select the area to remove the background.
 Complete list of ps shortcut keys
Mar 11, 2024 pm 04:31 PM
1. Ctrl + N: Create a new document. 2. Ctrl + O: Open a file. 3. Ctrl + S: Save the current file. 4. Ctrl + Shift + S: Save as. 5. Ctrl + W: Close the current document. 6. Ctrl + Q: Exit Photoshop. 7. Ctrl + Z: Undo. 8. Ctrl + Y: Redo. 9. Ctrl + X: Cut the selected content. 10. Ctrl + C: Copy the selected content.


