

教你用PS把美女照片打造成海报点阵图效果的方法

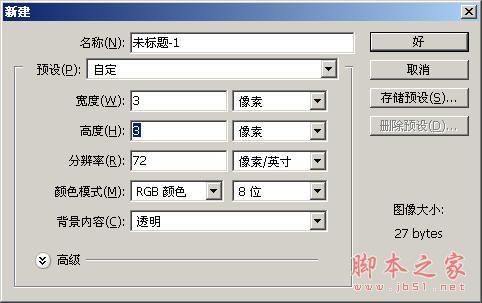
1、新建一文件,如图所示:
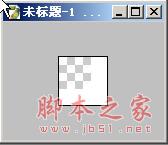
2、将工具箱中的前景色设置为白色,选择工具箱中的“铅笔”工具,在属性栏中设置大小为“1像素”的笔头,然后在画面中绘制出如图所示的白色。
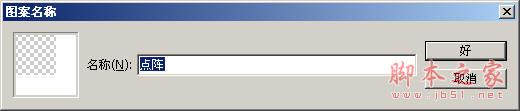
3、选择菜单栏中的“编辑”“定义图案”命令,弹出“图案名称”对话框,设置名称如图所示。
4、打开一张海报如图所示。

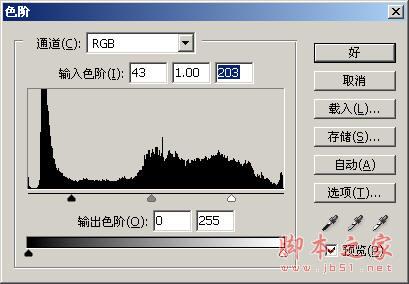
5、按“Shift+Ctrl+U”键,将图像转换为相同颜色模式下的灰度图像,在按“Ctrl+L”键,在弹出的“色阶”对话框中设置各参数如图所示。
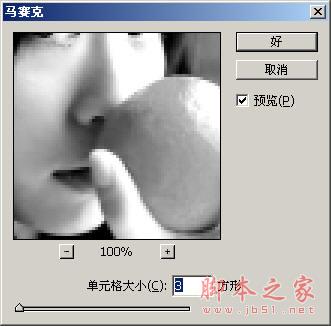
6、选择菜单栏中的“滤镜”“像素化”“马赛克”命令,弹出“马赛克”对话框,参数设置如图所示。
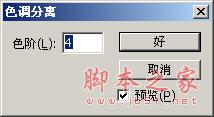
7、选择菜单栏中的“图像”“调整”“色调分离”命令,弹出“色调分离”对话框,参数设置如图07所示,画面效果如图所示。
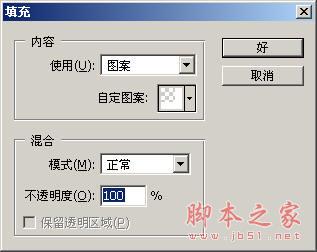
8、选择菜单栏中的“编辑”“填充”命令,弹出“填充”对话框,设置如图所示。
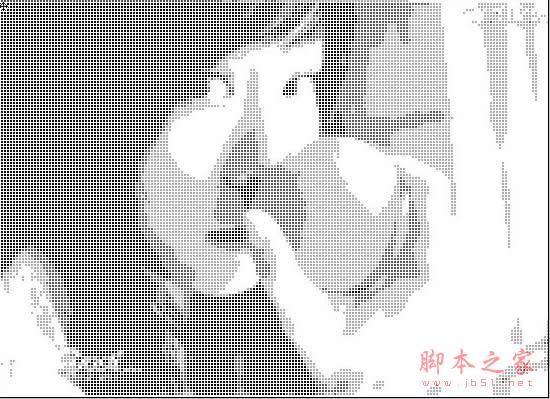
9、最终效果如下:

Hot AI Tools

Undresser.AI Undress
AI-powered app for creating realistic nude photos

AI Clothes Remover
Online AI tool for removing clothes from photos.

Undress AI Tool
Undress images for free

Clothoff.io
AI clothes remover

AI Hentai Generator
Generate AI Hentai for free.

Hot Article
Hot Tools

Notepad++7.3.1
Easy-to-use and free code editor

SublimeText3 Chinese version
Chinese version, very easy to use

Zend Studio 13.0.1
Powerful PHP integrated development environment

Dreamweaver CS6
Visual web development tools

SublimeText3 Mac version
God-level code editing software (SublimeText3)
Hot Topics


 Users encounter rare glitches: Samsung Watch smartwatches suddenly experience white screen issues
Apr 03, 2024 am 08:13 AM
Users encounter rare glitches: Samsung Watch smartwatches suddenly experience white screen issues
Apr 03, 2024 am 08:13 AM
You may have encountered the problem of green lines appearing on the screen of your smartphone. Even if you have never seen it, you must have seen related pictures on the Internet. So, have you ever encountered a situation where the smart watch screen turns white? On April 2, CNMO learned from foreign media that a Reddit user shared a picture on the social platform, showing the screen of the Samsung Watch series smart watches turning white. The user wrote: "I was charging when I left, and when I came back, it was like this. I tried to restart, but the screen was still like this during the restart process." Samsung Watch smart watch screen turned white. The Reddit user did not specify the smart watch. Specific model. However, judging from the picture, it should be Samsung Watch5. Previously, another Reddit user also reported
 8 Ways to Fix Contact Photos and Posters Disabled in iOS 17
Sep 22, 2023 am 10:33 AM
8 Ways to Fix Contact Photos and Posters Disabled in iOS 17
Sep 22, 2023 am 10:33 AM
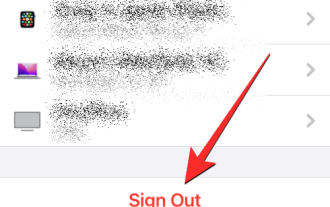
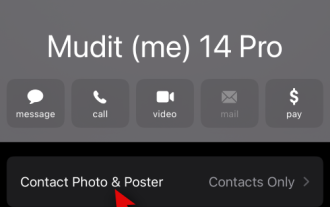
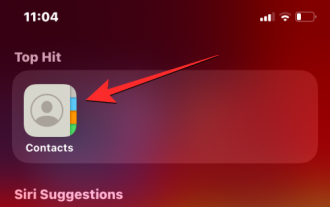
Learn the correct way to set up Contact Photos and Posters Contact Photos and Posters is a new feature that can be set up in iOS 17 for your contact cards and other contacts saved on your iPhone. For those who don’t know, the feature allows you to personalize the look of your call screen with custom posters, which you can design with photos, names, colors, fonts, emojis, and Memoji. Once created, contact posters can be shared with your saved contacts or restricted so that only a few selected people can view them. To learn how to create your own contact poster and how to share it with others, you can check out the guide at the following link: Contact Photos and Contact Posters Disabled: 8 Fixes Explained Despite Setting Contact Photos
 How to personalize your iPhone on the latest iOS 17
Sep 21, 2023 am 08:17 AM
How to personalize your iPhone on the latest iOS 17
Sep 21, 2023 am 08:17 AM
How to Personalize Calls on iPhone Apple’s iOS 17 introduces a new feature called Contact Posters that allows you to personalize the look of your call screen on your iPhone. This feature allows you to design a poster using selected photos, colors, fonts, and Memoji as contact cards. So when you make a call, your custom image will appear on the recipient's iPhone exactly as you envisioned. You can choose to share your unique contact poster with all your saved contacts, or choose who can see it. Likewise, during a call exchange, you will also see other people's contact posters. Additionally, Apple lets you set specific contact photos for individual contacts, making calls from those contacts
 6 Fixes: How to solve the problem of contact poster not displaying properly on iPhone?
Sep 17, 2023 pm 12:41 PM
6 Fixes: How to solve the problem of contact poster not displaying properly on iPhone?
Sep 17, 2023 pm 12:41 PM
1. Check if your iPhone supports iOS17 If the contact poster feature does not work on your iPhone, the first thing you should do is check if your iPhone supports iOS17. This new feature is only available on iPhones running iOS 17, so be sure to update your phone to the latest update. Additionally, even if your iPhone is running iOS17, your contacts should have iPhones with iOS17 updates. Here is a list of all iPhones that support iOS17: iPhone15, 15PlusiPhone15Pro, 15ProMaxiPhone14, 14PlusiPhone14Pro, 1
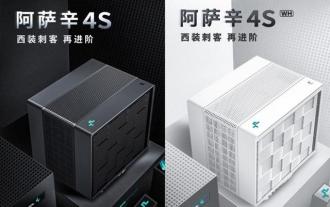 Kyushu Fengshen Assassin 4S Radiator Review Air-cooled 'Assassin Master' Style
Mar 28, 2024 am 11:11 AM
Kyushu Fengshen Assassin 4S Radiator Review Air-cooled 'Assassin Master' Style
Mar 28, 2024 am 11:11 AM
Speaking of ASSASSIN, I believe players will definitely think of the master assassins in "Assassin's Creed". They are not only skilled, but also have the creed of "devoting themselves to the darkness and serving the light". The ASSASSIN series of flagship air-cooled radiators from the appliance brand DeepCool coincide with each other. Recently, the latest product of this series, ASSASSIN4S, has been launched. "Assassin in Suit, Advanced" brings a new air-cooling experience to advanced players. The appearance is full of details. The Assassin 4S radiator adopts a double tower structure + a single fan built-in design. The outside is covered with a cube-shaped fairing, which has a strong overall sense. It is available in white and black colors to meet different colors. Tie
 How to make a word poster
Mar 19, 2024 pm 07:50 PM
How to make a word poster
Mar 19, 2024 pm 07:50 PM
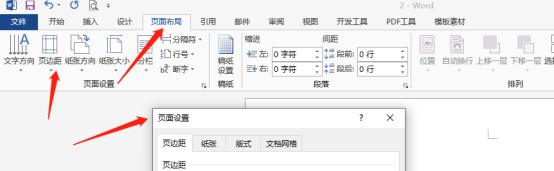
Don't think that Word can only edit and process simple text. In fact, as one of the commonly used office software, Word's functions are very powerful, but some functions have not been discovered or used by the public, and they are not known to the public. For example, did you know that Word can create posters? If you haven't used Word to make a poster, then try it with me and let's make a simple and beautiful Word poster! 1. First, we create and open a word document. Then, find [Page Design] in the menu bar, then click [Page Spacing], and among the page margin options, we select "Custom Margins". 2. Set the parameters as shown below. We need to set all the page margin parameters to 0. After that, click
 Exquisite light and shadow art in spring, Haqu H2 is the cost-effective choice
Apr 17, 2024 pm 05:07 PM
Exquisite light and shadow art in spring, Haqu H2 is the cost-effective choice
Apr 17, 2024 pm 05:07 PM
With the arrival of spring, everything revives and everything is full of vitality and vitality. In this beautiful season, how to add a touch of color to your home life? Haqu H2 projector, with its exquisite design and super cost-effectiveness, has become an indispensable beauty in this spring. This H2 projector is compact yet stylish. Whether placed on the TV cabinet in the living room or next to the bedside table in the bedroom, it can become a beautiful landscape. Its body is made of milky white matte texture. This design not only makes the projector look more advanced, but also increases the comfort of the touch. The beige leather-like material adds a touch of warmth and elegance to the overall appearance. This combination of colors and materials not only conforms to the aesthetic trend of modern homes, but also can be integrated into
 How to protect the privacy of contact photos and posters on iPhone
Sep 18, 2023 am 10:49 AM
How to protect the privacy of contact photos and posters on iPhone
Sep 18, 2023 am 10:49 AM
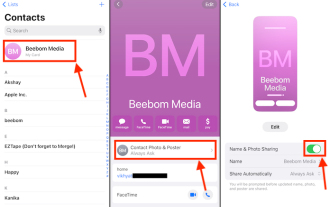
Who can view your contact photos and posters on iPhone? Apple offers options for personalizing how you appear on someone's iPhone when they call or send a message. The options include Memoji, simple text, or a custom photo with effects as your contact photo and display image. You are free to change these selections at any time and switch between profiles on the contact card. Additionally, Apple is giving you the ability to control who can view and access photos or display images of your choice on iOS17. You can decide to share these with individuals saved in your contact list, or you can set your iPhone to prompt you every time you interact with a contact. If you wish, you can also disable the name permanently
