
Want to know how to use the geometric sketchpad to design a unique pi animation? PHP editor Banana has thoughtfully compiled a detailed tutorial for you, which will guide you step by step to master animation production techniques. This article will start from the basic principles of animation and introduce the specific operation steps of pi animation in the geometric sketchpad. Come and explore how to use the powerful function of Geometry Sketchpad to vividly present the abstract concept of pi!
1. Open the geometric sketchpad, click [Draw] - [Define Coordinate System], click [Draw] - [Draw Point]. Enter the coordinates of the point and click Draw. Draw points (0, 2), (12.56, 0), (12.56, 2) in sequence, and click Finish.
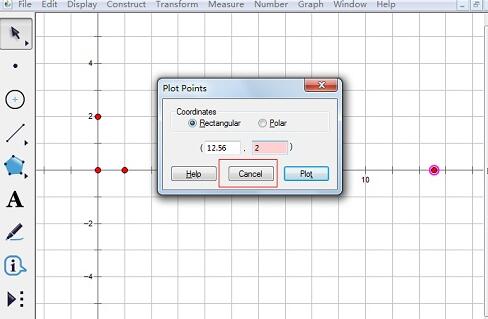
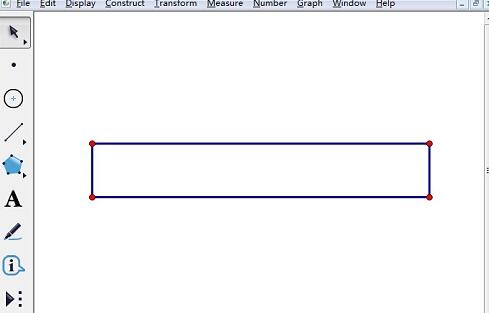
2. Use the [Line Segment Tool] to connect the four sides to make a rectangle. Select the four points and four sides of the rectangle. Click [Edit] - [Copy]. Click [File] - [New], create a new artboard, click [Edit] - [Paste]. The rectangle is pasted in. Use the arrow tool to move the rectangle to the appropriate place.
3. Construct a circle with the shorter side of the rectangle as the radius. Draw a point on the top edge of the rectangle, select this point, and the shorter side, click [Construct] - [Draw a circle with center and radius]. The radius is the length of the shorter side.
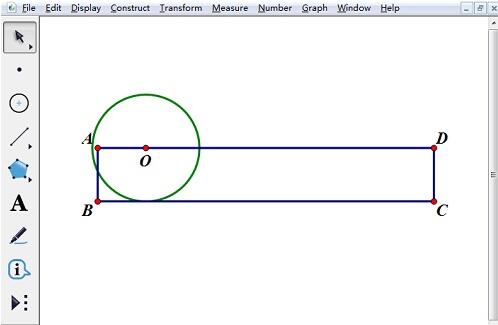
4. Set the circle rotation animation. First, the center of the circle must move along the upper edge of the rectangle, and then the circle must also rotate. The rotation of the circle can be reflected by the movement of the points on it around the circle. Click to select the center of the circle, click [Edit] - [Operation Button] - [Animation]. Select the animation movement direction to be forward, the speed to be slow, and check Play only once. Click [OK]. Draw a point on the circle, select this point, and click [Operation Button] - [Animation]. Select the animation movement direction as clockwise, the speed as slow, and check Play only once. Click [OK].
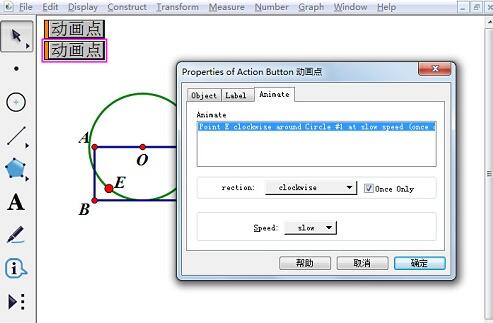
5. Set series animation. The movement of the center of the circle and the rotation of the circle must occur simultaneously. Use the [Selection Tool], select two animation buttons, and click [Edit] - [Operation Buttons] - [Series]. Check both Execute simultaneously and Stop at the end of the action. Click [OK]. Select two sides of the rectangle and press [Ctrl H] to hide the object.
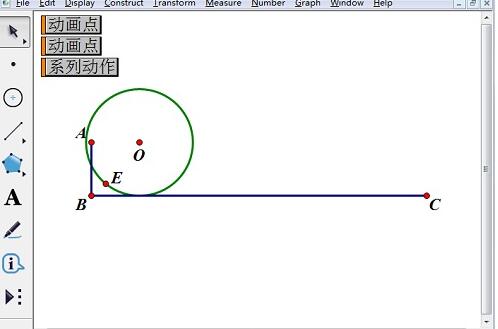
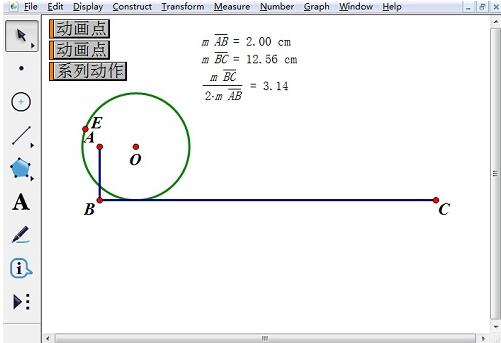
6. Click the series action button to start the animation demonstration. Click again to stop the animation. When the circle rolls around on the straight line, the points on the circle in the figure return to the straight line. The distance BC rolled at this time is the circumference of the circle. Select AB and BC successively, click [Measure]-[Length] respectively, and measure the lengths of AB and BC. Click [Calculate] to calculate the ratio of BC/2AB. This ratio is an approximation of pi.
The above is the detailed content of Introduction to the method of designing pi animation on geometric sketchpad. For more information, please follow other related articles on the PHP Chinese website!


