Beyond Compare is a powerful comparison and merge tool, but the way its tab bar operates can be confusing. PHP editor Zimo will introduce you how to use the tab bar, including how to add, delete, rearrange and close tabs, and share some useful tips to help you make full use of Beyond Compare's tab bar feature. Read on to learn more!
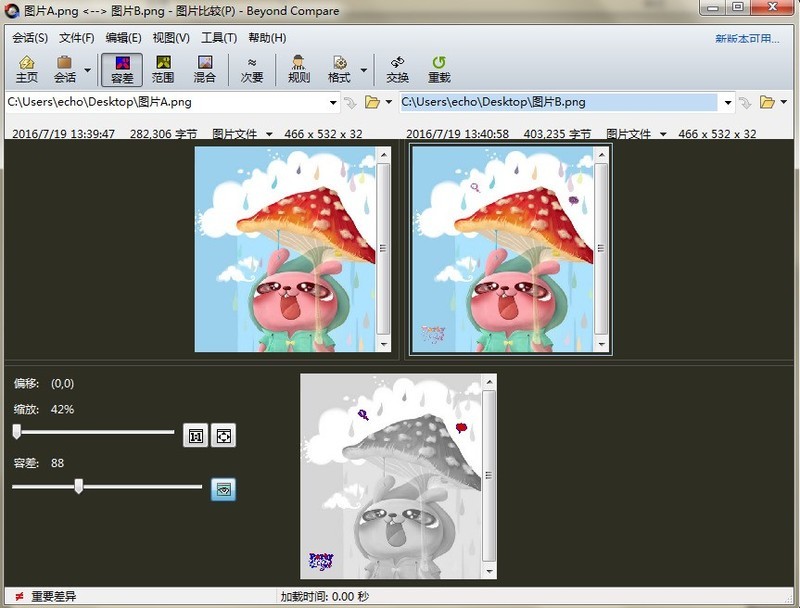
Open Beyond Compare, double-click the [Picture Comparison] icon on the right side of the main page to open the comparison session interface. Click the [Open File] button on both sides of the interface to add the image files you need to compare. As shown in the figure, the tab bar is hidden when there is only one comparison session.

Note: Considering that Beyond Compare has a wide range of executable comparison session types, here we take the image comparison session as an example to explain how to display the tab bar.
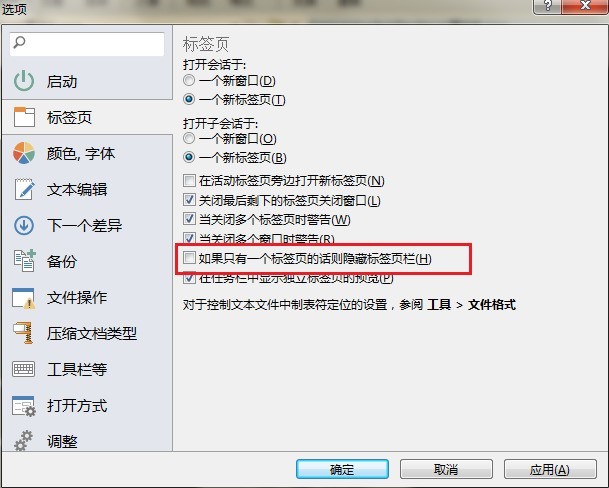
Click the tool button, select the [Options] command in the expanded drop-down menu, open the Beyond Compare options window, click [Tab] in the directory on the left side of the window, and switch to the corresponding column.
In the [Open child session in:] column on the page, uncheck the [Hide tab bar if there is only one tab] checkbox, and click the [Apply] button to complete the operation.

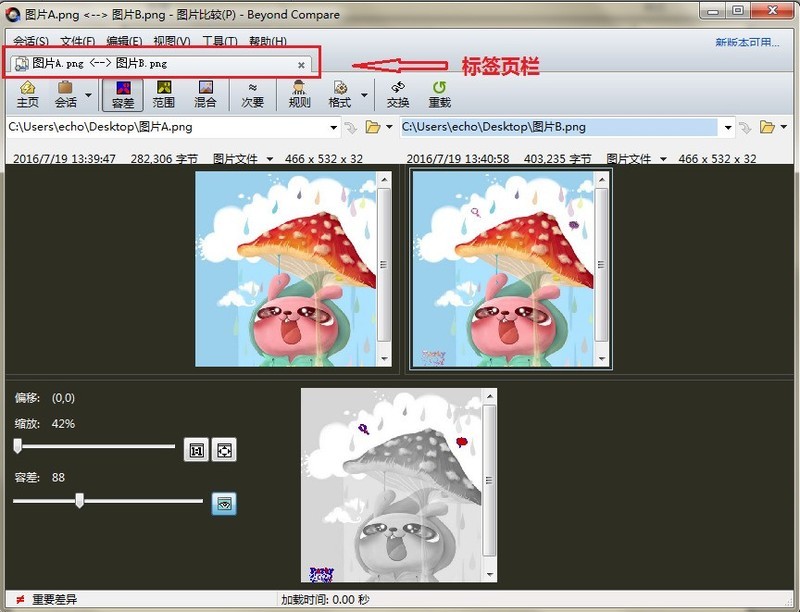
Click the [OK] button to close the options window and return to the image comparison session operation interface. As shown in the figure, the tab bar is displayed between the menu bar and toolbar, which is convenient User views comparison file information.

The above is the detailed content of How to display the tab bar in Beyond Compare. For more information, please follow other related articles on the PHP Chinese website!


