Want to know how to set up scheduled photos for OPPO Reno3 Pro? PHP editor Baicao will bring you detailed operation procedures this time. With the scheduled photo function, you can easily capture wonderful moments and avoid missing important scenes. This article will guide you step by step to set up the scheduled photo taking of OPPO Reno3 Pro. Come and read on with us!
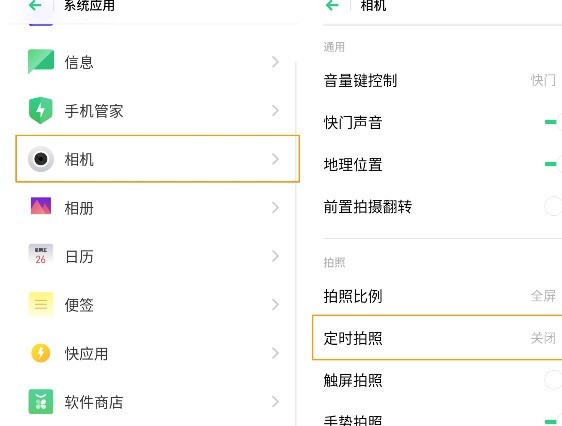
1. Through [Settings] on the desktop, click to enter [System Applications].

2. Find [Camera], click to enter and select [Scheduled Photo].

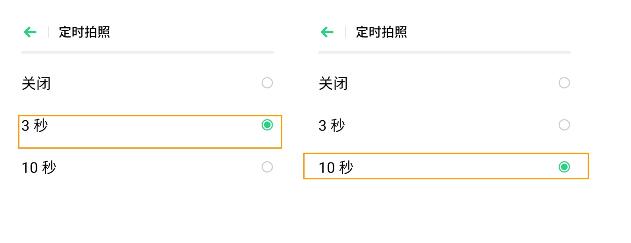
3. Select [3 seconds] or [10 seconds] according to your needs.

After the setting is completed, return to the [Camera] on the desktop to enter, click the photo button, and a countdown will appear to take photos.
The above is the detailed content of Opporeno3pro set up the operation process of scheduled photography. For more information, please follow other related articles on the PHP Chinese website!
 Blue screen code 0x000009c
 A collection of common computer commands
 You need permission from admin to make changes to this file
 Tutorial on turning off Windows 11 Security Center
 How to set up a domain name that automatically jumps
 What are the virtual currencies that may surge in 2024?
 The reason why header function returns 404 failure
 How to use js code


