PS打造一款冷酷逼真的金属质感符号
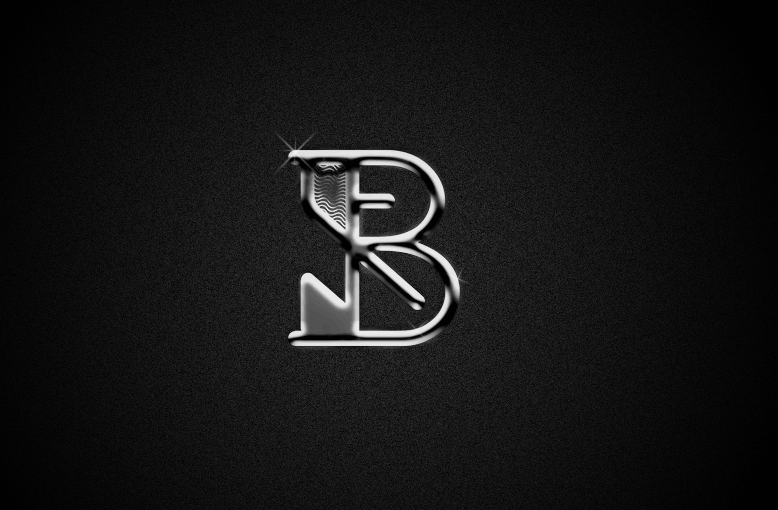
这篇教程是向脚本之家的朋友介绍利用PS打造一款冷酷逼真的金属质感符号方法,教程制作出来的效果真的超级棒,难度不是很大,喜欢的朋友可以跟着教程一起来学习,希望能对大家有所帮助
本篇教程是向脚本之家的朋友介绍用PS打造一款冷酷逼真的金属质感符号方法,教程很不错,也很简单,大家可以学习制作方法和思路,好了,一起来学习吧!
金属质感是一个应该被重视起来的风格,因为它充斥在我们生活周围太多,以至于有时我们会淡忘了它的存在。但是,当我们看到金属质感的图像,仍然会产生诸如:冷感、冰凉、重量、尖锐、……等等感受。
人们不会把金属与小清新联系在一起,但是却在想到冷酷时第一时间会回到金属这种材质的联想中。今天我们学习的是如何制作一款金属符号,它的方法十分简单,你也可以采用同样的方式制作海报字体等其他设计。
一、准备
1、Photoshop
2、PNG格式的符号图像
二、布景
或许只是简单的一个符号,但在实际运用的时候,仍然要先调试好环境布景,以确认是否能让最终效果呈现得更自然美观。这里,我采用曾经做过的一个PNG格式的符号图像,你也可以采用其他简单的单色图形或字体。
1、在PS中新建一个大小为W:1280px、H:786px的文件,新建一个图层,图层填充为深灰色(#232323)。

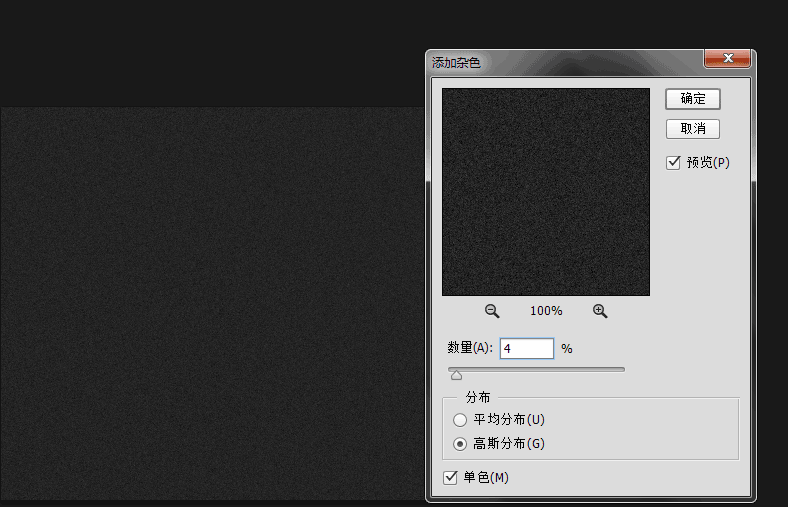
2、选中深灰色图层的同时,进入【滤镜>杂色>添加杂色】为整个背景添加上灰色颗粒。杂色属性面板中,我设置的数量为4、高斯分布以及勾选“单色”,你也可以根据你的背景大小进行设定。

3、将上一步做好的图层复制一个图层,然后选中复制层,进入【编辑>变换>水平翻转】。

4、将复制层的图层混合模式变为“叠加”,透明度降至35。

最后这两个步骤的目的是为了增加背景颗粒的细腻感,以及均化整个背景。很多人都认为这一步显得太多余,我的忠告就是,细节决定成败,尤其在平面设计中,你会发现每个像素都有值得考虑的必要。
三、给图形添加金属效果
1、加入PNG图片,放置在图像正中,由于我的PNG图片为白色,这里我将为其添加一个颜色叠加,让它变为纯黑色。金属当然有不同灰度的色彩,但在这里,我选择了呈现黑色多一些的金属质感。
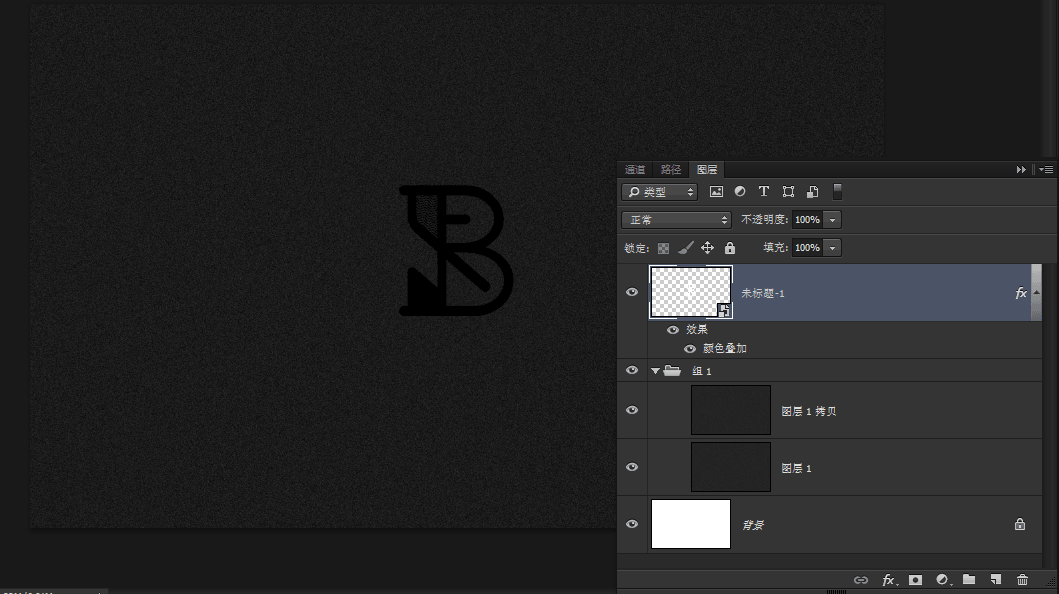
2、应用图层样式
在学习PS基础的过程中,老师对图层样式几乎就是蜻蜓点水一般提到了各种样式的功能,并没有深入讲解。直到我们对PS运用自如时才发现,原来图层样式真的不能在基础时过多的讲解,因为对于每一种样式,都是在实例训练中经过自己的探索才会对样式的属性掌握略一二,所以,通过这次练习,我们也要学习加深对这下面几种图层样式的理解。
1)斜面和浮雕
打开图层样式后,在斜面与浮雕这一样式面板中,对各种属性进行设置。这里需要强调的是,根据你所处理对象大小的不同,你所要设置的数值也会不同,而我们唯一能做的,就是通过对每个数值反复尝试,从而找到最好的效果。我在这里所设置的数值如下:

这里的属性分为“结构”和“阴影”两类,金属质感的塑造大部分依靠的也是这一图层样式,因此在这一步里,我们就要将对象改造成为金属的感觉。今后,我们的设计中相当一部分金属质感的打造,也需要采用这一图层样式。
同时,在斜面与浮雕下勾选“等高线”,对等高线默认值进行调整如下:

经过我反复的尝试和努力,我所调试出的效果如下:

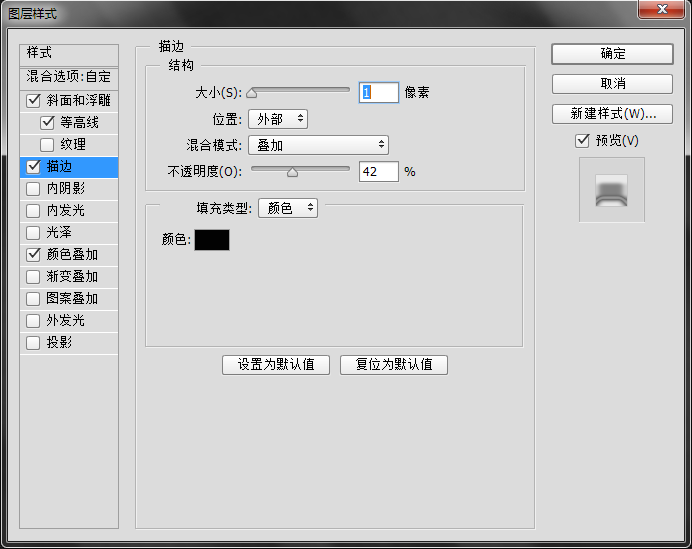
2)这时,再为细部增加图层样式,这里我用上了“描边”和“内阴影”,它们的属性设置如下:
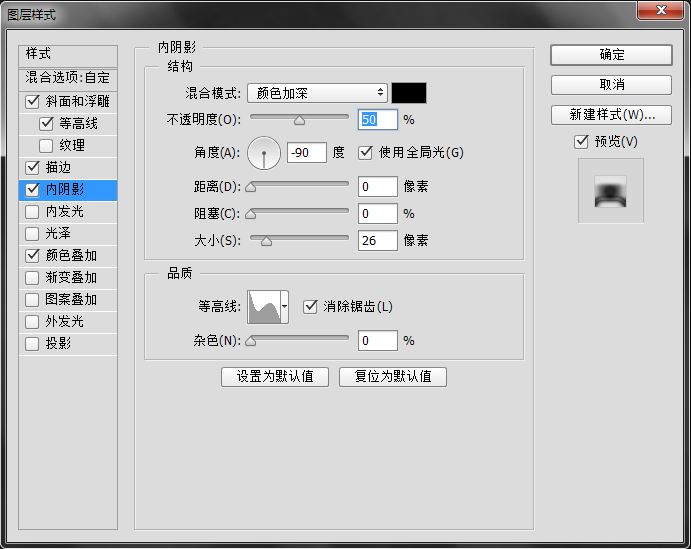
这时,我的图像效果是:
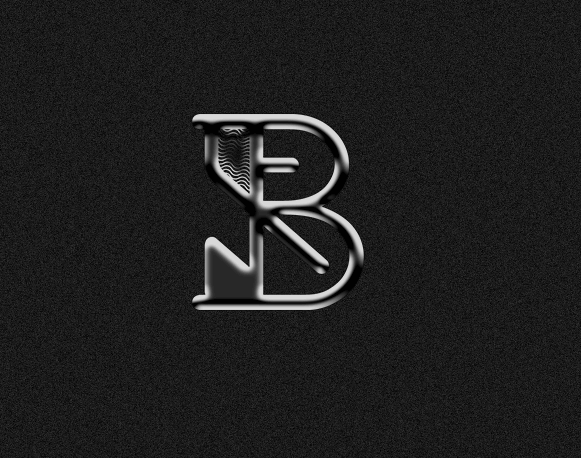
3)最后,我们在做任何写实案例时,都不要忘记给对象加上阴影。
这里需要说明的一点是,在PS中,如果你在设置任何样式的角度时,选中了“使用全局光”,那么该图层中所有样式的角度都会保持一致。这是为了让大家对待明暗处理时的一种辅助功能。这里我采用了全局光,让整个画面保持明暗一致。

经过图层样式调整后,我做出的效果是这样:

四、美化细节
1、将我们刚刚所编辑的图层都加入到一个组当中,为这个组增加一个渐变叠加混合选项。

混合选项的属性设置如下:

这一部帮助我们将光亮的部分集中到图案上。
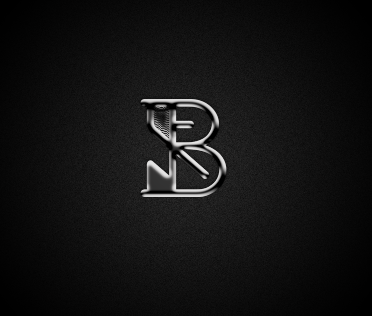
2、当然,金属是有着光泽的,那么这时为了突出我们的金属光泽,我首先将所有的图层复制出来并且合并为一个图层。
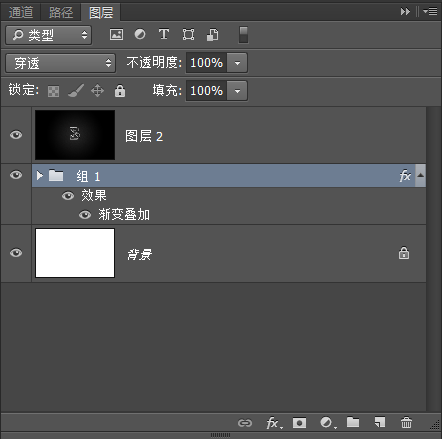
进入【滤镜>模糊>高斯模糊】,对高斯模糊数值设置根据实际情况而定,效果如下:

将模糊后的图层的图层混合模式调整为“滤光”,透明度调整为60,
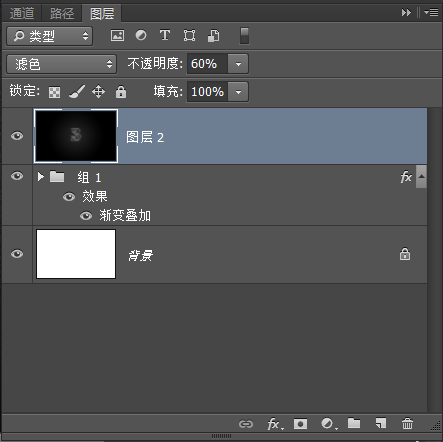
然后,按住“alt”键的同时点击图层面板下方的添加图层蒙版的图标,利用画笔在蒙版上,针对图案的部分涂上白色,白色信息在蒙版上记录了对该图层的完全隐藏。添加蒙版的好处就是可以只为图案中金属的高亮部分进行加亮,而其他阴影部分继续保持深度。
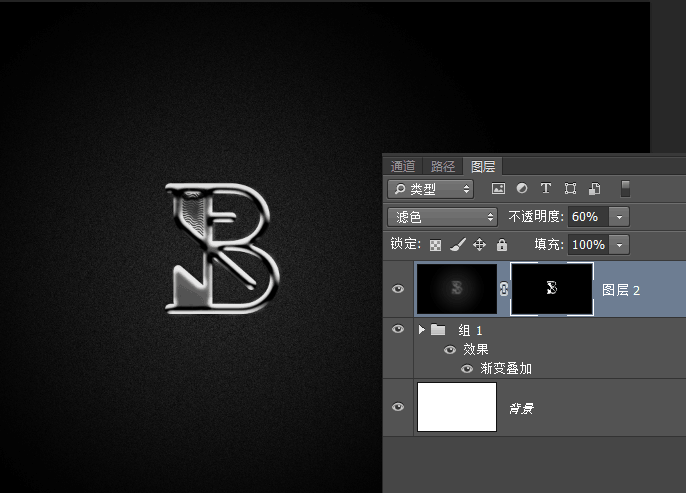
3、最后,我再对图像进一步处理,例如增加一些闪光,还可以打开刚刚对图案图层所做的图层样式进行进一步的修改。完成的效果如下:

五、后记:
对于金属质感的打造应该不限于上述方法,金属质感也千差万别,但是通过训练,我们会逐渐熟练地能识别出怎样的质感应该采用什么样的处理方式。
教程介绍,以上就是PS打造一款冷酷逼真的金属质感符号教程,希望能对大家有所帮助!

Hot AI Tools

Undresser.AI Undress
AI-powered app for creating realistic nude photos

AI Clothes Remover
Online AI tool for removing clothes from photos.

Undress AI Tool
Undress images for free

Clothoff.io
AI clothes remover

AI Hentai Generator
Generate AI Hentai for free.

Hot Article

Hot Tools

Notepad++7.3.1
Easy-to-use and free code editor

SublimeText3 Chinese version
Chinese version, very easy to use

Zend Studio 13.0.1
Powerful PHP integrated development environment

Dreamweaver CS6
Visual web development tools

SublimeText3 Mac version
God-level code editing software (SublimeText3)

Hot Topics
 ps serial number cs5 permanently free 2020
Jul 13, 2023 am 10:06 AM
PS serial numbers cs5 permanent free 2020 include: 1. 1330-1384-7388-4265-2355-8589 (Chinese); 2. 1330-1409-7892-5799-0412-7680 (Chinese); 3. 1330-1616-1993 -8375-9492-6951 (Chinese); 4. 1330-1971-2669-5043-0398-7801 (Chinese), etc.
 iOS 17: How to use emojis as stickers in Messages
Sep 18, 2023 pm 05:13 PM
In iOS17, Apple has added several new features to its Messages app to make communicating with other Apple users more creative and fun. One of the features is the ability to use emojis as stickers. Stickers have been around in the Messages app for years, but so far, they haven't changed much. This is because in iOS17, Apple treats all standard emojis as stickers, allowing them to be used in the same way as actual stickers. This essentially means you're no longer limited to inserting them into conversations. Now you can also drag them anywhere on the message bubble. You can even stack them on top of each other to create little emoji scenes. The following steps show you how it works in iOS17
 How to delete selected area in ps
Aug 07, 2023 pm 01:46 PM
Steps to delete the selected area in PS: 1. Open the picture you want to edit; 2. Use the appropriate tool to create a selection; 3. You can use a variety of methods to delete the content in the selection, use the "Delete" key, use the "Healing Brush Tool" , use "Content-Aware Fill", use the "Stamp Tool", etc.; 4. Use tools to repair any obvious traces or defects to make the picture look more natural; 5. After completing editing, click "File" > in the menu bar "Save" to save the editing results.
 What to do if ps installation cannot write registry value error 160
Mar 22, 2023 pm 02:33 PM
Solution to error 160 when ps installation cannot write registry value: 1. Check whether there is 2345 software on the computer, and if so, uninstall the software; 2. Press "Win+R" and enter "Regedit" to open the system registry, and then Find "Photoshop.exe" and delete the Photoshop item.
 What should I do if the PS interface font is too small?
Dec 01, 2022 am 11:31 AM
How to fix the PS interface font that is too small: 1. Open PS, click the "Edit" button on the top menu bar of PS to expand the editing menu; 2. Click the "Preferences" button in the expanded editing menu, and then click "Interface. .." button; 3. In the interface settings, set the user interface font size to "Large", set the UI scaling to "200%" and save the settings, then restart PS to take effect.
 Introduction to the process of extracting line drawings in PS
Apr 01, 2024 pm 12:51 PM
1. Open the software and import a piece of material, as shown in the picture below. 2. Then ctrl+shift+u to remove color. 3. Then press ctrl+J to copy the layer. 4. Then reverse ctrl+I, and then set the layer blending mode to Color Dodge. 5. Click Filter--Others--Minimum. 6. In the pop-up dialog box, set the radius to 2 and click OK. 7. Finally, you can see the line draft extracted.
 How to automate tasks using PowerShell
Feb 20, 2024 pm 01:51 PM
If you are an IT administrator or technology expert, you must be aware of the importance of automation. Especially for Windows users, Microsoft PowerShell is one of the best automation tools. Microsoft offers a variety of tools for your automation needs, without the need to install third-party applications. This guide will detail how to leverage PowerShell to automate tasks. What is a PowerShell script? If you have experience using PowerShell, you may have used commands to configure your operating system. A script is a collection of these commands in a .ps1 file. .ps1 files contain scripts executed by PowerShell, such as basic Get-Help
 Complete list of ps shortcut keys
Mar 11, 2024 pm 04:31 PM
1. Ctrl + N: Create a new document. 2. Ctrl + O: Open a file. 3. Ctrl + S: Save the current file. 4. Ctrl + Shift + S: Save as. 5. Ctrl + W: Close the current document. 6. Ctrl + Q: Exit Photoshop. 7. Ctrl + Z: Undo. 8. Ctrl + Y: Redo. 9. Ctrl + X: Cut the selected content. 10. Ctrl + C: Copy the selected content.


