

Photoshop纯手工创建高清晰血迹喷溅效果笔刷教程

这篇教程是向脚本之家的朋友介绍利用Photoshop纯手工创建高清晰血迹喷溅效果笔刷方法,从这个教程,我希望你明白,创建自定义画笔的基础知识。当然,你可以下载一个免费的自定义画笔或买一个。但是,使用您自己的自定义画笔肯定会让你的设计独特。好了下面我们一起来学习吧!
教程所需要的材料:
白纸
油基漆
刷或一个简单的棒
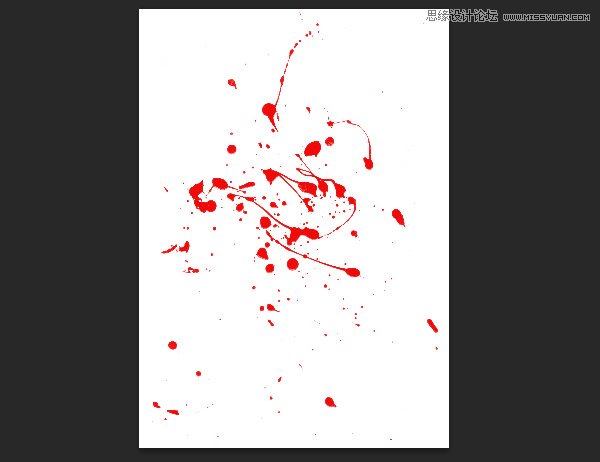
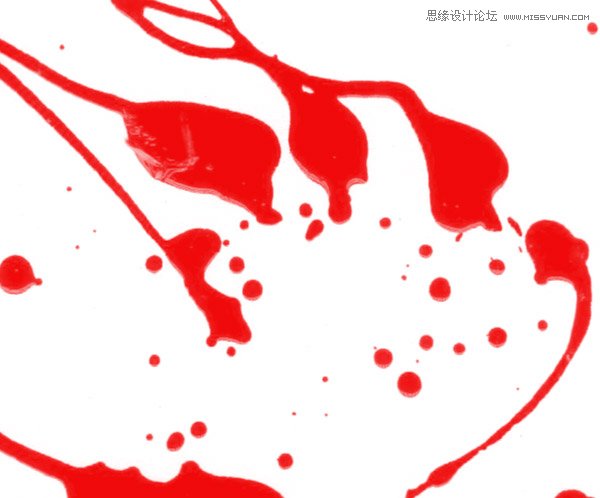
先看看喷溅笔刷应用实例效果

1。制备的帆布
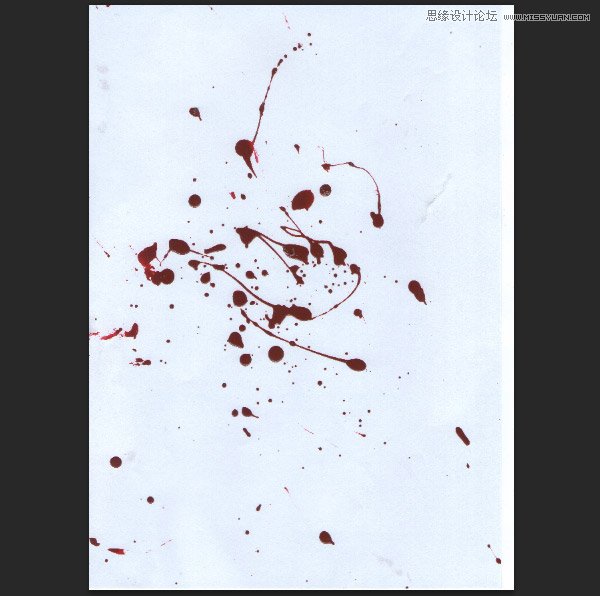
首先,准备一个干净的纸。用于油漆,您可以选择与油‑基础漆和水性漆。油基漆多光泽比水‑涂料和厚得多。在这种情况下,我选择了油基涂料由于其飞溅也类似于一个鲜血飞溅。
用刷子或一个简单的坚持,溢油在纸张上的油漆。等油漆干燥。油基漆需要更长的时间去干;你可能需要离开一天。它是干燥后,在最高分辨率扫描研究。
2。编辑扫描图像
步骤1
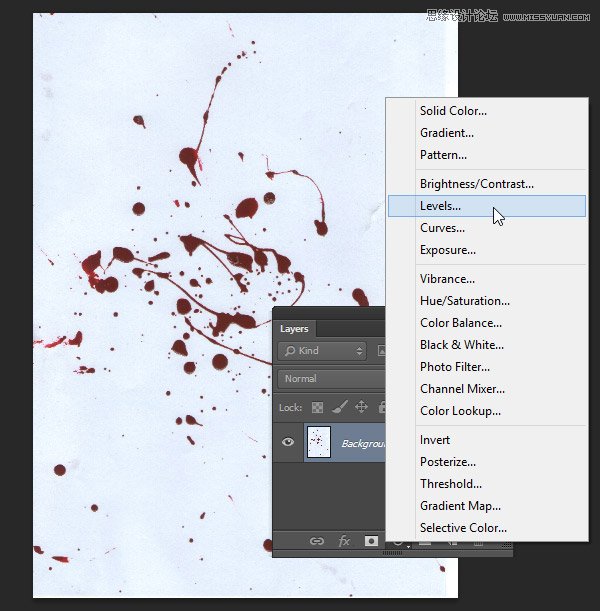
打开扫描的油漆飞溅和点击图层面板中添加调整层>水平。
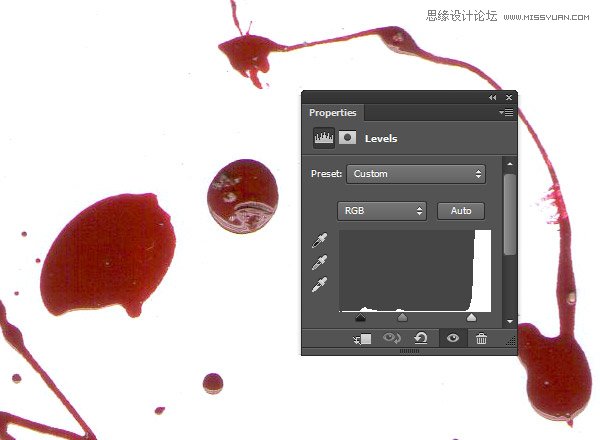
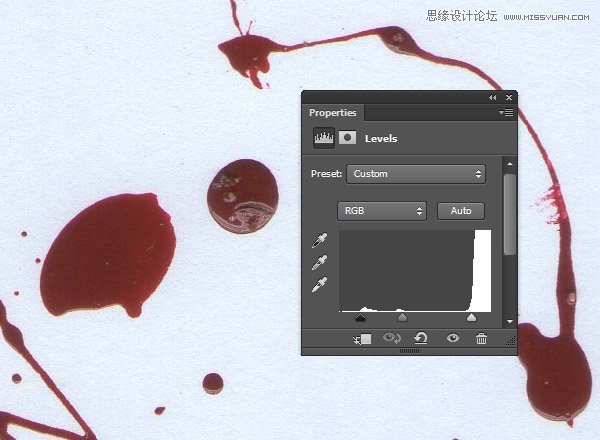
移动滑块的中心参数直到油漆飞溅具有更高的对比度,我们在本文坚实的白色。
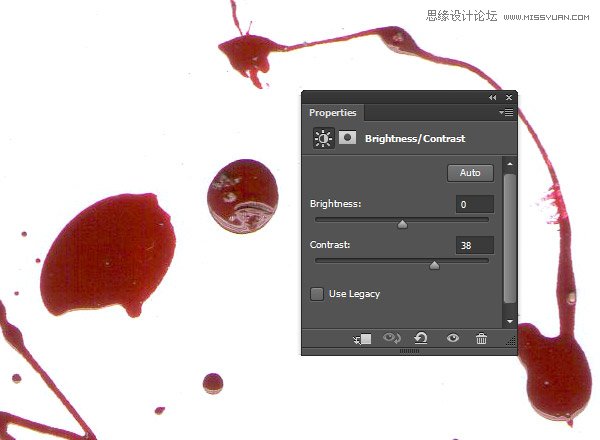
步骤2
添加一个亮度/对比度调整图层,并提高对比度值。
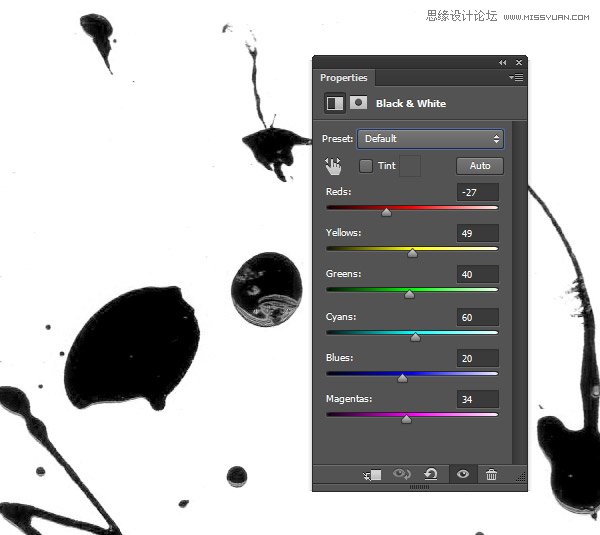
步骤3
在制作一个自定义的笔刷,我们只有黑色和白色的图像中的像素。将该涂料飞溅成黑白图像添加一个黑白调整图层。拖动可滑块直到你有最大的黑暗,但要小心不要破坏它的亮点。
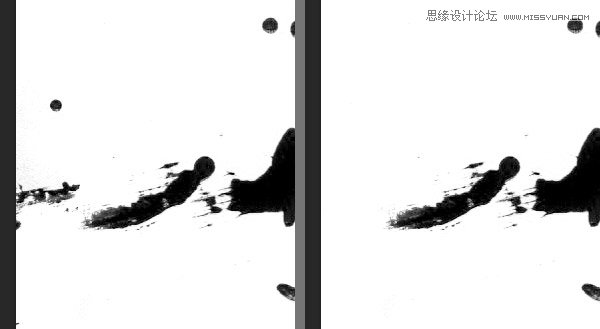
步骤4
使一个新的层上面,然后盖上纸边的白色油漆飞溅每。我们不想看到任何锋利刷。
3。转刷尖
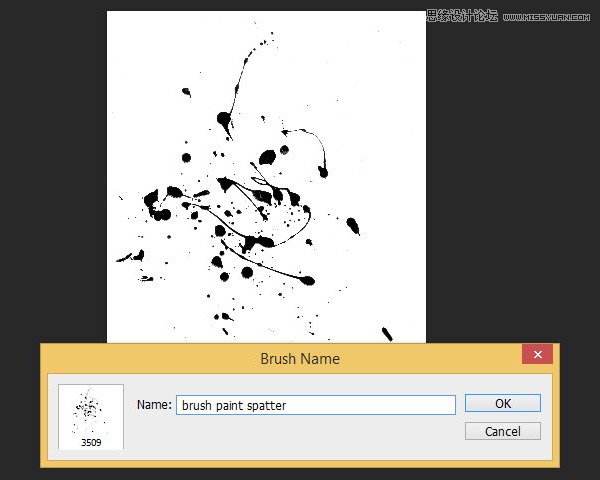
步骤1
点击编辑>定义画笔预设。给它一个令人难忘的名字,然后单击“确定”。
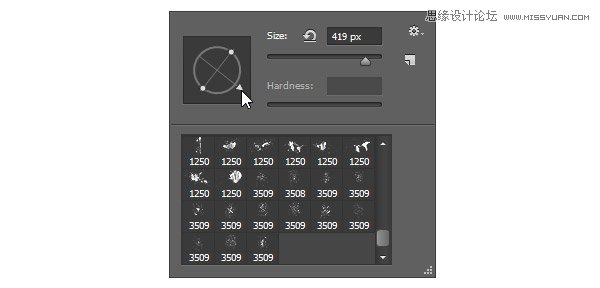
步骤2
从现在开始,你会发现它作为自定义画笔笔尖内PS图象处理软件。启动电刷工具然后在画布上单击右键。在刷头的对话框,你可以在列表的末尾找到最新的画笔笔尖。单击以激活它。
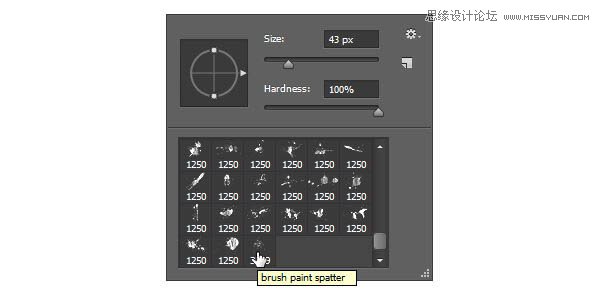
步骤3
设置前景颜色为红色,然后单击一次,在一个新的帆布文件测试结果。
4。进出口刷
步骤1
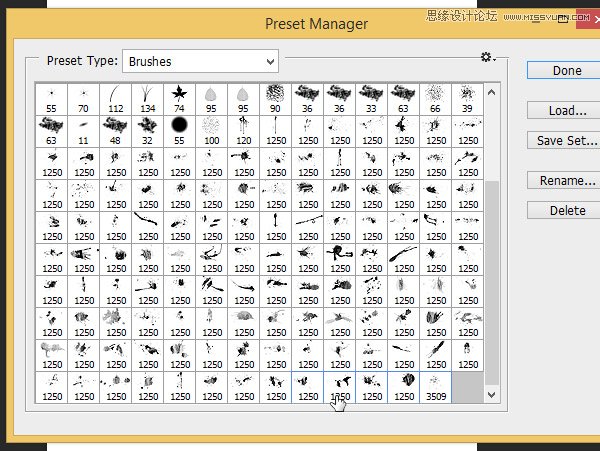
我们也可以刷出口到一个文件。点击编辑>预置>预设管理器然后选择画笔预设的类型。这是PS图象处理软件地方所有的刷子。单击画笔,你想出口。要选择多个刷子,按住Shift键的同时单击画笔。单击保存设置进口。
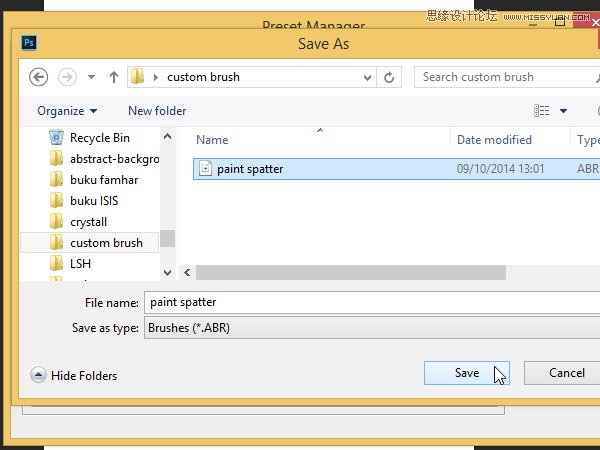
步骤2
在接下来的对话盒,把它保存为一个画笔文件。你可以把这个文件给你的朋友。
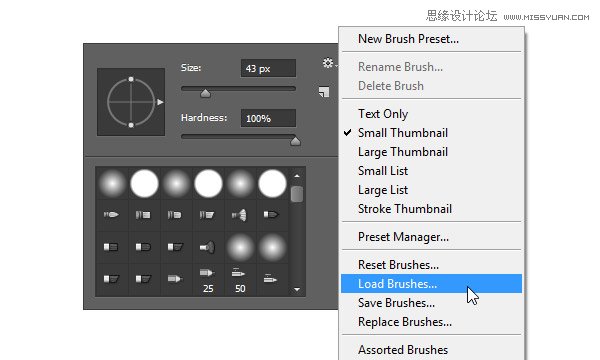
步骤3
进口刷文件,打开画笔选项”对话框,然后在右上角单击上下文菜单。选择载入画笔选择画笔‑文件。
5。变化
至少有三种方法可以让你看起来更独特的刷:
把它与另一个刷
删除使用另一个自定义笔刷刷部分
玩它的不透明度
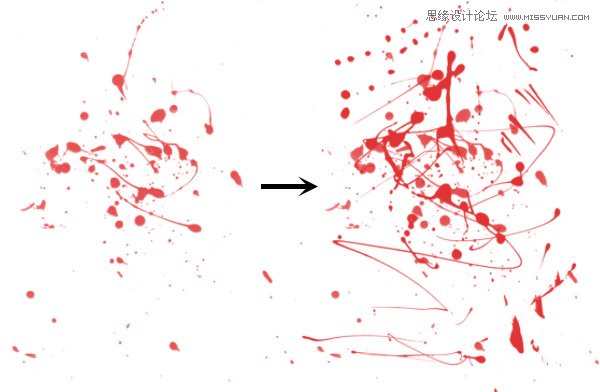
步骤1
你可以把刷子的简单应用的另一个上面刷上一‑一。
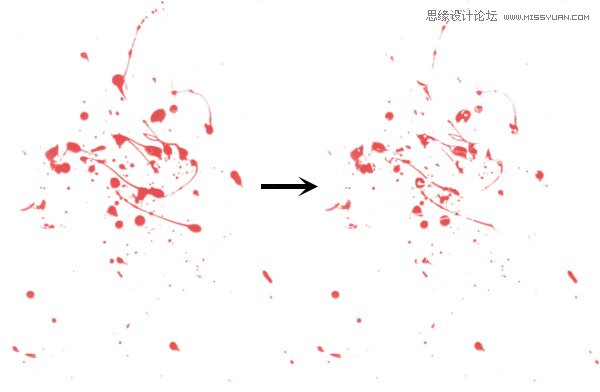
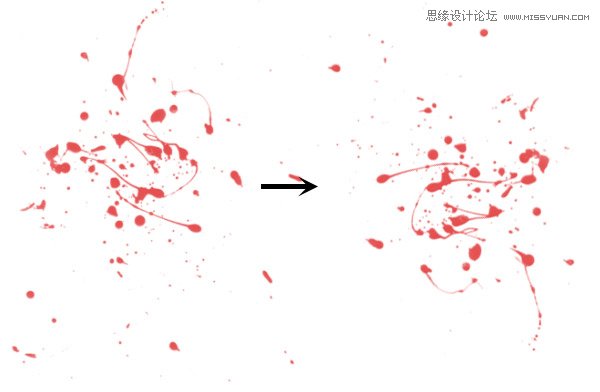
步骤2
另一种不同的画笔是通过删除一些使用另一个自定义笔刷刷。
步骤3
你也可以试着转动的刷状通过右键点击并拖动箭头笔刷预览。
结论
从这个教程,我希望你明白,创建自定义画笔的基础知识。当然,你可以下载一个免费的自定义画笔或买一个。但是,使用您自己的自定义画笔肯定会让你的设计独特。
去吧,不要害怕尝试。走出你的舒适的设计师的工作室开始创建自己的刷子。下面是在Dexter电视剧风格的红色文本的一个简单的一块,用鲜血飞溅笔刷画。我敢打赌,你可以复制这很容易。
教程结束,以上就是Photoshop纯手工创建高清晰血迹喷溅效果笔刷教程,希望能对大家有所帮助!

Hot AI Tools

Undresser.AI Undress
AI-powered app for creating realistic nude photos

AI Clothes Remover
Online AI tool for removing clothes from photos.

Undress AI Tool
Undress images for free

Clothoff.io
AI clothes remover

AI Hentai Generator
Generate AI Hentai for free.

Hot Article
Hot Tools

Notepad++7.3.1
Easy-to-use and free code editor

SublimeText3 Chinese version
Chinese version, very easy to use

Zend Studio 13.0.1
Powerful PHP integrated development environment

Dreamweaver CS6
Visual web development tools

SublimeText3 Mac version
God-level code editing software (SublimeText3)
Hot Topics
 1386
1386
 52
52

 What is the reason why PS keeps showing loading?
Apr 06, 2025 pm 06:39 PM
What is the reason why PS keeps showing loading?
Apr 06, 2025 pm 06:39 PM
PS "Loading" problems are caused by resource access or processing problems: hard disk reading speed is slow or bad: Use CrystalDiskInfo to check the hard disk health and replace the problematic hard disk. Insufficient memory: Upgrade memory to meet PS's needs for high-resolution images and complex layer processing. Graphics card drivers are outdated or corrupted: Update the drivers to optimize communication between the PS and the graphics card. File paths are too long or file names have special characters: use short paths and avoid special characters. PS's own problem: Reinstall or repair the PS installer.
 What are the common questions about exporting PDF on PS
Apr 06, 2025 pm 04:51 PM
What are the common questions about exporting PDF on PS
Apr 06, 2025 pm 04:51 PM
Frequently Asked Questions and Solutions when Exporting PS as PDF: Font Embedding Problems: Check the "Font" option, select "Embed" or convert the font into a curve (path). Color deviation problem: convert the file into CMYK mode and adjust the color; directly exporting it with RGB requires psychological preparation for preview and color deviation. Resolution and file size issues: Choose resolution according to actual conditions, or use the compression option to optimize file size. Special effects issue: Merge (flatten) layers before exporting, or weigh the pros and cons.
 How to solve the problem of loading when PS is always showing that it is loading?
Apr 06, 2025 pm 06:30 PM
How to solve the problem of loading when PS is always showing that it is loading?
Apr 06, 2025 pm 06:30 PM
PS card is "Loading"? Solutions include: checking the computer configuration (memory, hard disk, processor), cleaning hard disk fragmentation, updating the graphics card driver, adjusting PS settings, reinstalling PS, and developing good programming habits.
 How to set password protection for export PDF on PS
Apr 06, 2025 pm 04:45 PM
How to set password protection for export PDF on PS
Apr 06, 2025 pm 04:45 PM
Export password-protected PDF in Photoshop: Open the image file. Click "File"> "Export"> "Export as PDF". Set the "Security" option and enter the same password twice. Click "Export" to generate a PDF file.
 How to speed up the loading speed of PS?
Apr 06, 2025 pm 06:27 PM
How to speed up the loading speed of PS?
Apr 06, 2025 pm 06:27 PM
Solving the problem of slow Photoshop startup requires a multi-pronged approach, including: upgrading hardware (memory, solid-state drive, CPU); uninstalling outdated or incompatible plug-ins; cleaning up system garbage and excessive background programs regularly; closing irrelevant programs with caution; avoiding opening a large number of files during startup.
 How to solve the problem of loading when the PS opens the file?
Apr 06, 2025 pm 06:33 PM
How to solve the problem of loading when the PS opens the file?
Apr 06, 2025 pm 06:33 PM
"Loading" stuttering occurs when opening a file on PS. The reasons may include: too large or corrupted file, insufficient memory, slow hard disk speed, graphics card driver problems, PS version or plug-in conflicts. The solutions are: check file size and integrity, increase memory, upgrade hard disk, update graphics card driver, uninstall or disable suspicious plug-ins, and reinstall PS. This problem can be effectively solved by gradually checking and making good use of PS performance settings and developing good file management habits.
 How to use PS Pen Tool
Apr 06, 2025 pm 10:15 PM
How to use PS Pen Tool
Apr 06, 2025 pm 10:15 PM
The Pen Tool is a tool that creates precise paths and shapes, and is used by: Select the Pen Tool (P). Sets Path, Fill, Stroke, and Shape options. Click Create anchor point, drag the curve to release the Create anchor point. Press Ctrl/Cmd Alt/Opt to delete the anchor point, drag and move the anchor point, and click Adjust curve. Click the first anchor to close the path to create a shape, and double-click the last anchor to create an open path.
 How does PS feathering control the softness of the transition?
Apr 06, 2025 pm 07:33 PM
How does PS feathering control the softness of the transition?
Apr 06, 2025 pm 07:33 PM
The key to feather control is to understand its gradual nature. PS itself does not provide the option to directly control the gradient curve, but you can flexibly adjust the radius and gradient softness by multiple feathering, matching masks, and fine selections to achieve a natural transition effect.
