
 System Tutorial
Windows Series
Graphic method for setting the number of processor cores in WIN7
System Tutorial
Windows Series
Graphic method for setting the number of processor cores in WIN7
Graphic method for setting the number of processor cores in WIN7

How to adjust the number of processor cores in Windows 7? When many users use Windows 7 systems, they may need to adjust the number of processor cores based on specific needs. This guide will detail how to complete this setup through graphic steps to help users optimize system performance. The following content will guide you through the process of adjusting the number of processor cores quickly and efficiently.
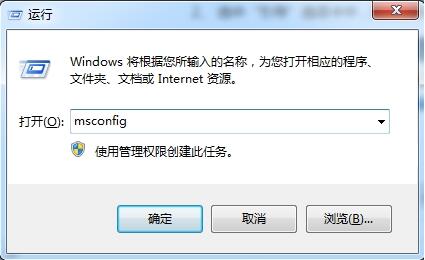
Press the [Win] key and [R] key at the same time to open the run, enter: msconfig, and press the Enter key to open the system configuration window.
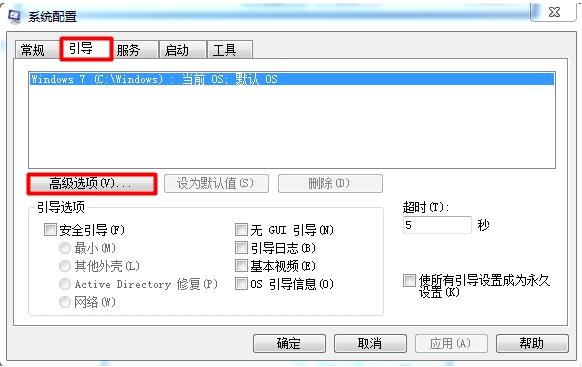
Select the [Guide] tab and click [Advanced Options].
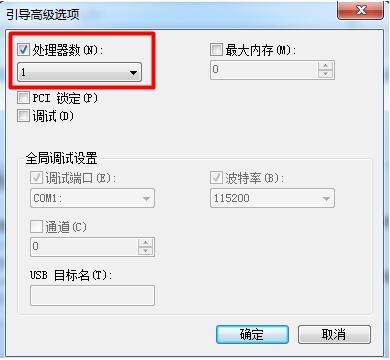
Then adjust [Number of Processors] and [Maximum Memory] to the maximum values of the computer, and click [OK] to exit.
The above is the detailed content of Graphic method for setting the number of processor cores in WIN7. For more information, please follow other related articles on the PHP Chinese website!

Hot AI Tools

Undresser.AI Undress
AI-powered app for creating realistic nude photos

AI Clothes Remover
Online AI tool for removing clothes from photos.

Undress AI Tool
Undress images for free

Clothoff.io
AI clothes remover

AI Hentai Generator
Generate AI Hentai for free.

Hot Article
Hot Tools

Notepad++7.3.1
Easy-to-use and free code editor

SublimeText3 Chinese version
Chinese version, very easy to use

Zend Studio 13.0.1
Powerful PHP integrated development environment

Dreamweaver CS6
Visual web development tools

SublimeText3 Mac version
God-level code editing software (SublimeText3)
Hot Topics


 The Framework Desktop Might Be The Coolest Tiny PC I've Seen
Mar 01, 2025 am 03:04 AM
The Framework Desktop Might Be The Coolest Tiny PC I've Seen
Mar 01, 2025 am 03:04 AM
Framework Desktop: The Good, the Bad, and the Unexpected The Framework Desktop, a compact PC emphasizing upgradability, largely delivers on its promise. iFixit's teardown reveals a design prioritizing standard components, making future upgrades sign
 PowerToys Is the Ultimate Work From Home Companion App
Mar 03, 2025 am 10:07 AM
PowerToys Is the Ultimate Work From Home Companion App
Mar 03, 2025 am 10:07 AM
PowerToys: Supercharge Your Windows Work-From-Home Experience Working from home presents unique productivity challenges. Distractions abound, demanding a focused workspace. PowerToys helps optimize your home office, whether it's a dedicated space or
 How to Find the Product Key for Windows 10
Mar 04, 2025 am 01:46 AM
How to Find the Product Key for Windows 10
Mar 04, 2025 am 01:46 AM
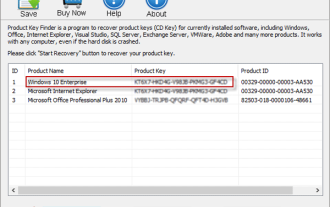
Retrieve lost Windows 10 product key: Two ways Have you lost your product key after installing genuine Windows 10? Don't worry, this article will introduce two ways to retrieve your keys so that you can reinstall the system in the future. Case 1: Windows 10 is installed but the key is lost Even if you get Windows 10 through a free upgrade or genuine installation, you can easily find the product key using the iSumsoft Product Key Finder as long as your computer works properly. Method 1: Use iSumsoft Product Key Finder Download and install: Download and install iSumsoft Product Key Finder to your computer. Find the product key: Start
 How to Install Windows 11 23H2 on Unsupported PC
Mar 03, 2025 pm 12:55 PM
How to Install Windows 11 23H2 on Unsupported PC
Mar 03, 2025 pm 12:55 PM
In the second half of 2023, Microsoft released the Windows 11 23H2 system. Many users can't wait to upgrade their computer to the latest version, but some users encountered the error message "This computer does not meet the minimum requirements..." when trying to install Windows 11 23H2 on an unsupported computer. don’t worry! This article will provide a step-by-step guide to how to install Windows 11 23H2 on an unsupported computer. Let's get started! Note: Microsoft said, "Installing Windows 11 on unsupported computers is not recommended. If you choose to install Windows 11 on hardware that does not qualify, you should risk compatibility issues." allow
 Top 3 Windows 11 Gaming Features That Outshine Windows 10
Mar 16, 2025 am 12:17 AM
Top 3 Windows 11 Gaming Features That Outshine Windows 10
Mar 16, 2025 am 12:17 AM
Upgrade to Windows 11: Enhance Your PC Gaming Experience Windows 11 offers exciting new gaming features that significantly improve your PC gaming experience. This upgrade is worth considering for any PC gamer moving from Windows 10. Auto HDR: Eleva
 ASUS Zenbook S 14 (2024) Review: Iterative Refinement of a Premium Ultraportable
Mar 01, 2025 am 06:01 AM
ASUS Zenbook S 14 (2024) Review: Iterative Refinement of a Premium Ultraportable
Mar 01, 2025 am 06:01 AM
The 2024 ASUS Zenbook S 14: A Top-Tier MacBook Air Competitor The ASUS Zenbook S 14 (2024) emerges as a leading Windows alternative to Apple's MacBook Air, boasting significant upgrades. This refined ultraportable retains its lightweight design and
 The Best Ergonomic Keyboards of 2025
Mar 03, 2025 am 10:02 AM
The Best Ergonomic Keyboards of 2025
Mar 03, 2025 am 10:02 AM
Recommended Best Ergonomic Keyboards in 2025 Ergonomic keyboards function the same as regular keyboards, but add support to reduce stress on wrists, hands and fingers. These keyboards are designed to keep your hands and wrists in a more natural position, helping to minimize muscle strain and prevent potential damage from prolonged typing. There are a wide variety of ergonomic keyboards available on the market, so be sure to consider which features are most important to you before purchasing. From layout to design, each type offers unique benefits based on your preferences and needs. Most ergonomic keyboards fall into two categories. The first category is the split keyboard, which, as the name suggests, divides the key layout into two parts for a more natural wrist posture. There are two types of split keyboards:
 How to Change the Font and Layout of PowerShell Window
Mar 03, 2025 pm 01:03 PM
How to Change the Font and Layout of PowerShell Window
Mar 03, 2025 pm 01:03 PM
Enhance your Windows 10 PowerShell experience with these simple customization steps! This guide shows you how to adjust PowerShell fonts and enable automatic text wrapping for improved readability and optimal window fitting. Let's get started: Step 1
