Photoshop制作超炫镀铬效果的金属版背景
今天我们来教同学们如何在Photoshop制作超炫镀铬效果的金属版背景,之后添加一个超酷的光效,最终合成一个超炫的电脑发光主板。教程可以帮同学们纯熟运用图层样式,如果学完有不懂的同学还可以免费得到作者的PSD哟,现在就练起来吧。
第1步
打开Photoshop,创建新文档,我使用2880×1800的尺寸,因为这样就可以把它拿来当作桌面背景。使用油漆桶工具,为背景填充#201E1E颜色。

第2步
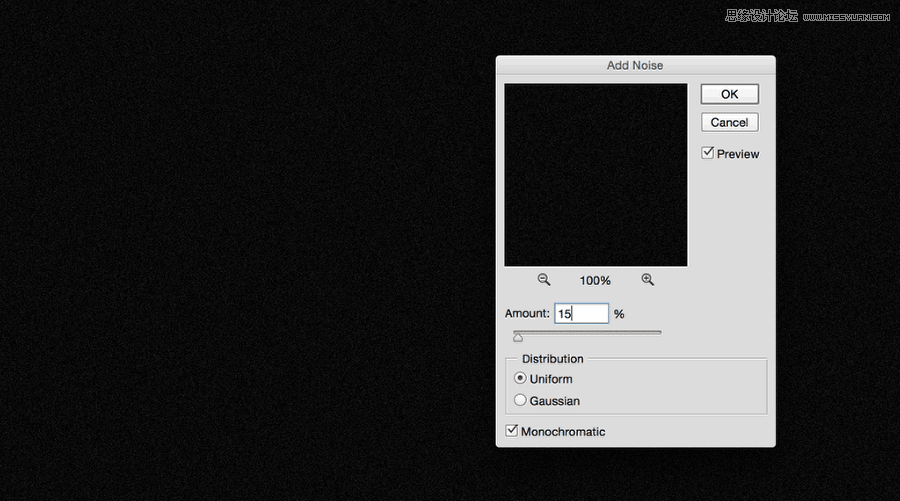
新建图层填充为黑色,然后使用滤镜>杂色>添加杂色。数量为15%,平均分布以及单色。
第3步
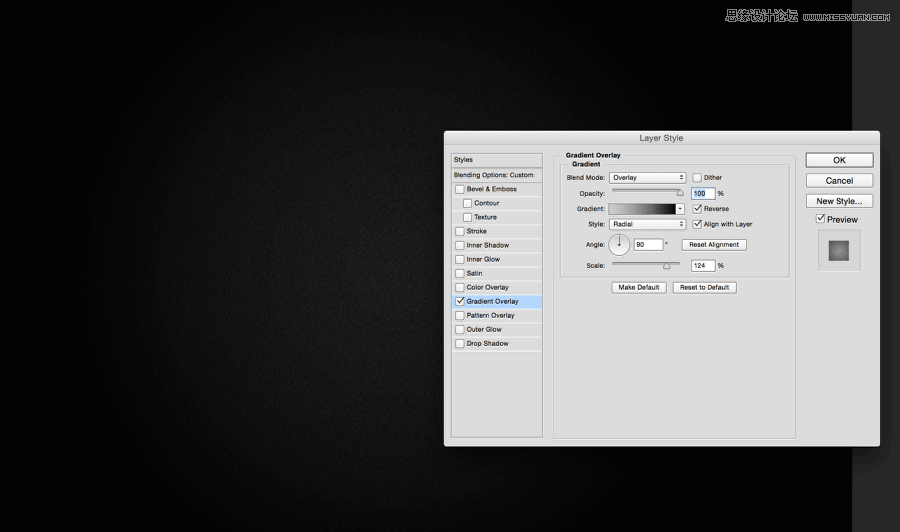
复制杂色图层并水平翻转。然后把这两个图层编组,并为组使用图层样式。图层>图层样式>渐变叠加。使用从中灰到深灰的径向渐变。
第4步
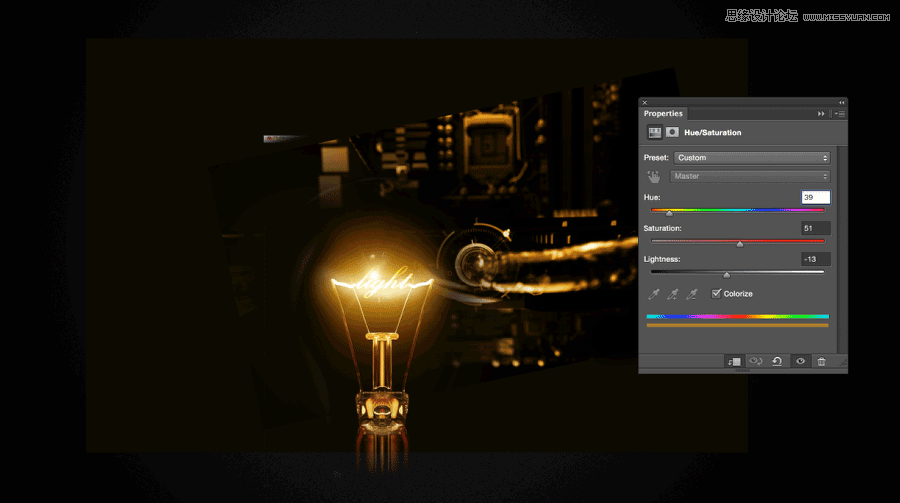
我们可以使用Google Images/找到一些图片作为我们扬声器或机箱内部的图像(国内朋友可百度),他们在设计方面通常超级棒。我还使用了前段时间自己做的带有光照效果的图像。你可以随便使用你想要的光照效果。合并所有的图像然后图像>图像调整>色相和饱和度。选择40色调,50饱和以及-13亮度。
第5步
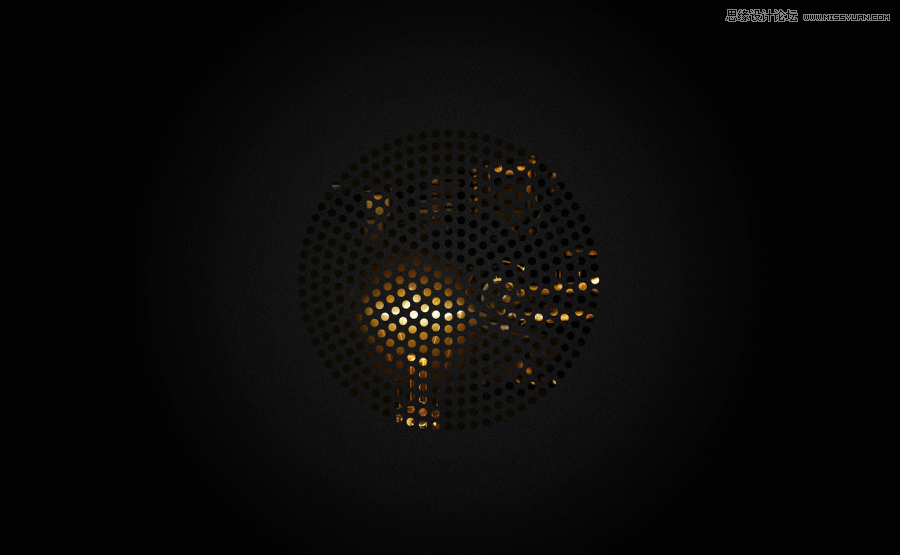
我在网上找到一个类似圆形扩音器的圈圈矢量图,我用这张图片创建选区并遮盖内部。

第6步
盖上之后就是这样。
第7步
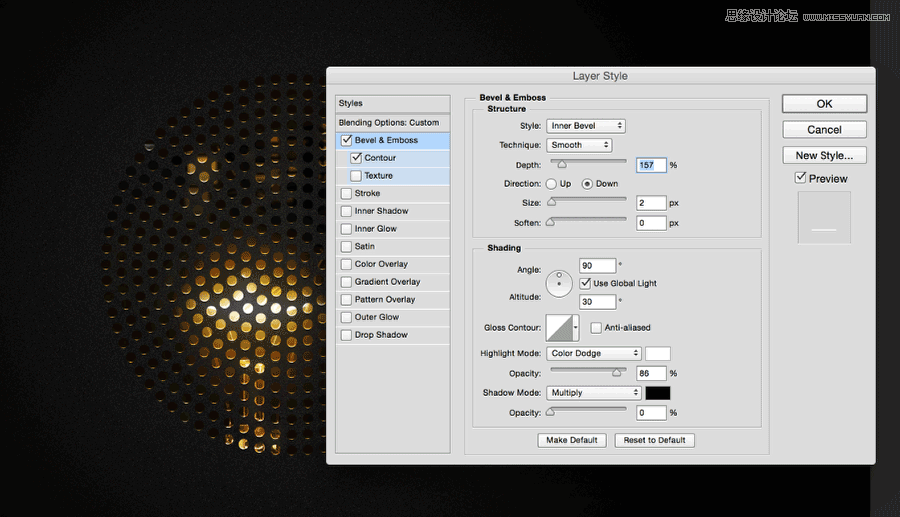
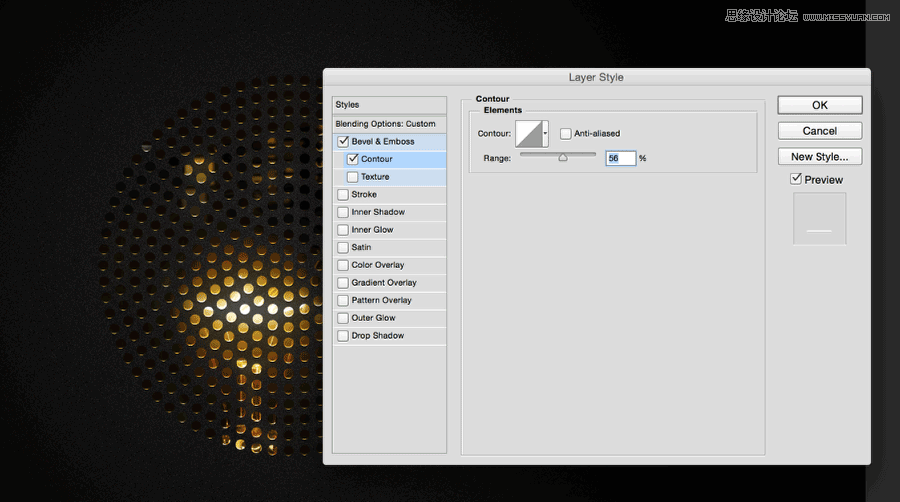
选中你用于创建遮罩的形状,然后在图层>图层样式>混合模式中,把填充不透明度改为0.选择斜面与浮雕,使用下图所示的数值设置,然后选择等高线并把范围改成56%。最后复制这个图层并把不透明度改为10%。
想学最新的教程记得来优设网哟!
第8步
在所有图层顶端新建图层并填充黑色。使用画笔工具(B)画一个暗灰色的大圆(如图所示)。然后把混合模式改为颜色减淡。


第9步
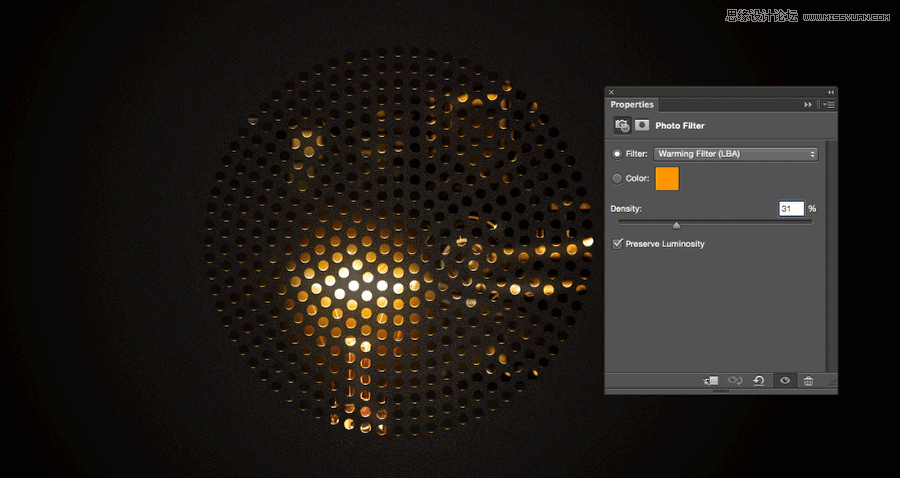
在图层>新建图层样式>照片滤镜。使用暖色调,30%密度。
第10步
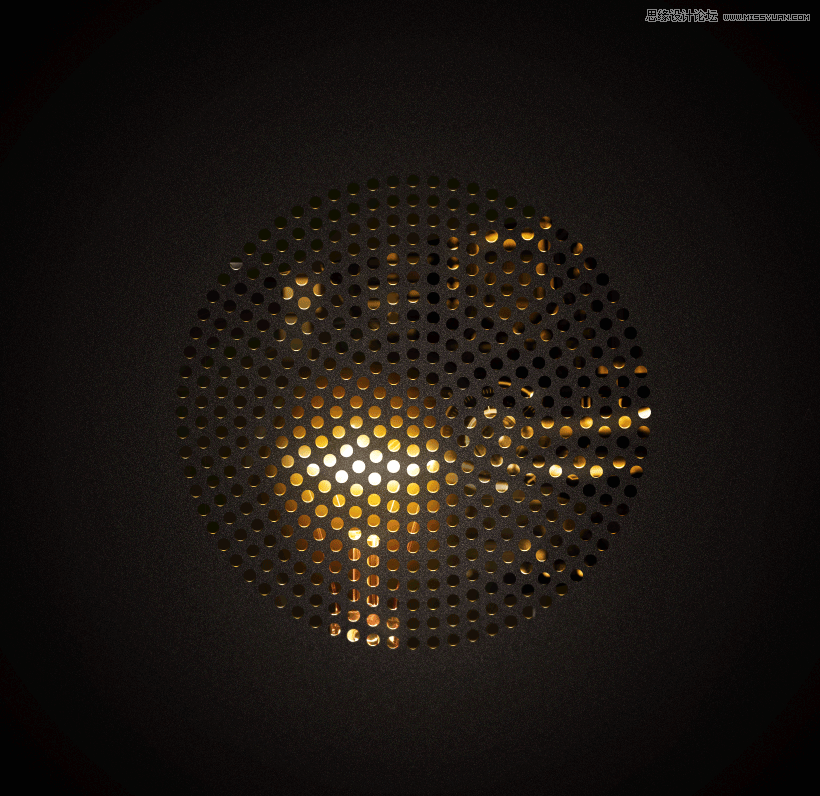
选择所有图层并复制。合并这些新图层并使用滤镜>模糊>高斯模糊。使用15px半径,把混合模式改为滤色,70%不透明度。
结论
现在只要把你的logo用相同的镀铬效果加上去,设计就做完了。现在是你来做自己的图的时间了,希望你玩开心。

教程结束,以上就是Photoshop制作超炫镀铬效果的金属版背景教程,希望大家喜欢!

Hot AI Tools

Undresser.AI Undress
AI-powered app for creating realistic nude photos

AI Clothes Remover
Online AI tool for removing clothes from photos.

Undress AI Tool
Undress images for free

Clothoff.io
AI clothes remover

AI Hentai Generator
Generate AI Hentai for free.

Hot Article

Hot Tools

Notepad++7.3.1
Easy-to-use and free code editor

SublimeText3 Chinese version
Chinese version, very easy to use

Zend Studio 13.0.1
Powerful PHP integrated development environment

Dreamweaver CS6
Visual web development tools

SublimeText3 Mac version
God-level code editing software (SublimeText3)

Hot Topics
 1382
1382
 52
52
 How do I use Photoshop for creating social media graphics?
Mar 18, 2025 pm 01:41 PM
The article details using Photoshop for social media graphics, covering setup, design tools, and optimization techniques. It emphasizes efficiency and quality in graphic creation.
 How do I prepare images for web using Photoshop (optimize file size, resolution)?
Mar 18, 2025 pm 01:35 PM
Article discusses optimizing images for web using Photoshop, focusing on file size and resolution. Main issue is balancing quality and load times.
 What is the reason why PS keeps showing loading?
Apr 06, 2025 pm 06:39 PM
PS "Loading" problems are caused by resource access or processing problems: hard disk reading speed is slow or bad: Use CrystalDiskInfo to check the hard disk health and replace the problematic hard disk. Insufficient memory: Upgrade memory to meet PS's needs for high-resolution images and complex layer processing. Graphics card drivers are outdated or corrupted: Update the drivers to optimize communication between the PS and the graphics card. File paths are too long or file names have special characters: use short paths and avoid special characters. PS's own problem: Reinstall or repair the PS installer.
 What are the common questions about exporting PDF on PS
Apr 06, 2025 pm 04:51 PM
Frequently Asked Questions and Solutions when Exporting PS as PDF: Font Embedding Problems: Check the "Font" option, select "Embed" or convert the font into a curve (path). Color deviation problem: convert the file into CMYK mode and adjust the color; directly exporting it with RGB requires psychological preparation for preview and color deviation. Resolution and file size issues: Choose resolution according to actual conditions, or use the compression option to optimize file size. Special effects issue: Merge (flatten) layers before exporting, or weigh the pros and cons.
 How do I prepare images for print using Photoshop (resolution, color profiles)?
Mar 18, 2025 pm 01:36 PM
The article guides on preparing images for print in Photoshop, focusing on resolution, color profiles, and sharpness. It argues that 300 PPI and CMYK profiles are essential for quality prints.
 How to solve the problem of loading when PS is always showing that it is loading?
Apr 06, 2025 pm 06:30 PM
PS card is "Loading"? Solutions include: checking the computer configuration (memory, hard disk, processor), cleaning hard disk fragmentation, updating the graphics card driver, adjusting PS settings, reinstalling PS, and developing good programming habits.
 How do I use Photoshop's video editing capabilities?
Mar 18, 2025 pm 01:37 PM
The article explains how to use Photoshop for video editing, detailing steps to import, edit, and export videos, and highlighting key features like the Timeline panel, video layers, and effects.
 How to set password protection for export PDF on PS
Apr 06, 2025 pm 04:45 PM
Export password-protected PDF in Photoshop: Open the image file. Click "File"> "Export"> "Export as PDF". Set the "Security" option and enter the same password twice. Click "Export" to generate a PDF file.


