

利用PS创建几何图案的复古怀旧海报 PS入门实例教程

这篇文章主要介绍了用ps创建最近比较流行的几何图案的复古怀旧海报,步骤详细,教程不长,非常适合新手练习,需要的朋友可以参考下

篇文章主要介绍了用ps创建最近比较流行的几何图案的复古怀旧海报,步骤详细,在今天的教程里你学到的最有价值的东西是,作者巧妙的创作思路,突破了平常设计思维的墙。当然,还有他对几何形状的高超使用技巧,教程不长但是步骤非常详细,非常适合新手练习,需要的朋友可以参考下。
抽象几何图案在西方也被叫做“希腊艺术”,或者“地中海风格”,相传它起源于公元前900年到700年间的古希腊,最初是在花瓶装饰画中产生的。它是由诸如方形、圆形、三角形等基本的几何图案经过艺术的处理和加工产生的一种艺术形式。
抽象几何的风格鲜明,经过岁月的演化,它从古典艺术中分离出来,摇身变为摩登、时尚、简洁的代言风格。在我们日常生活设计中,会常常看到它的存在,甚至在最近流行的低多边形也可以看到这类艺术形式的影子。
今天我们就来学习如果制作这类抽象几何风格的海报,并且我们要为这幅海报添加GRUNGE的质感,让它显得怀旧,又不失大气、时尚。

素材微盘下载:GRUNGE纹理图案
二、几何图形的构建
1、打开AI开始画图形的基本结构
让我们先画上几个最基础的长方形,长方形按照下面的方式排列,你也可以根据自己喜欢的方式构图。没错!有人说这是不是有些像建筑户型图?这也许是这类构图最直接的灵感来源哦!
抽象构图似乎没有明确的规律可循,自然随机的进行创造即可,如果实在对此有疑问的,可以参考云朵在天空上的那种自由自在的复杂变化。停下来好好观察晴朗的天空吧~
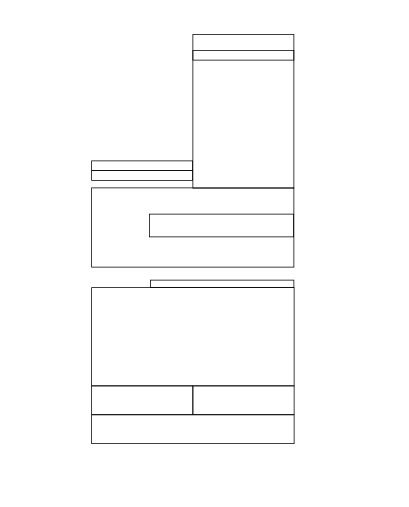
在画基础图形时,必须注意这里要用长方形来构图,而切忌让直线参与进来。这样做的理由是等下当我们在为每个长方形填充色彩的时候,用直线的地方显然是无法顺利填充的。
当然了,每个长方形边缘都保持两两重叠的,没有缝隙,这样的图形才会看上去更精美。
让我们再继续多添加几个长方形,它最终变成了这个样子
2、变形
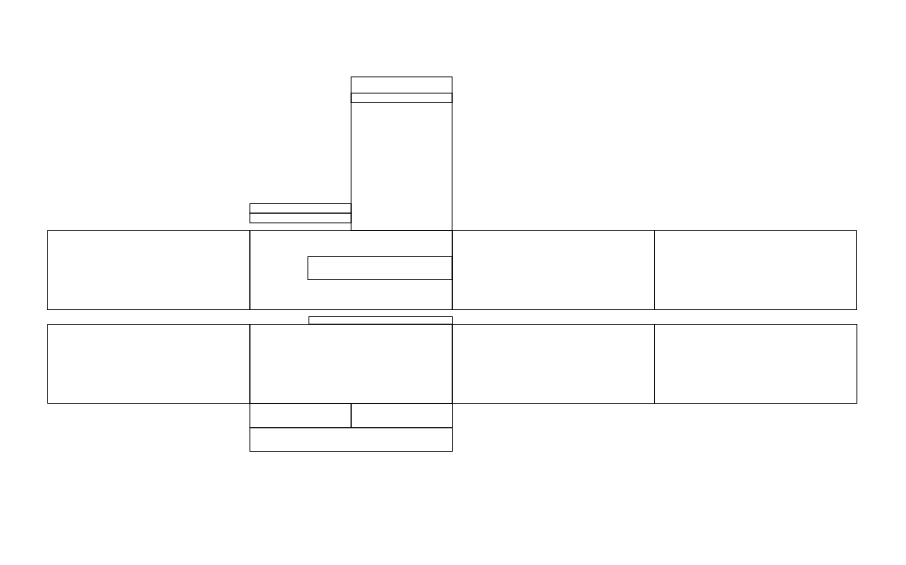
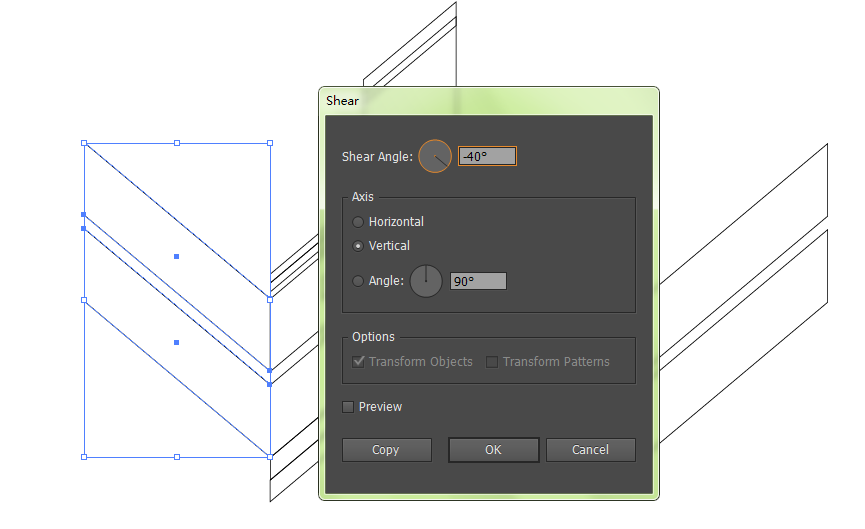
接下来,按照上下两个矩形为一列,对图形进行变形。变形的方式有很多,今天我们所使用的是“倾斜”工具。
选择【对象>变换>倾斜】,弹出倾斜设置面板,在面板中的角度内输入-40度,“轴”这个选项里选择“垂直”,点击确认后,图形就发生了变换。
当你把角度变为40度时,图形就朝着相反的地方倾斜,经过这样相错倾斜的角度的调整后的效果如下:
3、上色
让我们开始为每一块图形上色吧,在这里我使用的是红黄蓝三种颜色,你也可以自由发挥。有的选择整块填充,有的使用渐变,而其中有的我还选用了色板中的基本线条图案。
【窗口>色板>打开色板库>图案>基本图形>基本图形-线条】
当选中你要填充的对象,再点选相应图案,对象就变为了线条图案填充。
如果你不懂上色,那么这组资源太及时了,立刻帮上忙!《随取随用!专属扁平化设计的PS色板(配色库)》

这里对色彩的协调搭配是重要的,基本的要点有一个那就是尽量保持在3—5个颜色内,这样会让整个画面不显凌乱,最后我做出的效果如下:

三、PS里的效果处理
1、将图形输出为PNG文档后,记得去掉背景色。然后打开PS,新建一个文档,尺寸自理。填充背景色为黑色,然后将刚刚做好的PNG图案加入。

2、夜光效果
怎样添加一点夜光效果呢?大家可以在此停下来想想,将它的颜色减淡?透明度调低?增加一层颜色渐变图层?还是?……
这里我要使用的是一个新方法:复制图案的图层,将图案的复制层进行高斯模糊。再将模糊的图层模式改为滤色,透明度降低为80%。高斯模糊的像素根据你的图像大小而定,目标是让图案看上去稍微有点在黑暗中的夜光效果。

3、怀旧效果
增加怀旧感的做法是,打开最初准备好的纹理图案,图层模式为正片叠底。这时它就整个与图案相融合,让图案变出了怀旧感的纹理。

这时我们还可以试用GRUNGE画笔继续进行修饰,让整个海报的怀旧氛围更加浓郁哦~
总结
以上就是ps创建几何图案的复古怀旧海报 的详细过程,各位读者尝试了吗?将一张图案变成GRUNGE风格显得好像真的很容易,但是往往在实践过程中,有时候我们的思维就是兜不了我们想要去到的地方,试错也是成功的开始,脚本之家的小编一直认为动动手就有大改变。

Hot AI Tools

Undresser.AI Undress
AI-powered app for creating realistic nude photos

AI Clothes Remover
Online AI tool for removing clothes from photos.

Undress AI Tool
Undress images for free

Clothoff.io
AI clothes remover

AI Hentai Generator
Generate AI Hentai for free.

Hot Article
Hot Tools

Notepad++7.3.1
Easy-to-use and free code editor

SublimeText3 Chinese version
Chinese version, very easy to use

Zend Studio 13.0.1
Powerful PHP integrated development environment

Dreamweaver CS6
Visual web development tools

SublimeText3 Mac version
God-level code editing software (SublimeText3)
Hot Topics
 1376
1376
 52
52

 How to set up windows 10 eye protection mode. Example tutorial of setting windows 10 eye protection mode.
Jul 15, 2023 pm 01:01 PM
How to set up windows 10 eye protection mode. Example tutorial of setting windows 10 eye protection mode.
Jul 15, 2023 pm 01:01 PM
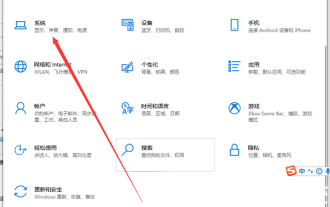
Some Windows 10 users often use the computer at night, but long-term use is not good for their eyes, so they need to set the eye protection mode for the computer. So how should they do this? In fact, you can turn on the dark mode, which also has the function of protecting eyesight. The specific steps are: open the settings control panel, click the system software to enter, and then select the display on the left, and then you can see the dark mode on the right interface. Just turn on its power switch. How to set the eye protection mode in Windows 10: 1. "Win+i" opens the settings and clicks the first "System" to set the channel mark and enter the system settings interface; 2. In the detailed settings area on the right side of the dialog box, there is a night light power switch, the default setting remains on
 How to turn off hibernation mode in windows7. Tutorial on how to turn off hibernation state in windows7.
Jul 10, 2023 pm 09:37 PM
How to turn off hibernation mode in windows7. Tutorial on how to turn off hibernation state in windows7.
Jul 10, 2023 pm 09:37 PM
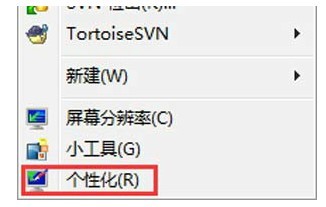
Hibernation is a unique method of the Windows 7 system. It can put the computer into a low-power state when the user is away temporarily. However, some Windows 7 users feel that they do not need this method. If they want to turn it off, what should they do? Go to the personalized control panel, click the screen saver, change the power settings, change the computer sleep time, and then set "Put the computer to sleep" to Never. How to turn off hibernation mode in windows 7: 1. First, click the mouse on a blank space on the desktop and select the "Personalization" option, as shown in the figure below: 2. In the personalization dialog box, please click the "Screen Saver" logo, as shown in the figure below Display: 3. Click in the screen saver settings dialog box
 Where is the Win7 compatibility setting? Win7 compatibility setting example tutorial
Jul 12, 2023 pm 09:25 PM
Where is the Win7 compatibility setting? Win7 compatibility setting example tutorial
Jul 12, 2023 pm 09:25 PM
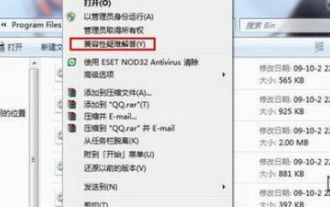
The Windows 7 system is a very stable system, and many consumers are now using the Win7 system. Nowadays, many customers don’t know how to set the compatibility mode. Let’s take a look at the specific setting method below. Compatibility setting method: 1. Right-click the mobile software with any problem. 2. Select the [Compatibility Mode Troubleshooting] option. 3. The system automatically recognizes it, please wait a moment. 4. When a prompt box appears, select [Try proposed settings]. 5. Click [Run Program Flow] to test whether the tool is operating normally, and click [Next]. 6. If there is no problem, select [Yes, so the program saves these settings]. 7. If there is any problem, select [No, try again using other settings]. 8. Choose
 Detailed example tutorial on how to adjust mouse sensitivity in Windows 7
Jul 09, 2023 am 08:33 AM
Detailed example tutorial on how to adjust mouse sensitivity in Windows 7
Jul 09, 2023 am 08:33 AM
Many users of win7 mouse sensitivity do not know how to set it, where to set it, etc. If they want to adjust the mouse speed as they like, but cannot find the setting place, what should they do? You can see the following detailed examples. Tutorial. How to adjust mouse sensitivity in win7: 1. Right-click the mouse on a blank space on the desktop and select "Personalize (R)" in the pop-up menu. 2. In the personalized web page, select "Change mouse pointer". 3. After opening the dialog box, search for "Pointer Options" on the top of the page and perform settings. After the settings are completed, click Apply.
 Windows 7 desktop background how to set windows 7 desktop background setting example tutorial
Jul 18, 2023 am 10:45 AM
Windows 7 desktop background how to set windows 7 desktop background setting example tutorial
Jul 18, 2023 am 10:45 AM
Windows 7 supports many custom settings. For example, customers can set their own desktop background and create an exclusive personalized theme. So how to set the desktop background of Windows 7? The method is relatively simple. First, right-click on an empty space on the desktop, select Humanization, then click on the desktop background below, click to access in the open interface, select a picture that you like, and then save the settings to make your desktop The background is set successfully. Windows 7 desktop background setting example tutorial: 1. Enter the win7 desktop software, click on the blank space on the desktop, select Humanization to turn on, and go to the next step. 2. Click "Desktop Background" on the humanized page that opens and go to the next step. 3. Then click the access button and choose your favorite
 Example tutorial on turning off the sound when booting up a win7 computer
Jul 14, 2023 am 10:01 AM
Example tutorial on turning off the sound when booting up a win7 computer
Jul 14, 2023 am 10:01 AM
By default, win7 will have a startup sound when it is turned on. If it is too loud, it may harm the people around you. So how do you turn off the startup sound of your win7 computer? In fact, you can turn off the startup sound in the sound settings. How to turn off the startup sound of win7 computer: 1. First, click the lower left menu bar and open "Control Panel" 2. Then enter the "Hardware and Sound" settings above. 3. Then click "Change System Sound" in the sound. 4. Finally cancel "Play Windows Startup Sound" and "OK" to save.
 Use PHP to write an example tutorial for docking Baidu Portrait Segmentation API
Aug 12, 2023 am 11:34 AM
Use PHP to write an example tutorial for docking Baidu Portrait Segmentation API
Aug 12, 2023 am 11:34 AM
Use PHP to write an example tutorial to interface with Baidu Portrait Segmentation API. Portrait segmentation is an important computer vision task, which can separate the portrait in the image from the background. Baidu provides a portrait segmentation API that can easily implement this function. This article will use PHP language to write a simple sample program to demonstrate how to connect to Baidu Portrait Segmentation API. Preparation work First, we need to register a Baidu developer account and create a new application to obtain API credential information. After logging in to Baidu AI open platform, enter
 Printer Status Aborted Repair Example Tutorial
Jul 09, 2023 am 08:45 AM
Printer Status Aborted Repair Example Tutorial
Jul 09, 2023 am 08:45 AM
When we use the printer to print documents, we sometimes find that the printer has stopped and cannot print. How to recover at this time? In fact, we only need to cancel the printing stop. How to restore the printer status that has been suspended: 1. First open the printer settings through the small icon on the lower right. 2. After opening, you can see the message "Stopped" 3. Now, click "Printer" in the upper right corner 4. If "Stop Printing" is checked, click again to uncheck it. 5. After unchecking, you will find that the printing has stopped and you can print again.
