

PS制作扁平及长投影的视觉效果


最终效果
第一步 创建一个背景
新建画布,尺寸为840*400可以使用纯色做为背景,或是用渐变工具创建,这里的色值为#e0e0e0 这里就不多更描述了。
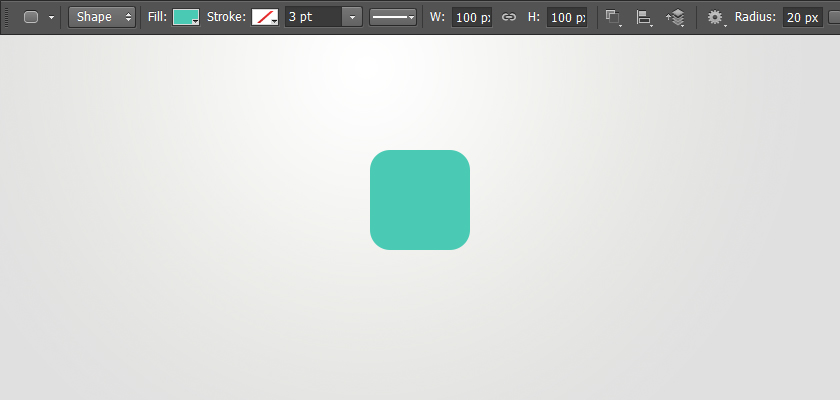
第二步 创建一个形状
选择矩形工具。大小为100px,半径为20px,色值:#4ac9b4

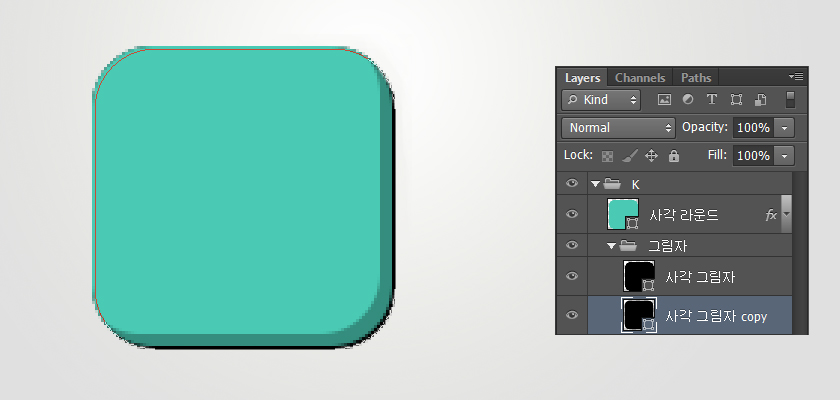
参考图片上的图层
快捷键ctrl+j,复制一层,形状填充黑色,ctrl+G并到一个组里,命名为“ K ”,双击第一个矩形图层调出图层样式
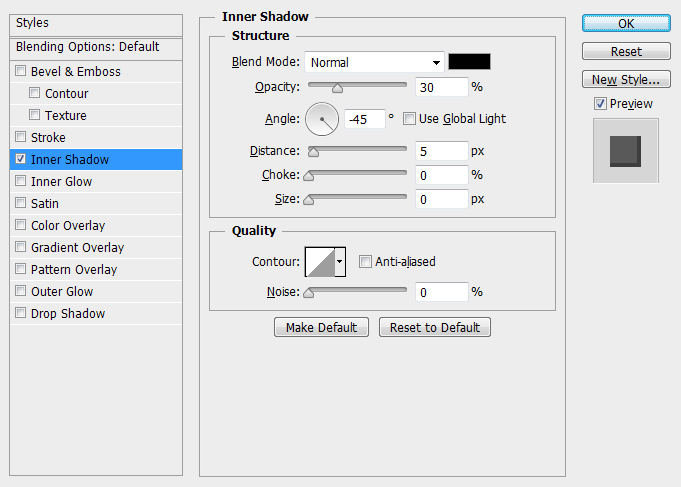
图层样式为内阴影,请记得不勾选“使用全局光”。

样式效果是这样的
第三步 创建一个阴影
再复制一个阴影层的副本,拖到原图层的下面,并到一个组里,如图如示
*快捷键:ctrl+G 或是 选择要复制的层,按alt +点击拖曳复制
按键盘上的方向箭,往右边和底部,移动1px,通过观察下图所示的形状:1px黑色边出现。

按上面的方式每以1px的方式重复移动9次,注意总共是10次。

接下来要以相同的方式,以10个图层为基础,复制一份(按ctrl+G或是 选择alt +点击拖动),在选中的状态下按shift+方向键,就会是10的倍数移动,这样的方式再重复7次,注意总共是复制8次。
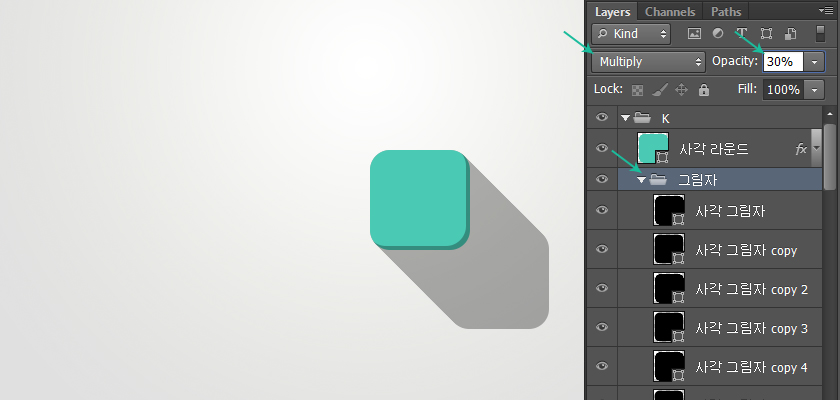
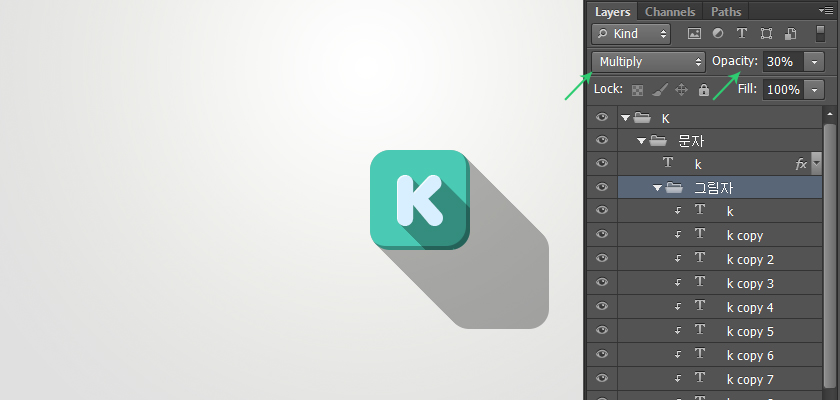
选择阴影的文件夹,设置混合模式为正片叠底,不透明度30%,这里的阴影形状就完成。 1/2 1 2 下一页 尾页赞
第四步 输入字符
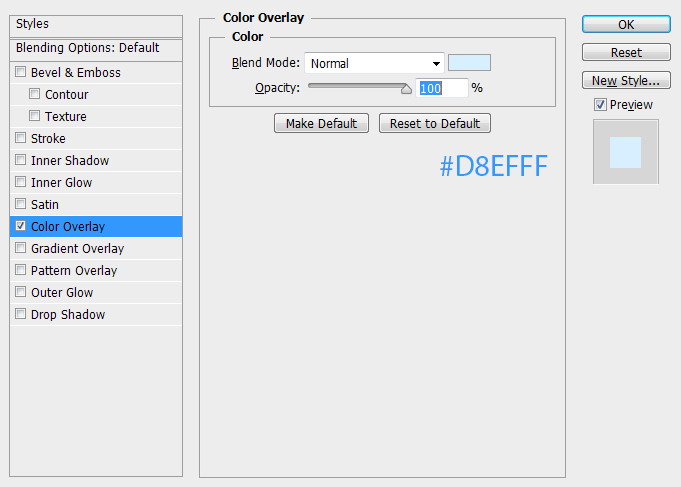
这次,选择圆角的任何字符。选择你喜欢的字体就行了, 双击文字,打开图层样式窗口。
选择颜色叠加,色值为:#D8EFFF
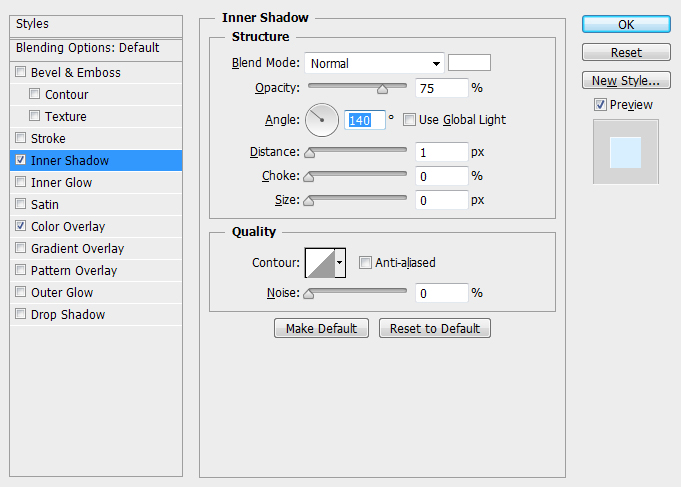
下一步,选择内阴影,数据如图。记得不勾选“使用全局光”。
成品外观这样子也不错。 但是,现在让我们也给字符增加一下影子。
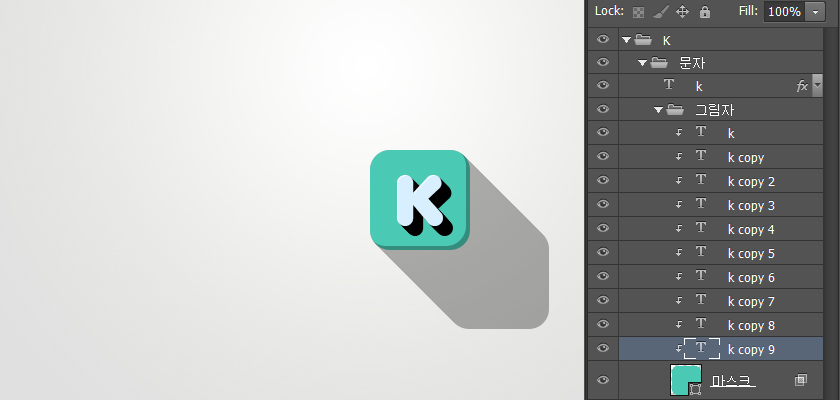
第五步 增加一下字符的投影
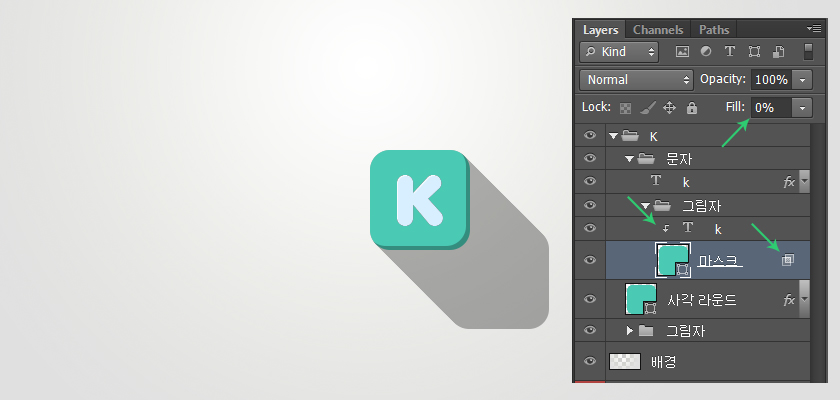
注意图层面板,复制一下字体跟圆角矩形图层,将副本圆角矩形图层和文字的样式去掉,将文字设置成黑色,并在一个组里
将面版中的高级混合选项中”将剪贴图层混合成组“的部分取消勾选
”将剪贴图层混合成组“的部分取消勾选后,右边出现相关图标,副本图层的填充设置为0%,为文字“创建剪贴蒙版”(快捷键:ALT+点击)
现在,通过复制图层副本和以1px移动的方式做出切实的影子,做法跟上面讲的方式一样,总次数为10次。如图所示
以10个为单位的复制,每一次以10px移动
选中文件夹,混合模式为“正片叠底”,不透明度设置为30%
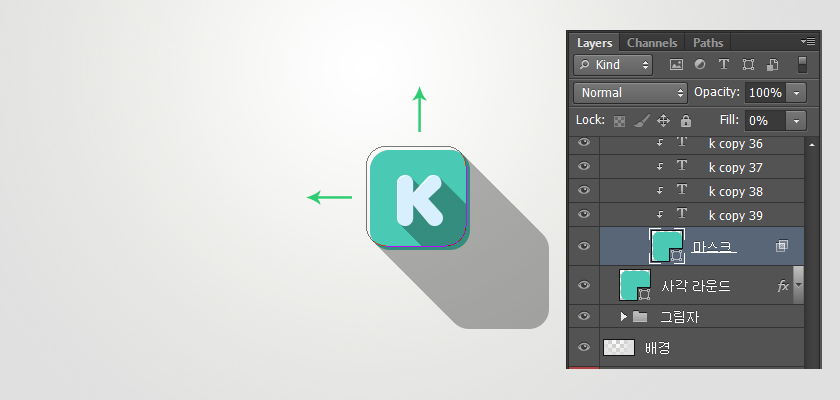
为了解决重叠部分的遮罩层,选中副本矩形图层,移动4px,分别向左和顶部移动。
最终结果
还有比这个更简单的方法,大家都可以多去尝试,目前分享的就是这种,大家可以通过这种方法创造各种图形和文字
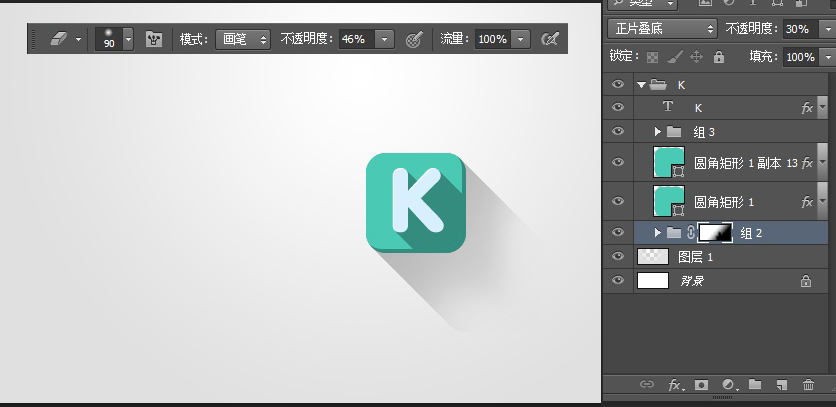
想要像banner的效果,在长投影上添加图层蒙版,然后用渐变工具拉伸。(按D键,恢复原来的黑白值)
将一些细节部分,和橡皮擦除一下。记得用软笔刷,不透明设置一下,根据自己的情况调整。


Hot AI Tools

Undresser.AI Undress
AI-powered app for creating realistic nude photos

AI Clothes Remover
Online AI tool for removing clothes from photos.

Undress AI Tool
Undress images for free

Clothoff.io
AI clothes remover

AI Hentai Generator
Generate AI Hentai for free.

Hot Article
Hot Tools

Notepad++7.3.1
Easy-to-use and free code editor

SublimeText3 Chinese version
Chinese version, very easy to use

Zend Studio 13.0.1
Powerful PHP integrated development environment

Dreamweaver CS6
Visual web development tools

SublimeText3 Mac version
God-level code editing software (SublimeText3)
Hot Topics
 1377
1377
 52
52

 What is the difference between nearby sharing/casting/projection/sharing in win11?
Feb 29, 2024 am 09:01 AM
What is the difference between nearby sharing/casting/projection/sharing in win11?
Feb 29, 2024 am 09:01 AM
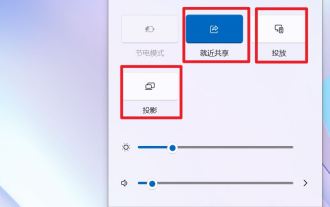
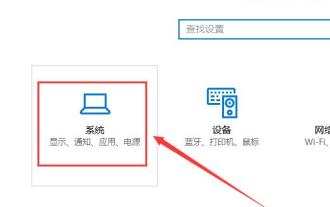
Win11 system comes with nearby sharing, casting, projection, and sharing functions. How to use these functions? what differences are there? Please see the introduction below for details. 1. Official documentation for nearby sharing: Nearby sharing - Microsoft Community shares content with nearby devices in Windows (microsoft.com) Function: Two computers transfer files via Bluetooth. (Can be used without WiFi or USB disk) Prerequisite: Two computers Steps: 1) Right click → Go to settings 2) System → Attach to anyone (to allow other devices to discover this device) 3) Both computers Set up like this 4) Right-click the file you want to send and click Share. 5) Click on another discovered computer to transfer files
 How to project win10 to this computer
Jan 06, 2024 pm 09:17 PM
How to project win10 to this computer
Jan 06, 2024 pm 09:17 PM
When using our projection function, we can project the screen of the mobile phone onto the computer screen. We only need to connect the mobile phone and the computer through the network or Bluetooth, and then use the screen projection function on the computer. How to project win10 to this computer: 1. Go to settings from the start menu and select enter. 2. Then we can find the option in the coordinates and click to enter. 3. Then we set it up. 4. After the settings are completed, press the + shortcut key and then select. 5. Then we open the settings of the mobile phone. We can see that some mobile phones have more connection methods. Enter the settings. 6. We found the option and entered to select our own computer equipment. 7. At this time, a prompt box will appear on our computer, we just click it.
 How to project on an Apple phone_How to connect an Apple phone to a projector
Mar 23, 2024 pm 08:01 PM
How to project on an Apple phone_How to connect an Apple phone to a projector
Mar 23, 2024 pm 08:01 PM
1. Connect the projector and iPhone to the same network, swipe down from the upper right corner of the screen, open the control center, and click [Screen Mirroring]. 2. In the scan results of screen mirroring, find the projector device for mirroring.
 How to hide desktop icon projection in win10?
Dec 22, 2023 am 08:13 AM
How to hide desktop icon projection in win10?
Dec 22, 2023 am 08:13 AM
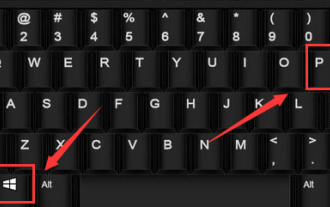
The win10 projector only displays the desktop background but not the desktop icons. What's your problem? I believe many friends have encountered this problem. In fact, this problem is easy to solve. Let's take a look with the editor. Solution to win10 projection not showing desktop icons: You have turned on the dual-screen extended mode. This is not a problem, it is just a display mode. That is to say, your current computer has two displays, one is the home screen of your computer. The other is the screen projected by your projector, and your current system has selected the dual-screen expansion mode by default. 1. We can press the "win+P" keys on the keyboard at the same time. 2. On one side of the home screen desktop (the pop-up method will be different depending on your system version) the following 4 options pop up. computer screen only
 What should I do if my win10 projection doesn't respond?
Jan 06, 2024 pm 10:53 PM
What should I do if my win10 projection doesn't respond?
Jan 06, 2024 pm 10:53 PM
When using the projection function of win10, many users said that when using this function, the projection function did not respond or could not be used normally. At this time, it is necessary to check the system function first and then confirm the working condition of the projector. It can be solved. What to do if Windows 10 projection does not respond: 1. If you are projecting from a mobile phone to a computer, please make sure that your mobile phone and computer are on the same WiFi network. 2. In the settings on the computer, set it to on the right and turn it off. 3. If the problem still cannot be solved, please reinstall the network card driver, uninstall and reinstall, or update directly. 4. If you are connecting to a projector, please check whether there is a problem with the VGA cable and whether it is connected properly. 5. If the computer has dual systems, it will also cause graphics card driver conflicts.
 How to use the projection function in win10?
Dec 29, 2023 am 11:49 AM
How to use the projection function in win10?
Dec 29, 2023 am 11:49 AM
When using a win10 projector, we need to open it from the settings or control panel every time. It is very troublesome to operate. So does the projector have shortcut keys? Of course there is, let’s take a look at the shortcut keys. Let’s introduce~ What are the shortcut keys for projection in Win10: 1. Users can quickly open the projection settings by pressing + on the keyboard. 2. Then we select the required method and then we can project. Related articles: How to project win10 to this computer>>>How to fill the full screen with win10 projector>>>
 How to solve the problem of the project to this computer option disappearing in Windows 10 Home Edition
Jan 16, 2024 pm 05:21 PM
How to solve the problem of the project to this computer option disappearing in Windows 10 Home Edition
Jan 16, 2024 pm 05:21 PM
Win10 users generally like to use the projection function of Windows 10 system. If you find that the "Project to this computer" option is not displayed in the connection function menu. Don’t worry, here’s a detailed guide on how to easily fix this problem! Please follow the steps below: What to do if the option to project to this computer is no longer available in Windows 10 Home Edition 1. First, click on the dedicated icon in the lower left corner, and you will see multiple option menus pop up. 2. Click any option button again to confirm and enter the page. 3. On the home page, find and click the button and click the tab. 4. At this point, we will find that there are two different types of projection settings in this option. 5. To ensure that the screencasting function can be smoothly implemented on any occasion, just check it.
 Your computer cannot project to other screens in win10
Feb 16, 2024 am 10:36 AM
Your computer cannot project to other screens in win10
Feb 16, 2024 am 10:36 AM
In our daily office work, we often encounter an unavoidable situation - using electronic devices for screen projection. However, some users have recently reported that after upgrading to the Windows 10 operating system, the screen mirroring function suddenly failed and they were at a loss. In this context, the solutions provided below may be available for you to use as a reference and try to implement. Your computer cannot project to other screens in Windows 10. Reason 1: The graphics card driver is out of date and needs to be upgraded. 1. Just download professional driver update management software such as 360 Driver Master or Driver Life, and filter out the needs within its scope. There is an option to update the graphics card driver. 2. You can also enter the big red paper on the computer to update the driver, but the corresponding device cannot be found.
