

PS制作逼真的立体耳机图标教程

在这个教程中,我们会教你如何在PS中制作逼真的立体耳机图标教程
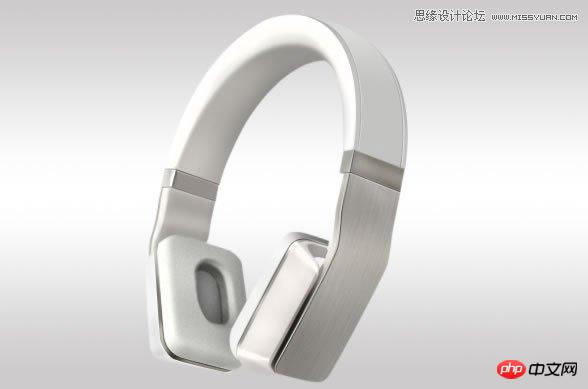
在这个教程中,我们会教你如何在PS中创建写实耳机图标。
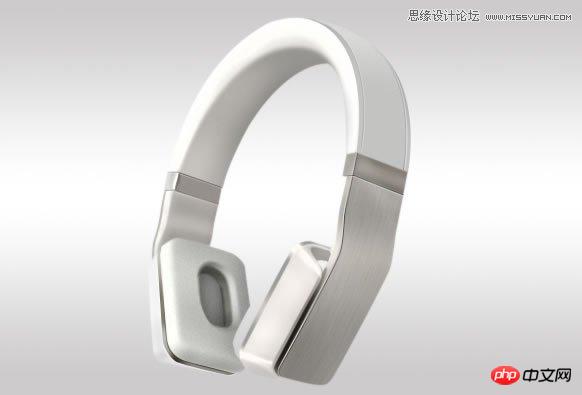
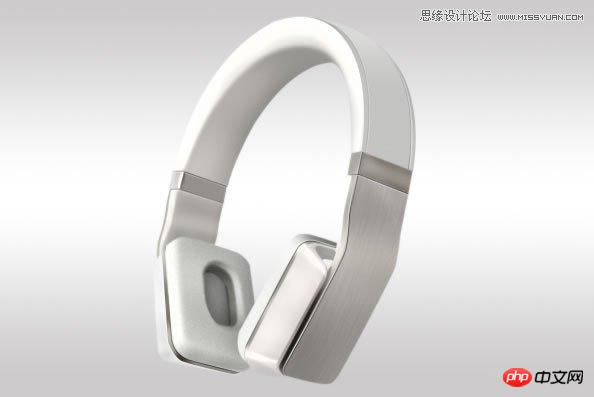
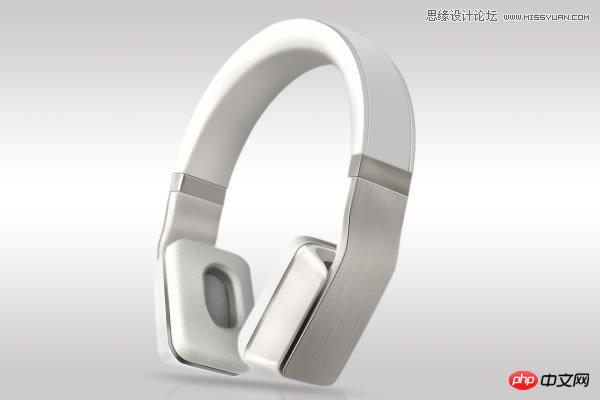
最终的效果

Step 1: 新建文件
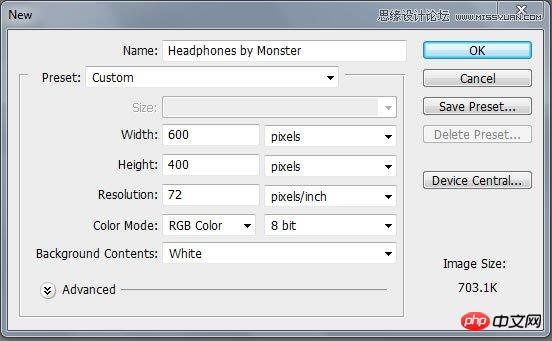
打开PS,新建一个文件,然后设置参数 (Command/Command/Ctrl + N). 使用下面的参数;
分辨率: 72dpi, 颜色模式 RGB , 尺寸: 600×400 px.
Step 2: 创建背景
应用下面的渐变设置创建一个合适的背景(G)

使用渐变工具 (G) 创建一个背景像下图所示的那样。

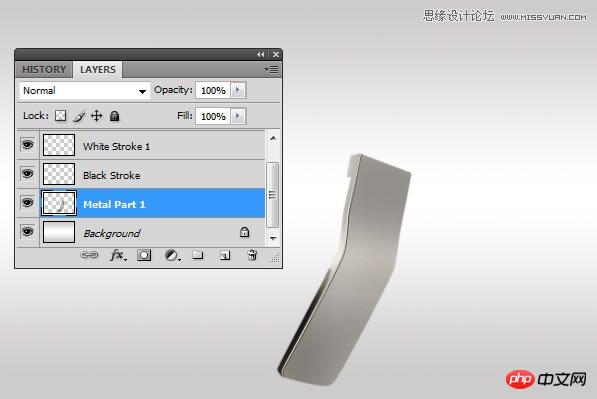
Step 3: 开始创建耳机
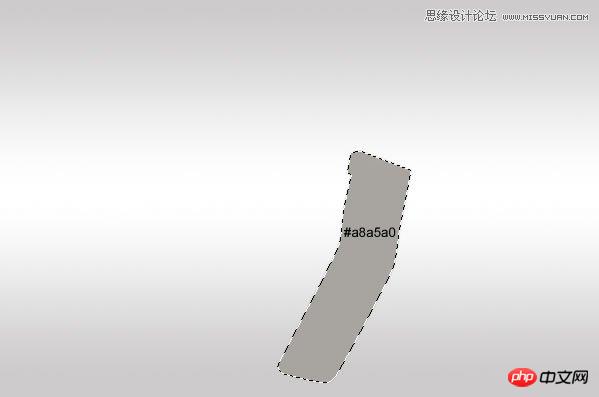
创建一个新图层(Command/Ctrl + Shift + N) 然后使用选择工具新建一个选取, 个人而言我更喜欢用钢笔工具(P) 因为可以做出更好的选区使用钢笔, 然后填充这个图层使用灰颜色. 我用 #a8a5a0.
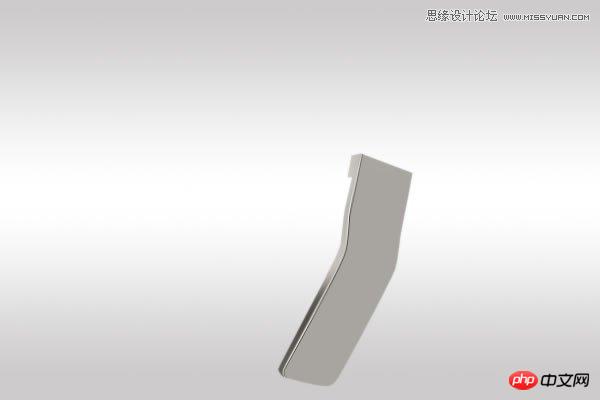
使用加深 (O) 和减淡工具 (O)涂抹下图所示的地方。

你要获得的图形像下图那样。

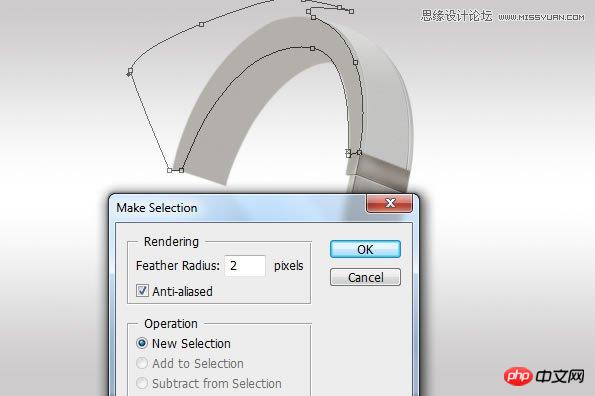
Step 4: 增加描边
倒一个新层 (Command/Ctrl + Shift + N)画出一个路径像我做的那样。

单击右键选择画笔描边路径 (笔刷大小必须是2px左右)
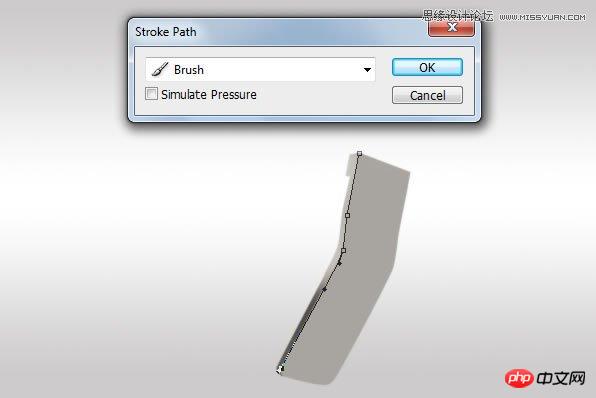
单击“ok”,描边路径做出的效果如下图所示。

Step 5:创建黑色的描边
复制白色的描边图层 (Command/Ctrl + J) 然后向右移动1px ,使用橡皮擦工具 (E) 让它看起来舒服一些。
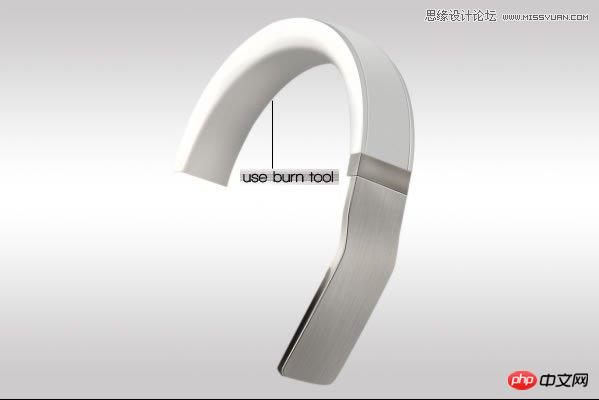
Step 6: 增加投影和高光
选择 Metal Part 图层使用加深与减淡工具(O)增加一些投影和高光。让它更有对比,突出质感。
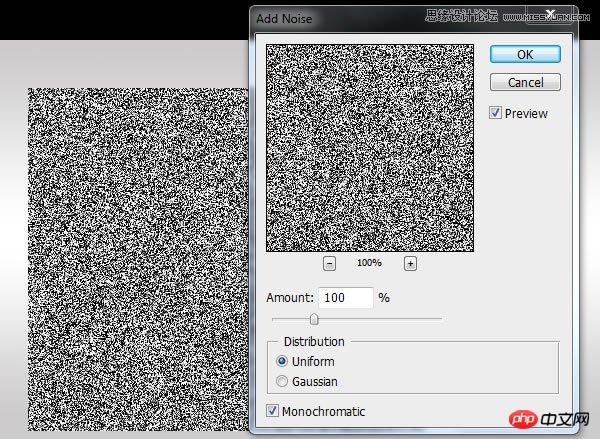
Step 7:金属质感
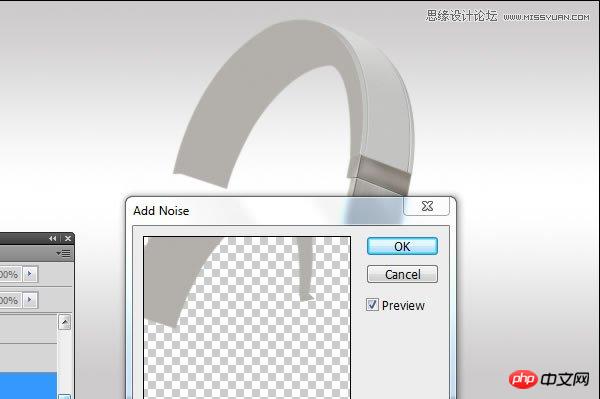
新建一个层, 使用矩形工具填充一个颜色 (#808080) 像我画的那样。

到滤镜 > 添加噪点 > 噪点设置像下图所示。
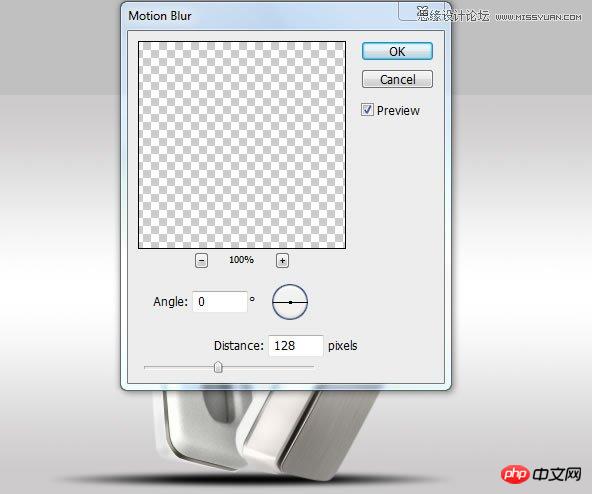
然后是 滤镜 > 模糊 > 动感模糊

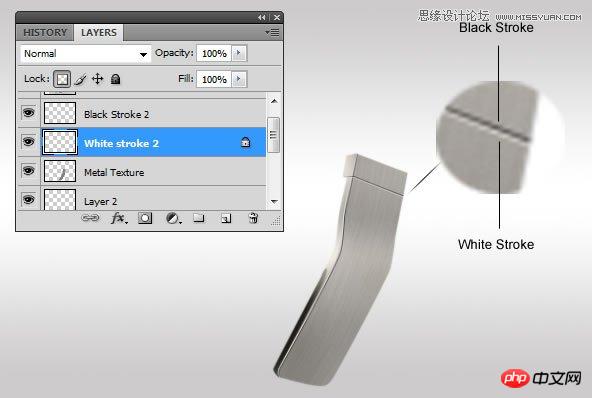
Step 8: 固定这个金属材质
减少刚创建的金属材质的图层的透明度到15%,然后使用自由变换工具,让它更好地与下面的图层贴合。

使用橡皮擦 (E)清除多余的材质,让它看起来像下图所示的那样。

使用第四步和第五步的技术创建一个黑色的和白色的描边。
使用钢笔工具(P)创建一个选区,在金属材质的上部,然后使用加深工具,稍微加深一些。
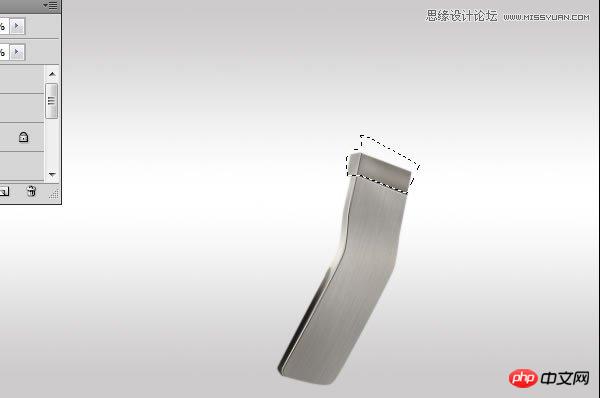
Step 9: 创建上面部分 创建一个新层 (Command/Ctrl + Shift + N) 创建一个路径(P)想下面图片所示的那样。 填充路径,使用一个亮灰色 (#c3c3c1) 滤镜 噪点 添加噪点 使用下图的设置 创建一个新层(Command/Ctrl + Shi
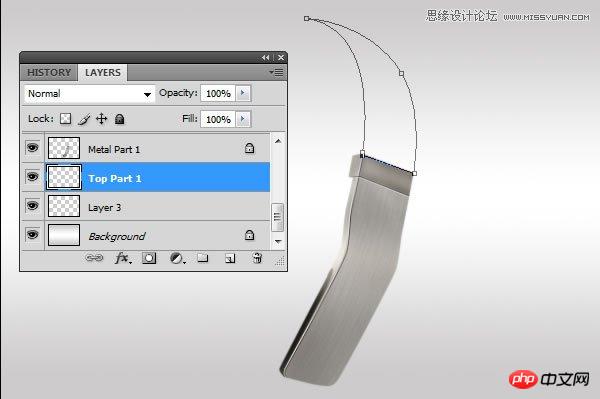
填充路径,使用一个亮灰色 (#c3c3c1)

滤镜 > 噪点 > 添加噪点 使用下图的设置

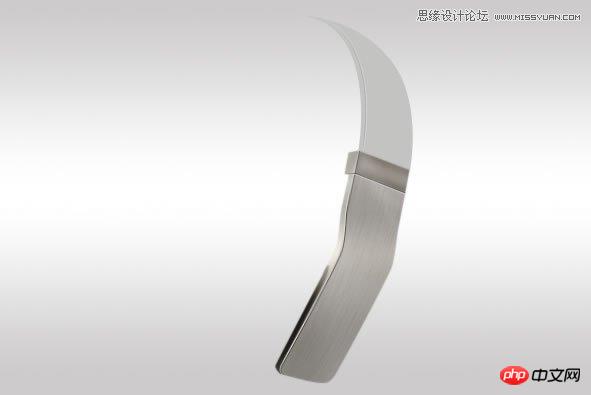
创建一个新层(Command/Ctrl + Shift + N) 使用钢笔工具(P) 创建一个路径。

添加两个描边白色和黑色的然后使用橡皮工具,擦掉不要的部分,让效果更好些。
复制上面创建的图层 (Command/Ctrl + J)把它放在上部的右边。

Step 11
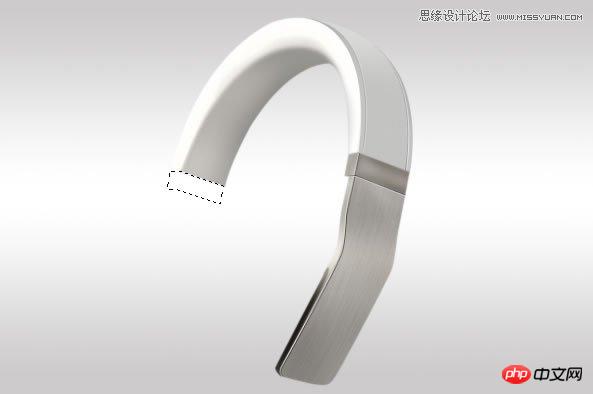
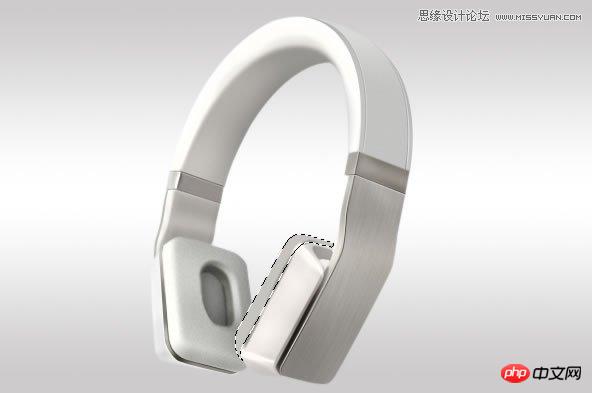
创建下一个选取,使用钢笔工具。
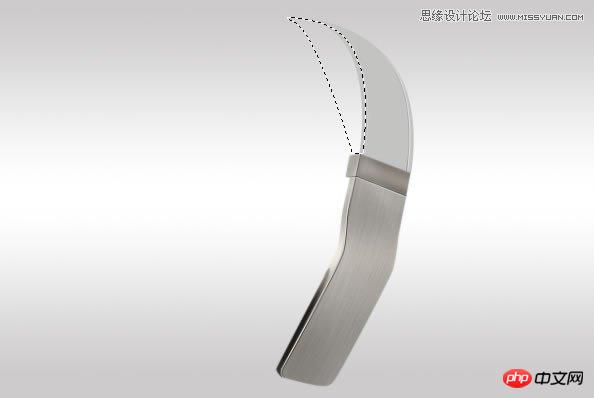
在创建的选取,使用加深工具,添加阴影,到达加深的目的。

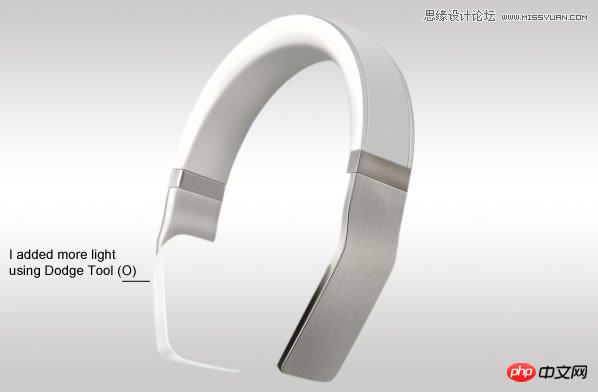
Step 12: 高光
继续使用钢笔工具 (P)

这时使用减淡工具 (O) 变亮一些,增加一些光,像我所做的那样。

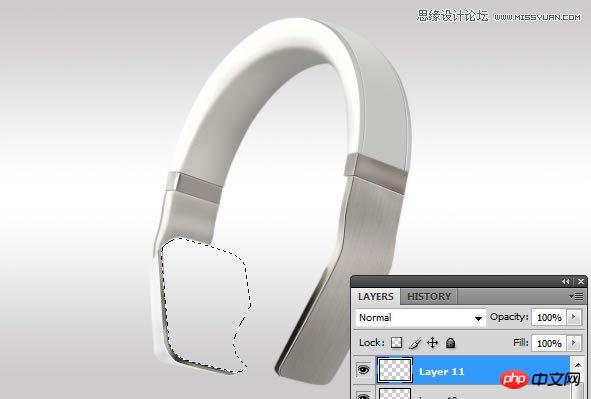
Step 13
创建一个新层,使用钢笔工具创建一个选取。

填充这个选取一个灰色, 我用 #b3b0ab
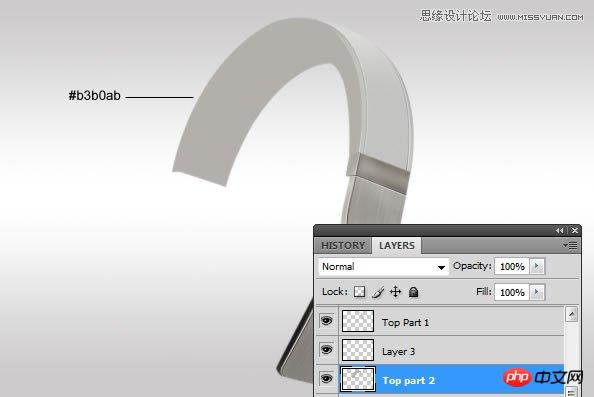
使用滤镜 > 噪点 > 添加噪点 ,使用如下图的设置。
Step 14 选取钢笔工具(P), 创建一个路径,右键单击路径一个选择选项。让这个选取使用这些设置。 使用减淡工具 (O) 增加高光, 增加一些数量多的光在这个选取. Step 15 创建选取画出下面的部分。 增加一些阴影, 使用
使用减淡工具 (O) 增加高光, 增加一些数量多的光在这个选取.

Step 15
创建选取画出下面的部分。

增加一些阴影, 使用加深工具(O)
Step 16
创建一个新层 (Command/Ctrl + Shift + N) 创建下一个选区选择羽化: 0.3 px
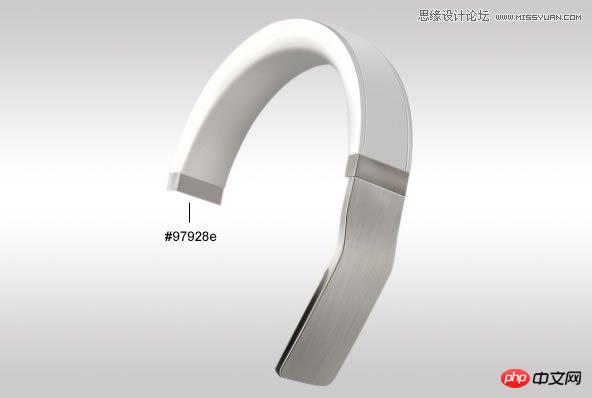
填充这个选取一个灰色,我使用#97928e 增加一些高光 和阴影在这个图层.
继续使用加深与减淡工具。
Step 17
继续创建一个选取使用钢笔工具。
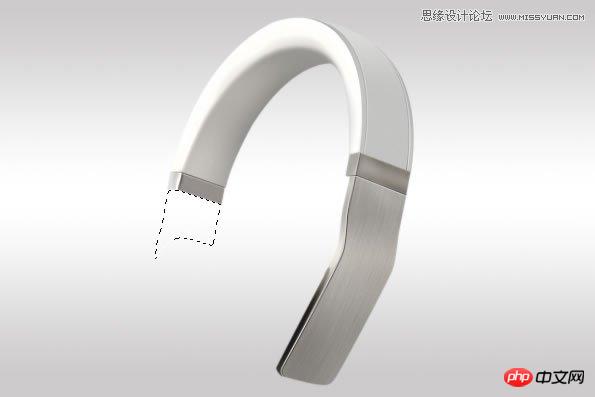
填充这个选取一个颜色 #b0ada8
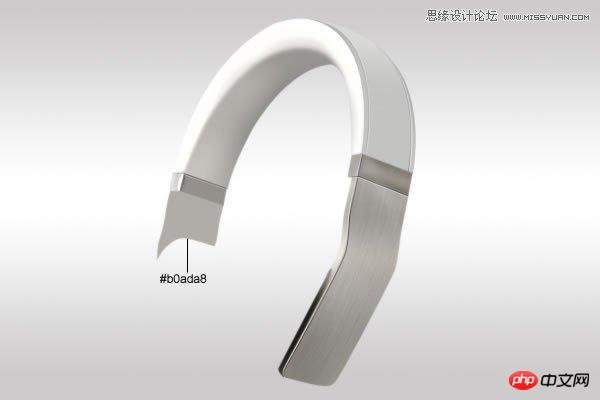
像先前的步骤那样使用减淡工具(O) 在上面添加一些高光。

下面使用加深工具(O)

Step 18
创建一个新选区,如我创建的那样。

填充一个颜色 #ececec
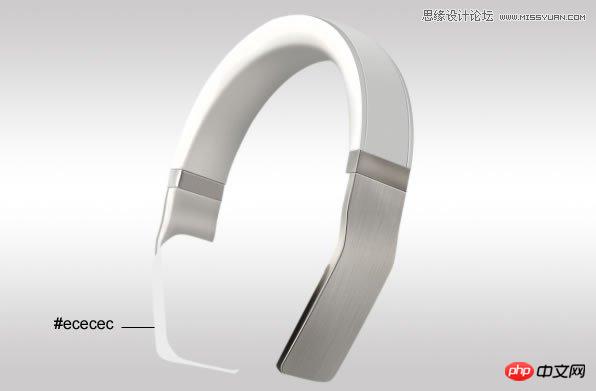
使用减淡和加深工具在表示的地方。
Step 19:添加描边 增加一个2PX 的描边。 Step 20 Draw a selection like I did in the image below. Dont forget, use Feather Radius: 0.3 px 创建一个新层, 填充灰色,然后再这个图层上面使用加深与减淡工具。 在
Step 19:添加描边
增加一个2PX 的描边。

Step 20
Draw a selection like I did in the image below. Don’t forget, use Feather Radius: 0.3 px

创建一个新层, 填充灰色,然后再这个图层上面使用加深与减淡工具。

在刚刚创建的图层上面,添加一个1Px的描边。

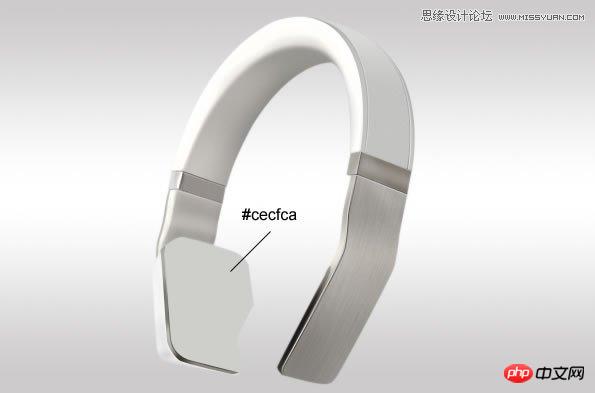
Step 21
创建一个新图层,使用选择工具(羽化: 4-5px)
使用一个灰色 #cecfca,填充这个选取。
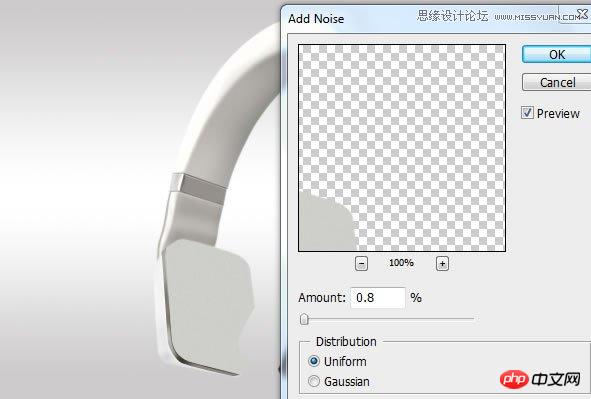
使用滤镜 > 噪点 > 添加噪点使用下面的设置。
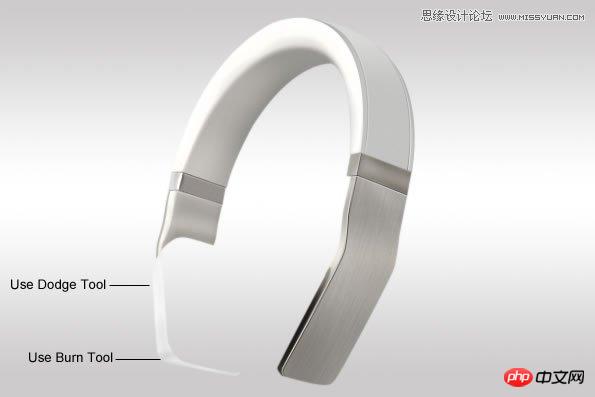
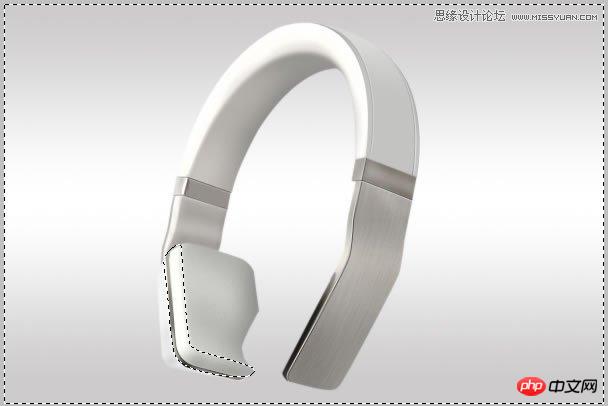
Step 22:添加一些高光和阴影
继续,使用加深与减淡工具。

使用加深与减淡工具 (O)添加一些阴影与高光,如下图标示的地方。

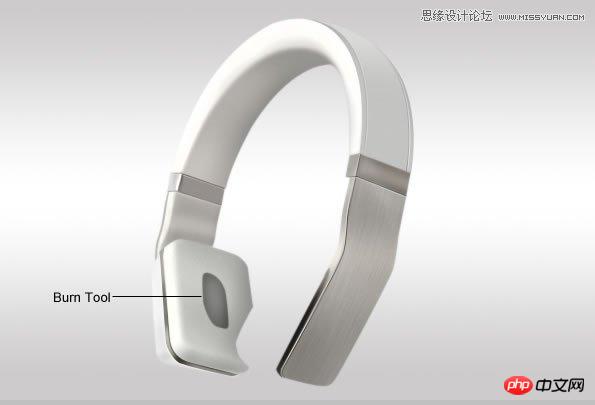
Step 23: 更多的阴影
反向选择 添加更多阴影使用加深工具 (O).
Step 24
在中间的那个地方, 创建下一个选取

使用加深工具 或者亮度对比度创建一些少许的阴影.
创建另一个选� � 使用加深工具,做出看起来像是3D的那种效果。 Step 25: 更多的光和投影。 在顶部的洞,添加一些光和投影,使用加深与减淡工具。 使用滤镜 噪点 添加噪点。 Step 26: 左边的那个 创建一个新层(Comma
使用加深工具,做出看起来像是3D的那种效果。

Step 25: 更多的光和投影。
在顶部的洞,添加一些光和投影,使用加深与减淡工具。

使用滤镜 > 噪点 >添加噪点。

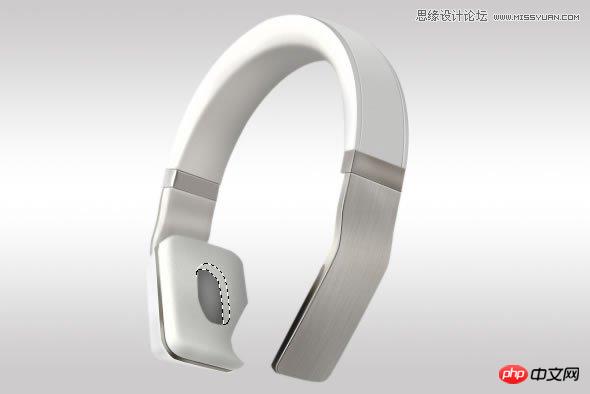
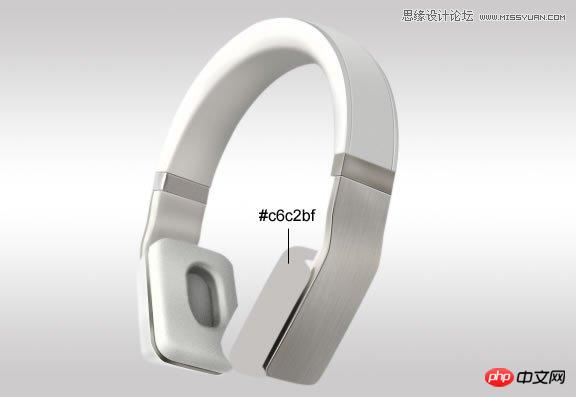
Step 26: 左边的那个
创建一个新层(Command/Ctrl + Shift + N)创建一个下图所示的选区。

给这个选区填充一个颜色 #c6c2bf
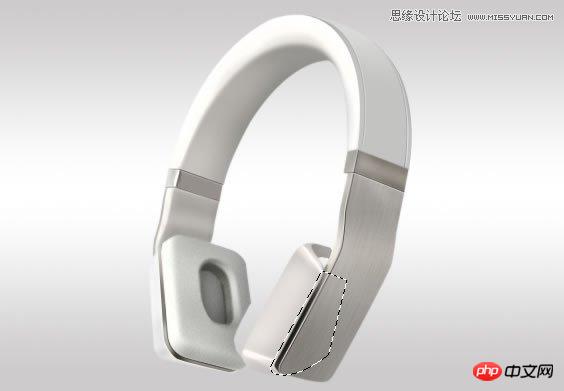
Step 27: Highlights and Shadows
Make a selection using Pen Tool (P)

使用加深工具(O) 在中间调那里添加一些阴影。

使用减淡工具 (O) 添加一些光。
Step 28
让我所做的那样选择另外一个部分。
使用加深工具 (在中间调) 增加一些阴影。

Inverse the selection (Command/Ctrl + I) and use Dodge Tool (O) to add some light

Step 29: 另一个金属材质
创建一个选取,使用钢笔工具。

填充一个灰色。

现在有两种使用渐变工具创建金属效果 或者是使用加深工具,我选择后者。
Step 30 创建两外一个选区,填充灰色。 添加一些阴影和高光。使用加深与减淡工具。 增加一个1px的描边。 Step 31 使用橡皮擦(E)擦去不必要的部分,让它看起来更满意。 复制这个描边层。 (Command/Ctrl + J), 让它向
添加一些阴影和高光。使用加深与减淡工具。
增加一个1px的描边。
Step 31
使用橡皮擦(E)擦去不必要的部分,让它看起来更满意。
复制这个描边层。 (Command/Ctrl + J), 让它向下移动一个像素.
Step 32: 阴影
创建一个新层,在背景层使下一个选择使用椭圆选框工具

填充,使用黑色。
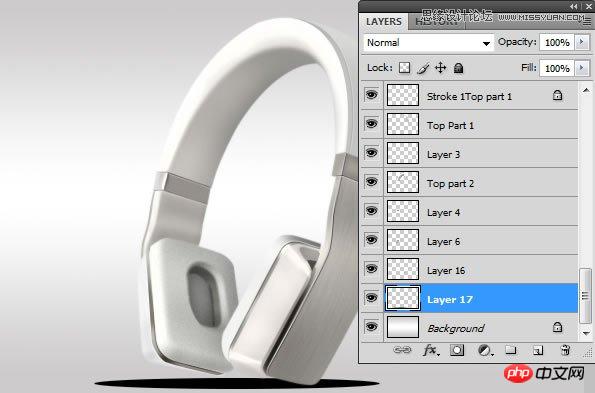
Step 33
滤器>模糊>高斯模糊
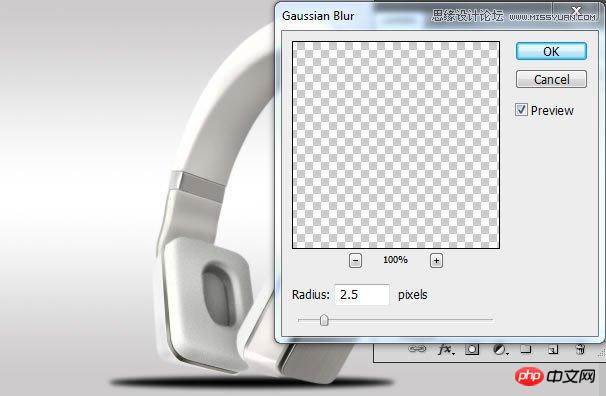
然后过滤>模糊>动态模糊和使以下设置
降低不透明度或擦除使用橡皮擦工具(E)让它看起来更真实

Final Image

Hot AI Tools

Undresser.AI Undress
AI-powered app for creating realistic nude photos

AI Clothes Remover
Online AI tool for removing clothes from photos.

Undress AI Tool
Undress images for free

Clothoff.io
AI clothes remover

AI Hentai Generator
Generate AI Hentai for free.

Hot Article
Hot Tools

Notepad++7.3.1
Easy-to-use and free code editor

SublimeText3 Chinese version
Chinese version, very easy to use

Zend Studio 13.0.1
Powerful PHP integrated development environment

Dreamweaver CS6
Visual web development tools

SublimeText3 Mac version
God-level code editing software (SublimeText3)
Hot Topics
 1379
1379
 52
52

 How to disable taskbar thumbnail preview in Win11? Turn off the taskbar icon display thumbnail technique by moving the mouse
Feb 29, 2024 pm 03:20 PM
How to disable taskbar thumbnail preview in Win11? Turn off the taskbar icon display thumbnail technique by moving the mouse
Feb 29, 2024 pm 03:20 PM
This article will introduce how to turn off the thumbnail function displayed when the mouse moves the taskbar icon in Win11 system. This feature is turned on by default and displays a thumbnail of the application's current window when the user hovers the mouse pointer over an application icon on the taskbar. However, some users may find this feature less useful or disruptive to their experience and want to turn it off. Taskbar thumbnails can be fun, but they can also be distracting or annoying. Considering how often you hover over this area, you may have inadvertently closed important windows a few times. Another drawback is that it uses more system resources, so if you've been looking for a way to be more resource efficient, we'll show you how to disable it. but
 How to distinguish left and right earphones rl How to wear left and right earphones
Feb 22, 2024 pm 05:10 PM
How to distinguish left and right earphones rl How to wear left and right earphones
Feb 22, 2024 pm 05:10 PM
L stands for left, worn on the left ear, and R stands for right, worn on the right ear. Analysis 1 Usually there are logos on the earphones. The English letters are abbreviated as L and R. L stands for left and is worn on the left ear. R stands for right and is worn on the right ear. The specific positions marked by R and L are not fixed and are based on the specific headphones. Some headphones will mark R in red. For headphones that come with a mobile phone, the side with the microphone and buttons is usually on the right side. Supplement: Types of Headphones 1 Headphones are a symbol of people’s portable audio. Headphones can be divided into two specifications: OMTP specifications are generally called national standards, and CTIA are generally called international standards. Earphones are classified according to their energy conversion methods, specifically: dynamic coil method, moving iron method, static method
 How to remove icons in Ubuntu start menu?
Jan 13, 2024 am 10:45 AM
How to remove icons in Ubuntu start menu?
Jan 13, 2024 am 10:45 AM
There are many software icons listed in the Ubuntu system start menu. There are many uncommon icons. If you want to delete them, how should you delete them? Let’s take a look at the detailed tutorial below. 1. First enter the ubuntu desktop and click on the start menu under the left panel. 2. You can find a text editor icon inside, we need to delete it. 3. Now we return to the desktop and right-click the mouse to open the terminal. 4. Use the command to open the application list directory. sudonautilus/usr/share/applicationssudonautilus~/.local/share/applications5. Find the corresponding text editor icon inside. 6. Then go straight
 Download the phone settings icon to the desktop 'Know in seconds: Steps to change icons for apps on Android phones'
Feb 06, 2024 pm 04:27 PM
Download the phone settings icon to the desktop 'Know in seconds: Steps to change icons for apps on Android phones'
Feb 06, 2024 pm 04:27 PM
In order to beautify their desktop, many users like to change their desktop themes regularly to keep them fresh. However, changing the theme will not change the icon of the third-party APP, and the personalized beautification is not thorough enough. If you're tired of the same app icons, replace them. Theoretically, if you want to change the icon for a mobile app, you usually need a ROOT system and some tools to unpack and replace the icon. But since the vast majority of mobile phones no longer support the ROOT system, we need to find other methods to achieve it. For example, some specific applications may offer the option to customize the icon, or personalize the icon through a third-party launcher. In addition, some mobile phone brands have also launched special theme and icon stores for users to choose and change icons. In major app stores,
 What do the 5G UC and 5G UW icons on your T-mobile smartphone mean?
Feb 24, 2024 pm 06:10 PM
What do the 5G UC and 5G UW icons on your T-mobile smartphone mean?
Feb 24, 2024 pm 06:10 PM
T-Mobile users have started noticing that the network icon on their phone screens sometimes reads 5GUC, while other carriers read 5GUW. This is not a typo, but represents a different type of 5G network. In fact, operators are constantly expanding their 5G network coverage. In this topic, we will take a look at the meaning of the 5GUC and 5GUW icons displayed on T-Mobile smartphones. The two logos represent different 5G technologies, each with its own unique characteristics and advantages. By understanding what these signs mean, users can better understand the type of 5G network they are connected to so they can choose the network service that best suits their needs. 5GUCVS5GUW icon in T
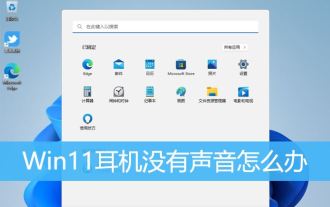
 How to solve the problem of headphone noise in win11
Dec 26, 2023 pm 07:04 PM
How to solve the problem of headphone noise in win11
Dec 26, 2023 pm 07:04 PM
After updating to the win11 system, many friends have experienced sizzling noise from their headphones, which is very painful. This may be because the microphone is turned on in the headphones at the same time. We can try to turn it off to solve the problem. Let’s take a look at the details below. solution. What to do if there is no sound when plugging headphones into the computer in Windows 11? 1. First, find the speaker-shaped audio button in the lower right corner of the screen, right-click to select it, and click "Playback Devices" 2. In the pop-up window, click "Speaker" at the top, and then click "Properties" at the bottom ”3. Open the speaker properties interface and select the “Level” tab above. 4. Find the microphone settings slider and slide it to the leftmost "0" 5. Then return to the playback device, select "Sound" and open the properties. 6. Then click on the top of the window
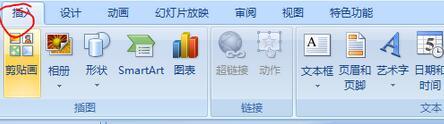 How to insert excel icons into PPT slides
Mar 26, 2024 pm 05:40 PM
How to insert excel icons into PPT slides
Mar 26, 2024 pm 05:40 PM
1. Open the PPT and turn the page to the page where you need to insert the excel icon. Click the Insert tab. 2. Click [Object]. 3. The following dialog box will pop up. 4. Click [Create from file] and click [Browse]. 5. Select the excel table to be inserted. 6. Click OK and the following page will pop up. 7. Check [Show as icon]. 8. Click OK.
 Collection of solutions to the silent problem of Win11 headphones
Jan 05, 2024 pm 04:37 PM
Collection of solutions to the silent problem of Win11 headphones
Jan 05, 2024 pm 04:37 PM
What should I do if the headphones are plugged into my Win11 computer but there is no sound from the headphones? First of all, we need to make sure that the headset is good, and then check whether the headset and the computer are connected properly. This article is the solution to the problem of no sound from Win11 headset brought to you by this site. Method 1: 1. First, press the [Win+X] key combination on the keyboard, or right-click the [Windows Start Logo] on the taskbar, and then select [Settings] in the menu item that opens; 2. Settings window, Click [System] on the left sidebar, and click [Sound (Volume Level, Output, Input, Sound Device)] on the right side; 3. The current path is: System > Sound, under Output, select [Headphones]; Method 2: 1. First , press the [Win] key, or click [Win] on the taskbar
