

How to identify iPhones assembled in India?
Apr 30, 2024 am 09:22 AMWhen buying an iPhone, how to tell whether it is an Indian-assembled product has aroused consumer concern. The influx of iPhones assembled in India has created a need for consumers to accurately identify their origins to make informed purchasing decisions. In order to solve this problem, PHP editor Xigua will provide a detailed identification guide to help you identify iPhones assembled in India to ensure that you get authentic and high-quality products.

How to identify iPhones assembled in India?
To determine whether an iPhone is assembled in India, you can use the following methods to tell the difference: 1. Check the IMEI number: Check the "About this" menu in the phone settings and find the "IMEI" one. column. Based on the last five digits of the IMEI number, if it ends with "0" or "8", the iPhone was assembled in India. 2. Open the back of the iPhone: For iPhone SE, iPhone 6s, iPhone 7, iPhone XR and other models, there is a small label at the bottom of the back, which will indicate the assembly location. If the mark is "Designed by Apple in California Assembled in India" or similar words, it means that the iPhone is assembled in India. 3. Online query: You can enter the IMEI number to query through Apple's official website or other reputable mobile phone certification websites, and the assembly location and other relevant information of the mobile phone will be displayed. It’s important to note that even if an iPhone is assembled in India, its core components may still be manufactured in other countries, as Apple’s global supply chain is spread out. The assembly location is not a complete representation of where a product is manufactured.
How to distinguish the positive and negative poles of LED lights?
1. The positive and negative poles of LED lights are fixed no matter what color they are.
1. Plug the LED light directly: the longer leg is the positive pole and the shorter leg is the negative pole. You can also carefully observe the electrodes inside the tube. The smaller one is the positive electrode, and the larger, bowl-shaped one is the negative electrode.
2. SMD LED light: Looking down, the colored line on one side is the negative electrode, and the other side is the positive electrode.
2. You can also use the ohm setting of a multimeter to measure. Adjust the pointer multimeter to the Rx1 setting. When the LED lights up, the red test lead is connected to the positive pole and the black test lead is connected to the negative pole.
3. Since the LED turn-on threshold is about 1.5-1.8V. It's possible that the voltage supplied by the digital multimeter won't start it, so just look at the markings. For SMD LED lights, the green dot is the negative pole, and the opposite side is the positive pole.
The LED cable in the computer, the computer switch cable, and the restart cable. How to plug in HDDLED?
The chassis connection cable hddled means: hard disk indicator light. This is the connection cable between the computer host and the motherboard. When the computer is turned on and running normally, the hard disk indicator light will glow red and flash.
Tips: Connecting these chassis cables is actually very simple. The most important thing is to find the location to plug these cables on the motherboard. There will be markings next to the pins. According to the markings on the motherboard and the markings on the line, Just plug them in as soon as they match. If it is not marked on the motherboard, it will be marked on the motherboard manual.
How to tell whether a laptop is assembled or original?
There is no concept of assembly and originality in notebook computers, because notebook computers are all assembled in the manufacturer's production workshop.
I think the question you asked is how to tell whether the computer is brand new or whether the hardware has been replaced, right? If a brand-new computer has a pre-installed system, there will be a process of decompressing the system when it is turned on for the first time. If it does not have this process, it may be a sample machine. Then use Master Lu to check the power-on time of the hard disk. Generally, if it is less than 10 hours, it is a new machine. , more than ten hours is the prototype machine. As for whether the configuration has been changed, you can check whether the computer body number and the cabinet number are consistent. If they are consistent, use Master Lu to detect the hardware configuration, and then check according to the configuration on the configuration sheet...What to do when assembling a computer Check whether the computer is compatible?
1. Check whether the core of the motherboard is Intel or AMD, and choose CPU;
2. Check whether the number of pins on the motherboard and CPU are the same;
3. Check the memory of the motherboard Whether the slot is ddr2 or ddr3, now it is usually ddr3;
4. Check whether the motherboard specification is ATX or m-ATX, and choose the chassis;
5. Check the internal volume of the chassis, and whether the graphics card is Extra long;
6. Check the power of the power supply and whether it can power all accessories;
7. For more demanding requirements, check the size of the chassis and the length of the power cord, and whether the backline is long enough. That’s all I can think of for now, welcome to add!
How to distinguish the positive and negative poles of LED lights?
Answer: How to identify the positive and negative poles of LED energy-saving lamps:
The most commonly used method is the multimeter detection method. When using a multimeter to detect light-emitting diodes, you must use the "R×l0k" setting. The voltage drop of the tube that is a light-emitting diode is about 3V, and the multimeter is at "R×lk"
and below. The battery inside the meter is only 1.5V. below the pipe pressure drop. Regardless of forward or reverse connection, the light-emitting diode cannot be turned on and cannot be detected. In the "R×1k" setting, the meter is connected to a 9V (or
15V) high-voltage battery, which is higher than the tube voltage drop, so it can be used to detect light-emitting diodes. When testing, how to distinguish the positive and negative poles of the magnet that separates the two test leads into
balls?
Magnets have no positive and negative stages, only north and south poles.
Take a magnet with known north and south poles and bring it close. If it repels, the two magnetic poles that are close to each other are the same. If it is close to the south pole, you don’t know that this end of the magnet with the north and south poles is also a south pole, so the other end It's the North Pole.
How to plug in the cable of the computer's HDDLED running light? The light isn't on?
HDDLED± This is the hard drive light and there is a powerled which is the power light of the switch. Well, the letters in the corresponding positions on the motherboard, or the letters on the plug may not be so many, they are abbreviations. These two lights are You must distinguish the positive and negative poles, otherwise they will burn. It is best to have the motherboard manual in hand and follow the manual. Generally speaking, the positive pole of the motherboard is a thick line, and the negative pole is a thinner line. The corresponding wires of these plugs, Generally, the lighter color is the negative pole.
How to assemble computer cables?
Just plug in the internal lines of the computer and connect them. Just pay attention to the connection position of the external circuit so that it doesn't get in the way.
How to test the assembled computer?
To test an assembled computer, you can take the following steps to ensure it is functioning properly:
1. Perform an external inspection:
- Check that the power cord is connected properly, and Make sure the power plug is inserted securely.
- Check that the video connection between the monitor and computer is secure.
- Make sure all external devices (e.g. keyboard, mouse, etc.) are connected correctly.
2. Power startup detection:
- Press the power button to start the computer, and observe whether the computer starts normally and hear corresponding sounds, such as fan sound or hard disk working sound.
- If the computer does not respond, you can check whether the power cord is plugged in properly, whether the power switch is on, or try changing other power cords and sockets.
3. System self-test:
- After turning on the computer, a series of self-test procedures will be performed to display the basic input/output system (BIOS) interface or manufacturer's logo. Make sure these self-test programs can run normally without abnormal prompts.
4. Operating system startup:
- If the computer successfully passes the self-test program, the operating system should start booting. Make sure that the startup process of the operating system proceeds normally and there are no error messages.
5. Hardware function test:
- Run hardware function test software, such as Memtest86 (test memory), CrystalDiskInfo (test hard drive), etc., to ensure the stability and normal operation of each hardware component .
6. Performance test:
- Run performance testing software, such as 3DMark (test graphics card performance), Prime95 (test CPU performance), etc., to evaluate the overall performance and stability of the computer.
7. Temperature monitoring:
- Use temperature monitoring software, such as HWMonitor, to monitor the temperature of various hardware components. Make sure the temperature is within a reasonable range and don't overheat.
Please note that the above steps are general recommendations only. If you encounter a specific problem or want a more detailed and comprehensive test, you can use professional diagnostic tools or consult a professional, such as a computer support technician or a computer repair expert, for accurate detection and solutions.
The above is the detailed content of How to identify iPhones assembled in India?. For more information, please follow other related articles on the PHP Chinese website!

Hot Article

Hot tools Tags

Hot Article

Hot Article Tags

Notepad++7.3.1
Easy-to-use and free code editor

SublimeText3 Chinese version
Chinese version, very easy to use

Zend Studio 13.0.1
Powerful PHP integrated development environment

Dreamweaver CS6
Visual web development tools

SublimeText3 Mac version
God-level code editing software (SublimeText3)
Hot Topics


 iPhone 16 Pro and iPhone 16 Pro Max official with new cameras, A18 Pro SoC and larger screens
Sep 10, 2024 am 06:50 AM
iPhone 16 Pro and iPhone 16 Pro Max official with new cameras, A18 Pro SoC and larger screens
Sep 10, 2024 am 06:50 AM
iPhone 16 Pro and iPhone 16 Pro Max official with new cameras, A18 Pro SoC and larger screens
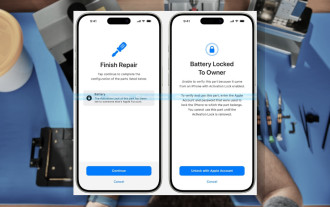 iPhone parts Activation Lock spotted in iOS 18 RC — may be Apple\'s latest blow to right to repair sold under the guise of user protection
Sep 14, 2024 am 06:29 AM
iPhone parts Activation Lock spotted in iOS 18 RC — may be Apple\'s latest blow to right to repair sold under the guise of user protection
Sep 14, 2024 am 06:29 AM
iPhone parts Activation Lock spotted in iOS 18 RC — may be Apple\'s latest blow to right to repair sold under the guise of user protection
 iPhone parts Activation Lock may be Apple\'s latest blow to right to repair sold under the guise of user protection
Sep 13, 2024 pm 06:17 PM
iPhone parts Activation Lock may be Apple\'s latest blow to right to repair sold under the guise of user protection
Sep 13, 2024 pm 06:17 PM
iPhone parts Activation Lock may be Apple\'s latest blow to right to repair sold under the guise of user protection
 Gate.io trading platform official app download and installation address
Feb 13, 2025 pm 07:33 PM
Gate.io trading platform official app download and installation address
Feb 13, 2025 pm 07:33 PM
Gate.io trading platform official app download and installation address
 LCD iPhone becomes history! Apple will be completely abandoned: the end of an era
Sep 03, 2024 pm 09:38 PM
LCD iPhone becomes history! Apple will be completely abandoned: the end of an era
Sep 03, 2024 pm 09:38 PM
LCD iPhone becomes history! Apple will be completely abandoned: the end of an era
 How to install and register an app for buying virtual coins?
Feb 21, 2025 pm 06:00 PM
How to install and register an app for buying virtual coins?
Feb 21, 2025 pm 06:00 PM
How to install and register an app for buying virtual coins?
 Anbi app official download v2.96.2 latest version installation Anbi official Android version
Mar 04, 2025 pm 01:06 PM
Anbi app official download v2.96.2 latest version installation Anbi official Android version
Mar 04, 2025 pm 01:06 PM
Anbi app official download v2.96.2 latest version installation Anbi official Android version
 Apple Intelligence rolls out globally in iOS 18.1 beta 3 — EU and China still in Apple\'s dog box
Aug 31, 2024 am 10:19 AM
Apple Intelligence rolls out globally in iOS 18.1 beta 3 — EU and China still in Apple\'s dog box
Aug 31, 2024 am 10:19 AM
Apple Intelligence rolls out globally in iOS 18.1 beta 3 — EU and China still in Apple\'s dog box
