ps鼠绘透明杯子中燃烧的蓝色蜡烛
本教程介绍杯子及蜡烛的鼠绘方法。尤其杯子的制作比较费时间,需要制作透明及反光效果,要根据背景颜色及整体图片色彩来制作。其它的地方就比较简单!
最终效果

1)新建400*500文档,白背景。
2)先做桌面。新建图层1,设前景色为202/211/230,背景色为白色,执行云彩滤镜。复制这一层。回到图层1,执行风格化中的浮雕效果:角度-45,高度2,数量500%。然后稍微高斯模糊一下,半径约2。将图层1副本的模式设为叠加。这样桌面上铺的这张布便有了点皱纹了。选择图层1副本,加蒙板,复位色板后,用线性渐变,设置不透明度为25%,由右上向左下拉。合并这二个层,命名“桌面”。
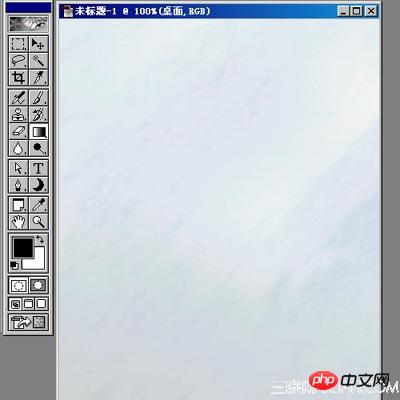
3 )新建一层,在上面画个矩形选区,设前景色为暗绿色(0/88/38),背景色为黑色,执行云彩。再用喷枪选暗紫色随便喷一下。
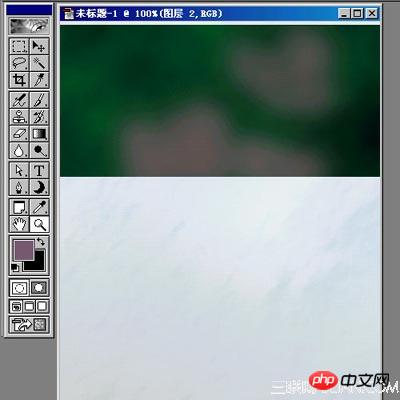
4)桌上是放了一束花的,现在来画花。新建一层,用大小约17的画笔,设置大小渐隐步长为15,拖出花的形状,这里的颜色是188/191/172。随便拖就行,等一下还要模糊的。再改变颜色画出花心。
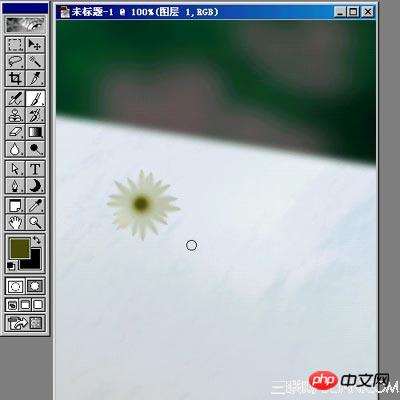
5)将花复制几朵出来,随便自由变换和旋转,再将它们放在一起,合并起来。
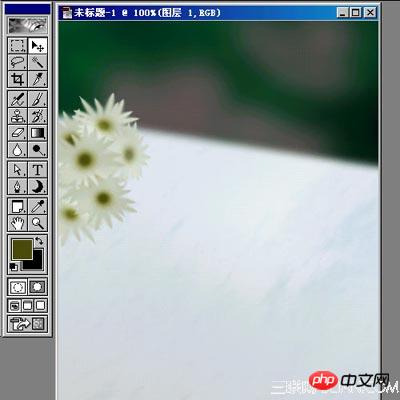
6)在花的下面建一层,用画笔画枝。画好后和花合并,高斯模糊约4。再向下合并到桌面。
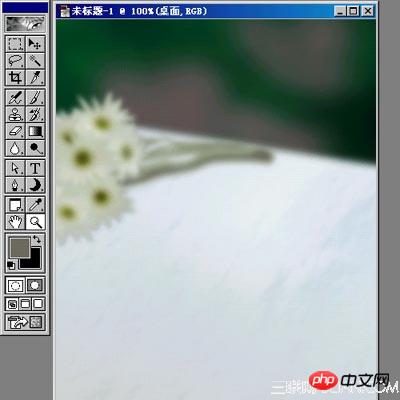
7)新建一层,画椭圆,填充蓝黑色(71/88/111),将选区储存为ALPHA1,等会儿要用。将选区收缩约6个像素,向上移动几个像素后,删除。
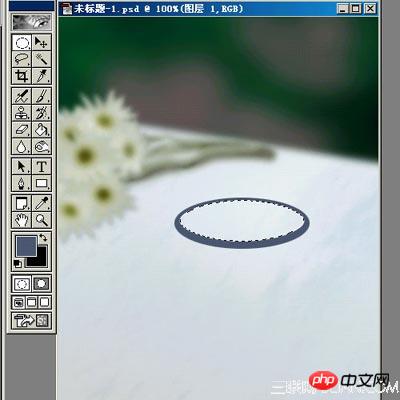
8)将这一层名为“杯口”。用低透明度的橡皮在上下两条边上轻擦,使它变得半透明,再用模糊工具檫。
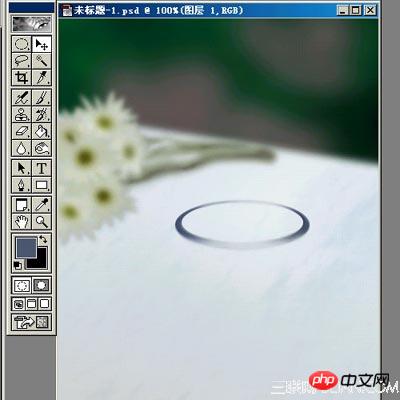
9)在“杯口”层的下面建层,用椭圆工具画出杯沿的高光和暗调,再和“杯口”层合并。

10)在“杯口”层的下面新建一层,命名“杯身”。画矩形,按CTRL+SHIFT点击通道面板中的ALPHA1,得到选区,填充蓝黑色(71/88/111)。用透视将杯身下面收细些,再画椭选区在杯的两边删除得到杯两边的弧度,同样用椭圆选区处理杯底。
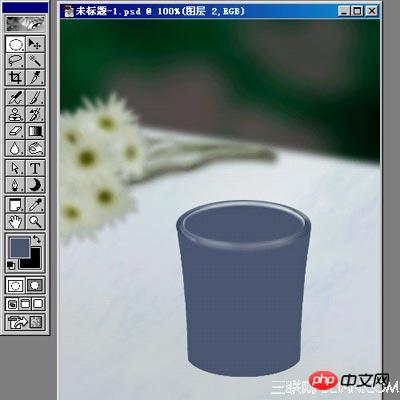
11)将“杯身”的不透明度降为12%。新建一层,用喷枪画出杯身的一些阴影和被蜡烛污染的地方。用橡皮檫修改和调整不透明度到适合后,向下合并到杯身。
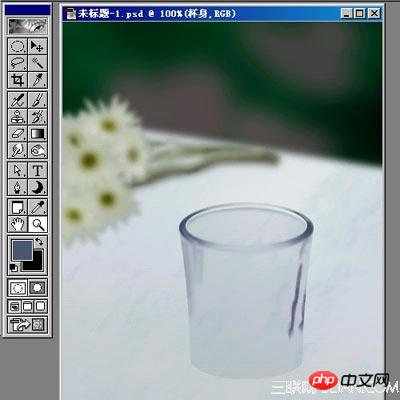
12)新建一层,载入杯身的不透明区域,填充浅灰色,不要取消选择,将选区向上移动几个像素后,删除。加图层样式,选择内发光:大小约1像素,颜色为黑色,稍微降低不透明度。再选择投影:不透明度50%,距离2,大小2,其余按默认。回到图层,在这一层的“效果”中点右键,选“创建图层”,将效果分离出来,用橡皮檫修改内发光层,完成后这几个层全部合并到“杯身”层。

13)新建一层,在杯底稍上的地方用钢笔钩出选区,用喷枪,选黑色和深绿色在选区中喷涂。再新建一层,换白色喷出高光,完成后将这二层合并到杯身。

14)新建一层,命名“烛底”,画垂到杯底的蜡。用钢笔钩出选区,填充蓝(40/47/125),用橡皮檫出左边不规则的区域,再用减淡工具作一些局部减淡。最后高斯模糊约2。

15)在“烛底”层下面新建一层,命名“蜡烛”。用钢笔钩出蜡烛的形状,填充蓝色(60/62/113)。对蜡烛的上部和两边进行高光和暗调的减淡,对底部和中间一些局部进行加深。由于蜡烛的上部受到烛光的照射会有些红色,新建一层,选择淡淡的紫红色(171/147/183),用喷枪,降低压力轻轻喷上一层。合并到“蜡烛”层。
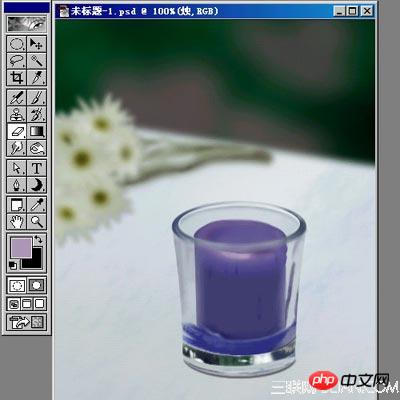
16)在“蜡烛”层上新建一层,在蜡烛的上部画个椭圆,填充深蓝色。双击图层来到图层样式,将高级混合中的填充 不透明度降为25%。选择斜面和浮雕:方向下,大小7,软化11,高光的不透明度为0,暗调的颜色为深蓝色,其余按默认。回到图层,用模糊工具作一些模糊,然后向下合并到蜡烛层。
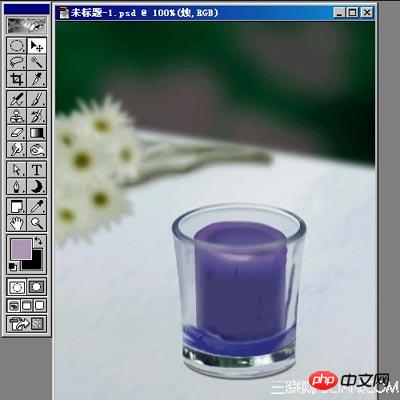
17)新建一层画火。选择深蓝色,用喷枪喷出烛心下的蜡,作一些局部减淡,再选择黑色画出烛心。新建一层,用钢笔钩出火的形状,填充白色。加图层样式,选择内发光,颜色为淡黄色。再用喷枪,在火的底部喷点紫红色。将这几个层合并到“蜡烛”层。
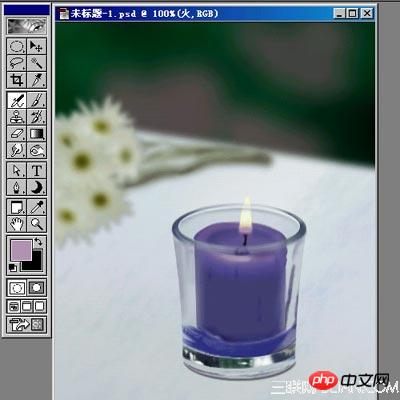
18)这时发现火的上面有部分被“杯口”层遮住了。可以用橡皮檫檫掉杯口层中火的部分,如果不想破坏杯口,可用矩形选出火的上部分,粘贴出来,放到杯口层的上面。现在基本上完成了,在杯口上喷点紫红色作为火的反光。
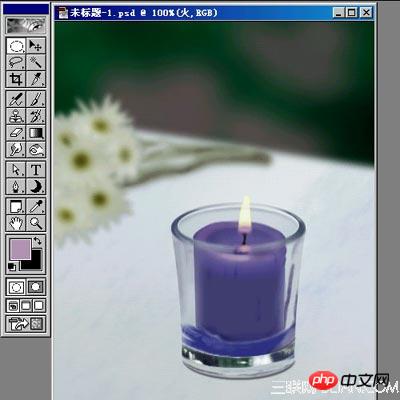
19)桌面好象亮了点。调整一下亮度对比度。如果不想边花也一起变暗,可用魔棒选出台布,羽化1-2后调整。最后,在桌面上建层,画出杯子轻微的阴影和反光,完成。


Hot AI Tools

Undresser.AI Undress
AI-powered app for creating realistic nude photos

AI Clothes Remover
Online AI tool for removing clothes from photos.

Undress AI Tool
Undress images for free

Clothoff.io
AI clothes remover

AI Hentai Generator
Generate AI Hentai for free.

Hot Article

Hot Tools

Notepad++7.3.1
Easy-to-use and free code editor

SublimeText3 Chinese version
Chinese version, very easy to use

Zend Studio 13.0.1
Powerful PHP integrated development environment

Dreamweaver CS6
Visual web development tools

SublimeText3 Mac version
God-level code editing software (SublimeText3)

Hot Topics
 How to solve the black line problem of win11 transparent taskbar
Dec 22, 2023 pm 10:04 PM
After many friends used translucenttb to set up a transparent taskbar, they found that there was a black line in the win11 transparent taskbar, which looked very uncomfortable. How should I solve it at this time? In fact, it can be solved in the software. There is a black line in the win11 transparent taskbar: Method 1: 1. According to user feedback, you can right-click translucenttb and open settings. 2. Then set the "margin" of the icon option to "1" to solve the problem. Method 2: 1. If it still doesn't work, you can right-click the blank space to open "Personalization" 2. Then select the system default theme to change it. Method three: 1. If all else fails, it is recommended that you uninstall translucenttb. 2. Then replace
 How to solve the problem of a line on the taskbar transparency in Win11?
Jan 29, 2024 pm 12:12 PM
Many Win11 users will set their taskbar to be transparent when running the system, but many users will see a black line appear on the taskbar after setting it up. So what is going on? Users can use third-party software to set it up. Let this website carefully introduce to users the solution to the problem of a transparent line on the win11 taskbar. Solution to the problem of a transparent line on the win11 taskbar. Method 1: 1. According to user feedback, you can right-click translucenttb and open settings. 2. Then set the margin of the icon option to 1 to solve the problem. 2. Then select the system default theme and change it to solve the problem.
 How to set transparency in CSS
Nov 01, 2023 am 10:00 AM
CSS methods for setting transparency include opacity attribute, rgba color value, background-color attribute, using pseudo elements, etc. Detailed introduction: 1. Opacity attribute, by setting the opacity attribute of the element to achieve a transparent effect, the value range of this attribute is 0 to 1, 0 means completely transparent, 1 means completely opaque; 2. RGB color value, by setting the element's opacity The background color or text color is an rgba color value to achieve a transparent effect. The rgba color value consists of red, green, blue, transparency, etc.
 Graphical tutorial on making the win7 taskbar transparent
Jul 20, 2023 am 09:49 AM
Today, a group of users asked why their computers had no transparency effect after reinstalling Windows 7. In fact, this is caused by your computer not updating the graphics card driver in time and adjusting the Windows 7 Aero theme. You can set it up in the following ways. 1. First, you need to make sure that your computer has a new graphics card driver installed. You can use Driver Wizard or 360 Driver Master to update the graphics card driver online. . 2. Facing a blank space on the desktop, right-click, select Personalize and open. 3. Find the Aero theme here and select it. Under normal circumstances, you should be able to see the transparent glass effect. Do you understand the tutorial on how to make your win7 taskbar transparent? Students who don’t know how to do it, please do it quickly.
 How to make blue fluorescent effect in PS
Feb 27, 2024 pm 12:55 PM
The editor of this website brings you this tutorial to take you into the wonderful world of Photoshop and learn how to create a charming blue fluorescent effect. Whether you are new to Photoshop or an experienced user, you can find inspiration and practical tips from this tutorial. So how to create the blue fluorescent effect in PS? This tutorial guide will give you a detailed introduction, I hope it can help you. PS blue fluorescence effect production method steps final effect: 1. Adjust the brightness of the picture. 2. Add curves to adjust the overall light and dark contrast of the picture. 3. Use a pen to hook out the "edge strips" of the shoes. 4. After cutting out, create a selection and fill it with white. 5. Select the blur tool and blur the hooked white part. 5. Use a pen to mark the shoelaces
 What should I do if the file name turns blue in win7 system?
Jul 20, 2023 pm 11:57 PM
What should I do if the file name turns blue in win7 system? The win7 system is currently the most popular Windows system. It has a very long history of development and is deeply loved by users. However, the win7 system also has problems, big and small. When many friends use the win7 system, they will find that the file names on the computer turn blue, and other newly created folders will also turn blue. This is What is the situation and how to solve it? Below, the editor will bring you a method to restore the win7 system file name to blue. Recovery method of win7 system file name turning blue 1. First, right-click the disk with blue file name and open properties. 2. Find the option to compress this drive to save disk space in the properties window and remove it.
 How to set terminal transparency in Linux system?
Jan 07, 2024 am 10:21 AM
When Linux executes commands in the terminal, in order to make it difficult to see other help documents, such as PDFs, web pages, etc., you can set the terminal transparency. How to set it? Let’s take a look at the detailed tutorial below. . 1. Turn on window special effects 1. To set the transparency of the terminal, you need to turn on the window special effects first. First, click "Control Center" on the taskbar. 2. Click "Display" in the Control Center. 3. In "Display", make sure the "Turn on window effects" button is turned on. 4. In addition, you can also use the shortcut keys shift+win+tab to quickly open or close window effects. 2. Set transparency
 Step-by-step tutorial on how to set the taskbar transparency in Windows 10
Jul 11, 2023 pm 11:37 PM
By chance, I saw someone else's win10 taskbar being transparent, and it looked very beautiful. After I came back, I also wanted to set my own win10 computer to be transparent. Under normal circumstances, the default taskbar does not have a transparent background, and you need to adjust the settings. Next, the editor will explain in detail how to make the Win10 taskbar fully transparent in one minute. Come and take a look. 1. First, open the win10 system, then right-click on the desktop and find "Personalization" in the right-click menu. 2. Then, in the "Personalization" window, select "Color" in the left menu and click to open. 3. Then, find "Transparency Effect" in the menu on the right, select "On" and check "Start Menu, Taskbar, and Action Center" and "Title Bar". 4. Then, return to w


