PhotoShop(PS)自制炫酷旋转QQ头像实例教程
在网上荡下来的QQ头像图片,怎么都不对自己的口味,老是觉得缺点什么,不是自己心里想象中的样子,怎么办?没关系!你可以自己制作想要的头像图片,不会?没事,小编今天就给大家举个例子 你还在为不会制作炫酷旋转QQ头像而烦恼吗?看到别人发布的好看的炫酷旋转QQ头像,自己也想学习制作?今天小编教各位如何使用PS制作炫酷旋转QQ头像!

工具/原料
Adobe Photoshop CS3
方法/步骤
1双击图标打开photoshop图形图像软件

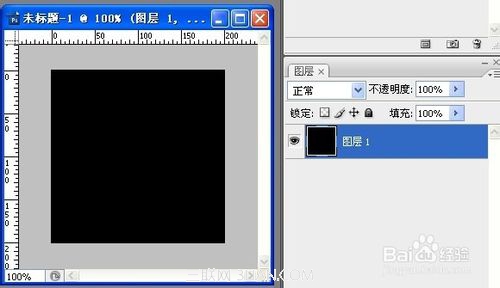
新建一个200*200大的透明图像

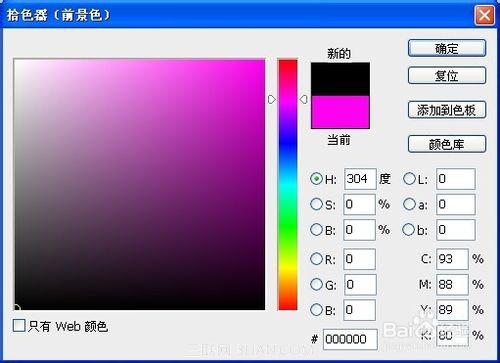
设置前景色为黑色(色值:#000000),并按快捷键:Alt+Delete键给新建的图层填充前景色
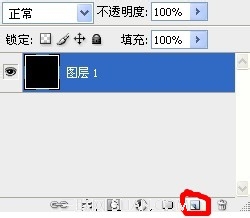
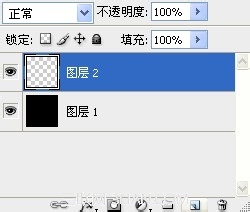
点击有图红圈内图标新建图层
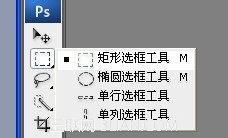
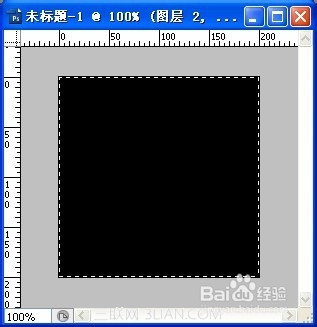
使用矩形选框工具,框选如下图所示:
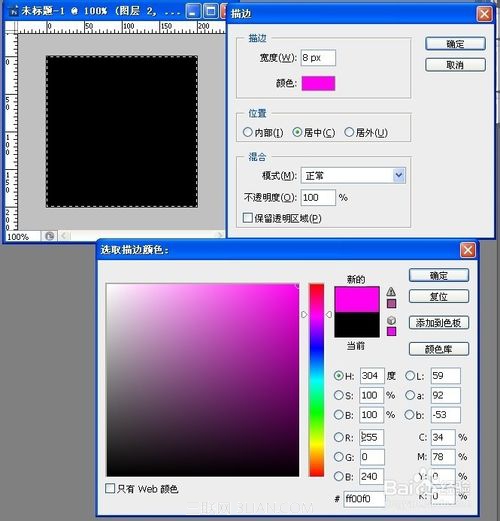
在虚线框内点击右键——描边,弹出描边对话框;
设置宽度为:8px;点击颜色框,弹出选取描边颜色对话框,设置颜色


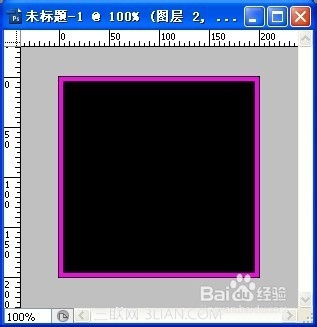
按ctrl+D取消虚线框
使用文字工具输入“炫酷宅男”
点击弹出设置文字大小、行间距、颜色等信息。


Hot AI Tools

Undresser.AI Undress
AI-powered app for creating realistic nude photos

AI Clothes Remover
Online AI tool for removing clothes from photos.

Undress AI Tool
Undress images for free

Clothoff.io
AI clothes remover

AI Hentai Generator
Generate AI Hentai for free.

Hot Article

Hot Tools

Notepad++7.3.1
Easy-to-use and free code editor

SublimeText3 Chinese version
Chinese version, very easy to use

Zend Studio 13.0.1
Powerful PHP integrated development environment

Dreamweaver CS6
Visual web development tools

SublimeText3 Mac version
God-level code editing software (SublimeText3)

Hot Topics
 What are the permanently free photoshopcs5 serial numbers?
Jul 06, 2023 am 10:00 AM
The permanently free photoshopcs5 serial numbers are: 1. 1330-1440-1602-3671-9749-7897; 2. 1330-1191-2998-6712-2520-5424; 3. 1330-1367-4285-4928-0630-3107; 4. 1330-1570-9599-9499-8092-8237; 5. 1330-1028-1662-3206-1688-5114, etc.
 Solution: Fix keyboard shortcuts not working in Photoshop
Sep 22, 2023 pm 03:17 PM
Adobe Photoshop is the industry standard for digital design, loved and used every day by the online community. However, when keyboard shortcuts stutter or fail entirely, it can significantly slow down any project or your overall productivity on Windows 11. Whether you're an experienced designer or just dabbling in photo editing, these glitches are more than just minor annoyances in Photoshop and Photoshop CC. First, let's look at the common reasons why custom or default shortcuts stop working. Why don't my shortcuts work in Photoshop? Customize workspace settings: Sometimes, adjusting or switching between workspace settings can reset keyboard shortcuts. Sticky Keys: This accessibility feature
 How to deal with blurred scanned documents
Jan 05, 2021 pm 03:09 PM
Processing method: 1. Open the scanned image to be processed in the PS software; 2. Click "Filter" - "Sharpening" - "Smart Sharpening" on the top toolbar; 3. In the pop-up window, select according to your needs Sharpen the radius and click "OK"; 4. Click "File" - "Save As" and save it as a file.
 Which company does photoshop belong to?
Jul 20, 2022 am 11:47 AM
photoshop is owned by Adobe. Photoshop is an image processing software developed and distributed by Adobe. It mainly processes digital images composed of pixels. Adobe is an American computer software company headquartered in San Jose, California. It is mainly engaged in the development of multimedia production software; its customers include enterprises, knowledge workers, creative people and designers, OEM partners, and developers around the world.
 Adobe Photoshop official web version AI generated fill and generate extended image tools
Sep 29, 2023 pm 10:13 PM
Adobe's Photoshop web service (an online web version) is now generally available. The web version of Photoshop will soon support the AI-generated fill and generate extended image tools, which were recently released for the desktop version of Photoshop. Powered by the Adobe Firefly generative AI model, these features are commercially available and allow users to quickly add, remove, or expand images using text-based descriptions in more than 100 languages while matching the lighting conditions and perspective of the original image. The web version of Photoshop also provides many of the most commonly used tools from the desktop version, but with a redesigned layout to provide a more "simplified" user experience for new Photoshop users. This includes early this year
 Which company developed photoshop?
Jul 08, 2022 am 11:34 AM
Photoshop was developed by Adobe Systems; Photoshop is a graphics processing software developed and distributed by "Adobe Systems", which mainly processes digital images composed of pixels. Adobe Systems is an American multinational computer software company headquartered in San Jose, California.
 What tools do you use to draw paths in photoshop
Mar 19, 2021 pm 05:11 PM
In photoshop, you can use the "pen tool" to draw paths. The pen tool is a tool used to create paths. After creating a path, you can edit it again. The pen tool is a vector drawing tool. Its advantage is that it can draw smooth curves and maintain a smooth effect after scaling or deformation.
 Win7 self-made theme desktop tutorial
Jun 29, 2023 pm 10:13 PM
How to customize the theme desktop in Win7 system? How should we make our own theme desktop in Win7 system? When we use Win7 system, if we are not satisfied with the themes and wallpapers in the system, then we can make our own theme desktop. I believe many users don’t know how to operate it. , then this article will share with you the detailed steps for making a homemade desktop theme for Win7 system, let’s take a look! Detailed steps for making a homemade desktop theme for Win7 system 1. First, turn on the computer and prepare the pictures used to make wallpapers. Just go online and download what you like. As shown in the figure: 2. Enter the desktop of the Windows 7 system, then right-click the mouse on a blank space on the desktop to pop up


