PS快速打造像素风图案
今天的教程是:用PS快速打造像素风图案。
图案能让你的网页背景更加漂亮。本教程将展示如何在5-10分钟内快速打造像素风格图案。废话不多说,开始了!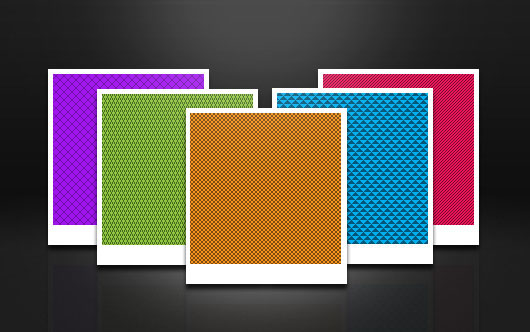
具体的制作步骤如下:
步骤一:
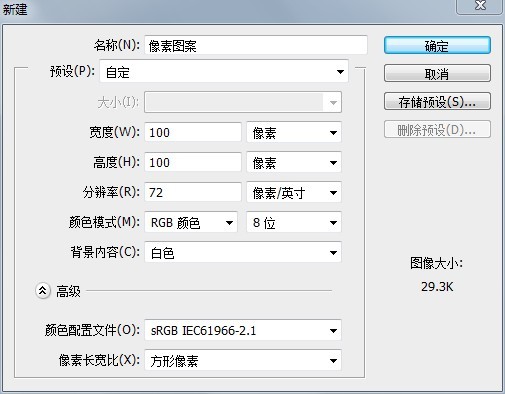
先来创建画布,画布大小可任意调整,但不能少于10×10 px,因为我们做出来的图案大小不能小于10 x10 px,文中采用了100 x 100 px,这样便能进行”放大”、”缩小”。
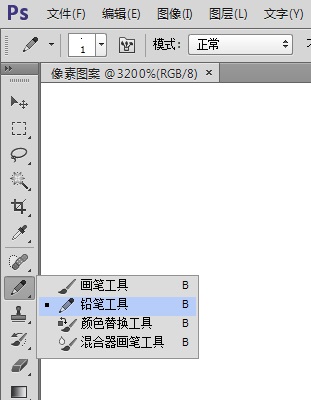
步骤二:放大到最大
用”铅笔工具”开始绘制
步骤4:默认设置即可;大小1px,颜色使用#000000 不透明度100%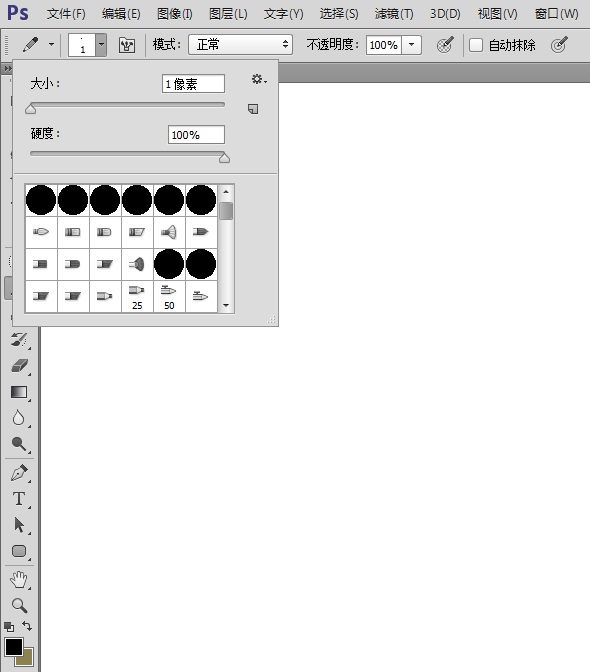
步骤5:创建新图层,该图层将用来绘制形状。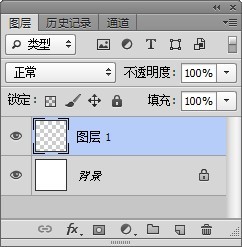
步骤6:在图层1中这么画几个点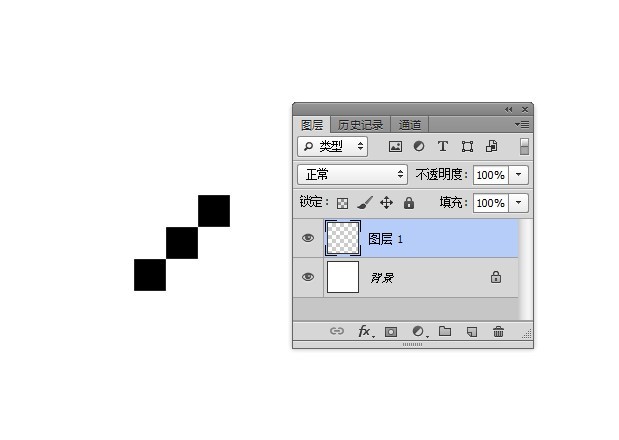
步骤 7:使用矩形选框工具选中它们。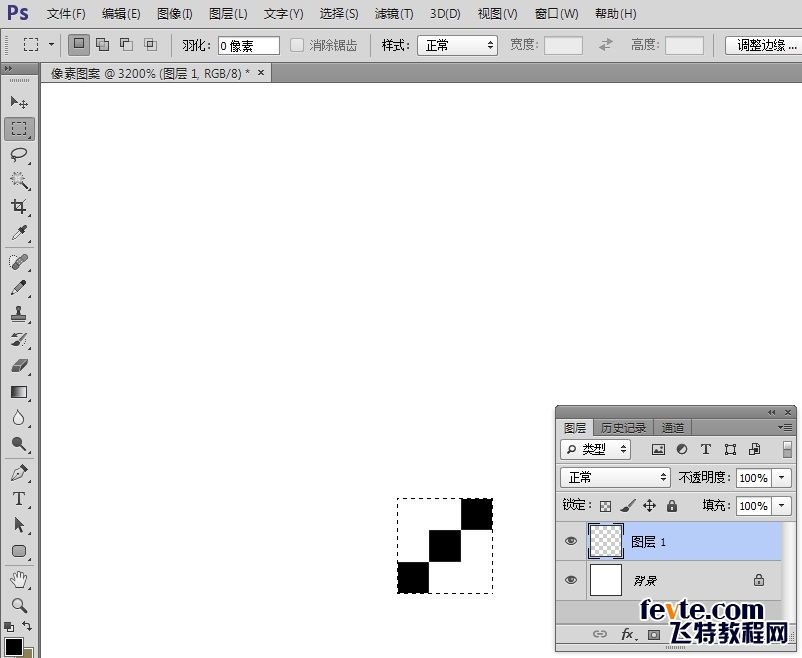
步骤8:图像->裁剪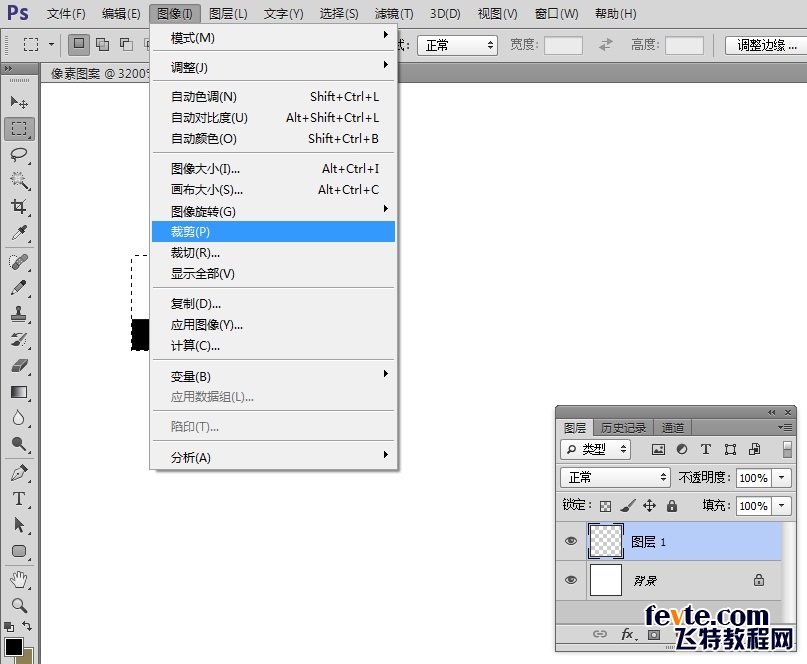
步骤9:隐藏背景图层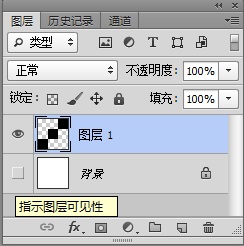
步骤10:编辑->定义图案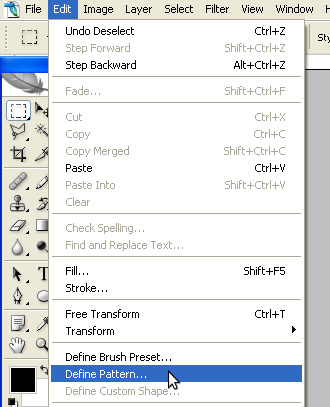
步骤11:会弹出这样的对话框
这不就有这款图案了吗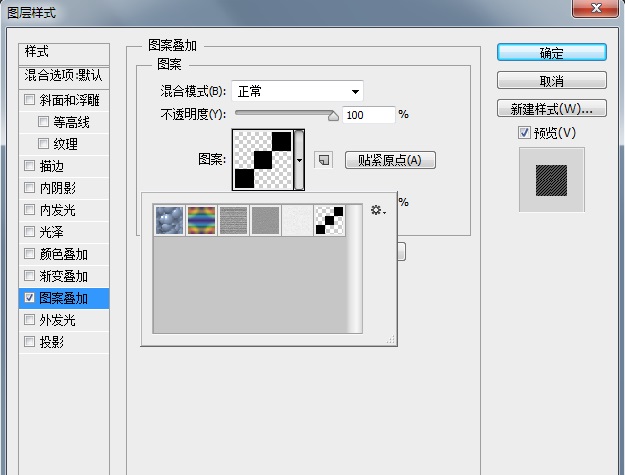
效果展示: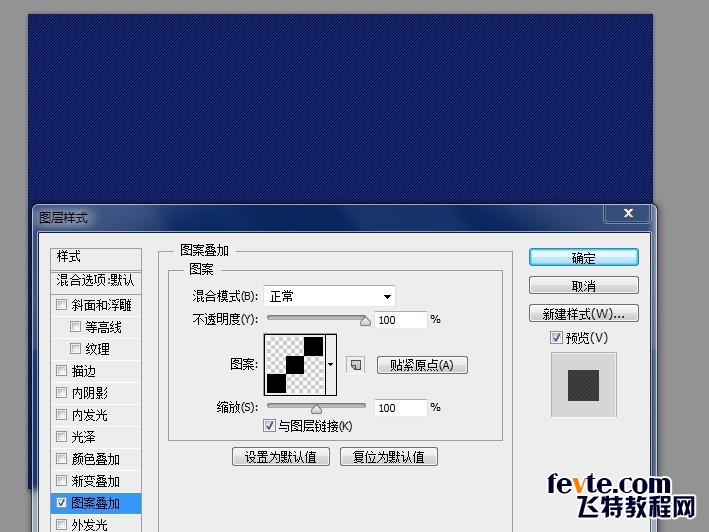
用克莱因蓝(RGB 0.47,147)试一下!还不错!
这张图呢?
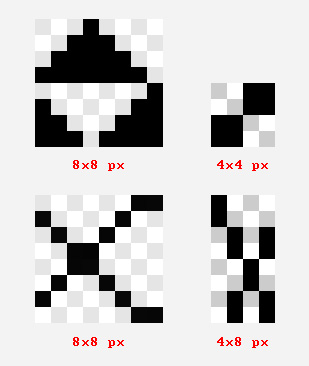
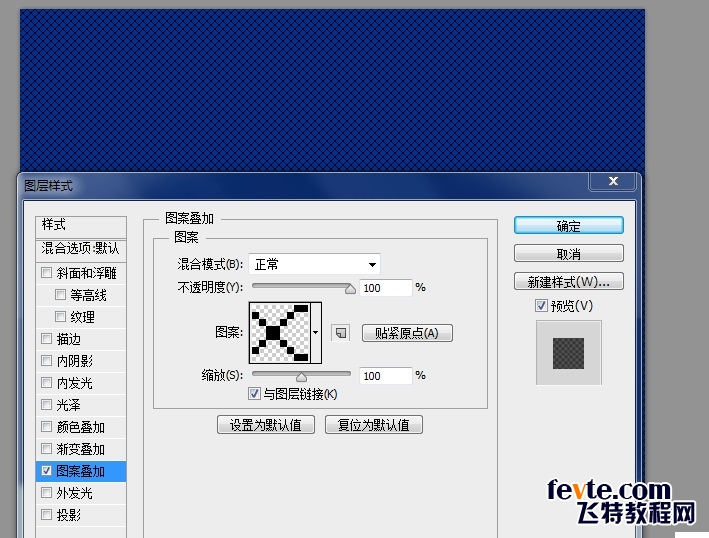
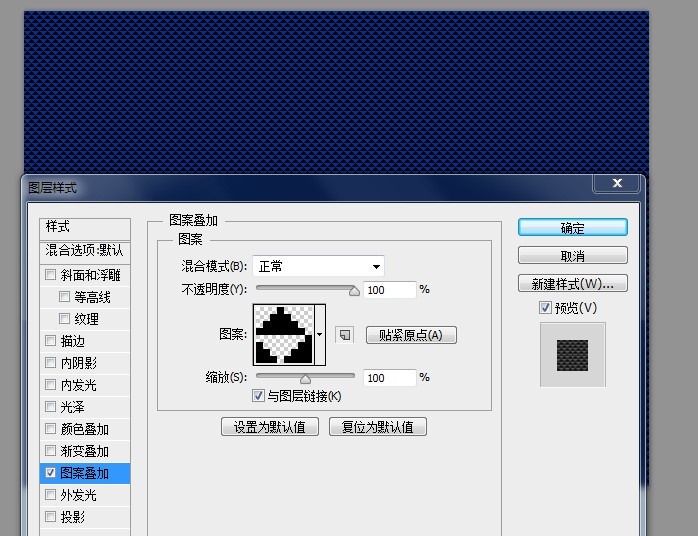
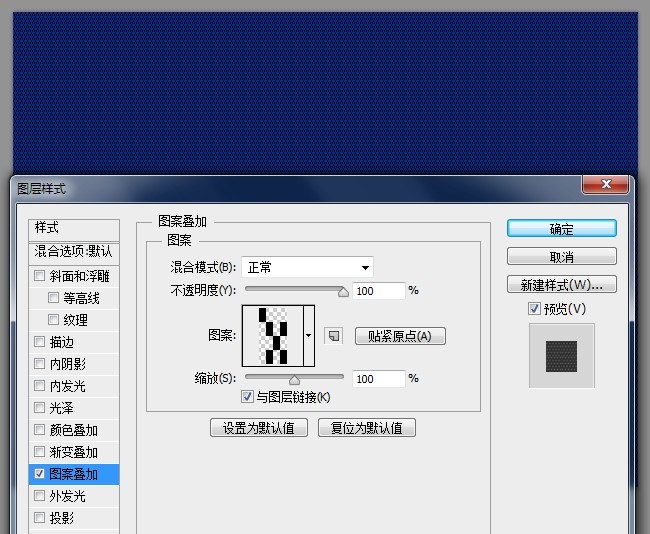
结论希望这个小教程对你有所帮助,举一反三,打造自己的图案吧!

Hot AI Tools

Undresser.AI Undress
AI-powered app for creating realistic nude photos

AI Clothes Remover
Online AI tool for removing clothes from photos.

Undress AI Tool
Undress images for free

Clothoff.io
AI clothes remover

AI Hentai Generator
Generate AI Hentai for free.

Hot Article

Hot Tools

Notepad++7.3.1
Easy-to-use and free code editor

SublimeText3 Chinese version
Chinese version, very easy to use

Zend Studio 13.0.1
Powerful PHP integrated development environment

Dreamweaver CS6
Visual web development tools

SublimeText3 Mac version
God-level code editing software (SublimeText3)

Hot Topics
 How many megapixels is 8k?
Mar 30, 2023 pm 06:21 PM
The resolution of 8k reaches 7680*4320, which is about 33 million pixels. 8K resolution is an experimental digital video standard, promoted by organizations such as the Japan Broadcasting Corporation (NHK), the British Broadcasting Corporation (BBC), and the Italian Radio and Television Corporation (RAI); the ultra-high resolution of 8K is the ultra-high resolution of 4K 4 times that of HD and 16 times that of Full HD.
 How to create pixel art in GIMP
Feb 19, 2024 pm 03:24 PM
This article will interest you if you are interested in using GIMP for pixel art creation on Windows. GIMP is a well-known graphics editing software that is not only free and open source, but also helps users create beautiful images and designs easily. In addition to being suitable for beginners and professional designers alike, GIMP can also be used to create pixel art, a form of digital art that utilizes pixels as the only building blocks for drawing and creating. How to Create Pixel Art in GIMP Here are the main steps to create pixel pictures using GIMP on a Windows PC: Download and install GIMP, then launch the application. Create a new image. Resize width and height. Select the pencil tool. Set the brush type to pixels. set up
 How to change pixels on Meitu Xiuxiu How to change pixels on Meitu Xiuxiu
Mar 12, 2024 pm 02:50 PM
How to change the pixels of Meitu Xiuxiu? Meitu Xiuxiu is a mobile photo editing software with many functions, dedicated to providing users with an excellent photo editing experience. In the software, we can perform many operations on our photos, such as portrait beauty, skin whitening, facial reshaping, face slimming, etc. If we are not satisfied, we can just click on it to create perfect proportions easily. For the repaired photos, we can also adjust their size and pixels before saving. So, do you know how to pixel? For those who don’t know yet, let’s take a look at the method shared by the editor below. How to change the pixels of MeituXiuXiu 1. Double-click to open MeituXiuXiu, click to select the "Beautify Picture" option; 2. In the beautify picture, click "Size"
 How to set the pixel height of Meitu Xiuxiu
Mar 27, 2024 am 11:00 AM
In the digital age, pictures have become an integral part of our daily lives and work. Whether it is sharing on social media or presenting in a work report, high-quality pictures can add a lot of points to us. However, many times the pixels of the pictures in our hands are not satisfactory. In this case, we need to use some tools to adjust the pixel height to meet the needs of different scenes. So this tutorial guide will introduce in detail how to use Meitu Xiuxiu to adjust the pixels of pictures. I hope it can help you! First of all, please find the [Meitu Xiu Xiu] icon on your mobile phone, click to enter the main interface, and then click on the [Beautify Pictures] item. 2. The second step, next, we come to the [Camera Roll] page as shown in the picture, please click on yourself
 Java program to create pyramids and patterns
Sep 05, 2023 pm 03:05 PM
If anyone wants to get a solid foundation in Java programming language. Then, it is necessary to understand how the loop works. Furthermore, solving Pyramid Pattern problems is the best way to enhance your knowledge of Java basics as it includes extensive use of for and while loops. This article aims to provide some Java programs to print pyramid patterns with the help of different types of loops available in Java. Java Program to Create Pyramid Pattern We will print the following pyramid patterns through Java program - Inverted Star Pyramid Star Pyramid Number Pyramid Let's discuss one by one. Mode 1: The inverted star pyramid method declares and initializes an integer "n" with the specified number of rows. Next, define the initial count of the space as 0 and the initial count of the star as "n+
 What is the concept of 12 million pixels?
Nov 29, 2022 am 10:31 AM
12 million pixels refers to 12 million pixel units, about 4,000 in a row, and about 3,000 in a column. If you count them all, it is about 12 million. A pixel is the smallest unit that makes up a picture. It is a single color, and the picture is made up of such different colors. Colorful little things are arranged in rows and columns.
 What are pixels and resolution
Feb 28, 2023 am 11:28 AM
A pixel refers to the smallest unit in an image represented by a sequence of numbers; a pixel refers to a number of small squares in an image, each of which has a clear position and assigned color values. The combination of the color and position of the small squares determines the appearance of the image. Resolution refers to the number of pixels expressed in unit length, which determines the fineness of bitmap image details; resolution can be subdivided into display resolution, image resolution, printing resolution, scanning resolution, etc.
 iOS 16.1.1 improves iPhone 14 Pro's 48-megapixel shooting speed and performance improvements
May 07, 2023 am 10:34 AM
Apple has earlier launched an update to the latest generation of iOS system, version iOS16.1.1. Apple did not explain what the content of the new version update is. However, after testing, the author found that iOS16.1.1 made a new feature on the iPhone14Pro series. With fewer changes, the speed of shooting 48-megapixel RAW files will be improved. After testing, it was found that after turning on ProRAW mode, when shooting 48 million pixels, the loading time is greatly shortened from 2-3 seconds to 1 second. Although compared with the speed of normal mode, ProRAW continuously presses the shutter button. It's still quite slow, but that's a big improvement. This improvement is what Apple will do to "process images"


