

Photoshop打造出一朵漂亮的红色透明火焰花朵

火焰花的制作重点是花瓣部分的烟雾刻画,花瓣里面包含的细小烟雾有很多,都是用透明度较低的柔化色块叠加得到的,制作的时候一定要细心
最终效果
1、新建一个1000 * 1000像素的文件,背景填充黑色,如下图。
<图1>
2、新建一个组,在组里新建一个图层,用套索工具勾出下图所示的选区,羽化200个像素后填充暗红色。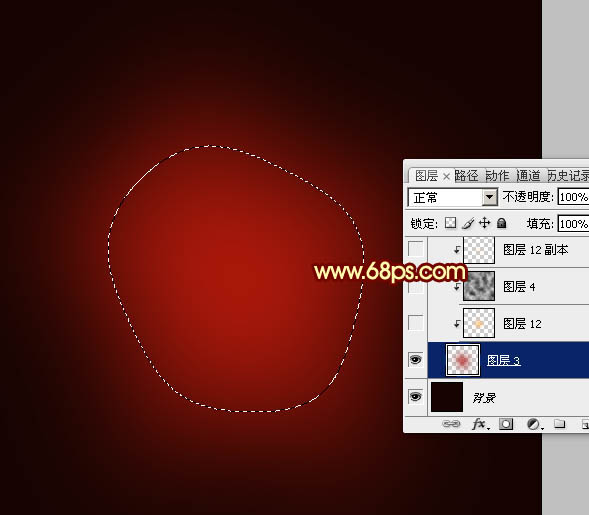
<图2>
3、新建一个图层,按Ctrl + Alt + G 创建剪贴蒙版,用椭圆选框工具拉出下图所示的椭圆选区,羽化50个像素后填充橙黄色。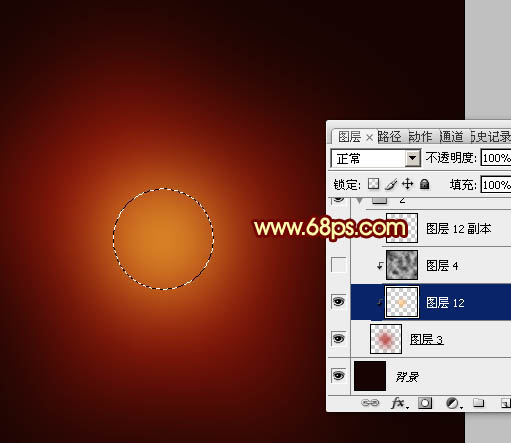
<图3>
4、新建一个图层,按字母键“D”,把前背景颜色恢复到默认的黑白,执行:滤镜 > 渲染 > 云彩,确定后按Ctrl + Alt + F加强一下,然后把混合模式改为“柔光”,并按Ctrl + Alt + G 创建剪贴蒙版,效果如下图。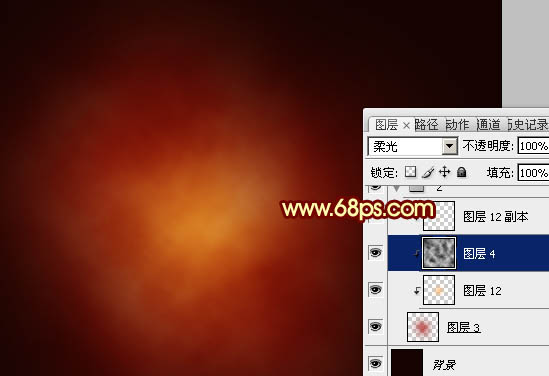
<图4>
5、现在来制作花朵部分,我们只需要制作一片花瓣,其它的可以通过复制及变形得到。
<图5>
6、新建一个组,在组里新建一个图层,用钢笔勾出花瓣的轮廓,转为选区后填充橙黄色,如下图。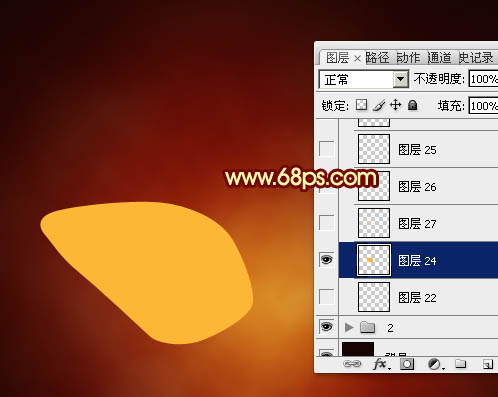
<图6>
7、把轮廓图层的不透明度改为:20%,效果如下图。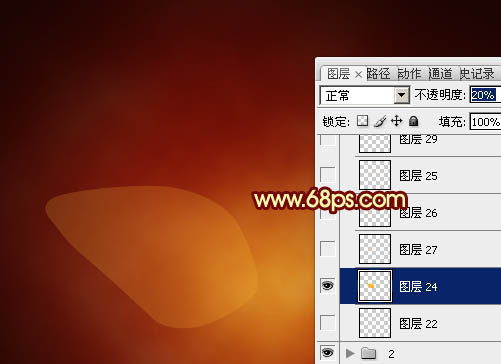
<图7>
8、用钢笔在轮廓中间位置勾出下图所示的选区,羽化5个像素后按Ctrl + J 复制到新的图层,不透明度改为:30%,效果如图9。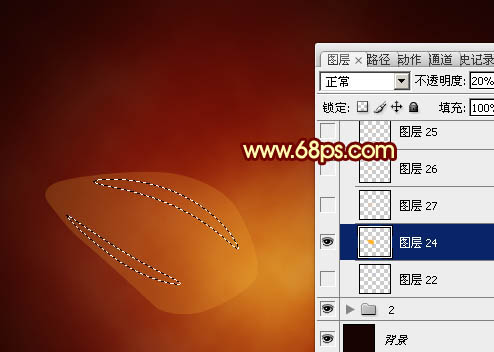
<图8> 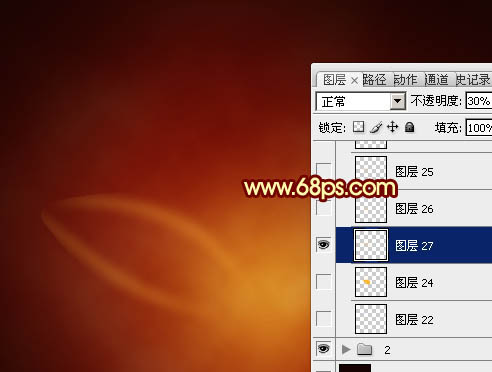
<图9>
9、回到轮廓图层,用钢笔勾出图10所示的路径,转为选区后羽化4个像素,按Ctrl + J 把选区部分的色块复制到新的图层,不透明度改为:40%,效果如图11。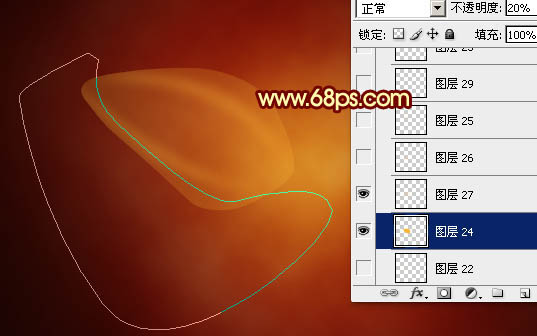
<图10> 
<图11>
10、回到轮廓图层,用钢笔勾出图12所示的路径,转为选区后羽化5个像素,按Ctrl + J复制到新的图层,不透明度改为:50%,效果如图13。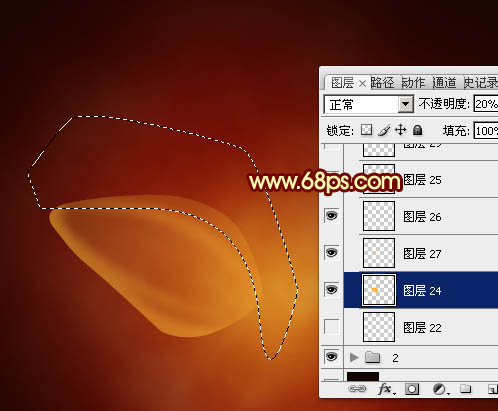
<图12> 
<图13>
11、回到轮廓图层,用钢笔勾出顶部高光区域选区如图14,羽化3个像素后按Ctrl + J 复制到新的图层,不透明度改为:50%,效果如图15。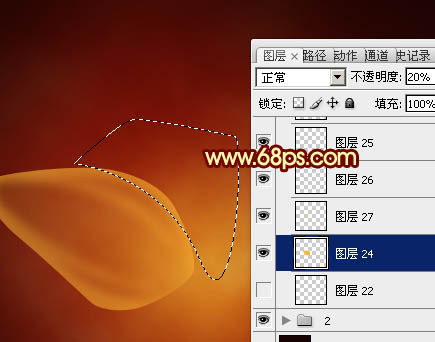
<图14> 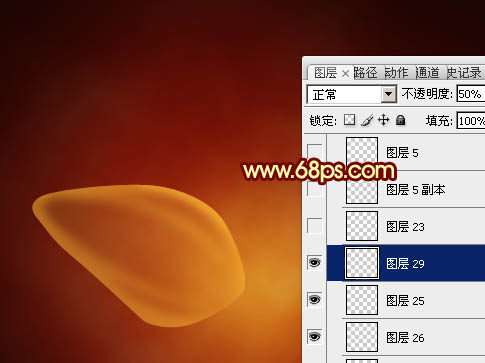
<图15>
12、新建一个图层,用钢笔勾出下图所示的选区,填充橙黄色,确定后把图层不透明度改为:20%,效果如下图。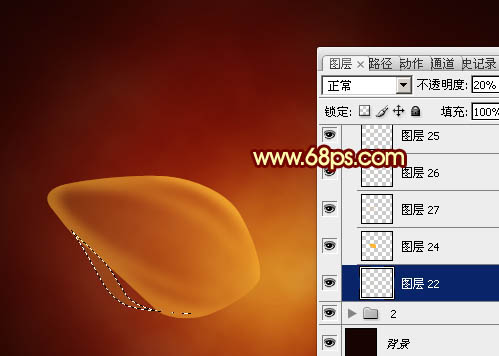
<图16>
13、用钢笔勾出图17所示的路径,转为选区后羽化3个像素,按Ctrl + J 复制到新的图层,不透明度改为:60%,效果如图18。
<图17> 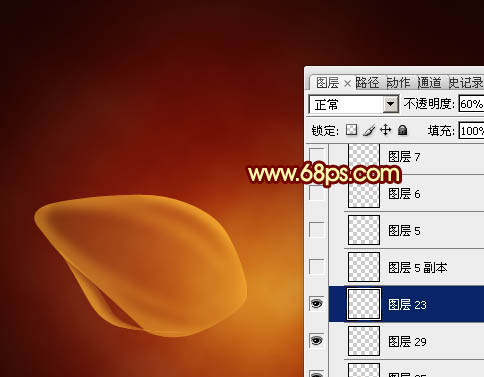
<图18>
14、新建一个图层,用钢笔勾出顶部边缘的高光选区,羽化1个像素后填充橙黄色。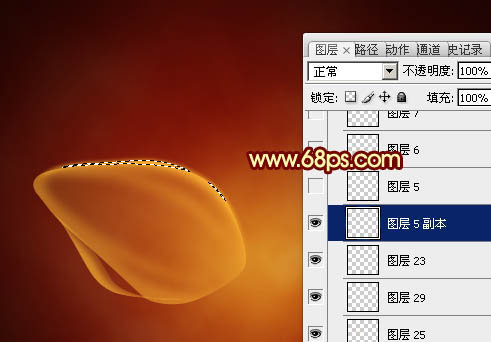
<图19>

Hot AI Tools

Undresser.AI Undress
AI-powered app for creating realistic nude photos

AI Clothes Remover
Online AI tool for removing clothes from photos.

Undress AI Tool
Undress images for free

Clothoff.io
AI clothes remover

AI Hentai Generator
Generate AI Hentai for free.
Hot Article
Hot Tools

Notepad++7.3.1
Easy-to-use and free code editor

SublimeText3 Chinese version
Chinese version, very easy to use

Zend Studio 13.0.1
Powerful PHP integrated development environment

Dreamweaver CS6
Visual web development tools

SublimeText3 Mac version
God-level code editing software (SublimeText3)
Hot Topics
 1378
1378
 52
52

 How do I use Photoshop for creating social media graphics?
Mar 18, 2025 pm 01:41 PM
How do I use Photoshop for creating social media graphics?
Mar 18, 2025 pm 01:41 PM
The article details using Photoshop for social media graphics, covering setup, design tools, and optimization techniques. It emphasizes efficiency and quality in graphic creation.
 What is the reason why PS keeps showing loading?
Apr 06, 2025 pm 06:39 PM
What is the reason why PS keeps showing loading?
Apr 06, 2025 pm 06:39 PM
PS "Loading" problems are caused by resource access or processing problems: hard disk reading speed is slow or bad: Use CrystalDiskInfo to check the hard disk health and replace the problematic hard disk. Insufficient memory: Upgrade memory to meet PS's needs for high-resolution images and complex layer processing. Graphics card drivers are outdated or corrupted: Update the drivers to optimize communication between the PS and the graphics card. File paths are too long or file names have special characters: use short paths and avoid special characters. PS's own problem: Reinstall or repair the PS installer.
 How do I prepare images for web using Photoshop (optimize file size, resolution)?
Mar 18, 2025 pm 01:35 PM
How do I prepare images for web using Photoshop (optimize file size, resolution)?
Mar 18, 2025 pm 01:35 PM
Article discusses optimizing images for web using Photoshop, focusing on file size and resolution. Main issue is balancing quality and load times.
 How do I prepare images for print using Photoshop (resolution, color profiles)?
Mar 18, 2025 pm 01:36 PM
How do I prepare images for print using Photoshop (resolution, color profiles)?
Mar 18, 2025 pm 01:36 PM
The article guides on preparing images for print in Photoshop, focusing on resolution, color profiles, and sharpness. It argues that 300 PPI and CMYK profiles are essential for quality prints.
 What are the common questions about exporting PDF on PS
Apr 06, 2025 pm 04:51 PM
What are the common questions about exporting PDF on PS
Apr 06, 2025 pm 04:51 PM
Frequently Asked Questions and Solutions when Exporting PS as PDF: Font Embedding Problems: Check the "Font" option, select "Embed" or convert the font into a curve (path). Color deviation problem: convert the file into CMYK mode and adjust the color; directly exporting it with RGB requires psychological preparation for preview and color deviation. Resolution and file size issues: Choose resolution according to actual conditions, or use the compression option to optimize file size. Special effects issue: Merge (flatten) layers before exporting, or weigh the pros and cons.
 How do I create animated GIFs in Photoshop?
Mar 18, 2025 pm 01:38 PM
How do I create animated GIFs in Photoshop?
Mar 18, 2025 pm 01:38 PM
Article discusses creating and optimizing animated GIFs in Photoshop, including adding frames to existing GIFs. Main focus is on balancing quality and file size.
 How do I use Photoshop's video editing capabilities?
Mar 18, 2025 pm 01:37 PM
How do I use Photoshop's video editing capabilities?
Mar 18, 2025 pm 01:37 PM
The article explains how to use Photoshop for video editing, detailing steps to import, edit, and export videos, and highlighting key features like the Timeline panel, video layers, and effects.
 How to speed up the loading speed of PS?
Apr 06, 2025 pm 06:27 PM
How to speed up the loading speed of PS?
Apr 06, 2025 pm 06:27 PM
Solving the problem of slow Photoshop startup requires a multi-pronged approach, including: upgrading hardware (memory, solid-state drive, CPU); uninstalling outdated or incompatible plug-ins; cleaning up system garbage and excessive background programs regularly; closing irrelevant programs with caution; avoiding opening a large number of files during startup.
