

Photoshop设计出制作出梦幻的绚丽彩色条纹光束背景

效果图中的所有光束都是由同一条光束复制得到的,不过复制的时候还需要经过一些特殊的处理,如改变光束的大小、颜色、发光效果等,大致效果确定后,再对整体做一些柔化,高光,暗部优化处理即可
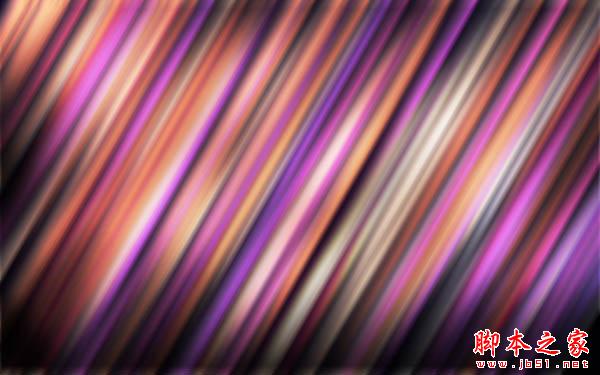
最终效果
1、首先在PS中新建一个文件(Ctrl+N),尺寸设置为1900px*1200px(色彩模式设为RGB),分辨率设置为72pixels/inch。使用油漆桶工具(G)将新建的背景图层用#0B0513填满。
2、使用矩形工具(U),画出一个矩形。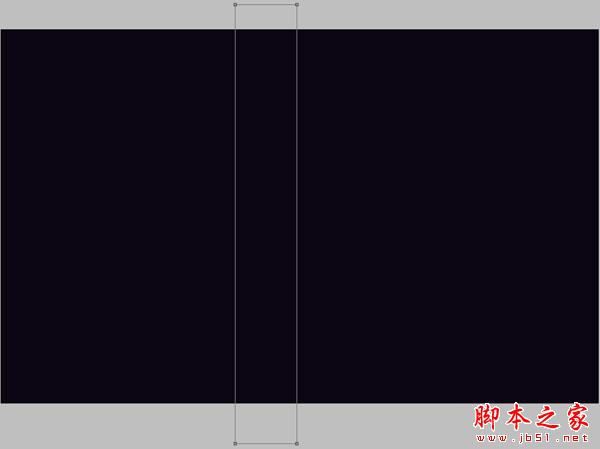
3、将图层的填充设置为0%,然后在图层面板的底部点击添加图层样式,选择渐变叠加。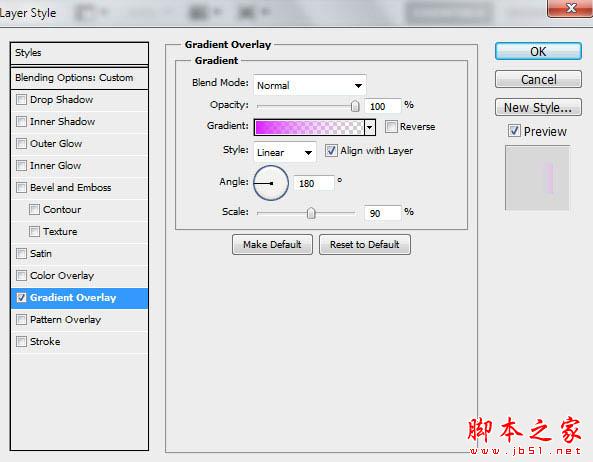
点击工具栏中的渐变编辑器,将渐变的色标设置为图中显示的样子。点击确定来关闭渐变编辑器。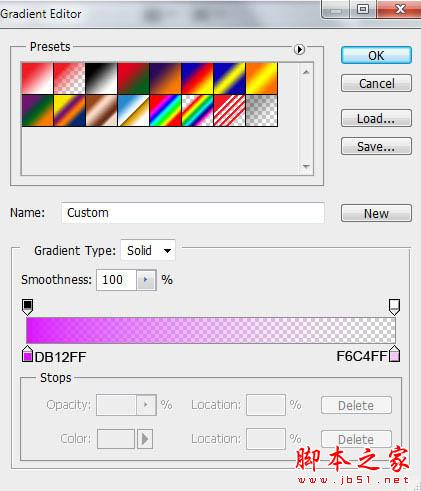

4、接下来我们要将有矩形的这个图层栅格化。之后,在刚才操作过的图层上新建一个图层,按住Ctrl键将两个图层都选取,然后使用快捷键Ctrl+E将两个图层向下合并。使用自由变换路径(Ctrl+T)将矩形倾斜45度。
5、点击图层面板底部的添加图层蒙版,再点击画笔工具,选择柔边圆笔刷,颜色为黑色。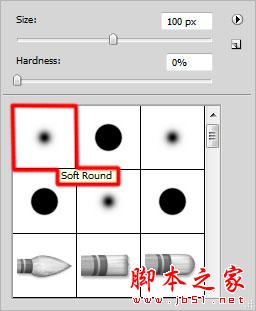
6、在蒙版中使用笔刷,像下图这样将线条的边缘遮盖住。
7、下一步我们需要将刚才那个带线条的图层复制很多次,并且要通过自由变换路径(Ctrl+T)来改变线条的位置。每一个复制出来的图层,在使用蒙版进行边缘遮盖时要做些变化。并且通过菜单栏的图像——调整——色相/饱和度(Ctrl+U)对线条的颜色进行更换和调整。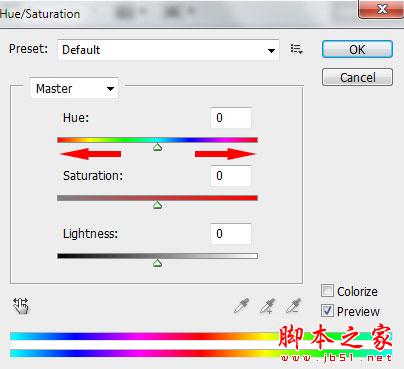

8、现在我们需要将图中指出的线条进行复制。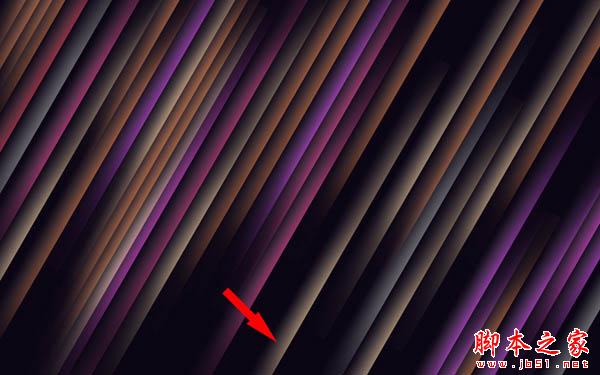
9、选择复制的图层,然后点击滤镜——模糊——高斯模糊。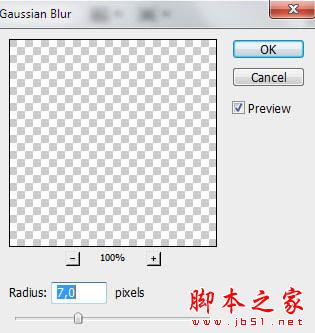

10、将添加过高斯模糊滤镜的图层进行复制。将这个图层的混合模式设置为颜色减淡,并用自由变换路径(Ctrl+T)改变位置,这条线就会变成偏红的颜色。
11、多次复制红色线条的图层,同样使用自用变换路径(Ctrl+T)来进行移动,变成下图的样子。在某些复制的图层上,需要使用色相/饱和度(Ctrl+U)来更改颜色。
12、接下来,我们将插入更多线条的复制图层。这些图层副本没有高斯模糊和颜色减淡模式。用色相/饱和度(Ctrl+T)改变线条颜色,并用自由变换路径(Ctrl+T)来移动。如果需要,就用蒙版将线条的边缘进行修整。
13、下一步,再插入一个线条图层的副本,然后点击图层面板下方的添加图层样式,勾选外发光。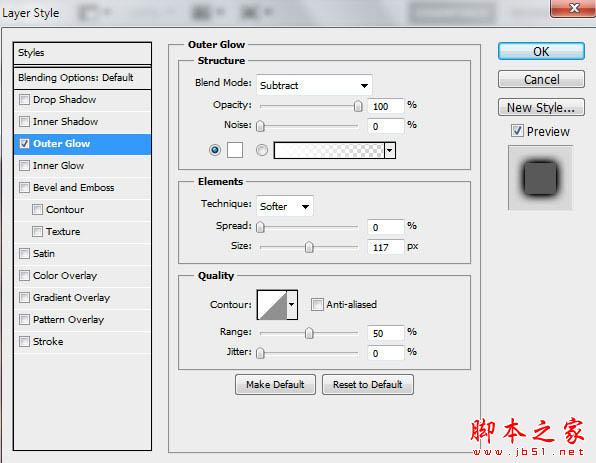
14、有外发光效果的线条就会是下图这样的。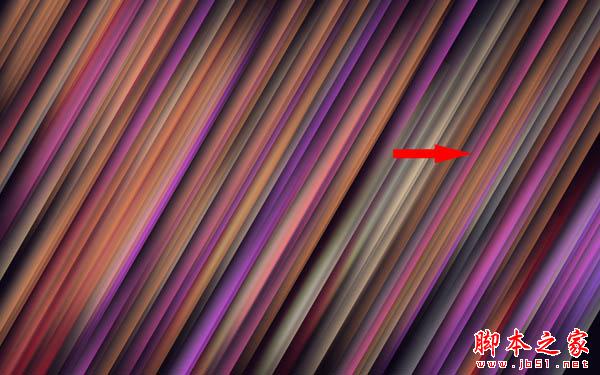
15、将刚才做出来的线条进行复制,并将它移动到图中显示的位置(使用Ctrl+T)。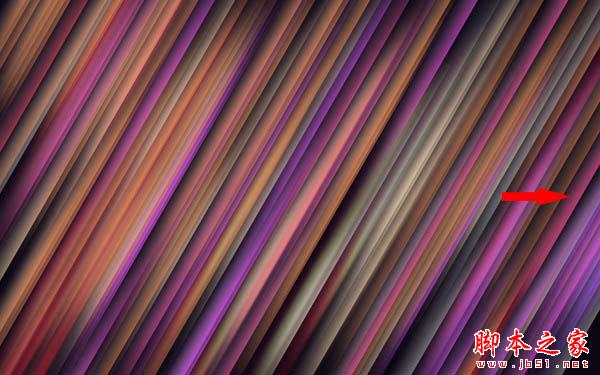
16、新建一个图层,选择柔边圆笔刷,颜色设置为白色(在选项中将透明度设置为30%)。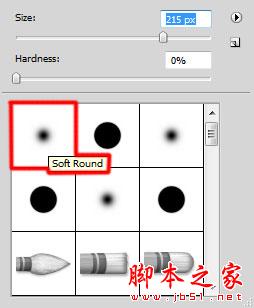
17、使用笔刷在画布上画出一些浅色的部分。
18、把这个图层的混合模式设置为叠加。
19、新建一个图层,选择柔边圆笔刷,颜色设置为黑色(透明度——20%)。
20、将画布的边角画暗一些。
21、在图层面板底部点击创建新的填充或调整图层,点击曲线,像图中显示的这样对图层进行微调。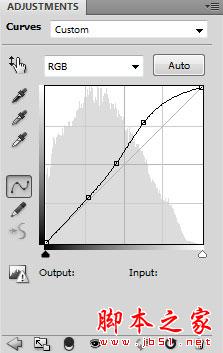

22、再次点击创建新的填充或调整图层,选择色相/饱和度。将色相滑块向左拖动一点。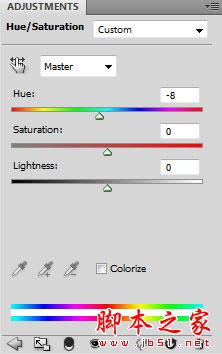

23、将这些线条图层放在一个群组里(按住Ctrl键同时点击需要的图层,然后按住鼠标左键将这些被选中的图层拖到图层面板底部的创建新组的图标上)。这个新组将被栅格化。选择这个图层组,按下Ctrl+E来合并图层,然后在栅格化后的图层上使用滤镜——模糊——动感模糊。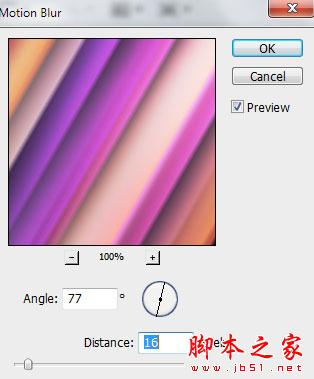

24、将刚才栅格化的图层进行复制,然后选择滤镜——模糊——动感模糊。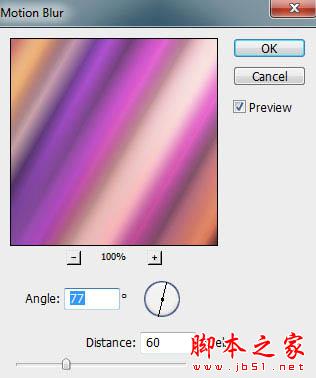
25、将这个图层的混合模式设置为饱和度。
26、新建一个图层,选择喷枪双画笔柔边圆,黑色(透明度——20%)。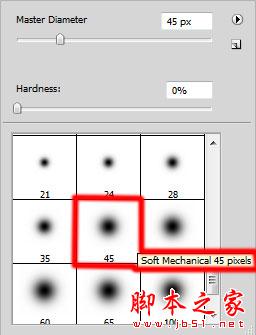
27、用这个笔刷来制造一些阴影。
28、再建一个新图层,选择柔边圆笔刷,白色(透明度——20%)。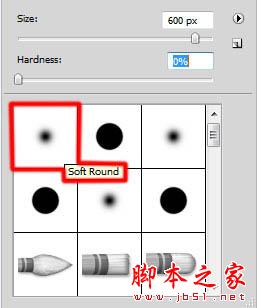
29、用笔刷在画笔的上半部分进行绘制。
30、将这个图层的填充改为63%,混合模式设置为叠加。
最终效果:

Hot AI Tools

Undresser.AI Undress
AI-powered app for creating realistic nude photos

AI Clothes Remover
Online AI tool for removing clothes from photos.

Undress AI Tool
Undress images for free

Clothoff.io
AI clothes remover

AI Hentai Generator
Generate AI Hentai for free.

Hot Article
Hot Tools

Notepad++7.3.1
Easy-to-use and free code editor

SublimeText3 Chinese version
Chinese version, very easy to use

Zend Studio 13.0.1
Powerful PHP integrated development environment

Dreamweaver CS6
Visual web development tools

SublimeText3 Mac version
God-level code editing software (SublimeText3)
Hot Topics
 1377
1377
 52
52

 How to set a picture as the background in OneNote
May 14, 2023 am 11:16 AM
How to set a picture as the background in OneNote
May 14, 2023 am 11:16 AM
Onenote is one of the best note-taking tools offered by Microsoft. Combined with Outlook and MSTeams, Onenote can be a powerful combination for increasing productivity at work and in personal creative productivity. We have to take notes in a different format, which may be more than just writing things down. Sometimes we need to copy images from different sources and do some editing in our daily work. Images pasted on Onenote can go a long way if you know how to apply the changes. Have you ever encountered a problem when using Onenote that images pasted on Onenote cannot allow you to work easily? This article will look at using images effectively on Onenote. we can
 Win11 new version of drawing: remove background with one click to realize cutout function
Sep 15, 2023 pm 10:53 PM
Win11 new version of drawing: remove background with one click to realize cutout function
Sep 15, 2023 pm 10:53 PM
Microsoft invites WindowsInsider project members in the Canary and Dev channels to test and experience the new Paint application. The latest version number is 11.2306.30.0. The most noteworthy new feature of this version update is the one-click cutout function. Users only need to click once to automatically eliminate the background and highlight the main body of the picture, making it easier for users to perform subsequent operations. The whole step is very simple. The user imports the picture in the new layout application, and then clicks the "removebackground" button on the toolbar to delete the background in the picture. The user can also use a rectangle to select the area to remove the background.
 How to replace all ppt backgrounds
Mar 25, 2024 pm 04:25 PM
How to replace all ppt backgrounds
Mar 25, 2024 pm 04:25 PM
PPT background replacement is an important operation that can quickly unify the visual style of the presentation. You can quickly replace the background of your entire presentation by modifying the slide master or using the Format Background feature. In addition, some PPT versions also provide a batch replacement function, which can easily replace the background of all slides. When replacing the background, you should pay attention to choosing a background that matches the theme of the presentation, and ensure that the background clarity and resolution meet the requirements.
 Play ambient background sounds on iPhone to stay focused
Nov 29, 2023 pm 11:27 PM
Play ambient background sounds on iPhone to stay focused
Nov 29, 2023 pm 11:27 PM
On iPhone and iPad, one of the many accessibility features Apple has included is background sounds. These sounds are designed to help you stay focused, stay calm, and help minimize distractions when you're busy with something. The background sounds provided include balanced, bright and dark noises, as well as natural sounds such as ocean, rain and streams. All sounds can be set to play in the background to mask unwanted ambient or external noise, and sounds are blended into or hidden beneath other audio and system sounds. Enable Background Sound on iPhone and iPad The following steps describe how to enable background sound on iPhone and iPad running iOS15/iPadOS15 and later. on iPhone ori
 How to change the background color of photos on Meitu Xiuxiu
Apr 08, 2024 pm 03:56 PM
How to change the background color of photos on Meitu Xiuxiu
Apr 08, 2024 pm 03:56 PM
1. Open the Meitu Xiu Xiu software, select [Picture Beautification], and import photos from the album. 2. Click [Cutting] on the bottom toolbar and select the [Background Replacement] function. 3. In the [Background] option, select the desired background color from the solid color box, or upload a custom image. 4. After confirming the selection, click [Save] to complete the background color change.
 How to change the default picture background when logging in to win7 system
Jun 30, 2023 pm 04:03 PM
How to change the default picture background when logging in to win7 system
Jun 30, 2023 pm 04:03 PM
How to change the default picture background when logging in to win7 system? Tutorial sharing on how to change the default picture background when logging in to win7 system. After setting a login password for our computer, when we turn on the computer and go to the login interface, there will be a picture background. Some users want to modify the background, so how can they modify the background? Many friends don’t know how to operate in detail. The editor below has compiled the steps to change the default picture background when logging in to the win7 system. If you are interested, follow the editor and take a look below! Steps to change the default picture background when logging in to the win7 system 1. First, go to the illustrated path C:WindowsSystem32oobeinfoackgrounds
 The birth background and original intention of Go language
Apr 04, 2024 am 08:48 AM
The birth background and original intention of Go language
Apr 04, 2024 am 08:48 AM
The Go language was born at Google to solve the problems of complexity and insufficient concurrency support of C++. Its original intention is to create a simple, easy-to-learn, efficient concurrency, memory-safe, cross-platform language to improve programmer productivity, build reliable and scalable systems, and promote code porting and sharing.
 How to solve the problem of black screen background when win11 is switched on and off?
Jan 04, 2024 pm 12:24 PM
How to solve the problem of black screen background when win11 is switched on and off?
Jan 04, 2024 pm 12:24 PM
When using win11, many friends find that their background is black when switching on and off, which is very ugly, but they don’t know how to set it up. In fact, we only need to turn on personalization, change the theme or lock screen wallpaper, and follow the editor below Let’s change it together. What should I do if the background is black when I turn on and off Windows 11? 1. First, open the computer desktop, right-click on a blank space on the desktop, and select the "Personalize" option. 2. After entering the personalization page, click the "Lock Screen" option on the right. 3. Then set a personalized lock screen interface and check the "Show lock screen background image on login screen" option.
