 Mobile Tutorial
 Android Phone
 How to easily register AppleID (Teach you step by step to register AppleID)
How to easily register AppleID (Teach you step by step to register AppleID)
Have you encountered problems registering an Apple ID when using Apple devices? Registering for an Apple ID is essential if you want to take full advantage of the Apple ecosystem. With an Apple ID, you can sync devices and data, download apps, purchase entertainment content such as movies and music, and enjoy various Apple services. This article is created by php editor Apple, and will introduce in detail how to successfully register an Apple ID in a few minutes in a step-by-step manner. Whether you are a newbie or an experienced user, this guide will provide you with step-by-step instructions on the registration process and valuable tips. Read on to start your Apple journey with ease!

1. Preparation: Connect to the Internet and open the AppStore
Please make sure that your device is connected to the Internet before starting to register Apple ID. Find the AppStore app on your device and click to open it.
2. Click "Create a new AppleID"
Click the "Account" in the upper right corner, then click the "Create a new AppleID" button after opening it in the AppStore.

3. Select the country/region
In order to use the correct regional setting during the registration process, find and click it in the drop-down menu and select your location country or region.
4. Read and agree to the Terms of Service
Click and carefully read Apple's Terms of Service and Privacy Policy "Agree" button to continue registration.
5. Fill in personal information
Date of birth, select an available address as your Apple ID, enter your name, gender and other personal information.

6. Choose a password and security question
To ensure that your Apple ID can be authenticated when it is restored in the future, choose a password with high security. and select and answer a few security questions.
7. Select billing information
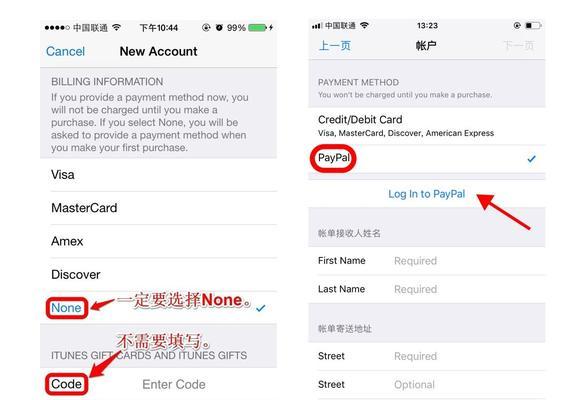
This will be used when you purchase content in the AppStore in the future. Enter your billing address and payment information (credit card, debit card or Alipay, etc.).
8. Verify identity
You may need to verify your identity. A verification code may be sent to you via text message or email to complete verification, depending on the registration method you choose.
9. Select notification settings
Set according to personal preferences. You can choose whether to receive push notifications from Apple.
10. Registration completed
Congratulations! You have successfully registered your Apple ID. You can now log in and start using Apple's various services and apps.
11. Add a trusted device
You can add a trusted device to increase the security of your account. When performing sensitive operations, this will require a verification code on the device.
12. Setting up two-factor authentication
can effectively protect your Apple ID. Two-factor authentication is a more secure login method. You can enable two-factor authentication in settings.
13. Retrieve the lost AppleID password
You can retrieve it through your mobile phone or if you have forgotten your AppleID password. Just follow the process and follow the prompts.
14. Manage AppleID
Payment methods, etc. You can manage your AppleID in the settings at any time, such as changing personal information and passwords.
15. Frequently Asked Questions
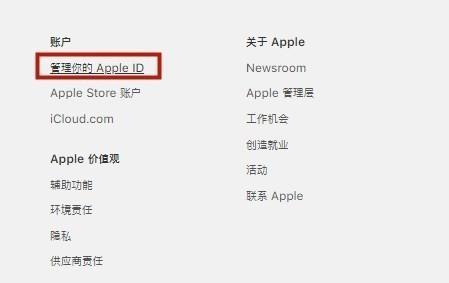
And provide corresponding solutions. This section answers some common problems encountered in the process of registering Apple ID.
You will easily complete the registration. Registering an Apple ID may sound complicated, but just follow the steps provided in this article. Allowing you to enjoy various services and applications in the Apple world, having an Apple ID will bring you more convenience and fun.
The above is the detailed content of How to easily register AppleID (Teach you step by step to register AppleID). For more information, please follow other related articles on the PHP Chinese website!

Hot AI Tools

Undresser.AI Undress
AI-powered app for creating realistic nude photos

AI Clothes Remover
Online AI tool for removing clothes from photos.

Undress AI Tool
Undress images for free

Clothoff.io
AI clothes remover

AI Hentai Generator
Generate AI Hentai for free.

Hot Article

Hot Tools

Notepad++7.3.1
Easy-to-use and free code editor

SublimeText3 Chinese version
Chinese version, very easy to use

Zend Studio 13.0.1
Powerful PHP integrated development environment

Dreamweaver CS6
Visual web development tools

SublimeText3 Mac version
God-level code editing software (SublimeText3)

Hot Topics
 Solution to the problem of blurry screen on Samsung monitor (how to deal with the phenomenon of blurry screen on Samsung monitor)
Sep 04, 2024 pm 01:32 PM
With the continuous development of technology, monitors have become an indispensable part of people's daily life and work. However, sometimes we may encounter some problems, such as screen blur on Samsung monitors. This article will introduce some common solutions to help you better deal with this problem. 1. Check whether the connection cable is secure - make sure the VGA, DVI or HDMI cables are intact and firmly connected to the monitor and computer or other devices. - Check whether the interface of the connecting cable is loose or dirty, and clean or replace it if necessary. 2. Adjust resolution and refresh rate - Adjust the resolution and refresh rate of the monitor on your computer system to ensure it matches the monitor's default settings. - Try different settings to see if they can resolve the blurry screen issue.
 How to withdraw money from Bitget Wallet to Alipay
Sep 04, 2024 pm 07:25 PM
The steps to withdraw money to Alipay using BitgetWallet are as follows: Open BitgetWallet and enter your password or use your fingerprint to unlock. Click Withdraw to select a cryptocurrency. Enter Alipay information and fill in the payment account number and amount. Select network Select the network that matches the Alipay payment method. Set Handling Fee Confirm the handling fee amount and accept it. Confirm and submit the inspection information and click Confirm. Waiting for confirmation awaits verification by the blockchain network. Fund withdrawals received will be credited to the Alipay payment account.
 Sesame Open Door Login Registration Entrance gate.io Exchange Registration Official Website Entrance
Mar 04, 2025 pm 04:51 PM
Gate.io (Sesame Open Door) is the world's leading cryptocurrency trading platform. This article provides a complete tutorial on spot trading of Gate.io. The tutorial covers steps such as account registration and login, KYC certification, fiat currency and digital currency recharge, trading pair selection, limit/market transaction orders, and orders and transaction records viewing, helping you quickly get started on the Gate.io platform for cryptocurrency trading. Whether a beginner or a veteran, you can benefit from this tutorial and easily master the Gate.io trading skills.
 How to get started with buying virtual coins? 2025 Ethereum Virtual Currency Newcomers' Guide
Feb 21, 2025 pm 06:54 PM
For investors new to the cryptocurrency world, it is crucial to understand how to buy virtual coins. This article is designed to provide a comprehensive guide to beginners covering detailed steps on how to choose the right exchange, register an account, deposit funds, and purchase Ethereum (ETH). By following this guide, beginners can safely and conveniently embark on their virtual currency investment journey and seize potential investment opportunities in 2025 and beyond.
 How to buy Bitcoin on Alipay? Alipay Buy BTC Complete Tutorial
Mar 05, 2025 pm 06:03 PM
Alipay and Bitcoin Transactions: A safe and convenient purchasing guide Alipay is a widely used payment tool in China. Although it does not support direct purchase of cryptocurrencies such as Bitcoin, you can complete transactions indirectly through some channels. This article will guide you on how to use Alipay to purchase Bitcoin safely and conveniently, and explain the risks that need to be paid attention to. The most common way to purchase Bitcoin indirectly through cryptocurrency exchanges is to trade through cryptocurrency exchanges that support Alipay. This method usually requires you to buy USDT (stablecoin) first and then exchange USDT for Bitcoin. The following is an example of Ouyi OKX Exchange, explain the operation steps in detail: Register Ouyi OKX account: Visit Ouyi OKX official website (click to register), register an account using email address, and complete
 Ouyi Exchange app domestic download tutorial
Mar 21, 2025 pm 05:42 PM
This article provides a detailed guide to safe download of Ouyi OKX App in China. Due to restrictions on domestic app stores, users are advised to download the App through the official website of Ouyi OKX, or use the QR code provided by the official website to scan and download. During the download process, be sure to verify the official website address, check the application permissions, perform a security scan after installation, and enable two-factor verification. During use, please abide by local laws and regulations, use a safe network environment, protect account security, be vigilant against fraud, and invest rationally. This article is for reference only and does not constitute investment advice. Digital asset transactions are at your own risk.
 List of handling fees for okx trading platform
Feb 15, 2025 pm 03:09 PM
The OKX trading platform offers a variety of rates, including transaction fees, withdrawal fees and financing fees. For spot transactions, transaction fees vary according to transaction volume and VIP level, and adopt the "market maker model", that is, the market charges a lower handling fee for each transaction. In addition, OKX also offers a variety of futures contracts, including currency standard contracts, USDT contracts and delivery contracts, and the fee structure of each contract is also different.
 How to withdraw money from Bitget Wallet Bitpie payment platform to Alipay or WeChat
Sep 04, 2024 pm 06:57 PM
How to withdraw money to Alipay or WeChat through BitgetWallet? 1. Log in to the BitgetWallet payment platform; 2. Select the asset to be withdrawn; 3. Click the "Withdraw" button; 4. Select the withdrawal method (Alipay or WeChat); 5. Enter the withdrawal amount and payment account number; 6. Confirm and submit.


