 Software Tutorial
 Computer Software
 How to use AI to make simple 3D offset fonts - AI font making tutorial
How to use AI to make simple 3D offset fonts - AI font making tutorial
In our daily work, we often use words to express our thoughts, but sometimes ordinary words cannot meet our needs. At this time, we can use some special effects to make our words more vivid Images, such as 3D misaligned fonts. Today, PHP editor Yuzai will bring you a tutorial on AI font making. Friends who are interested can learn it together!
The first step: Create a new workspace of any size and cover it with the rectangle tool, fill it with black; shortcut key ctrl 2 to lock it as the background:
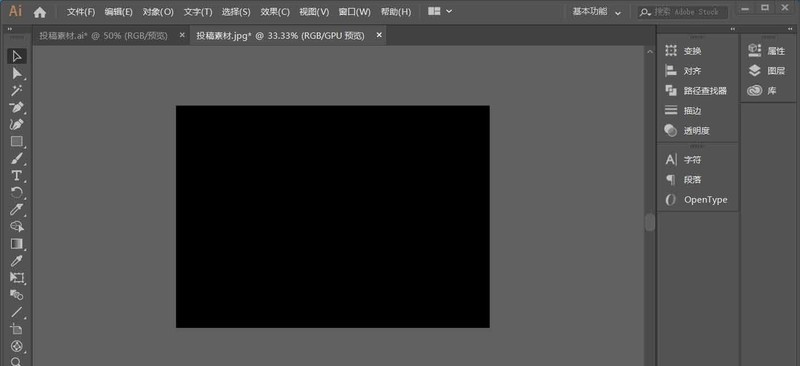
The second step: use Use the text tool to input the text you want and fill it with white. I recommend using Zaozi Kofang Jinhei as the font (other fonts are also acceptable; but be sure to use thicker fonts, otherwise it will affect the final effect). Then expand to shape in the upper left corner object.
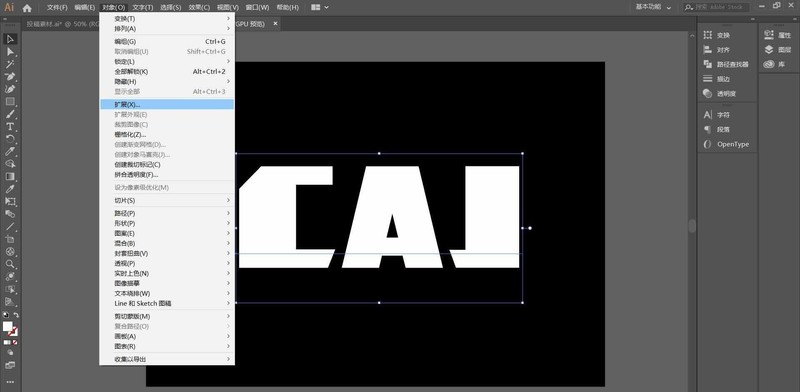
Step 3: After canceling the grouping, use the gradient tool to add a gradient to each character, as follows:
(C: R255, G0, B0/R255, G0, B255)
(A:R0,G0,B255/R0,G255,B0)
(J:R255,G255,B0/R255,G0,B255)
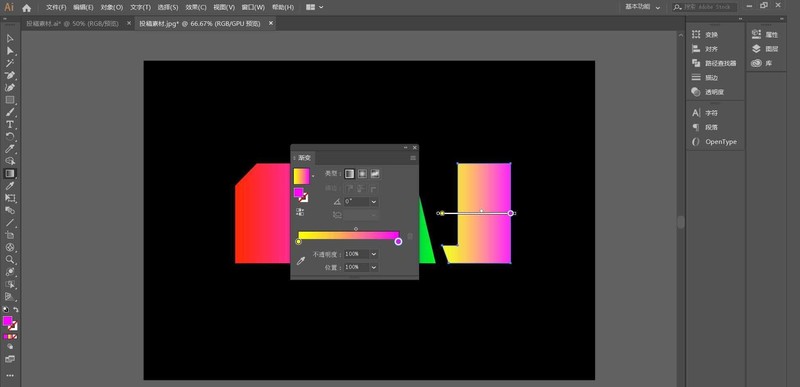
Finally, slightly adjust the starting and ending points of the gradient.
Step 4: Use the rectangle tool to make a rectangle and overlap it with the font, as shown in the figure:
Then use the split in the path finder to process the rectangle and the font, and then ungroup , Delete the rectangle
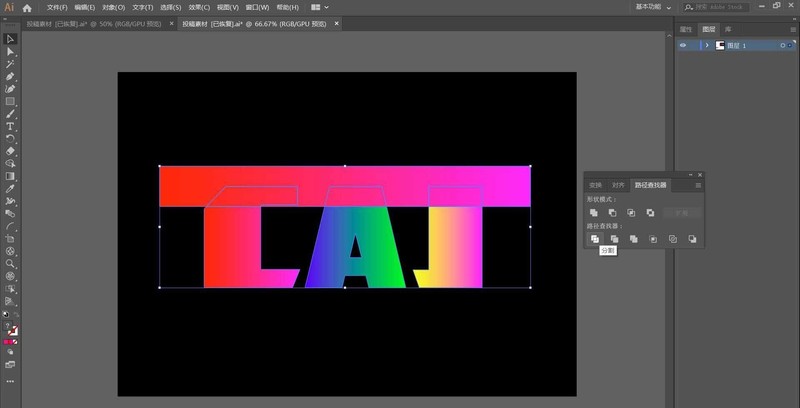
Next, select the cut part of the font and move it slightly to the right (as shown in the picture):
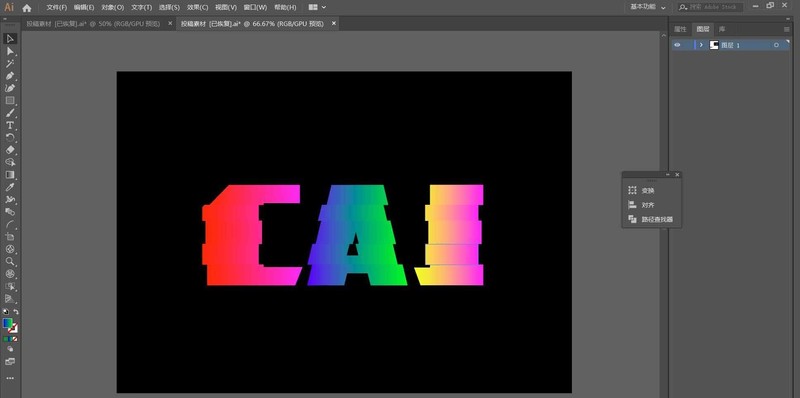
Repeat the operation just now. times, the following effect is obtained:
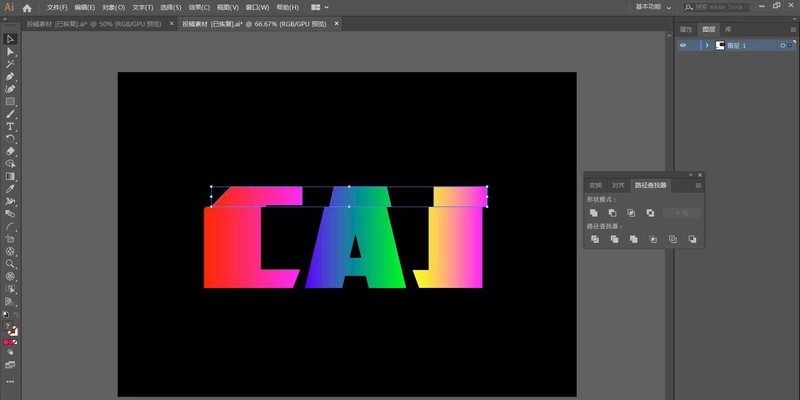
Step 5: Same as step 4, except that the rectangle is rotated 90° and the cut font moves slightly up and down; repeat several times to get Below:
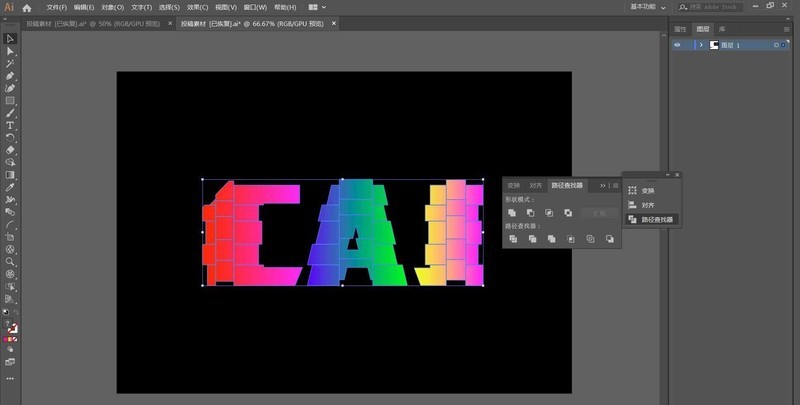
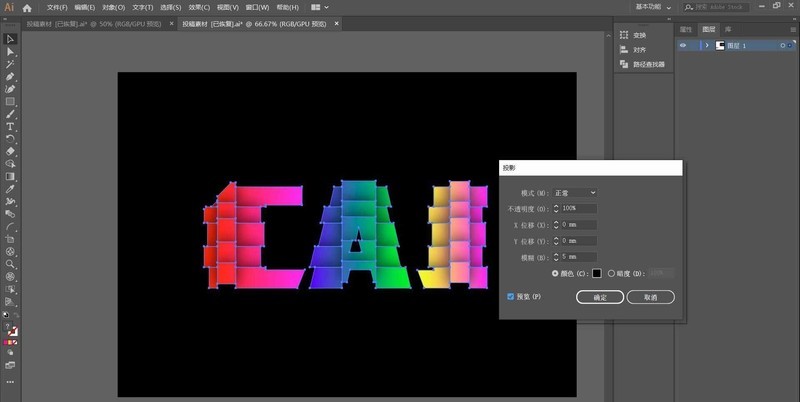
Step 7: Select the font and turn on the effect stylized
projection, as shown below:
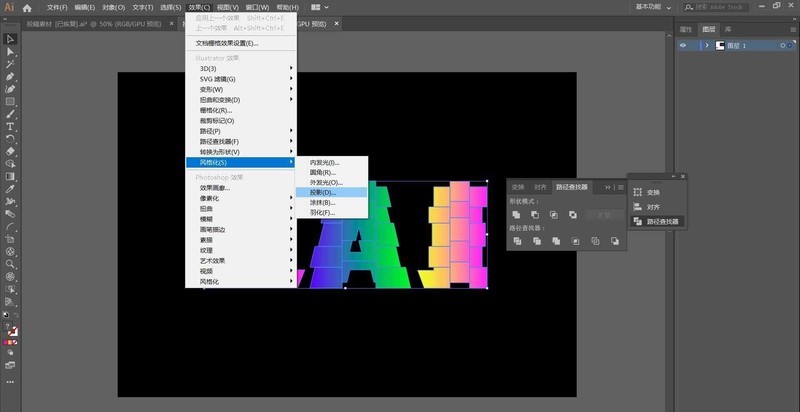
Value As follows
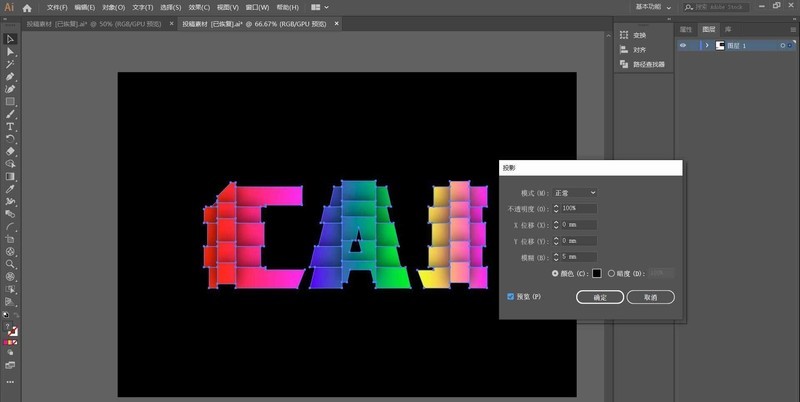
Step 8: Make a reflection, use the mirror tool to flip the font horizontally, copy and align it, as follows
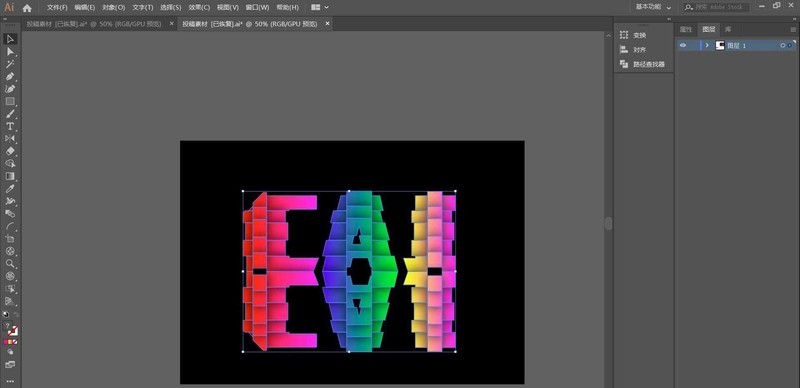
Select the font below and open it In the Transparency panel, click to create a mask, as shown in the picture:
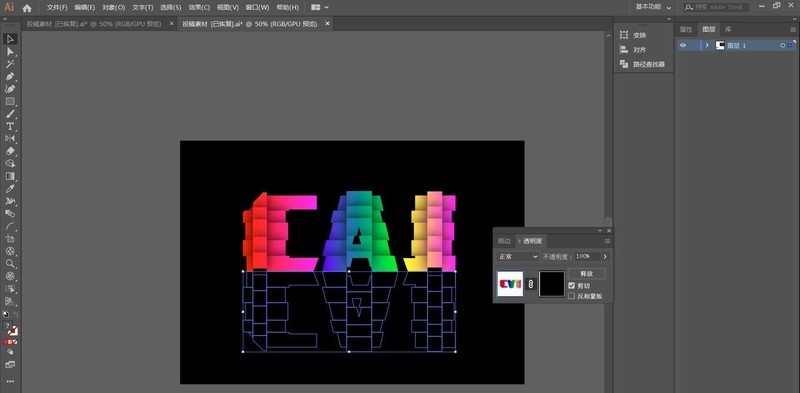
Click on the mask layer, and use the rectangle tool to draw a rectangle that completely covers the font below.
Then add a gradient effect to the rectangle, with the colors black and white.
Adjust the starting and ending points and angles of the gradient, and finally exit the mask layer, as follows:
Final rendering:
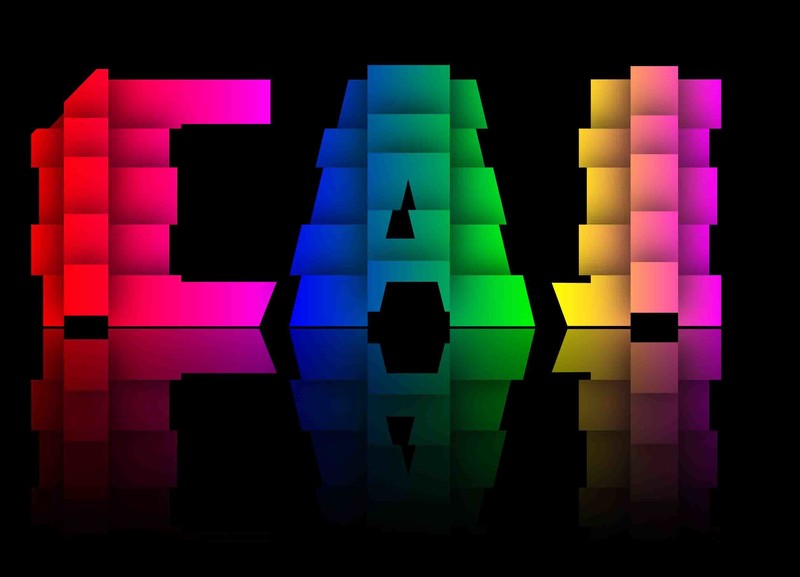
The above is the detailed content of How to use AI to make simple 3D offset fonts - AI font making tutorial. For more information, please follow other related articles on the PHP Chinese website!

Hot AI Tools

Undresser.AI Undress
AI-powered app for creating realistic nude photos

AI Clothes Remover
Online AI tool for removing clothes from photos.

Undress AI Tool
Undress images for free

Clothoff.io
AI clothes remover

AI Hentai Generator
Generate AI Hentai for free.

Hot Article

Hot Tools

Notepad++7.3.1
Easy-to-use and free code editor

SublimeText3 Chinese version
Chinese version, very easy to use

Zend Studio 13.0.1
Powerful PHP integrated development environment

Dreamweaver CS6
Visual web development tools

SublimeText3 Mac version
God-level code editing software (SublimeText3)

Hot Topics
 1377
1377
 52
52
![[PROVEN] Steam Error e87 Fix: Get Gaming Again in Minutes!](https://img.php.cn/upload/article/202503/18/2025031817560457401.jpg?x-oss-process=image/resize,m_fill,h_207,w_330) [PROVEN] Steam Error e87 Fix: Get Gaming Again in Minutes!
Mar 18, 2025 pm 05:56 PM
[PROVEN] Steam Error e87 Fix: Get Gaming Again in Minutes!
Mar 18, 2025 pm 05:56 PM
Article discusses causes of Steam Error e87, including network issues, security software, server problems, outdated clients, and corrupted files. Offers prevention and solution strategies.[159 characters]
 Steam Error e87: What It Is & How to Fix It
Mar 18, 2025 pm 05:51 PM
Steam Error e87 occurs during Steam client updates or launches due to connection issues. Fix it by restarting devices, checking server status, changing DNS, disabling security software, clearing cache, or reinstalling Steam.
 Easy Fix: Steam Error e87 Explained & Solved
Mar 18, 2025 pm 05:53 PM
Steam Error e87, caused by connectivity issues, can be fixed without reinstalling by restarting, checking internet, and clearing cache. Adjusting Steam settings helps prevent future occurrences.
 How to Fix Steam Error Code e87: The ULTIMATE Guide
Mar 18, 2025 pm 05:51 PM
Article discusses fixing Steam Error Code e87, caused by network issues, corrupt files, or client problems. Provides troubleshooting steps and prevention tips.
 Steam Error e87: Why It Happens & 5 Ways to Fix It
Mar 18, 2025 pm 05:55 PM
Steam Error e87 disrupts gaming on Steam due to connectivity issues. The article discusses causes like unstable internet and server overload, and offers fixes like restarting Steam and checking for updates.
 how to add page numbers in google docs
Mar 14, 2025 pm 02:57 PM
The article details how to add, customize, start from a specific page, and remove page numbers in Google Docs using step-by-step instructions.
 Steam Error Code e87: Get Back to Gaming FAST!
Mar 18, 2025 pm 05:52 PM
The article discusses Steam Error Code e87, its causes like network issues, server problems, and corrupted files, and provides fixes and preventive measures to avoid it.Character count: 159
 How to fix: err_response_headers_multiple_access_control_allow_origin error in Google Chrome
Mar 21, 2025 pm 06:19 PM
Article discusses fixing "err_response_headers_multiple_access_control_allow_origin" error in Chrome by addressing multiple Access-Control-Allow-Origin headers.


