How to add zoom animation effect to Premiere pictures? PHP editor Xinyi brings a detailed tutorial, with pictures and texts, to guide you step by step on how to use Premiere software to add vivid zoom-in and zoom-out animation effects to pictures. If you want to make your images more eye-catching in your videos, read on for detailed steps and tips.
1. Open the PR software, double-click the pop-up window in the sequence, and select a picture. You can also select it in File->Import.

2. Place the imported pictures into the video track, as shown in the figure. If you feel that the length of the picture is too small, move the time slider below to lengthen the time line. Or just lengthen the image. (This version is cs6, the slider is below.).

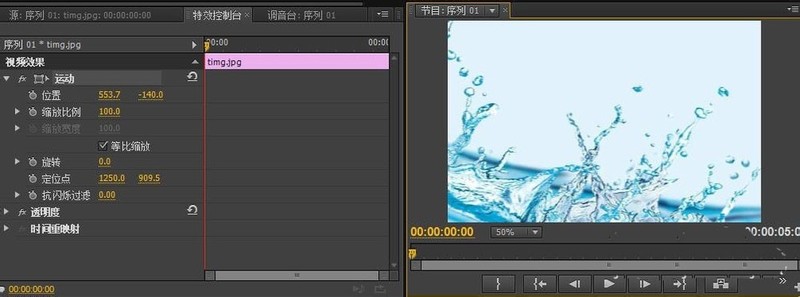
3. Double-click the picture and you will see the picture above. Select the special effects console here.

4. Select the movement in the special effects and there is a scaling ratio. Move the mouse over it and hold it to zoom left or right. Or double-click the picture of the program sequence to zoom.

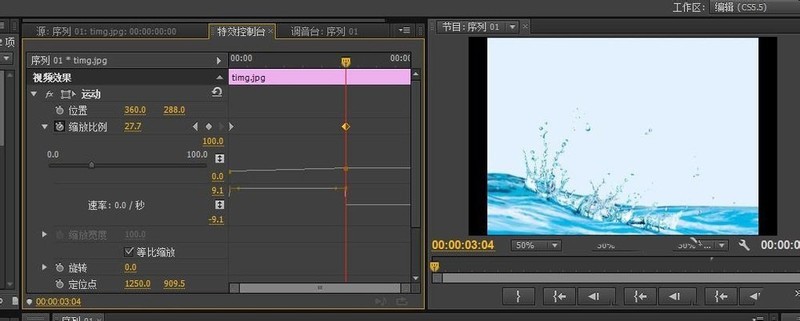
5. After the picture is scaled to an appropriate ratio. Turn on the small triangle next to the zoom ratio for detailed settings. The alarm clock-like icon next to the small triangle is the switching animation.

6. Based on the previous step, we select a certain time period and click it to enter a key frame. As shown in the picture. Then move the line up and down. The picture becomes larger and smaller accordingly.

7. Press Enter to test.
The above is the detailed content of Tutorial on adding zoom-in and zoom-out animation effects to premiere images. For more information, please follow other related articles on the PHP Chinese website!
 What software is premiere
 Four major characteristics of blockchain
 How to set startup items at startup
 Solution to java success and javac failure
 Where is the prtscrn button?
 Introduction to repeater nesting method
 How to solve no route to host
 Usage of indexof in java
 How to configure the pycharm environment


