Photoshop 逼真的流水动画
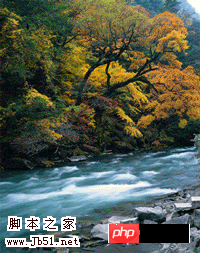
本教程介绍怎样制作流水动画。大致思路:先找好大致的素材图,把需要加动画的部分抠出来,复制到新的图层,然后给水纹加上条纹蒙版,做动画的时候移动水纹部分即可。
原图 
最终效果  1、新建文档,设置参数(见1图)。
<图1>
2、前景色设定为黑色,调整画笔大小,按住【Shift】键,在图层上端画出一条横线(见2-1图);选取横线,按【Ctrl+T】键,将横线适当下移,按【Enter】键确定(见2-2图);按住【Ctrl+Shift+Alt】键,连续点按【T】键,将图层复制满为止(见2-3图)。 
<图2-1> 
<图2-2> 
<图2-3> 3、用【矩形选框工具】将纹理选取,依次打开【编辑-定义图案-图案名称】,保存图案(见3-1 — 3-3图)。 
<图3-1> 
<图3-2> 
<图3-3> 4、打开一张图片并复制副本。 
<图4>
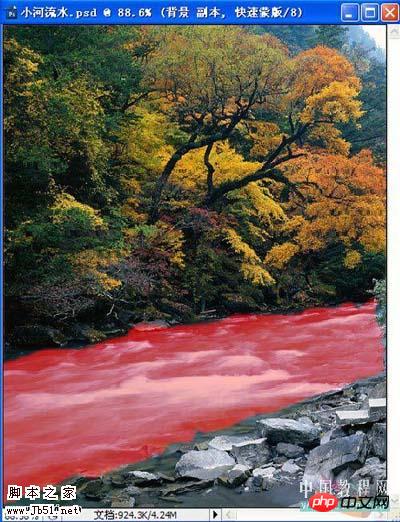
5、点按工具箱下边的【以快速蒙版编辑】,用画笔在副本层上涂抹有水的部分(见5图),树叶部分照此操作。 
<图5> 6、再次点按【以快速蒙版编辑】,依次打开【选择-反向】或按【Ctrl+Shift+I】键(见6图)。 
<图6>
7、按【Ctrl+J】保存并复制,树叶部分照此办理(见7图)。 
<图7> 8、打开图层面板,点按下方【添加矢量蒙版】(见8图)。 
<图8>
9、依次打开【编辑—填充—图案】,填充纹理图案,将河水1旋转90度(见9图)。 
<图9> 10、点按蒙版左边的小锁,断开链接,选取蒙版层(见10-1图)。依次打开【窗口—动画】,设定时间轴模式,预设参数(见10-2图);将时间轴拖至左端,点击【图层蒙版位置】左边的小时钟为纹理新建1个关键帧(见10-3图);随后将时间轴拖至右端(见10-4图);接下来将纹理向下拖动,直至合适位置松开鼠标,届时,右端自动增加1个关键帧(见10-4图)。注:河水1向左;河水2向下;树叶向上或向下分别移动。 
<图10-1> 
<图10-2> 
<图10-3> 
<图10-4> 11、选择菜单:文件 > 储存为 Web 和设备所用格式。 
<图11-1> 
<图11-2>
12、最终效果: 

Hot AI Tools

Undresser.AI Undress
AI-powered app for creating realistic nude photos

AI Clothes Remover
Online AI tool for removing clothes from photos.

Undress AI Tool
Undress images for free

Clothoff.io
AI clothes remover

AI Hentai Generator
Generate AI Hentai for free.

Hot Article

Hot Tools

Notepad++7.3.1
Easy-to-use and free code editor

SublimeText3 Chinese version
Chinese version, very easy to use

Zend Studio 13.0.1
Powerful PHP integrated development environment

Dreamweaver CS6
Visual web development tools

SublimeText3 Mac version
God-level code editing software (SublimeText3)

Hot Topics
 1378
1378
 52
52
 How do I use Photoshop for creating social media graphics?
Mar 18, 2025 pm 01:41 PM
The article details using Photoshop for social media graphics, covering setup, design tools, and optimization techniques. It emphasizes efficiency and quality in graphic creation.
 What is the reason why PS keeps showing loading?
Apr 06, 2025 pm 06:39 PM
PS "Loading" problems are caused by resource access or processing problems: hard disk reading speed is slow or bad: Use CrystalDiskInfo to check the hard disk health and replace the problematic hard disk. Insufficient memory: Upgrade memory to meet PS's needs for high-resolution images and complex layer processing. Graphics card drivers are outdated or corrupted: Update the drivers to optimize communication between the PS and the graphics card. File paths are too long or file names have special characters: use short paths and avoid special characters. PS's own problem: Reinstall or repair the PS installer.
 How do I prepare images for web using Photoshop (optimize file size, resolution)?
Mar 18, 2025 pm 01:35 PM
Article discusses optimizing images for web using Photoshop, focusing on file size and resolution. Main issue is balancing quality and load times.
 How do I prepare images for print using Photoshop (resolution, color profiles)?
Mar 18, 2025 pm 01:36 PM
The article guides on preparing images for print in Photoshop, focusing on resolution, color profiles, and sharpness. It argues that 300 PPI and CMYK profiles are essential for quality prints.
 How do I create animated GIFs in Photoshop?
Mar 18, 2025 pm 01:38 PM
Article discusses creating and optimizing animated GIFs in Photoshop, including adding frames to existing GIFs. Main focus is on balancing quality and file size.
 What are the common questions about exporting PDF on PS
Apr 06, 2025 pm 04:51 PM
Frequently Asked Questions and Solutions when Exporting PS as PDF: Font Embedding Problems: Check the "Font" option, select "Embed" or convert the font into a curve (path). Color deviation problem: convert the file into CMYK mode and adjust the color; directly exporting it with RGB requires psychological preparation for preview and color deviation. Resolution and file size issues: Choose resolution according to actual conditions, or use the compression option to optimize file size. Special effects issue: Merge (flatten) layers before exporting, or weigh the pros and cons.
 How do I use Photoshop's video editing capabilities?
Mar 18, 2025 pm 01:37 PM
The article explains how to use Photoshop for video editing, detailing steps to import, edit, and export videos, and highlighting key features like the Timeline panel, video layers, and effects.
 How to speed up the loading speed of PS?
Apr 06, 2025 pm 06:27 PM
Solving the problem of slow Photoshop startup requires a multi-pronged approach, including: upgrading hardware (memory, solid-state drive, CPU); uninstalling outdated or incompatible plug-ins; cleaning up system garbage and excessive background programs regularly; closing irrelevant programs with caution; avoiding opening a large number of files during startup.


