Photoshop制作设计3D风格的小脚丫ICON图标
本教程主要Photoshop制作设计3D风格的小脚丫ICON图标,教程制作出来的图标非常漂亮,难度不是很大,推荐到脚本之家,一起来看看吧
今天为大家分享Photoshop制作设计3D风格的小脚丫ICON图标方法,教程很不错,值得大家学习,推荐过来,一起来看看吧!
先看看效果图

首先让我们来新建一个高度为560,宽度为420.

填充背景为:#fbf5e7

选择圆角矩形工具


画一个180*180,半径为10的圆角矩形
填充颜色为:#a9d0e1


ctrl+t,然后右击旋转,旋转45°,然后右击进行扭曲(其中万万不可双击取消变形哦)

可以拉辅助线,按住alt键,选中其中一个点,进行水平移动,这样是以中心为点进行的两边的延伸,哎呀,具体怎么个术语我也不是很清楚,就是这个意思吧,哈哈

嗯,最后变成这个样子

接着我们Ctrl+Alt+↓ 多按几遍大概十七八次就可以了,这部叫轻移。look,是不是有厚度出来了,具体厚度根据自己喜好来定,可厚可薄的嘛,嘻嘻(*^__^*)

然后我们按住shift键点选所有轻移出的副本

接着Ctrl+g,这样这些副本就全部放到一个组里面了
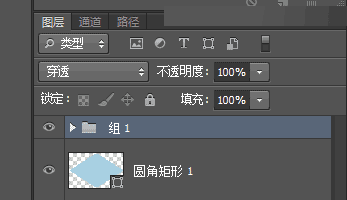
点击组1图层的绿色部分的任何一个位置都可以

打开图层样式,进行颜色叠加,颜色为#63a8c7
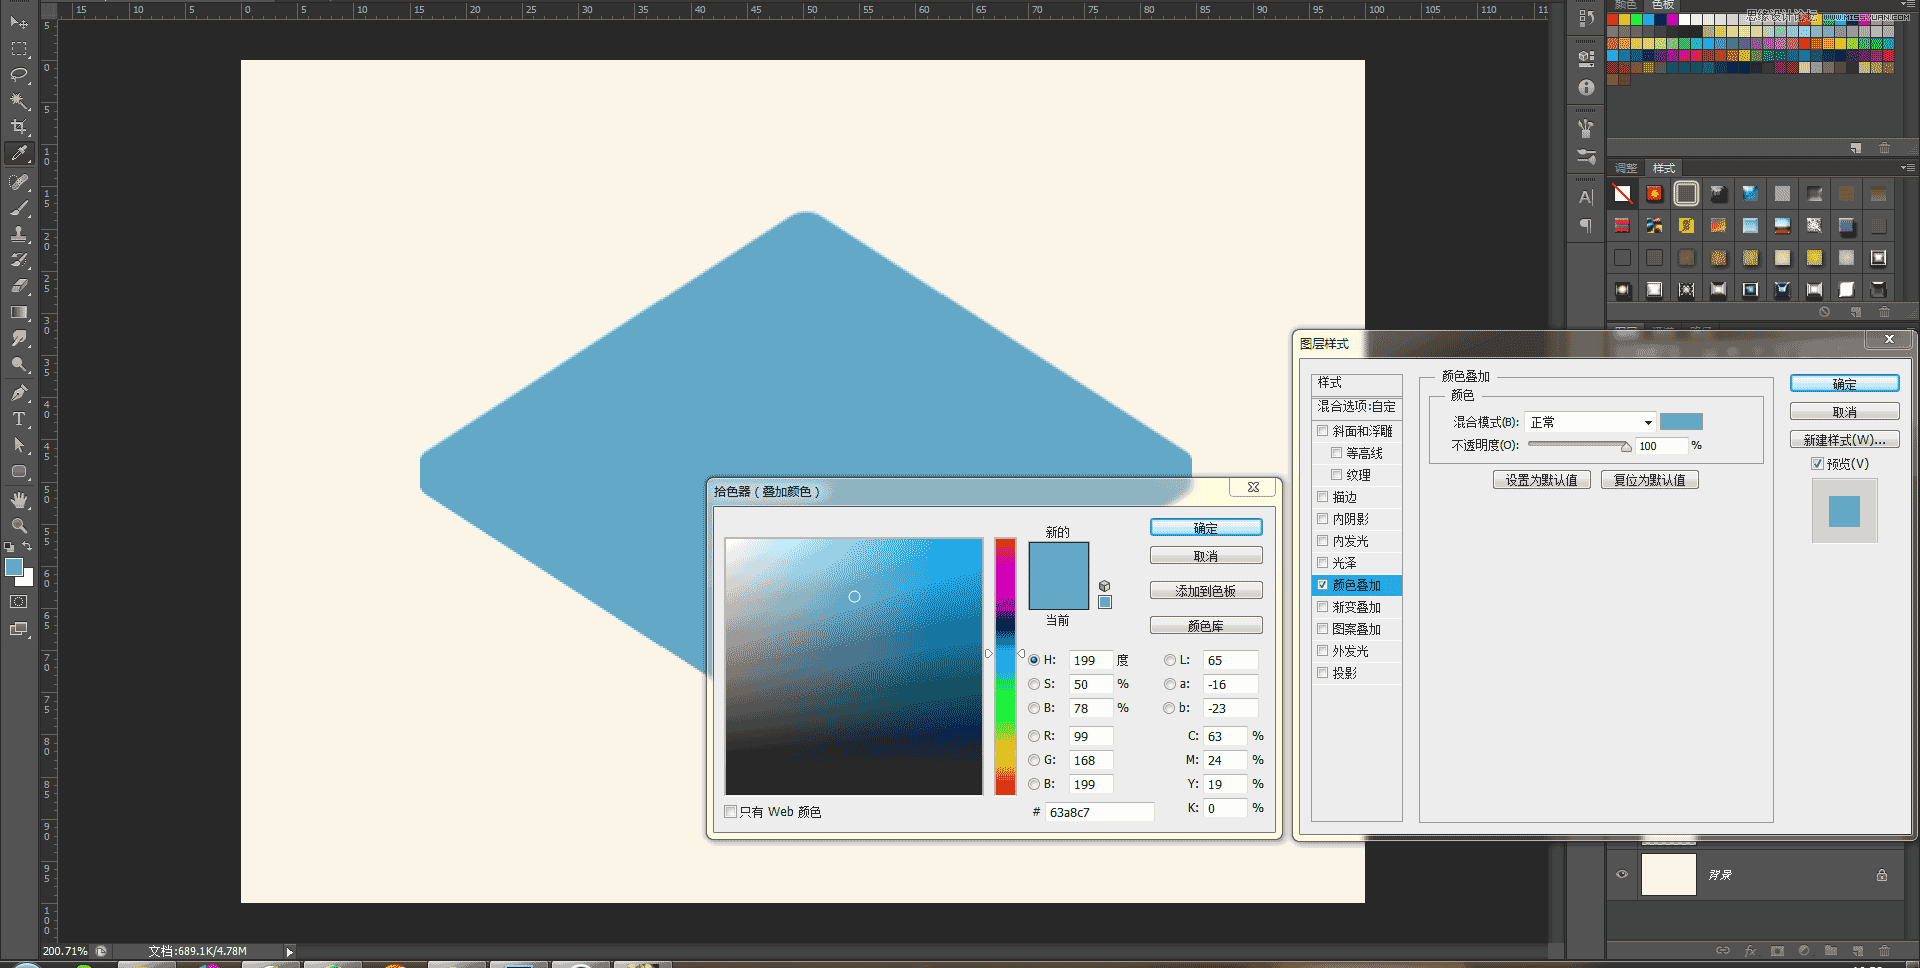
把组1图层放到圆角矩形1图层的下面

效果是这样的,是不是立起来啦,

接着复制圆角矩形1图层放置组1图层的下面

打开图层样式进行颜色叠加,颜色为:#345469,往右下方移动,使阴影露出


把不透明度降低至50%

下面我们来制作小爪子,打开自定形工具

找到小爪子

如果没有的话,点击边上的小齿轮,然后点击动物,点击追加,这图案是自带的。也可以选择或者制作自己喜欢的图案。


填充颜色为:#f3cfd3

同样,我们做一些变形扭曲的调整

从而达到这种效果

Ctrl+Alt+↓轻移出多个图层,shift点选所有副本图层,Ctrl+g放入一个组里

打开组2的图层样式,进行颜色叠加,颜色为#efa9b1

复制形状1图层,放在组2图层的下面

进行颜色叠加,颜色为#eb8894,往右下方移动,使阴影露出
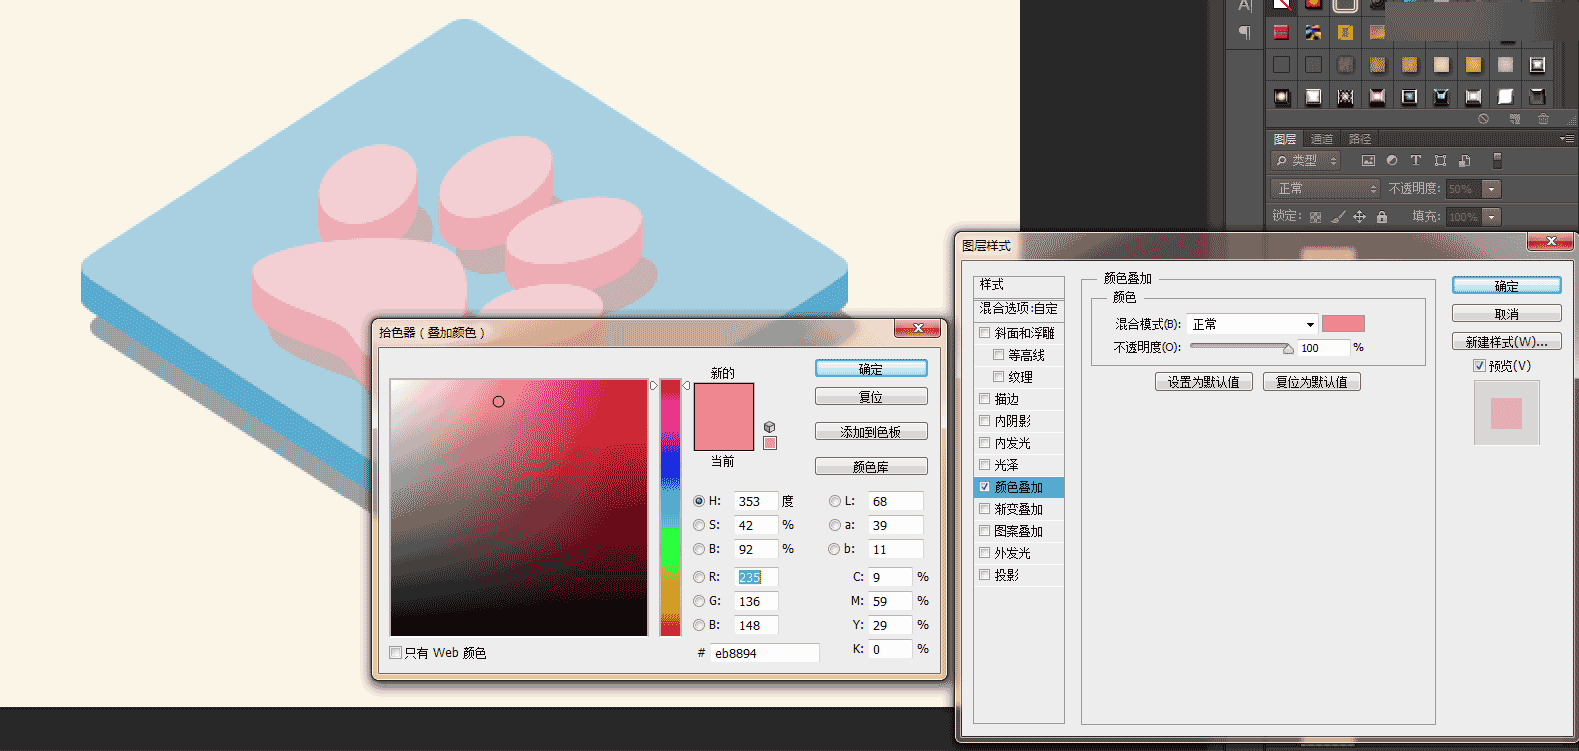
不透明度降低至50%
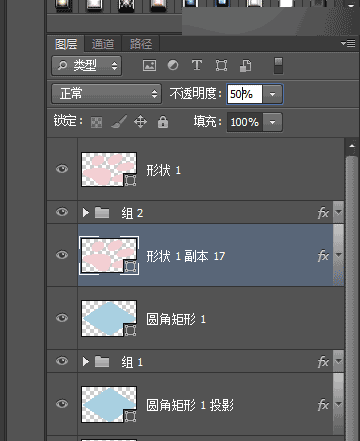
选择椭圆工具,画个椭圆,填充颜色为#fbf5e7


Ctrl+Alt+↓轻移出多个图层,shift点选所有副本图层,Ctrl+g放入一个组里
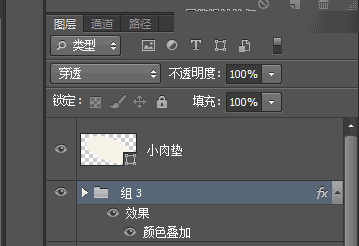
对组3进行颜色叠加,颜色为#fe12be

复制小肉垫图层,移至组3图层的下面

打开图层样式进行颜色叠加,颜色为#e1c789 往右下方移动,使阴影露出

不透明度降低至50%

大功告成啦,超简单的


以上就是Photoshop制作设计3D风格的小脚丫ICON图标的内容,更多相关内容请关注PHP中文网(www.php.cn)!

Hot AI Tools

Undresser.AI Undress
AI-powered app for creating realistic nude photos

AI Clothes Remover
Online AI tool for removing clothes from photos.

Undress AI Tool
Undress images for free

Clothoff.io
AI clothes remover

AI Hentai Generator
Generate AI Hentai for free.

Hot Article

Hot Tools

Notepad++7.3.1
Easy-to-use and free code editor

SublimeText3 Chinese version
Chinese version, very easy to use

Zend Studio 13.0.1
Powerful PHP integrated development environment

Dreamweaver CS6
Visual web development tools

SublimeText3 Mac version
God-level code editing software (SublimeText3)

Hot Topics
 How do I use Photoshop for creating social media graphics?
Mar 18, 2025 pm 01:41 PM
The article details using Photoshop for social media graphics, covering setup, design tools, and optimization techniques. It emphasizes efficiency and quality in graphic creation.
 How do I prepare images for web use in Photoshop (file size, resolution, color space)?
Mar 13, 2025 pm 07:28 PM
Article discusses preparing images for web use in Photoshop, focusing on optimizing file size, resolution, and color space. Main issue is balancing image quality with quick loading times.
 How do I use Photoshop's Content-Aware Fill and Content-Aware Move tools effectively?
Mar 13, 2025 pm 07:35 PM
Article discusses using Photoshop's Content-Aware Fill and Move tools effectively, offering tips on selecting source areas, avoiding mistakes, and adjusting settings for optimal results.
 How do I prepare images for web using Photoshop (optimize file size, resolution)?
Mar 18, 2025 pm 01:35 PM
Article discusses optimizing images for web using Photoshop, focusing on file size and resolution. Main issue is balancing quality and load times.
 How do I use Photoshop's video editing capabilities?
Mar 18, 2025 pm 01:37 PM
The article explains how to use Photoshop for video editing, detailing steps to import, edit, and export videos, and highlighting key features like the Timeline panel, video layers, and effects.
 How do I calibrate my monitor for accurate color in Photoshop?
Mar 13, 2025 pm 07:31 PM
Article discusses calibrating monitors for accurate color in Photoshop, tools for calibration, effects of improper calibration, and recalibration frequency. Main issue is ensuring color accuracy.
 How do I create animated GIFs in Photoshop?
Mar 18, 2025 pm 01:38 PM
Article discusses creating and optimizing animated GIFs in Photoshop, including adding frames to existing GIFs. Main focus is on balancing quality and file size.
 How do I prepare images for print using Photoshop (resolution, color profiles)?
Mar 18, 2025 pm 01:36 PM
The article guides on preparing images for print in Photoshop, focusing on resolution, color profiles, and sharpness. It argues that 300 PPI and CMYK profiles are essential for quality prints.


