

在服务器搭建Tengine+HHVM环境运行WordPress

系统环境 阿里云1核+512M内存 Ubuntu 12.04 64位 Wordpress 3.9 修改系统软件源 参考http://mirrors.aliyun.com/help/ubuntu deb http://mirrors.aliyun.com/ubuntu/ precise main restricted universe multiverse deb http://mirrors.aliyun.com/ubuntu/ pr
系统环境
阿里云1核+512M内存 Ubuntu 12.04 64位
Wordpress 3.9
修改系统软件源
参考http://mirrors.aliyun.com/help/ubuntu
  deb http://mirrors.aliyun.com/ubuntu/ precise main restricted universe multiverse
  deb http://mirrors.aliyun.com/ubuntu/ precise-security main restricted universe multiverse
  deb http://mirrors.aliyun.com/ubuntu/ precise-updates main restricted universe multiverse
  deb http://mirrors.aliyun.com/ubuntu/ precise-proposed main restricted universe multiverse
  deb http://mirrors.aliyun.com/ubuntu/ precise-backports main restricted universe multiverse
  deb-src http://mirrors.aliyun.com/ubuntu/ precise main restricted universe multiverse
  deb-src http://mirrors.aliyun.com/ubuntu/ precise-security main restricted universe multiverse
  deb-src http://mirrors.aliyun.com/ubuntu/ precise-updates main restricted universe multiverse
  deb-src http://mirrors.aliyun.com/ubuntu/ precise-proposed main restricted universe multiverse
  deb-src http://mirrors.aliyun.com/ubuntu/ precise-backports main restricted universe multiverse
若使用阿里云服务器,将源的域名从mirrors.aliyun.com改为mirrors.aliyuncs.com,不占用公网流量,而且下载速度更快。
更新系统软件
sudo apt-get update && sudo apt-get upgrade
安装Tengine
1、安装依赖软件
apt-get --install-suggests install gcc g++ make
2、下载相关软件
wget http://jaist.dl.sourceforge.net/project/pcre/pcre/8.35/pcre-8.35.tar.gz
wget http://zlib.net/zlib-1.2.8.tar.gz
wget http://www.openssl.org/source/openssl-1.0.1g.tar.gz
wget http://www.canonware.com/download/jemalloc/jemalloc-3.6.0.tar.bz2
wget http://tengine.taobao.org/download/tengine-2.0.2.tar.gz
3、安装Pcre
  tar zxvf pcre-8.35.tar.gz
  cd pcre-8.35
 ./configure --prefix=/usr/local/pcre-8.35
  make && make install
4、安装Zlib
  cd ..
  tar zxvf zlib-1.2.8.tar.gz
  cd zlib-1.2.8
  ./configure --prefix=/usr/local/zlib-1.2.8
  make && make install
5、安装OpenSSl
  cd ..
  tar zxvf openssl-1.0.1g.tar.gz
  cd openssl-1.0.1g
  ./config --prefix=/usr/local/openssl-1.0.1g
  make && make install
6、解压jemalloc不需要安装
cd .. && tar jxvf jemalloc-3.6.0.tar.bz2
7、安装Tengine
  ./configure --prefix=/usr/local/nginx \
--user=www-data \
--group=www-data \
--with-pcre=/usr/local/src/pcre-8.35 \
--with-zlib=/usr/local/src/zlib-1.2.8 \
--with-openssl=/usr/local/src/openssl-1.0.1g \
--with-jemalloc=/usr/local/src/jemalloc-3.6.0 \
--with-http_gzip_static_module \
--with-http_realip_module \
--with-http_stub_status_module \
--with-http_concat_module
make && make install
安装HHVM
其他系统参考https://github.com/facebook/hhvm/wiki
echo '140.211.166.134  dl.hhvm.com' >> /etc/hosts
sudo apt-get install software-properties-common python-software-properties
sudo add-apt-repository ppa:mapnik/boost
wget -O - http://dl.hhvm.com/conf/hhvm.gpg.key | sudo apt-key add -
echo deb http://dl.hhvm.com/ubuntu precise main | sudo tee /etc/apt/sources.list.d/hhvm.list
sudo apt-get update
sudo apt-get install hhvm
server hhvm start # 启动HHVM
如果想使用UNIX socket的方式启动HHVM,需要修改/etc/hhvm/server.ini
  ; php options
  pid = /var/run/hhvm/pid
  ; hhvm specific
  ;hhvm.server.port = 9000
  hhvm.server.type = fastcgi
  hhvm.server.file_socket = /var/run/hhvm/hhvm.sock
  hhvm.server.default_document = index.php
  hhvm.log.level = Error
  hhvm.log.always_log_unhandled_exceptions = true
  hhvm.log.runtime_error_reporting_level = 8191
  hhvm.log.use_log_file = true
  hhvm.log.file = /var/log/hhvm/error.log
  hhvm.repo.central.path = /var/run/hhvm/hhvm.hhbc
  hhvm.mysql.typed_results = false
配置nginx.conf,
  #user  nobody;
worker_processes  auto;
worker_rlimit_nofile 100000;
#error_log  logs/error.log;
#error_log  logs/error.log  notice;
#error_log  logs/error.log  info;
#pid        logs/nginx.pid;
events {
    worker_connections  65535;
    use epoll;
    multi_accept on;
}
# load modules compiled as Dynamic Shared Object (DSO)
#
#dso {
#    load ngx_http_fastcgi_module.so;
#    load ngx_http_rewrite_module.so;
#}
http {
    include       mime.types;
    default_type  application/octet-stream;
    log_format  main  '$remote_addr - $remote_user [$time_local] "$request" '
                      '$status $body_bytes_sent "$http_referer" '
                      '"$http_user_agent" "$http_x_forwarded_for"';
    #access_log  logs/access.log  main;
    access_log off;
    upstream hhvm {
        server unix:/var/run/hhvm/hhvm.sock;
        #server 127.0.0.1:9000;
    }
    server_tokens off;
    sendfile        on;
    tcp_nopush     on;
    keepalive_timeout  65;
    server_names_hash_bucket_size 128;
    client_header_buffer_size 32k;
    large_client_header_buffers 4 32k;
    client_max_body_size 20m;
    open_file_cache          max=10000 inactive=5m;
    open_file_cache_valid    2m;
    open_file_cache_min_uses 1;
    open_file_cache_errors   on;
    #gzip  on;
    include gzip.conf;
    #vhost
    include vhost_liuzhichao.com;
}
vim /etc/nginx/conf/gzip.conf
    gzip  on;
    gzip_proxied any;
    gzip_types text/css;
    gzip_types text/csv;
    gzip_types text/plain;
    gzip_types text/javascript;
    gzip_types application/javascript;
    gzip_types application/json;
    gzip_types application/x-javascript;
    gzip_types application/ecmascript;
    gzip_types application/xml;
    gzip_types application/xml+rss;
    gzip_types application/rss+xml;
    gzip_types application/atom_xml;
    gzip_types application/xhtml+xml;
    gzip_types application/x-font-ttf;
    gzip_types application/x-font-opentype;
    gzip_types application/vnd.ms-fontobject;
    gzip_types image/svg+xml;
    gzip_types image/x-icon;
    gzip_types text/xml;
    gzip_comp_level 3;
    gzip_http_version 1.1;
    gzip_vary on;
    gzip_disable "MSIE [1-6]\.(?!.*SV1)";
    gzip_buffers 16 8k;
    gzip_min_length 20;
vim vhost_liuzhichao.com
  server{
        listen 80;
        server_name liuzhichao.com www.liuzhichao.com;
        root /var/www/liuzhichao.com;
        index index.html index.htm index.php;
        charset utf-8;
        #access_log /var/log/nginx/liuzhichao.com-access.log main;
        access_log /dev/null;
        error_log  /var/log/nginx/liuzhichao.com/error.log error;
        location / {
           try_files $uri $uri/ /index.php$is_args$args;
        }
        location ~ /wp-content/uploads/.*\.(php|php5)?$ {
                deny all;
        }
        location = /favicon.ico {
                log_not_found off;
                access_log off;
                expires max;
        }
        location = /robots.txt {
                allow all;
                log_not_found off;
                access_log off;
        }
        #Browser Cache Control Directives
        #Prevent (deny) Access to Hidden Files with Nginx
        location ~ /\. {
                access_log off;
                log_not_found off;
        }
        # Cache static files for as long as possible
        location ~* .(ogg|ogv|svg|svgz|eot|otf|woff|mp4|ttf|css|rss|atom|js|jpg|jpeg|gif|png|ico|zip|tgz|gz|rar|bz2|doc|xls|exe|ppt|tar|mid|midi|wav|bmp|rtf)$ {
                expires max; log_not_found off; access_log off;
        }
        #The HHVM Magic Here
        location ~ \.(hh|php)$ {
                fastcgi_keep_conn on;
                try_files $uri = 404;
                fastcgi_index index.php;
                fastcgi_split_path_info ^(.+.php)(/.+)$;
                include fastcgi_params;
                fastcgi_param SCRIPT_FILENAME $document_root$fastcgi_script_name;
                fastcgi_pass hhvm;
        }
从目前的试用情况来看,查看阿里云监控,CPU占用率相对之前nginx+php-fpm架构低了不只是一点点,内存使用率也比较平稳.只是在上传文件或是更新插件时,经常会导致HHVM进程终止,然后网站出现502错误。不知道是不是因为上面的配置问题。
?
原文地址:在服务器搭建Tengine+HHVM环境运行WordPress, 感谢原作者分享。

Hot AI Tools

Undresser.AI Undress
AI-powered app for creating realistic nude photos

AI Clothes Remover
Online AI tool for removing clothes from photos.

Undress AI Tool
Undress images for free

Clothoff.io
AI clothes remover

Video Face Swap
Swap faces in any video effortlessly with our completely free AI face swap tool!

Hot Article
Hot Tools

Notepad++7.3.1
Easy-to-use and free code editor

SublimeText3 Chinese version
Chinese version, very easy to use

Zend Studio 13.0.1
Powerful PHP integrated development environment

Dreamweaver CS6
Visual web development tools

SublimeText3 Mac version
God-level code editing software (SublimeText3)
Hot Topics
 1386
1386
 52
52

 Detailed explanation of how to display the ruler in Word and how to operate the ruler!
Mar 20, 2024 am 10:46 AM
Detailed explanation of how to display the ruler in Word and how to operate the ruler!
Mar 20, 2024 am 10:46 AM
When we use Word, in order to edit the content more beautifully, we often use rulers. You should know that the rulers in Word include horizontal rulers and vertical rulers, which are used to display and adjust the document's page margins, paragraph indents, tabs, etc. So, how do you display the ruler in Word? Next, I will teach you how to set the ruler display. Students in need should quickly collect it! The steps are as follows: 1. First, we need to bring up the word ruler. The default word document does not display the word ruler. We only need to click the [View] button in word. 2. Then, we find the option of [Ruler] and check it. In this way, we can adjust the word ruler! Yes or no
 How to add handwritten signature to word document
Mar 20, 2024 pm 08:56 PM
How to add handwritten signature to word document
Mar 20, 2024 pm 08:56 PM
Word documents are widely used due to their powerful functions. Not only can various formats be inserted into Word, such as pictures and tables, etc., but now for the integrity and authenticity of the files, many files require a manual signature at the end of the document. It sounds like this How to solve complex problems? Today I will teach you how to add a handwritten signature to a word document. Use a scanner, camera or mobile phone to scan or photograph the handwritten signature, and then use PS or other image editing software to perform necessary cropping on the image. 2. Select "Insert - Picture - From File" in the Word document where you want to insert the handwritten signature, and select the cropped handwritten signature. 3. Double-click the handwritten signature picture (or right-click the picture and select "Set Picture Format"), and the "Set Picture Format" pops up.
 How to configure Dnsmasq as a DHCP relay server
Mar 21, 2024 am 08:50 AM
How to configure Dnsmasq as a DHCP relay server
Mar 21, 2024 am 08:50 AM
The role of a DHCP relay is to forward received DHCP packets to another DHCP server on the network, even if the two servers are on different subnets. By using a DHCP relay, you can deploy a centralized DHCP server in the network center and use it to dynamically assign IP addresses to all network subnets/VLANs. Dnsmasq is a commonly used DNS and DHCP protocol server that can be configured as a DHCP relay server to help manage dynamic host configurations in the network. In this article, we will show you how to configure dnsmasq as a DHCP relay server. Content Topics: Network Topology Configuring Static IP Addresses on a DHCP Relay D on a Centralized DHCP Server
 Where is the shading setting in word?
Mar 20, 2024 am 08:16 AM
Where is the shading setting in word?
Mar 20, 2024 am 08:16 AM
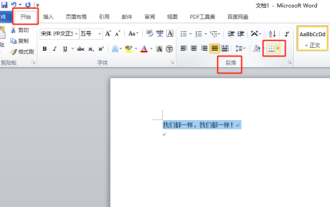
We often use word for office work, but do you know where the shading settings are in word? Today I will share with you the specific operation steps. Come and take a look, friends! 1. First, open the word document, select a paragraph of text paragraph information that needs to be added with shading, then click the [Start] button on the toolbar, find the paragraph area, and click the drop-down button on the right (as shown in the red circle in the figure below) ). 2. After clicking the drop-down box button, in the pop-up menu options, click the [Border and Shading] option (as shown in the red circle in the figure below). 3. In the pop-up [Border and Shading] dialog box, click the [Shading] option (as shown in the red circle in the figure below). 4. In the filled column, select a color
 Do you know how to sum a Word table?
Mar 21, 2024 pm 01:10 PM
Do you know how to sum a Word table?
Mar 21, 2024 pm 01:10 PM
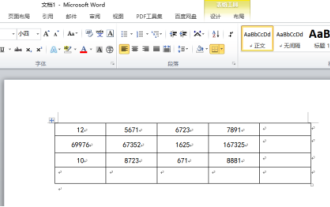
Sometimes, we often encounter counting problems in Word tables. Generally, when encountering such problems, most students will copy the Word table to Excel for calculation; some students will silently pick up the calculator. Calculate. Is there a quick way to calculate it? Of course there is, in fact the sum can also be calculated in Word. So, do you know how to do it? Today, let’s take a look together! Without further ado, friends in need should quickly collect it! Step details: 1. First, we open the Word software on the computer and open the document that needs to be processed. (As shown in the picture) 2. Next, we position the cursor on the cell where the summed value is located (as shown in the picture); then, we click [Menu Bar
 How to underline in Word
Mar 20, 2024 pm 03:16 PM
How to underline in Word
Mar 20, 2024 pm 03:16 PM
As a very commonly used word processing software, Word is used in our life, study and work all the time. Of course, if you want to make good use of Word to edit text, you must lay a good foundation. So today I will take you to learn how to underline in Word. You can do it together with the editor. It is very simple. 1. First, we open the file we need to edit. Here we take the following figure as an example. 2. Use the mouse to select the text we need to edit. In the pop-up tab, we select the [U] icon. The operation is as shown in the figure: 3. Let’s take a look at the effect: 4. In fact, we can use a more convenient and faster The method is to use the key combination [ctrl] + [U] on the keyboard to add and follow your text.
 How to automatically sort word serial numbers
Mar 20, 2024 pm 09:20 PM
How to automatically sort word serial numbers
Mar 20, 2024 pm 09:20 PM
When there is a lot of content in word, there will be many chapters. It is impossible for us to write each chapter one by one. In fact, we can use the word serial number to automatically sort. The operation is simple and convenient. Friends who don’t know how to operate, come and learn it. Bar! 1. First, we open the document to be processed on the computer, as shown in the figure below: 2. After opening the document, select the text that needs to be automatically sorted. In this example, select [Chapter 1] and [Chapter 2] and hold down the Ctrl key. To select multiple areas, use the mouse to click the [Start] menu of Word after selection, as shown in the red circle in the figure below: 3. Click the small triangle symbol to the right of the number on the [Paragraph] toolbar, and click in the pop-up menu The serial number type that needs to be selected is as shown below with the red arrow pointing to it.
 How to remove watermark in Word There are two ways to solve it
Mar 20, 2024 am 09:19 AM
How to remove watermark in Word There are two ways to solve it
Mar 20, 2024 am 09:19 AM
Word software has been used in everyone’s daily work and life. When using Word, everyone will want to add a watermark to the Word document. However, after adding the watermark, many people want to remove the watermark from the Word document. Many people do not know how to remove it, which is a bit confusing. What should friends who are too familiar with operating Word do? Today I will explain to you how to remove watermarks in Word. First open a document with a watermark in a Word document. Then find the "Insert" menu in the toolbar and click the [Watermark] option. Finally, select the [Delete Watermark] option in the pop-up drop-down option. After the operation is completed, when we return to the document, we will find that the watermark in the previous document has been removed. I don’t know if you have noticed that, in fact, “watermark
