The whole process of making a crawler with NodeJS_node.js
Today, let’s learn alsotang’s crawler tutorial, and then follow the simple crawling of CNode.
Create project craelr-demo
We first create an Express project, and then delete all the contents of the app.js file, because we do not need to display the content on the Web for the time being. Of course, we can also directly npm install express in an empty folder to use the Express functions we need.
Target website analysis
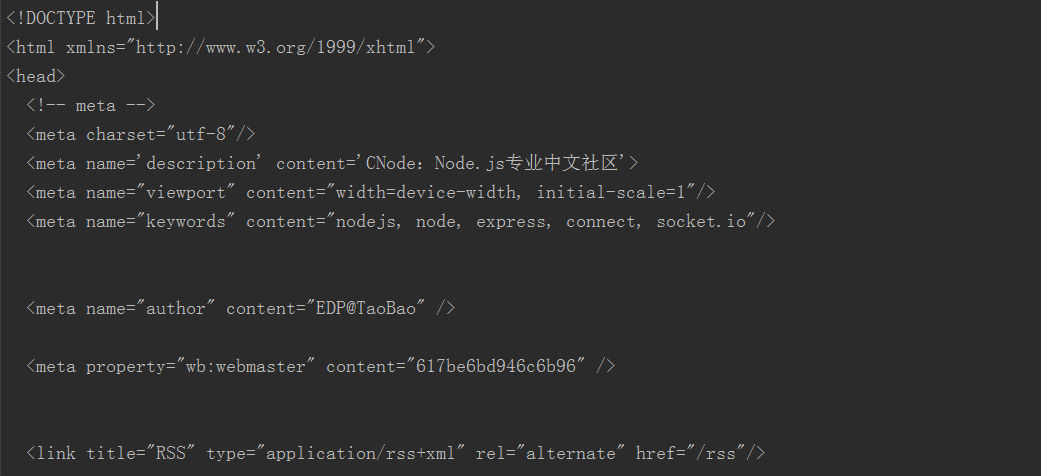
As shown in the picture, this is a part of the div tag on the CNode homepage. We use this series of ids and classes to locate the information we need.

Use superagent to obtain source data
superagent is an Http library used by ajax API. Its usage is similar to jQuery. We initiate a get request through it and output the result in the callback function.
var express = require('express');
var url = require('url'); //Parse operation url
var superagent = require('superagent'); //Don't forget to npm install
for these three external dependencies var cheerio = require('cheerio');
var eventproxy = require('eventproxy');
var targetUrl = 'https://cnodejs.org/';
superagent.get(targetUrl)
.end(function (err, res) {
console.log(res);
});
Its res result is an object containing target url information, and the website content is mainly in its text (string).

Use cheerio to parse
cheerio acts as a server-side jQuery function. We first use its .load() to load HTML, and then filter elements through CSS selector.
var $ = cheerio.load(res.text);
//Filter data through CSS selector
$('#topic_list .topic_title').each(function (idx, element) {
console.log(element);
});
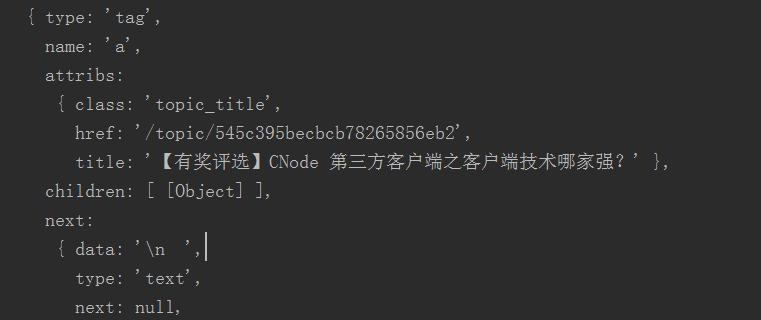
The result is an object. Call the .each(function(index, element)) function to traverse each object and return HTML DOM Elements.

The result of outputting console.log($element.attr('title')); is 广州 2014年12月06日 NodeParty 之 UC 场
Titles like console.log($element.attr('href')); are output as urls like /topic/545c395becbcb78265856eb2. Then use the url.resolve() function of NodeJS1 to complete the complete url.
superagent.get(tUrl)
.end(function (err, res) {
If (err) {
return console.error(err);
}
var topicUrls = [];
var $ = cheerio.load(res.text);
//Get all links on the homepage
$('#topic_list .topic_title').each(function (idx, element) {
var $element = $(element);
var href = url.resolve(tUrl, $element.attr('href'));
console.log(href);
//topicUrls.push(href);
});
});
Use eventproxy to concurrently crawl the content of each topic
The tutorial shows examples of deeply nested (serial) methods and counter methods. Eventproxy uses event (parallel) methods to solve this problem. When all the crawling is completed, eventproxy receives the event message and automatically calls the processing function for you.
//Step one: Get an instance of eventproxy
var ep = new eventproxy();
//Step 2: Define the callback function for listening events.
//The after method is repeated monitoring
//params: eventname(String) event name, times(Number) number of listening times, callback callback function
ep.after('topic_html', topicUrls.length, function(topics){
// topics is an array, containing the 40 pairs
in ep.emit('topic_html', pair) 40 times //.map
topics = topics.map(function(topicPair){
//use cheerio
var topicUrl = topicPair[0];
var topicHtml = topicPair[1];
var $ = cheerio.load(topicHtml);
return ({
title: $('.topic_full_title').text().trim(),
href: topicUrl,
comment1: $('.reply_content').eq(0).text().trim()
});
});
//outcome
console.log('outcome:');
console.log(topics);
});
//Step 3: Determine the
that releases the event message topicUrls.forEach(function (topicUrl) {
Superagent.get(topicUrl)
.end(function (err, res) {
console.log('fetch ' topicUrl ' successful');
ep.emit('topic_html', [topicUrl, res.text]);
});
});
The results are as follows

Extended Exercise (Challenge)
Get message username and points

Find the class name of the user who commented in the source code of the article page. The classname is reply_author. As you can see from the first element of console.log $('.reply_author').get(0), everything we need to get is here.

First, let’s crawl an article and get everything we need at once.
var userHref = url.resolve(tUrl, $('.reply_author').get(0).attribs.href);
console.log(userHref);
console.log($('.reply_author').get(0).children[0].data);
We can capture points information through https://cnodejs.org/user/username
$('.reply_author').each(function (idx, element) {
var $element = $(element);
console.log($element.attr('href'));
});
On the user information page $('.big').text().trim() is the points information.
Use cheerio’s function .get(0) to get the first element.
var userHref = url.resolve(tUrl, $('.reply_author').get(0).attribs.href);
console.log(userHref);
This is just a capture of a single article, there are still 40 that need to be modified.

Hot AI Tools

Undresser.AI Undress
AI-powered app for creating realistic nude photos

AI Clothes Remover
Online AI tool for removing clothes from photos.

Undress AI Tool
Undress images for free

Clothoff.io
AI clothes remover

Video Face Swap
Swap faces in any video effortlessly with our completely free AI face swap tool!

Hot Article

Hot Tools

Notepad++7.3.1
Easy-to-use and free code editor

SublimeText3 Chinese version
Chinese version, very easy to use

Zend Studio 13.0.1
Powerful PHP integrated development environment

Dreamweaver CS6
Visual web development tools

SublimeText3 Mac version
God-level code editing software (SublimeText3)

Hot Topics
 1386
1386
 52
52
 The difference between nodejs and vuejs
Apr 21, 2024 am 04:17 AM
Node.js is a server-side JavaScript runtime, while Vue.js is a client-side JavaScript framework for creating interactive user interfaces. Node.js is used for server-side development, such as back-end service API development and data processing, while Vue.js is used for client-side development, such as single-page applications and responsive user interfaces.
 Is nodejs a backend framework?
Apr 21, 2024 am 05:09 AM
Node.js can be used as a backend framework as it offers features such as high performance, scalability, cross-platform support, rich ecosystem, and ease of development.
 How to connect nodejs to mysql database
Apr 21, 2024 am 06:13 AM
To connect to a MySQL database, you need to follow these steps: Install the mysql2 driver. Use mysql2.createConnection() to create a connection object that contains the host address, port, username, password, and database name. Use connection.query() to perform queries. Finally use connection.end() to end the connection.
 What is the difference between npm and npm.cmd files in the nodejs installation directory?
Apr 21, 2024 am 05:18 AM
There are two npm-related files in the Node.js installation directory: npm and npm.cmd. The differences are as follows: different extensions: npm is an executable file, and npm.cmd is a command window shortcut. Windows users: npm.cmd can be used from the command prompt, npm can only be run from the command line. Compatibility: npm.cmd is specific to Windows systems, npm is available cross-platform. Usage recommendations: Windows users use npm.cmd, other operating systems use npm.
 What are the global variables in nodejs
Apr 21, 2024 am 04:54 AM
The following global variables exist in Node.js: Global object: global Core module: process, console, require Runtime environment variables: __dirname, __filename, __line, __column Constants: undefined, null, NaN, Infinity, -Infinity
 Is there a big difference between nodejs and java?
Apr 21, 2024 am 06:12 AM
The main differences between Node.js and Java are design and features: Event-driven vs. thread-driven: Node.js is event-driven and Java is thread-driven. Single-threaded vs. multi-threaded: Node.js uses a single-threaded event loop, and Java uses a multi-threaded architecture. Runtime environment: Node.js runs on the V8 JavaScript engine, while Java runs on the JVM. Syntax: Node.js uses JavaScript syntax, while Java uses Java syntax. Purpose: Node.js is suitable for I/O-intensive tasks, while Java is suitable for large enterprise applications.
 Is nodejs a back-end development language?
Apr 21, 2024 am 05:09 AM
Yes, Node.js is a backend development language. It is used for back-end development, including handling server-side business logic, managing database connections, and providing APIs.
 How to deploy nodejs project to server
Apr 21, 2024 am 04:40 AM
Server deployment steps for a Node.js project: Prepare the deployment environment: obtain server access, install Node.js, set up a Git repository. Build the application: Use npm run build to generate deployable code and dependencies. Upload code to the server: via Git or File Transfer Protocol. Install dependencies: SSH into the server and use npm install to install application dependencies. Start the application: Use a command such as node index.js to start the application, or use a process manager such as pm2. Configure a reverse proxy (optional): Use a reverse proxy such as Nginx or Apache to route traffic to your application


