

Centos 安装 nginx + php5.3

Centos 安装 nginx + php5.3,点开查看详情。 #查看系统版本信息cat /etc/issue uname -a#设置时区 rm -rf /etc/localtime ln -s /usr/share/zoneinfo/Asia/Shanghai /etc/localtime#使用ntpdate同步时间 yum install -y ntp ntpdate -u pool.ntp.org date#
Centos 安装 nginx + php5.3,点开查看详情。
#查看系统版本信息
cat /etc/issue
 uname -a
#设置时区
 rm -rf /etc/localtime
 ln -s /usr/share/zoneinfo/Asia/Shanghai /etc/localtime
#使用ntpdate同步时间
 yum install -y ntp
 ntpdate -u pool.ntp.org
 date
#搜索删除相关rpm包
rpm -qa|grep httpd  #[搜索指定rpm包是否安装]--all搜索*httpd*
rpm -e httpd  #[删除一个rpm包]
rpm -qa | grep php
rpm -e php
yum -y remove httpd*
yum -y remove php*
yum -y remove php-mysql
#自动选择最快的yum源
yum -y install yum-fastestmirror
#关闭SELinux
vi /etc/selinux/config
#将SELINUX=enforcing改为SELINUX=disabled
#yum安装依赖库
yum -y install gcc gcc-c++ gcc-g77 flex bison file libtool libtool-libs autoconf kernel-devel libjpeg libjpeg-devel libpng libpng-devel libpng10 libpng10-devel gd gd-devel freetype freetype-devel libxml2 libxml2-devel zlib zlib-devel glib2 glib2-devel bzip2 bzip2-devel libevent libevent-devel ncurses ncurses-devel curl curl-devel e2fsprogs e2fsprogs-devel krb5 krb5-devel libidn libidn-devel openssl openssl-devel vim-minimal nano fonts-chinese gettext gettext-devel ncurses-devel gmp-devel pspell-devel unzip libcap diffutils
#下载、安装依赖库
wget -c http://soft.vpser.net/web/libiconv/libiconv-1.14.tar.gz
wget -c http://soft.vpser.net/web/libmcrypt/libmcrypt-2.5.8.tar.gz
wget -c http://soft.vpser.net/web/mhash/mhash-0.9.9.9.tar.gz
wget -c http://soft.vpser.net/web/mcrypt/mcrypt-2.6.8.tar.gz
wget -c http://soft.vpser.net/lib/autoconf/autoconf-2.13.tar.gz
#autoconf
tar zxf autoconf-2.13.tar.gz
cd autoconf-2.13/
./configure --prefix=/usr/local/autoconf-2.13
make && make install
cd ../
#libiconv
tar zxf libiconv-1.14.tar.gz
cd libiconv-1.14/
./configure
make && make install
cd ../
#libmcrypt
tar zxf libmcrypt-2.5.8.tar.gz
cd libmcrypt-2.5.8/
./configure
make && make install
/sbin/ldconfig
cd libltdl/
./configure --enable-ltdl-install
make && make install
cd ../../
#mhash
tar zxf mhash-0.9.9.9.tar.gz
cd mhash-0.9.9.9/
./configure
make && make install
cd ../
ln -s /usr/local/lib/libmcrypt.la /usr/lib/libmcrypt.la
ln -s /usr/local/lib/libmcrypt.so /usr/lib/libmcrypt.so
ln -s /usr/local/lib/libmcrypt.so.4 /usr/lib/libmcrypt.so.4
ln -s /usr/local/lib/libmcrypt.so.4.4.8 /usr/lib/libmcrypt.so.4.4.8
ln -s /usr/local/lib/libmhash.a /usr/lib/libmhash.a
ln -s /usr/local/lib/libmhash.la /usr/lib/libmhash.la
ln -s /usr/local/lib/libmhash.so /usr/lib/libmhash.so
ln -s /usr/local/lib/libmhash.so.2 /usr/lib/libmhash.so.2
ln -s /usr/local/lib/libmhash.so.2.0.1 /usr/lib/libmhash.so.2.0.1
ldconfig
#mcrypt
tar zxf mcrypt-2.6.8.tar.gz
cd mcrypt-2.6.8/
./configure
make && make install
cd ../
#如果是64位系统 则执行:
 ln -s /usr/lib64/libpng.* /usr/lib/
 ln -s /usr/lib64/libjpeg.* /usr/lib/
ldconfig
#修改ld.so.conf
cat /etc/ld.so.conf
echo "/lib" >> /etc/ld.so.conf
echo "/usr/lib" >> /etc/ld.so.conf
echo "/usr/lib64" >> /etc/ld.so.conf
echo "/usr/local/lib" >> /etc/ld.so.conf
#更新库缓存
ldconfig
#高负载linux服务器的内核调优
#修改限制
ulimit -v unlimited
#系统最大打开文件数优化
? ? 默认情况下,系统允许最大打开文件数为1024个,这对于访问量较大的web服务器来说远远不够用。系统最大打开文件数可以通过ulimit来修改和查询。
一般情况下,可以通过ulimit -n来查看目前系统允许的最大打开文件数,例如 :
ulimit -n
1024 #系统返回
? ? 永久修改该参数,要修改/etc/security/limits.conf
执行:
cat >>/etc/security/limits.conf<<eof
* soft nproc 65535
* hard nproc 65535
* soft nofile 65535
* hard nofile 65535
eof
##修改 /etc/sysctl.conf。 执行:
echo "fs.file-max=65535" >> /etc/sysctl.conf
##修改完成后运行以下命令使参数生效:
/sbin/sysctl -p
============================安装PHP5.3.28========================================
#安装PHP
#设置环境变量
export PHP_AUTOCONF=/usr/local/autoconf-2.13/bin/autoconf
export PHP_AUTOHEADER=/usr/local/autoconf-2.13/bin/autoheader
#下载PHP安装包
wget -c http://soft.vpser.net/web/php/php-5.3.28.tar.gz
#安装
tar zxf php-5.3.28.tar.gz
cd php-5.3.28/
./configure --prefix=/usr/local/php --with-config-file-path=/usr/local/php/etc --enable-fpm --with-fpm-user=www --with-fpm-group=www --with-mysql=mysqlnd --with-mysqli=mysqlnd --with-pdo-mysql=mysqlnd --with-iconv-dir --with-freetype-dir --with-jpeg-dir --with-png-dir --with-zlib --with-libxml-dir=/usr --enable-xml --disable-rpath --enable-magic-quotes --enable-safe-mode --enable-bcmath --enable-shmop --enable-sysvsem --enable-inline-optimization --with-curl --enable-mbregex --enable-mbstring --with-mcrypt --enable-ftp --with-gd --enable-gd-native-ttf --with-openssl --with-mhash --enable-pcntl --enable-sockets --with-xmlrpc --enable-zip --enable-soap --without-pear --with-gettext --disable-fileinfo
make ZEND_EXTRA_LIBS='-liconv'
make install
rm -f /usr/bin/php
ln -s /usr/local/php/bin/php /usr/bin/php
ln -s /usr/local/php/bin/phpize /usr/bin/phpize
ln -s /usr/local/php/sbin/php-fpm /usr/bin/php-fpm
ldconfig
#复制php配置文件
mkdir -p /usr/local/php/etc
cp php.ini-production /usr/local/php/etc/php.ini
# php extensions
修改php.ini
sed -i 's/post_max_size = 8M/post_max_size = 50M/g' /usr/local/php/etc/php.ini
sed -i 's/upload_max_filesize = 2M/upload_max_filesize = 50M/g' /usr/local/php/etc/php.ini
sed -i 's/;date.timezone =/date.timezone = PRC/g' /usr/local/php/etc/php.ini
sed -i 's/short_open_tag = Off/short_open_tag = On/g' /usr/local/php/etc/php.ini
sed -i 's/; cgi.fix_pathinfo=1/cgi.fix_pathinfo=0/g' /usr/local/php/etc/php.ini
sed -i 's/; cgi.fix_pathinfo=0/cgi.fix_pathinfo=0/g' /usr/local/php/etc/php.ini
sed -i 's/;cgi.fix_pathinfo=1/cgi.fix_pathinfo=0/g' /usr/local/php/etc/php.ini
sed -i 's/max_execution_time = 30/max_execution_time = 300/g' /usr/local/php/etc/php.ini
sed -i 's/register_long_arrays = On/;register_long_arrays = On/g' /usr/local/php/etc/php.ini
sed -i 's/magic_quotes_gpc = On/;magic_quotes_gpc = On/g' /usr/local/php/etc/php.ini
sed -i 's/disable_functions =.*/disable_functions = passthru,exec,system,chroot,scandir,chgrp,chown,shell_exec,proc_open,proc_get_status,ini_alter,ini_restore,dl,openlog,syslog,readlink,symlink,popepassthru,stream_socket_server/g' /usr/local/php/etc/php.ini
#Install ZendGuardLoader for PHP 5.3
64位系统执行:
wget -c?http://soft.vpser.net/web/zend/ZendGuardLoader-php-5.3-linux-glibc23-x86_64.tar.gz
tar zxf ZendGuardLoader-php-5.3-linux-glibc23-x86_64.tar.gz
mkdir -p /usr/local/zend/
cp ZendGuardLoader-php-5.3-linux-glibc23-x86_64/php-5.3.x/ZendGuardLoader.so /usr/local/zend/
32位系统执行:
wget -c?http://soft.vpser.net/web/zend/ZendGuardLoader-php-5.3-linux-glibc23-i386.tar.gz
tar zxf ZendGuardLoader-php-5.3-linux-glibc23-i386.tar.gz
mkdir -p /usr/local/zend/
cp ZendGuardLoader-php-5.3-linux-glibc23-i386/php-5.3.x/ZendGuardLoader.so /usr/local/zend/
#Write ZendGuardLoader to php.ini……
cat >>/usr/local/php/etc/php.ini<<EOF
;eaccelerator
;ionCube
[Zend Optimizer]
zend_extension=/usr/local/zend/ZendGuardLoader.so
zend_loader.enable=1
zend_loader.disable_licensing=0
zend_loader.obfuscation_level_support=3
zend_loader.license_path=
EOF
echo “Creating new php-fpm configure file……”
cat >/usr/local/php/etc/php-fpm.conf<<EOF
[global]
pid = /usr/local/php/var/run/php-fpm.pid
error_log = /usr/local/php/var/log/php-fpm.log
log_level = notice
[www]
listen = /tmp/php-cgi.sock
listen.backlog = -1
listen.allowed_clients = 127.0.0.1
listen.owner = www
listen.group = www
listen.mode = 0666
user = www
group = www
pm = dynamic
pm.max_children = 10
pm.start_servers = 2
pm.min_spare_servers = 1
pm.max_spare_servers = 6
request_terminate_timeout = 100
request_slowlog_timeout = 0
slowlog = /var/log/slow.log
EOF
#复制php-fpm init.d文件
cp ./php-5.3.28/sapi/fpm/init.d.php-fpm /etc/init.d/php-fpm
chmod +x /etc/init.d/php-fpm
============================安装PHP结束========================================
============================安装Nginx 1.6.0========================================
#安装Nginx
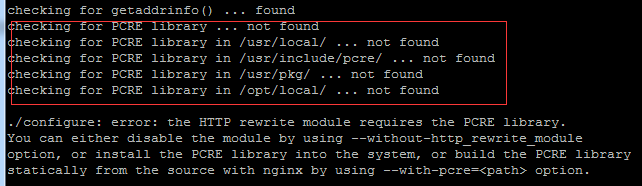
#建立用户组和用户
groupadd www
useradd -s /sbin/nologin -g www www
#下载安装PCRE库
wget -c http://soft.vpser.net/web/pcre/pcre-8.12.tar.gz
tar zxf pcre-8.12.tar.gz
cd pcre-8.12/
./configure
make && make install
cd ../
ldconfig
#下载、安装nginx
wget -c http://soft.vpser.net/web/nginx/nginx-1.6.0.tar.gz
tar zxf nginx-1.6.0.tar.gz
cd nginx-1.6.0/
./configure --user=www --group=www --prefix=/usr/local/nginx --with-http_stub_status_module --with-http_ssl_module --with-http_gzip_static_module --with-ipv6
make && make install
cd ../
##设置软连接
ln -s /usr/local/nginx/sbin/nginx /usr/bin/nginx
ldconfig
#创建网站目录及设置权限
mkdir -p /data0/wwwroot
chmod +w /data0/wwwroot
chown -R www:www /data0/wwwroot
#创建日志目录及设置权限
mkdir -p /data0/wwwlogs
chmod 777 /data0/wwwlogs
#nginx配置文件
替换 /usr/local/nginx/conf/nginx.conf 的文本为:
user  www www;
worker_processes auto;
error_log  /data0/wwwlogs/nginx_error.log  crit;
pid        /usr/local/nginx/logs/nginx.pid;
#Specifies the value for maximum file descriptors that can be opened by this process.
worker_rlimit_nofile 51200;
events
	{
		use epoll;
		worker_connections 51200;
		multi_accept on;
	}
http
	{
		include       mime.types;
		default_type  application/octet-stream;
		server_names_hash_bucket_size 128;
		client_header_buffer_size 32k;
		large_client_header_buffers 4 32k;
		client_max_body_size 50m;
		sendfile on;
		tcp_nopush     on;
		keepalive_timeout 60;
		tcp_nodelay on;
		fastcgi_connect_timeout 300;
		fastcgi_send_timeout 300;
		fastcgi_read_timeout 300;
		fastcgi_buffer_size 64k;
		fastcgi_buffers 4 64k;
		fastcgi_busy_buffers_size 128k;
		fastcgi_temp_file_write_size 256k;
		gzip on;
		gzip_min_length  1k;
		gzip_buffers     4 16k;
		gzip_http_version 1.0;
		gzip_comp_level 2;
		gzip_types       text/plain application/x-javascript text/css application/xml;
		gzip_vary on;
		gzip_proxied        expired no-cache no-store private auth;
		gzip_disable        "MSIE [1-6]\.";
		#limit_conn_zone $binary_remote_addr zone=perip:10m;
		##If enable limit_conn_zone,add "limit_conn perip 10;" to server section.
		server_tokens off;
		#log format
		log_format  access  '$remote_addr - $remote_user [$time_local] "$request" '
             '$status $body_bytes_sent "$http_referer" '
             '"$http_user_agent" $http_x_forwarded_for';
	include vhost/*.conf;
}mkdir -p? /usr/local/nginx/conf/vhost
#创建虚拟机
#假如网站域名为 www.xxx.com,则创建网站目录
mkdir -p /data0/wwwroot/www.xxx.com
chown -R?www:www /data0/wwwroot/www.xxx.com
#,并在 /usr/local/nginx/conf/vhost? 下创建文件 www.xxx.com.conf,文件内容为一下,www.xxx.com替换为实际域名。
server
	{
		listen 80;
		server_name www.xxxx.com;
		index index.html index.htm index.php default.html default.htm default.php;
		root  /data0/wwwroot/www.xxxx.com;
		#error_page   404   /404.html;
		location ~ [^/]\.php(/|$)
			{
				# comment try_files $uri =404; to enable pathinfo
				try_files $uri =404;
				fastcgi_pass  unix:/tmp/php-cgi.sock;
				fastcgi_index index.php;
				include fastcgi.conf;
				#include pathinfo.conf;
			}
		location /nginx_status {
			stub_status on;
			access_log   off;
		}
		location ~ .*\.(gif|jpg|jpeg|png|bmp|swf)$
			{
				expires      30d;
			}
		location ~ .*\.(js|css)?$
			{
				expires      12h;
			}
		access_log  /data0/wwwlogs/www.xxxx.com.log  access;
}#运行测试
cat >/data0/wwwroot/www.xxx.com/phpinfo.php
phpinfo();
?>
eof
#访问 http://www.xxx.com/phpinfo.php
#设置Nginx开机自启动
wget -c http://soft.vpser.net/lnmp/ext/init.d.nginx
cp init.d.nginx /etc/init.d/nginx
chmod +x /etc/init.d/nginx
chkconfig –add php-fpm
chkconfig –add nginxchkconfig –level 345 php-fpm on
chkconfig –level 345 nginx onchkconfig –list
/etc/init.d/php-fpm start
/etc/init.d/nginx start
#添加防火墙设置开放端口(看自身情况需要)
vi /etc/sysconfig/iptables
-A RH-Firewall-1-INPUT -m state –state NEW -m tcp -p tcp –dport 80 -j ACCEPT
#重启防火墙
service iptables restart
#保存对防火墙的设置
service iptables save
============================安装Nginx 结束========================================
原文地址:Centos 安装 nginx + php5.3, 感谢原作者分享。

Hot AI Tools

Undresser.AI Undress
AI-powered app for creating realistic nude photos

AI Clothes Remover
Online AI tool for removing clothes from photos.

Undress AI Tool
Undress images for free

Clothoff.io
AI clothes remover

AI Hentai Generator
Generate AI Hentai for free.

Hot Article
Hot Tools

Notepad++7.3.1
Easy-to-use and free code editor

SublimeText3 Chinese version
Chinese version, very easy to use

Zend Studio 13.0.1
Powerful PHP integrated development environment

Dreamweaver CS6
Visual web development tools

SublimeText3 Mac version
God-level code editing software (SublimeText3)
Hot Topics
 1377
1377
 52
52

 How to allow external network access to tomcat server
Apr 21, 2024 am 07:22 AM
How to allow external network access to tomcat server
Apr 21, 2024 am 07:22 AM
To allow the Tomcat server to access the external network, you need to: modify the Tomcat configuration file to allow external connections. Add a firewall rule to allow access to the Tomcat server port. Create a DNS record pointing the domain name to the Tomcat server public IP. Optional: Use a reverse proxy to improve security and performance. Optional: Set up HTTPS for increased security.
 SCP usage tips-recursively exclude files
Apr 22, 2024 am 09:04 AM
SCP usage tips-recursively exclude files
Apr 22, 2024 am 09:04 AM
One can use the scp command to securely copy files between network hosts. It uses ssh for data transfer and authentication. Typical syntax is: scpfile1user@host:/path/to/dest/scp -r/path/to/source/user@host:/path/to/dest/scp exclude files I don't think you can when using scp command Filter or exclude files. However, there is a good workaround to exclude the file and copy it securely using ssh. This page explains how to filter or exclude files when copying directories recursively using scp. How to use rsync command to exclude files The syntax is: rsyncav-essh-
 How to generate URL from html file
Apr 21, 2024 pm 12:57 PM
How to generate URL from html file
Apr 21, 2024 pm 12:57 PM
Converting an HTML file to a URL requires a web server, which involves the following steps: Obtain a web server. Set up a web server. Upload HTML file. Create a domain name. Route the request.
 How to deploy nodejs project to server
Apr 21, 2024 am 04:40 AM
How to deploy nodejs project to server
Apr 21, 2024 am 04:40 AM
Server deployment steps for a Node.js project: Prepare the deployment environment: obtain server access, install Node.js, set up a Git repository. Build the application: Use npm run build to generate deployable code and dependencies. Upload code to the server: via Git or File Transfer Protocol. Install dependencies: SSH into the server and use npm install to install application dependencies. Start the application: Use a command such as node index.js to start the application, or use a process manager such as pm2. Configure a reverse proxy (optional): Use a reverse proxy such as Nginx or Apache to route traffic to your application
 Can nodejs be accessed from the outside?
Apr 21, 2024 am 04:43 AM
Can nodejs be accessed from the outside?
Apr 21, 2024 am 04:43 AM
Yes, Node.js can be accessed from the outside. You can use the following methods: Use Cloud Functions to deploy the function and make it publicly accessible. Use the Express framework to create routes and define endpoints. Use Nginx to reverse proxy requests to Node.js applications. Use Docker containers to run Node.js applications and expose them through port mapping.
 How to deploy and maintain a website using PHP
May 03, 2024 am 08:54 AM
How to deploy and maintain a website using PHP
May 03, 2024 am 08:54 AM
To successfully deploy and maintain a PHP website, you need to perform the following steps: Select a web server (such as Apache or Nginx) Install PHP Create a database and connect PHP Upload code to the server Set up domain name and DNS Monitoring website maintenance steps include updating PHP and web servers, and backing up the website , monitor error logs and update content.
 How to use Fail2Ban to protect your server from brute force attacks
Apr 27, 2024 am 08:34 AM
How to use Fail2Ban to protect your server from brute force attacks
Apr 27, 2024 am 08:34 AM
An important task for Linux administrators is to protect the server from illegal attacks or access. By default, Linux systems come with well-configured firewalls, such as iptables, Uncomplicated Firewall (UFW), ConfigServerSecurityFirewall (CSF), etc., which can prevent a variety of attacks. Any machine connected to the Internet is a potential target for malicious attacks. There is a tool called Fail2Ban that can be used to mitigate illegal access on the server. What is Fail2Ban? Fail2Ban[1] is an intrusion prevention software that protects servers from brute force attacks. It is written in Python programming language
 Come with me to learn Linux and install Nginx
Apr 28, 2024 pm 03:10 PM
Come with me to learn Linux and install Nginx
Apr 28, 2024 pm 03:10 PM
Today, I will lead you to install Nginx in a Linux environment. The Linux system used here is CentOS7.2. Prepare the installation tools 1. Download Nginx from the Nginx official website. The version used here is: 1.13.6.2. Upload the downloaded Nginx to Linux. Here, the /opt/nginx directory is used as an example. Run "tar-zxvfnginx-1.13.6.tar.gz" to decompress. 3. Switch to the /opt/nginx/nginx-1.13.6 directory and run ./configure for initial configuration. If the following prompt appears, it means that PCRE is not installed on the machine, and Nginx needs to
