
 interface Web
tutoriel HTML
TinyEditor est un outil de production HTML WYSIWYG editor_HTML/Xhtml_webpage simple et facile à utiliser.
interface Web
tutoriel HTML
TinyEditor est un outil de production HTML WYSIWYG editor_HTML/Xhtml_webpage simple et facile à utiliser.
TinyEditor est un outil de production HTML WYSIWYG editor_HTML/Xhtml_webpage simple et facile à utiliser.

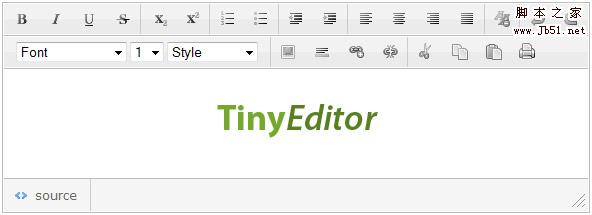
Il y a quelques jours, je vous ai présenté un éditeur xhtml domestique Le TinyEditor est un outil de production HTML WYSIWYG editor_HTML/Xhtml_webpage simple et facile à utiliser. que je souhaite vous recommander aujourd'hui est un blog de conception de sites Web étranger bien connu leigeber.com<.>Un éditeur HTML WYSIWYG simple et facile à utiliser vient de sortir.
TinyEditor est un outil de production HTML WYSIWYG editor_HTML/Xhtml_webpage simple et facile à utiliser. a les fonctionnalités suivantes
- Il est écrit en Javascript et ne dépend pas d'autres bibliothèques
- Il s'agit d'un éditeur léger, le fichier à appeler ne fait que 8 Ko
- Il peut gérer la plupart des besoins de formatage HTML et les fonctions intégrées rendent le balisage généré aussi concis que possible
- Les petites icônes utilisées dans l'éditeur utilisent la technologie CSS Sprite pour réduire les connexions http
- Testé et réussi dans les navigateurs grand public
- Peut être utilisé dans des projets personnels ou commerciaux sous la
- licence Creative Commons
Voici comment l'utiliser :
- Référencez les fichiers js et css fournis par TinyEditor est un outil de production HTML WYSIWYG editor_HTML/Xhtml_webpage simple et facile à utiliser. dans le fichier de la page Web
- Ajoutez les balises requises par l'éditeur dans le fichier de la page Web, qui est en fait une zone de texte, comme suit
-
Notez que la longueur et la largeur définies dans la zone de texte sont également la taille de l'éditeur.
<span style="COLOR: #009900"><<span style="FONT-WEIGHT: bold; COLOR: #000000">textarea</span> <span style="COLOR: #000066">id</span><span style="COLOR: #66cc66">=</span><span style="COLOR: #ff0000">"input"</span> <span style="COLOR: #000066">style</span><span style="COLOR: #66cc66">=</span><span style="COLOR: #ff0000">"width:400px; height:200px"</span>><<span style="COLOR: #66cc66">/</span><span style="FONT-WEIGHT: bold; COLOR: #000000">textarea</span>></span>
Copier après la connexionInitialisez l'éditeur via des scripts et configurez divers paramètres, comme suit :
-
On peut dire qu'il est hautement configurable et que les éléments de configuration sont relativement clairs.
<span style="FONT-WEIGHT: bold; COLOR: #003366">new</span> TINY.<span style="COLOR: #660066">editor</span>.<span style="COLOR: #660066">edit</span><span style="COLOR: #009900">(</span><span style="COLOR: #3366cc">'editor'</span><span style="COLOR: #339933">,</span><span style="COLOR: #009900">{</span>
	id<span style="COLOR: #339933">:</span><span style="COLOR: #3366cc">'input'</span><span style="COLOR: #339933">,</span>
<span style="COLOR: #006600; FONT-STYLE: italic">// (必须)上面第二步中定义的textarea的id</span>
	width<span style="COLOR: #339933">:</span><span style="COLOR: #cc0000">584</span><span style="COLOR: #339933">,</span>
<span style="COLOR: #006600; FONT-STYLE: italic">// (选填) 编辑器宽度</span>
	height<span style="COLOR: #339933">:</span><span style="COLOR: #cc0000">175</span><span style="COLOR: #339933">,</span>
 <span style="COLOR: #006600; FONT-STYLE: italic">// (选填) 编辑器高度</span>
	cssclass<span style="COLOR: #339933">:</span><span style="COLOR: #3366cc">'te'</span><span style="COLOR: #339933">,</span>
 <span style="COLOR: #006600; FONT-STYLE: italic">// (选填) 编辑器的class,用来通过css控制样式</span>
	controlclass<span style="COLOR: #339933">:</span><span style="COLOR: #3366cc">'tecontrol'</span><span style="COLOR: #339933">,</span>
 <span style="COLOR: #006600; FONT-STYLE: italic">// (选填) 编辑器上按钮的class</span>
	rowclass<span style="COLOR: #339933">:</span><span style="COLOR: #3366cc">'teheader'</span><span style="COLOR: #339933">,</span>
 <span style="COLOR: #006600; FONT-STYLE: italic">// (选填) 编辑器按钮行的class</span>
	dividerclass<span style="COLOR: #339933">:</span><span style="COLOR: #3366cc">'tedivider'</span><span style="COLOR: #339933">,</span>
<span style="COLOR: #006600; FONT-STYLE: italic">// (选填) 编辑器按钮间分割线的样式</span>
	controls<span style="COLOR: #339933">:</span><span style="COLOR: #009900">[</span><span style="COLOR: #3366cc">'bold'</span><span style="COLOR: #339933">,</span> <span style="COLOR: #3366cc">'italic'</span><span style="COLOR: #339933">,</span> <span style="COLOR: #3366cc">'underline'</span><span style="COLOR: #339933">,</span> <span style="COLOR: #3366cc">'strikethrough'</span><span style="COLOR: #339933">,</span> <span style="COLOR: #3366cc">'|'</span><span style="COLOR: #339933">,</span> <span style="COLOR: #3366cc">'subscript'</span><span style="COLOR: #339933">,</span> <span style="COLOR: #3366cc">'superscript'</span><span style="COLOR: #339933">,</span> <span style="COLOR: #3366cc">'|'</span><span style="COLOR: #339933">,</span> <span style="COLOR: #3366cc">'orderedlist'</span><span style="COLOR: #339933">,</span> <span style="COLOR: #3366cc">'unorderedlist'</span><span style="COLOR: #339933">,</span> <span style="COLOR: #3366cc">'|'</span> <span style="COLOR: #339933">,</span><span style="COLOR: #3366cc">'outdent'</span> <span style="COLOR: #339933">,</span><span style="COLOR: #3366cc">'indent'</span><span style="COLOR: #339933">,</span> <span style="COLOR: #3366cc">'|'</span><span style="COLOR: #339933">,</span> <span style="COLOR: #3366cc">'leftalign'</span><span style="COLOR: #339933">,</span> <span style="COLOR: #3366cc">'centeralign'</span><span style="COLOR: #339933">,</span> <span style="COLOR: #3366cc">'rightalign'</span><span style="COLOR: #339933">,</span> <span style="COLOR: #3366cc">'blockjustify'</span><span style="COLOR: #339933">,</span> <span style="COLOR: #3366cc">'|'</span><span style="COLOR: #339933">,</span> <span style="COLOR: #3366cc">'unformat'</span><span style="COLOR: #339933">,</span> <span style="COLOR: #3366cc">'|'</span><span style="COLOR: #339933">,</span> <span style="COLOR: #3366cc">'undo'</span><span style="COLOR: #339933">,</span> <span style="COLOR: #3366cc">'redo'</span><span style="COLOR: #339933">,</span> <span style="COLOR: #3366cc">'n'</span><span style="COLOR: #339933">,</span> <span style="COLOR: #3366cc">'font'</span><span style="COLOR: #339933">,</span> <span style="COLOR: #3366cc">'size'</span><span style="COLOR: #339933">,</span> <span style="COLOR: #3366cc">'style'</span><span style="COLOR: #339933">,</span> <span style="COLOR: #3366cc">'|'</span><span style="COLOR: #339933">,</span> <span style="COLOR: #3366cc">'image'</span><span style="COLOR: #339933">,</span> <span style="COLOR: #3366cc">'hr'</span><span style="COLOR: #339933">,</span> <span style="COLOR: #3366cc">'link'</span><span style="COLOR: #339933">,</span> <span style="COLOR: #3366cc">'unlink'</span><span style="COLOR: #339933">,</span> <span style="COLOR: #3366cc">'|'</span><span style="COLOR: #339933">,</span> <span style="COLOR: #3366cc">'cut'</span><span style="COLOR: #339933">,</span> <span style="COLOR: #3366cc">'copy'</span><span style="COLOR: #339933">,</span> <span style="COLOR: #3366cc">'paste'</span><span style="COLOR: #339933">,</span> <span style="COLOR: #3366cc">'print'</span><span style="COLOR: #009900">]</span><span style="COLOR: #339933">,</span>
 <span style="COLOR: #006600; FONT-STYLE: italic">// (必须) 要根据需要在编辑器上添加按钮控件, 其中'|'代表功能按钮间的竖分割线,'n'代表按钮行间的分割线</span>
	footer<span style="COLOR: #339933">:</span><span style="FONT-WEIGHT: bold; COLOR: #003366">true</span><span style="COLOR: #339933">,</span>
<span style="COLOR: #006600; FONT-STYLE: italic">// (选填) 是否显示编辑器底部</span>
	fonts<span style="COLOR: #339933">:</span><span style="COLOR: #009900">[</span><span style="COLOR: #3366cc">'Verdana'</span><span style="COLOR: #339933">,</span><span style="COLOR: #3366cc">'Arial'</span><span style="COLOR: #339933">,</span><span style="COLOR: #3366cc">'Georgia'</span><span style="COLOR: #339933">,</span><span style="COLOR: #3366cc">'Trebuchet MS'</span><span style="COLOR: #009900">]</span><span style="COLOR: #339933">,</span>
<span style="COLOR: #006600; FONT-STYLE: italic">// (选填) 编辑器中可选择的字体</span>
	xhtml<span style="COLOR: #339933">:</span><span style="FONT-WEIGHT: bold; COLOR: #003366">true</span><span style="COLOR: #339933">,</span>
<span style="COLOR: #006600; FONT-STYLE: italic">// (选填) 编辑器生成xhtml还是html标记</span>
	cssfile<span style="COLOR: #339933">:</span><span style="COLOR: #3366cc">'style.css'</span><span style="COLOR: #339933">,</span>
<span style="COLOR: #006600; FONT-STYLE: italic">// (选填) 要为编辑器附加的外部css文件</span>
	content<span style="COLOR: #339933">:</span><span style="COLOR: #3366cc">'starting content'</span><span style="COLOR: #339933">,</span>
<span style="COLOR: #006600; FONT-STYLE: italic">// (选填) 设置编辑器编辑区域中的初始内容</span>
	css<span style="COLOR: #339933">:</span><span style="COLOR: #3366cc">'body{background-color:#ccc}'</span><span style="COLOR: #339933">,</span>
 <span style="COLOR: #006600; FONT-STYLE: italic">// (选填) 设置编辑器编辑区域背景</span>
	bodyid<span style="COLOR: #339933">:</span><span style="COLOR: #3366cc">'editor'</span><span style="COLOR: #339933">,</span>
<span style="COLOR: #006600; FONT-STYLE: italic">// (选填) 设置编辑区域ID</span>
	footerclass<span style="COLOR: #339933">:</span><span style="COLOR: #3366cc">'tefooter'</span><span style="COLOR: #339933">,</span>
<span style="COLOR: #006600; FONT-STYLE: italic">// (选填) 设置编辑器底部class</span>
	toggle<span style="COLOR: #339933">:</span><span style="COLOR: #009900">{</span>text<span style="COLOR: #339933">:</span><span style="COLOR: #3366cc">'源代码'</span><span style="COLOR: #339933">,</span>activetext<span style="COLOR: #339933">:</span><span style="COLOR: #3366cc">'可视化'</span><span style="COLOR: #339933">,</span>cssclass<span style="COLOR: #339933">:</span><span style="COLOR: #3366cc">'toggle'</span><span style="COLOR: #009900">}</span><span style="COLOR: #339933">,</span>
 <span style="COLOR: #006600; FONT-STYLE: italic">// (选填) 设置源代码浏览切换文字,及切换按钮的class</span>
	resize<span style="COLOR: #339933">:</span><span style="COLOR: #009900">{</span>cssclass<span style="COLOR: #339933">:</span><span style="COLOR: #3366cc">'resize'</span><span style="COLOR: #009900">}</span>
<span style="COLOR: #006600; FONT-STYLE: italic">// (选填) 设置编辑器大小调整按钮的class</span>
<span style="COLOR: #009900">}</span><span style="COLOR: #009900">)</span><span style="COLOR: #339933">;</span>
Copier après la connexion
Voir l'exemple : http://sandbox.leigeber.com/tinyeditor/
Télécharger : Code source de TinyEditor est un outil de production HTML WYSIWYG editor_HTML/Xhtml_webpage simple et facile à utiliser. et exemples de fichiers

Outils d'IA chauds

Undresser.AI Undress
Application basée sur l'IA pour créer des photos de nu réalistes

AI Clothes Remover
Outil d'IA en ligne pour supprimer les vêtements des photos.

Undress AI Tool
Images de déshabillage gratuites

Clothoff.io
Dissolvant de vêtements AI

AI Hentai Generator
Générez AI Hentai gratuitement.

Article chaud
Outils chauds

Bloc-notes++7.3.1
Éditeur de code facile à utiliser et gratuit

SublimeText3 version chinoise
Version chinoise, très simple à utiliser

Envoyer Studio 13.0.1
Puissant environnement de développement intégré PHP

Dreamweaver CS6
Outils de développement Web visuel

SublimeText3 version Mac
Logiciel d'édition de code au niveau de Dieu (SublimeText3)


 Comment obtenir un effet de vague avec du CSS3 pur ? (exemple de code)
Jun 28, 2022 pm 01:39 PM
Comment obtenir un effet de vague avec du CSS3 pur ? (exemple de code)
Jun 28, 2022 pm 01:39 PM
Comment obtenir un effet de vague avec du CSS3 pur ? Cet article vous présentera comment utiliser l'animation SVG et CSS pour créer des effets de vagues. J'espère que cela vous sera utile !
 Utilisez habilement CSS pour réaliser divers boutons de forme étrange (avec code)
Jul 19, 2022 am 11:28 AM
Utilisez habilement CSS pour réaliser divers boutons de forme étrange (avec code)
Jul 19, 2022 am 11:28 AM
Cet article va vous montrer comment utiliser CSS pour réaliser facilement divers boutons aux formes étranges qui apparaissent fréquemment. J'espère que cela vous sera utile !
 Comment masquer des éléments en CSS sans prendre de place
Jun 01, 2022 pm 07:15 PM
Comment masquer des éléments en CSS sans prendre de place
Jun 01, 2022 pm 07:15 PM
Deux méthodes : 1. À l'aide de l'attribut display, ajoutez simplement le style "display:none;" à l'élément. 2. Utilisez les attributs position et top pour définir le positionnement absolu de l'élément afin de masquer l'élément. Ajoutez simplement le style "position:absolute;top:-9999px;" à l'élément.
 Comment implémenter des bordures en dentelle en CSS3
Sep 16, 2022 pm 07:11 PM
Comment implémenter des bordures en dentelle en CSS3
Sep 16, 2022 pm 07:11 PM
En CSS, vous pouvez utiliser l'attribut border-image pour réaliser une bordure en dentelle. L'attribut border-image peut utiliser des images pour créer des bordures, c'est-à-dire ajouter une image d'arrière-plan à la bordure. Il vous suffit de spécifier l'image d'arrière-plan comme style de dentelle ; largeur de la bordure de l'image vers l'intérieur. Indique si le début est répété ;".
 Il s'avère que le carrousel de texte et le carrousel d'images peuvent également être réalisés en utilisant du CSS pur !
Jun 10, 2022 pm 01:00 PM
Il s'avère que le carrousel de texte et le carrousel d'images peuvent également être réalisés en utilisant du CSS pur !
Jun 10, 2022 pm 01:00 PM
Comment créer un carrousel de texte et un carrousel d'images ? La première chose à laquelle tout le monde pense est de savoir s'il faut utiliser js. En fait, le carrousel de texte et le carrousel d'images peuvent également être réalisés en utilisant du CSS pur. Jetons un coup d'œil à la méthode d'implémentation.
 Comment agrandir l'image en cliquant sur la souris en CSS3
Apr 25, 2022 pm 04:52 PM
Comment agrandir l'image en cliquant sur la souris en CSS3
Apr 25, 2022 pm 04:52 PM
Méthode d'implémentation : 1. Utilisez le sélecteur ":active" pour sélectionner l'état du clic de la souris sur l'image ; 2. Utilisez l'attribut de transformation et la fonction scale() pour obtenir l'effet d'agrandissement de l'image, la syntaxe "img:active {transform : échelle (grossissement de l'axe x, grossissement de l'axe y);}".
 Comment définir la vitesse de rotation de l'animation en CSS3
Apr 28, 2022 pm 04:32 PM
Comment définir la vitesse de rotation de l'animation en CSS3
Apr 28, 2022 pm 04:32 PM
En CSS3, vous pouvez utiliser l'attribut "animation-timing-function" pour définir la vitesse de rotation de l'animation. Cet attribut est utilisé pour spécifier comment l'animation terminera un cycle et définir la courbe de vitesse de l'animation. La syntaxe est "element {. fonction de synchronisation d'animation : valeur de l'attribut de vitesse ;}".
 L'effet d'animation CSS3 a-t-il une déformation ?
Apr 28, 2022 pm 02:20 PM
L'effet d'animation CSS3 a-t-il une déformation ?
Apr 28, 2022 pm 02:20 PM
L'effet d'animation en CSS3 a une déformation ; vous pouvez utiliser "animation : attribut d'animation @keyframes ..{..{transform : attribut de transformation}}" pour obtenir un effet d'animation de déformation. L'attribut d'animation est utilisé pour définir le style d'animation et le. L'attribut transform est utilisé pour définir le style de déformation.
