

windows下配置nginx+php环境

刚看到nginx这个词,我很好奇它的读法(engine x),我的直译是“引擎x”,一般引“擎代”表了性能,而“x”大多出现是表示“xtras(额外的效果)”,那么整个词的意思就是类似“极致效果”,“额外性能”。当然这里不是要来唠嗑,以上是题外话。
nginx相较于我们熟悉的apache、IIS的优势,就我浅入浅出的了解,在于“反向代理”和“负载均衡”。因此考虑到能够为Web服务器节省资源,它可以代替apache来提供Web服务。那么上正题了,nginx有这么多优势,那在windows下如何来配置nginx+php环境?网上看到还是那么多转载来转载去的文章。这里就我配置的过程,来介绍一下:
1、首先需要准备的应用程序包。
nginx:nginx/Windows-1.0.4
php:php-5.2.16-nts-Win32-VC6-x86.zip (nginx下php是以FastCGI的方式运行,所以我们下载非线程安全也就是nts的php包)
(还会用到)RunHiddenConsole:RunHiddenConsole.zip
2、安装与配置。
1)php的安装与配置。
直接解压下载好的php包,到D盘wnmp目录(D:\wnmp),这里把解压出来的文件夹重命名成php5。进入文件夹修改php.ini-recommended文件为php.ini,并用Editplus或者Notepad++打开来。找到
<div>
<span style="color: #000000;">extension_dir </span><span style="color: #000000;">=</span><span style="color: #000000;"> </span><span style="color: #800000;">"</span><span style="color: #800000;">./ext</span><span style="color: #800000;">"</span>
</div>
更改为
<div>
<span style="color: #000000;">extension_dir </span><span style="color: #000000;">=</span><span style="color: #000000;"> </span><span style="color: #800000;">"</span><span style="color: #800000;">D:/wnmp/php5/ext</span><span style="color: #800000;">"</span>
</div>
<div>
<span style="color: #000000;">;extension</span><span style="color: #000000;">=</span><span style="color: #000000;">php_mysql.dll<br>;extension</span><span style="color: #000000;">=</span><span style="color: #000000;">php_mysqli.dll</span>
</div>
前面指定了php的ext路径后,只要把需要的扩展包前面所对应的“;”去掉,就可以了。这里打开php_mysql.dll和php_mysqli.dll,让php支持mysql。当然不要忘掉很重要的一步就是,把php5目录下的libmysql.dll文件复制到C:\Windows目录下,也可以在系统变量里面指定路径,当然这里我选择了更为方便的方法^_^。
到这里,php已经可以支持mysql了。
接下来我们来配置php,让php能够与nginx结合。找到
<div>
<span style="color: #000000;">;cgi.fix_pathinfo</span><span style="color: #000000;">=</span><span style="color: #800080;">1</span>
</div>
我们去掉这里的封号。
<div>
<span style="color: #000000;">cgi.fix_pathinfo</span><span style="color: #000000;">=</span><span style="color: #800080;">1</span>
</div>
2)nginx的安装与配置。
把下载好的nginx-1.0.4的包同样解压到D盘的wnmp目录下,并重命名为nginx。接下来,我们来配置nginx,让它能够和php协同工作。进入nginx的conf目录,打开nginx的配置文件nginx.conf,找到
<div>
<span style="color: #000000;">location </span><span style="color: #000000;">/</span><span style="color: #000000;"> {<br>      root   html;      #这里是站点的根目录<br>      index  index.html index.htm;<br>}</span>
</div>将root html;改为root D:/wnmp/www;
再往下,找到
<div>
<span style="color: #000000;"># pass the PHP scripts to FastCGI server listening on </span><span style="color: #800080;">127.0</span><span style="color: #000000;">.</span><span style="color: #800080;">0.1</span><span style="color: #000000;">:</span><span style="color: #800080;">9000</span><span style="color: #000000;"><br>#<br>#location </span><span style="color: #000000;">~</span><span style="color: #000000;"> \.php$ {<br>#    root           html;<br>#    fastcgi_pass   </span><span style="color: #800080;">127.0</span><span style="color: #000000;">.</span><span style="color: #800080;">0.1</span><span style="color: #000000;">:</span><span style="color: #800080;">9000</span><span style="color: #000000;">;<br>#    fastcgi_index  index.php;<br>#    fastcgi_param  SCRIPT_FILENAME  </span><span style="color: #ff0000;">/</span><span style="color: #000000;"><span style="color: #ff0000;">scripts</span>$fastcgi_script_name;<br>#    include        fastcgi_params;<br>#}</span>
</div>先将前面的“#”去掉,同样将root html;改为root D:/wnmp/www;。再把标记为红色的/scripts改为“$document_root”,这里的“$document_root”就是指前面“root”所指的站点路径,这是改完后的:
<div>
<span style="color: #000000;">#</span><span style="color: #000000;"> pass the PHP scripts to FastCGI server listening </span><span style="color: #0000ff;">on</span><span style="color: #000000;"> </span><span style="color: #000000;">127.0</span><span style="color: #000000;">.</span><span style="color: #000000;">0.1</span><span style="color: #000000;">:</span><span style="color: #000000;">9000</span><span style="color: #000000;"><br></span><span style="color: #000000;">#</span><span style="color: #000000;"><br>location ~ </span><span style="color: #000000;">\.</span><span style="color: #000000;">php</span><span style="color: #000000;">$</span><span style="color: #000000;"> {<br>      root           <span style="color: #ff0000;">D:</span></span><span style="color: #ff0000;">/wnmp/www;</span><span style="color: #000000;"><br>      fastcgi_pass   </span><span style="color: #800080;">127.0.0.1<span style="color: #000000;">:</span>9000</span><span style="color: #000000;">;</span><span style="color: #000000;"><br>      fastcgi_index  index</span><span style="color: #000000;">.</span><span style="color: #000000;">php</span><span style="color: #000000;">;</span><span style="color: #000000;"><br>      fastcgi_param  SCRIPT_FILENAME  </span><span style="color: #ff0000;">$document_root</span><span style="color: #000000;">$</span><span style="color: #000000;">fastcgi_script_name</span><span style="color: #000000;">;</span><span style="color: #000000;"><br>      include        fastcgi_params</span><span style="color: #000000;">;</span><span style="color: #000000;"><br>}</span>
</div>保存配置文件,就可以了。
nginx+php的环境就初步配置好了,来跑跑看。我们可以输入命令 
来启动php,并手动启动nginx,当然也可以利用脚本来实现。
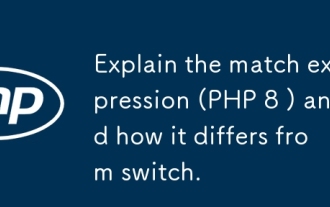
首先把下载好的RunHiddenConsole.zip包解压到nginx目录内,RunHiddenConsole.exe的作用是在执行完命令行脚本后可以自动关闭脚本,而从脚本中开启的进程不被关闭。然后来创建脚本,命名为“start_nginx.bat”,我们在Notepad++里来编辑它
<div>
<span style="color: #0000ff;">@echo</span><span style="color: #000000;"> </span><span style="color: #0000ff;">off</span><span style="color: #000000;"><br></span><span style="color: #008000;">REM</span><span style="color: #008000;"> Windows 下无效</span><span style="color: #008000;"><br>REM</span><span style="color: #008000;"> set PHP_FCGI_CHILDREN=5</span><span style="color: #008000;"><br></span><span style="color: #000000;"><br></span><span style="color: #008000;">REM</span><span style="color: #008000;"> 每个进程处理的最大请求数,或设置为 Windows 环境变量</span><span style="color: #008000;"><br></span><span style="color: #0000ff;">set</span><span style="color: #000000;"> PHP_FCGI_MAX_REQUESTS</span><span style="color: #000000;">=</span><span style="color: #000000;">1000</span><span style="color: #000000;"><br> <br></span><span style="color: #0000ff;">echo</span><span style="color: #000000;"> Starting PHP FastCGI</span><span style="color: #000000;">...</span><span style="color: #000000;"><br>RunHiddenConsole D:</span><span style="color: #000000;">/</span><span style="color: #000000;">wnmp</span><span style="color: #000000;">/</span><span style="color: #000000;">php5</span><span style="color: #000000;">/</span><span style="color: #000000;">php-cgi</span><span style="color: #000000;">.</span><span style="color: #000000;">exe -b </span><span style="color: #000000;">127.0</span><span style="color: #000000;">.</span><span style="color: #000000;">0.1</span><span style="color: #000000;">:</span><span style="color: #000000;">9000</span><span style="color: #000000;"> -c D:</span><span style="color: #000000;">/</span><span style="color: #000000;">wnmp</span><span style="color: #000000;">/</span><span style="color: #000000;">php5</span><span style="color: #000000;">/</span><span style="color: #000000;">php</span><span style="color: #000000;">.</span><span style="color: #000000;">ini<br> <br></span><span style="color: #0000ff;">echo</span><span style="color: #000000;"> Starting nginx</span><span style="color: #000000;">...</span><span style="color: #000000;"><br>RunHiddenConsole D:</span><span style="color: #000000;">/</span><span style="color: #000000;">wnmp</span><span style="color: #000000;">/</span><span style="color: #000000;">nginx</span><span style="color: #000000;">/</span><span style="color: #000000;">nginx</span><span style="color: #000000;">.</span><span style="color: #000000;">exe -p D:</span><span style="color: #000000;">/</span><span style="color: #000000;">wnmp</span><span style="color: #000000;">/</span><span style="color: #000000;">nginx</span>
</div>
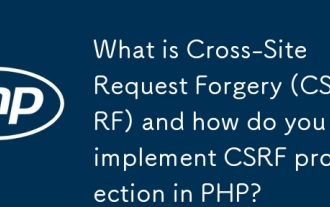
再另外创建一个名为stop_nginx.bat的脚本用来关闭nginx
<div>
<span style="color: #0000ff;">@echo</span><span style="color: #000000;"> </span><span style="color: #0000ff;">off</span><span style="color: #000000;"><br></span><span style="color: #0000ff;">echo</span><span style="color: #000000;"> Stopping nginx</span><span style="color: #000000;">...</span><span style="color: #000000;"> </span><span style="color: #000000;"> </span><span style="color: #000000;"><br>taskkill </span><span style="color: #000000;">/</span><span style="color: #000000;">F </span><span style="color: #000000;">/</span><span style="color: #000000;">IM nginx</span><span style="color: #000000;">.</span><span style="color: #000000;">exe </span><span style="color: #000000;">></span><span style="color: #000000;"> nul</span><span style="color: #000000;"></span><span style="color: #000000;"><br></span><span style="color: #0000ff;">echo</span><span style="color: #000000;"> Stopping PHP FastCGI</span><span style="color: #000000;">...</span><span style="color: #000000;"><br>taskkill </span><span style="color: #000000;">/</span><span style="color: #000000;">F </span><span style="color: #000000;">/</span><span style="color: #000000;">IM php-cgi</span><span style="color: #000000;">.</span><span style="color: #000000;">exe </span><span style="color: #000000;">></span><span style="color: #000000;"> nul<br></span><span style="color: #0000ff;">exit</span>
</div>
做好后,是这样的

这样,我们的服务脚本也都创建完毕了。双击start_nginx.bat看看进程管理器是不是有两个nginx.exe的进程和一个php-cgi.exe的进程呢?

这样nginx服务就启动了,而且php也以fastCGI的方式运行了。
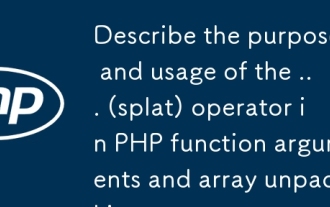
到站点目录下,新建一个phpinfo.php的文件,在里面编辑
<div>
<span style="color: #000000;"></span><span style="color: #000000;">php<br>    </span><span style="color: #008080;">phpinfo</span><span style="color: #000000;">();<br></span><span style="color: #000000;">?></span>
</div>
保存后,打开浏览器输入“http://localhost/phpinfo.php”,如果看到

就说明,nginx+php的环境已经配置好了,呵呵~

Outils d'IA chauds

Undresser.AI Undress
Application basée sur l'IA pour créer des photos de nu réalistes

AI Clothes Remover
Outil d'IA en ligne pour supprimer les vêtements des photos.

Undress AI Tool
Images de déshabillage gratuites

Clothoff.io
Dissolvant de vêtements AI

AI Hentai Generator
Générez AI Hentai gratuitement.

Article chaud
Outils chauds

Bloc-notes++7.3.1
Éditeur de code facile à utiliser et gratuit

SublimeText3 version chinoise
Version chinoise, très simple à utiliser

Envoyer Studio 13.0.1
Puissant environnement de développement intégré PHP

Dreamweaver CS6
Outils de développement Web visuel

SublimeText3 version Mac
Logiciel d'édition de code au niveau de Dieu (SublimeText3)


 Expliquez les jetons Web JSON (JWT) et leur cas d'utilisation dans les API PHP.
Apr 05, 2025 am 12:04 AM
Expliquez les jetons Web JSON (JWT) et leur cas d'utilisation dans les API PHP.
Apr 05, 2025 am 12:04 AM
JWT est une norme ouverte basée sur JSON, utilisée pour transmettre en toute sécurité des informations entre les parties, principalement pour l'authentification de l'identité et l'échange d'informations. 1. JWT se compose de trois parties: en-tête, charge utile et signature. 2. Le principe de travail de JWT comprend trois étapes: la génération de JWT, la vérification de la charge utile JWT et l'analyse. 3. Lorsque vous utilisez JWT pour l'authentification en PHP, JWT peut être généré et vérifié, et les informations sur le rôle et l'autorisation des utilisateurs peuvent être incluses dans l'utilisation avancée. 4. Les erreurs courantes incluent une défaillance de vérification de signature, l'expiration des jetons et la charge utile surdimensionnée. Les compétences de débogage incluent l'utilisation des outils de débogage et de l'exploitation forestière. 5. L'optimisation des performances et les meilleures pratiques incluent l'utilisation des algorithmes de signature appropriés, la définition des périodes de validité raisonnablement,
 Comment exécuter le projet H5
Apr 06, 2025 pm 12:21 PM
Comment exécuter le projet H5
Apr 06, 2025 pm 12:21 PM
L'exécution du projet H5 nécessite les étapes suivantes: Installation des outils nécessaires tels que le serveur Web, Node.js, les outils de développement, etc. Créez un environnement de développement, créez des dossiers de projet, initialisez les projets et écrivez du code. Démarrez le serveur de développement et exécutez la commande à l'aide de la ligne de commande. Aperçu du projet dans votre navigateur et entrez l'URL du serveur de développement. Publier des projets, optimiser le code, déployer des projets et configurer la configuration du serveur Web.
 Gitee Pages STATIQUE Le déploiement du site Web a échoué: comment dépanner et résoudre les erreurs de fichier unique 404?
Apr 04, 2025 pm 11:54 PM
Gitee Pages STATIQUE Le déploiement du site Web a échoué: comment dépanner et résoudre les erreurs de fichier unique 404?
Apr 04, 2025 pm 11:54 PM
GiteEpages STATIQUE Le déploiement du site Web a échoué: 404 Dépannage des erreurs et résolution lors de l'utilisation de Gitee ...
 Expliquez l'expression de correspondance (PHP 8) et comment elle diffère du commutateur.
Apr 06, 2025 am 12:03 AM
Expliquez l'expression de correspondance (PHP 8) et comment elle diffère du commutateur.
Apr 06, 2025 am 12:03 AM
Dans PHP8, les expressions de correspondance sont une nouvelle structure de contrôle qui renvoie différents résultats en fonction de la valeur de l'expression. 1) Il est similaire à une instruction Switch, mais renvoie une valeur au lieu d'un bloc d'instruction d'exécution. 2) L'expression de correspondance est strictement comparée (===), ce qui améliore la sécurité. 3) Il évite les éventuelles omissions de rupture dans les instructions de commutation et améliore la simplicité et la lisibilité du code.
 Dans le développement frontal, comment utiliser CSS et JavaScript pour obtenir des effets de procédure similaires à l'interface des paramètres de Windows 10?
Apr 05, 2025 pm 10:21 PM
Dans le développement frontal, comment utiliser CSS et JavaScript pour obtenir des effets de procédure similaires à l'interface des paramètres de Windows 10?
Apr 05, 2025 pm 10:21 PM
Comment implémenter des fenêtres dans le développement frontal ...
 Comment accélérer la vitesse de chargement de PS?
Apr 06, 2025 pm 06:27 PM
Comment accélérer la vitesse de chargement de PS?
Apr 06, 2025 pm 06:27 PM
La résolution du problème du démarrage lent Photoshop nécessite une approche à plusieurs volets, notamment: la mise à niveau du matériel (mémoire, lecteur à semi-conducteurs, CPU); des plug-ins désinstallés ou incompatibles; nettoyer régulièrement les déchets du système et des programmes de fond excessifs; clôture des programmes non pertinents avec prudence; Éviter d'ouvrir un grand nombre de fichiers pendant le démarrage.
 Qu'est-ce que la contrefaçon de demande inter-sites (CSRF) et comment implémentez-vous la protection CSRF dans PHP?
Apr 07, 2025 am 12:02 AM
Qu'est-ce que la contrefaçon de demande inter-sites (CSRF) et comment implémentez-vous la protection CSRF dans PHP?
Apr 07, 2025 am 12:02 AM
En PHP, vous pouvez prévenir efficacement les attaques du CSRF en utilisant des jetons imprévisibles. Les méthodes spécifiques comprennent: 1. Générer et intégrer les jetons CSRF dans la forme; 2. Vérifiez la validité du jeton lors du traitement de la demande.
 Décrivez l'objectif et l'utilisation de l'opérateur ... (SPLAT) dans les arguments de fonction PHP et le déballage du tableau.
Apr 06, 2025 am 12:07 AM
Décrivez l'objectif et l'utilisation de l'opérateur ... (SPLAT) dans les arguments de fonction PHP et le déballage du tableau.
Apr 06, 2025 am 12:07 AM
L'opérateur ... (SPLAT) dans PHP est utilisé pour déballer les paramètres et les tableaux de fonction, améliorant la simplicité et l'efficacité du code. 1) Démontage du paramètre de fonction: passez l'élément de tableau en tant que paramètre à la fonction. 2) Démontage du tableau: déballer un tableau dans un autre tableau ou en tant que paramètre de fonction.
