

《C#微信开发系列(2)-自定义菜单管理》

2.0自定义菜单管理 ①接口说明: 微信服务号聊天窗口下面的菜单项(有的公众号有启用有的则没有),这个可以在编辑模式简单配置,也可以在开发模式代码配置。微信公众平台开发者文档:微信公众号开发平台创建自定义菜单,可以看到创建菜单的一些注意事项,下
2.0自定义菜单管理①接口说明:
微信服务号聊天窗口下面的菜单项(有的公众号有启用有的则没有),这个可以在编辑模式简单配置,也可以在开发模式代码配置。微信公众平台开发者文档:微信公众号开发平台创建自定义菜单,可以看到创建菜单的一些注意事项,下面的使用网页调试工具调试该接口,只是调试接口是否可以正常调用,并不是直接创建菜单,根据微信自定义菜单管理文档菜单事件可分为两种:
click: 用户点击click类型按钮后,微信服务器会通过消息接口推送消息类型为event 的结构给开发者(参考消息接口指南),并且带上按钮中开发者填写的key值,开发者可以通过自定义的key值与用户进行交互。
view: 用户点击view类型按钮后,微信客户端将会打开开发者在按钮中填写的url值 (即网页链接),达到打开网页的目的,建议与网页授权获取用户基本信息接口结合,获得用户的登入个人信息。
设置菜单JSON格式(可根据需要进行修改):
<span style="color: #000000;">{
     </span><span style="color: #800000;">"</span><span style="color: #800000;">button</span><span style="color: #800000;">"</span><span style="color: #000000;">:[
     {
          </span><span style="color: #800000;">"</span><span style="color: #800000;">type</span><span style="color: #800000;">"</span>:<span style="color: #800000;">"</span><span style="color: #800000;">click</span><span style="color: #800000;">"</span><span style="color: #000000;">,
          </span><span style="color: #800000;">"</span><span style="color: #800000;">name</span><span style="color: #800000;">"</span>:<span style="color: #800000;">"</span><span style="color: #800000;">今日歌曲</span><span style="color: #800000;">"</span><span style="color: #000000;">,
          </span><span style="color: #800000;">"</span><span style="color: #800000;">key</span><span style="color: #800000;">"</span>:<span style="color: #800000;">"</span><span style="color: #800000;">V1001_TODAY_MUSIC</span><span style="color: #800000;">"</span><span style="color: #000000;">
      },
      {
           </span><span style="color: #800000;">"</span><span style="color: #800000;">name</span><span style="color: #800000;">"</span>:<span style="color: #800000;">"</span><span style="color: #800000;">菜单</span><span style="color: #800000;">"</span><span style="color: #000000;">,
           </span><span style="color: #800000;">"</span><span style="color: #800000;">sub_button</span><span style="color: #800000;">"</span><span style="color: #000000;">:[
           {
               </span><span style="color: #800000;">"</span><span style="color: #800000;">type</span><span style="color: #800000;">"</span>:<span style="color: #800000;">"</span><span style="color: #800000;">view</span><span style="color: #800000;">"</span><span style="color: #000000;">,
               </span><span style="color: #800000;">"</span><span style="color: #800000;">name</span><span style="color: #800000;">"</span>:<span style="color: #800000;">"</span><span style="color: #800000;">搜索</span><span style="color: #800000;">"</span><span style="color: #000000;">,
               </span><span style="color: #800000;">"</span><span style="color: #800000;">url</span><span style="color: #800000;">"</span>:<span style="color: #800000;">"</span><span style="color: #800000;">http://www.soso.com/</span><span style="color: #800000;">"</span><span style="color: #000000;">
            },
            {
               </span><span style="color: #800000;">"</span><span style="color: #800000;">type</span><span style="color: #800000;">"</span>:<span style="color: #800000;">"</span><span style="color: #800000;">view</span><span style="color: #800000;">"</span><span style="color: #000000;">,
               </span><span style="color: #800000;">"</span><span style="color: #800000;">name</span><span style="color: #800000;">"</span>:<span style="color: #800000;">"</span><span style="color: #800000;">视频</span><span style="color: #800000;">"</span><span style="color: #000000;">,
               </span><span style="color: #800000;">"</span><span style="color: #800000;">url</span><span style="color: #800000;">"</span>:<span style="color: #800000;">"</span><span style="color: #800000;">http://v.QQ.com/</span><span style="color: #800000;">"</span><span style="color: #000000;">
            },
            {
               </span><span style="color: #800000;">"</span><span style="color: #800000;">type</span><span style="color: #800000;">"</span>:<span style="color: #800000;">"</span><span style="color: #800000;">click</span><span style="color: #800000;">"</span><span style="color: #000000;">,
               </span><span style="color: #800000;">"</span><span style="color: #800000;">name</span><span style="color: #800000;">"</span>:<span style="color: #800000;">"</span><span style="color: #800000;">赞一下我们</span><span style="color: #800000;">"</span><span style="color: #000000;">,
               </span><span style="color: #800000;">"</span><span style="color: #800000;">key</span><span style="color: #800000;">"</span>:<span style="color: #800000;">"</span><span style="color: #800000;">V1001_GOOD</span><span style="color: #800000;">"</span><span style="color: #000000;">
            }]
       }]
}</span>配置菜单的注意点:
1、自定义菜单最多包括3个一级菜单,每个一级菜单最多包含5个二级菜单。
2、一级菜单最多4个汉字,二级菜单最多7个汉字,多出来的部分将会以“...”代替。
3、创建自定义菜单后,由于微信客户端缓存,需要24小时微信客户端才会展现出来。测试时可以尝试取消关注公众账号后再次关注,则可以看到创建后的效果。
接口参数配置:

②请求接口:
接口调用请求说明:
http请求方式:POST(请使用https协议)
https://api.weixin.qq.com/cgi-bin/menu/create?access_token=ACCESS_TOKEN
POST请求接口调用接口凭据ACCESS_TOKEN的获取方式可参见文档(获取ACCESS_TOKEN文档)使用POST方式带上ACCESS_TOKEN以及菜单JSON请求接口,具体实现代码如下:
<span style="color: #008080;"> 1</span> <span style="color: #808080;">///</span> <span style="color: #808080;"><summary></summary></span>
<span style="color: #008080;"> 2</span> <span style="color: #808080;">///</span><span style="color: #008000;"> 创建菜单事件
</span><span style="color: #008080;"> 3</span> <span style="color: #808080;">///</span> <span style="color: #808080;"></span>
<span style="color: #008080;"> 4</span> <span style="color: #808080;">///</span> <span style="color: #808080;"><param name="sender"></span>
<span style="color: #008080;"> 5</span> <span style="color: #808080;">///</span> <span style="color: #808080;"><param name="e"></span>
<span style="color: #008080;"> 6</span> <span style="color: #0000ff;">PRotected</span> <span style="color: #0000ff;">void</span> creayeMenu_Click(<span style="color: #0000ff;">object</span><span style="color: #000000;"> sender, EventArgs e)
</span><span style="color: #008080;"> 7</span> <span style="color: #000000;">{
</span><span style="color: #008080;"> 8    </span>FileStream fs1 = <span style="color: #0000ff;">new</span> FileStream(Server.MapPath(<span style="color: #800000;">"</span><span style="color: #800000;">~/</span><span style="color: #800000;">"</span>) + <span style="color: #800000;">"</span><span style="color: #800000;">\\menuInfo.txt</span><span style="color: #800000;">"</span><span style="color: #000000;">, FileMode.Open);
</span><span style="color: #008080;"> 9    </span>StreamReader sr = <span style="color: #0000ff;">new</span> StreamReader(fs1, Encoding.GetEncoding(<span style="color: #800000;">"</span><span style="color: #800000;">GBK</span><span style="color: #800000;">"</span><span style="color: #000000;">));
</span><span style="color: #008080;">10    </span><span style="color: #0000ff;">string</span> menu =<span style="color: #000000;"> sr.ReadToEnd();
</span><span style="color: #008080;">11    </span><span style="color: #000000;">sr.Close();
</span><span style="color: #008080;">12    </span><span style="color: #000000;">fs1.Close();
</span><span style="color: #008080;">13    <span style="color: #000000;">CreateMenu</span></span>(<span style="color: #800000;">"</span><span style="color: #800000;">https://api.weixin.qq.com/cgi-bin/menu/create?access_token=ACCESS_TOKEN</span><span style="color: #800000;">"</span><span style="color: #000000;">, menu);
</span><span style="color: #008080;">14</span> }
<span style="color: #008080;"> 1</span> <span style="color: #808080;">///</span> <span style="color: #808080;"><summary></summary></span>
<span style="color: #008080;"> 2</span> <span style="color: #808080;">///</span><span style="color: #008000;"> 创建公众号菜单
</span><span style="color: #008080;"> 3</span> <span style="color: #808080;">///</span> <span style="color: #808080;"></span>
<span style="color: #008080;"> 4</span> <span style="color: #808080;">///</span> <span style="color: #808080;"><param name="posturl"></span><span style="color: #008000;">URL</span><span style="color: #808080;"></span>
<span style="color: #008080;"> 5</span> <span style="color: #808080;">///</span> <span style="color: #808080;"><param name="postData"></span><span style="color: #008000;">菜单JSON数据</span><span style="color: #808080;"></span>
<span style="color: #008080;"> 6</span> <span style="color: #808080;">///</span> <span style="color: #808080;"><returns></returns></span>
<span style="color: #008080;"> 7</span> <span style="color: #0000ff;">public</span> <span style="color: #0000ff;">void</span> CreateMenu(<span style="color: #0000ff;">string</span> posturl, <span style="color: #0000ff;">string</span><span style="color: #000000;"> postData)
</span><span style="color: #008080;"> 8</span> <span style="color: #000000;">{
</span><span style="color: #008080;"> 9    </span>Stream outstream = <span style="color: #0000ff;">null</span><span style="color: #000000;">;
</span><span style="color: #008080;">10    </span>Stream instream = <span style="color: #0000ff;">null</span><span style="color: #000000;">;
</span><span style="color: #008080;">11    </span>StreamReader sr = <span style="color: #0000ff;">null</span><span style="color: #000000;">;
</span><span style="color: #008080;">12    </span>HttpWebResponse response = <span style="color: #0000ff;">null</span><span style="color: #000000;">;
</span><span style="color: #008080;">13    </span>HttpWebRequest request = <span style="color: #0000ff;">null</span><span style="color: #000000;">;
</span><span style="color: #008080;">14    </span>Encoding encoding =<span style="color: #000000;"> Encoding.UTF8;
</span><span style="color: #008080;">15    </span><span style="color: #0000ff;">byte</span>[] data =<span style="color: #000000;"> encoding.GetBytes(postData);
</span><span style="color: #008080;">16</span>
<span style="color: #008080;">17    </span>request = WebRequest.Create(posturl) <span style="color: #0000ff;">as</span><span style="color: #000000;"> HttpWebRequest;
</span><span style="color: #008080;">18    </span>CookieContainer cookieContainer = <span style="color: #0000ff;">new</span><span style="color: #000000;"> CookieContainer();
</span><span style="color: #008080;">19    </span>request.CookieContainer =<span style="color: #000000;"> cookieContainer;
</span><span style="color: #008080;">20</span>       request.AllowAutoRedirect = <span style="color: #0000ff;">true</span><span style="color: #000000;">;
</span><span style="color: #008080;">21</span>       request.Method = <span style="color: #800000;">"</span><span style="color: #800000;">POST</span><span style="color: #800000;">"</span><span style="color: #000000;">;
</span><span style="color: #008080;">22</span>       request.ContentType = <span style="color: #800000;">"</span><span style="color: #800000;">application/x-www-form-urlencoded</span><span style="color: #800000;">"</span><span style="color: #000000;">;
</span><span style="color: #008080;">23</span>       request.ContentLength =<span style="color: #000000;"> data.Length;
</span><span style="color: #008080;">24</span>       outstream =<span style="color: #000000;"> request.GetRequestStream();
</span><span style="color: #008080;">25</span>       outstream.Write(data, <span style="color: #800080;">0</span><span style="color: #000000;">, data.Length);
</span><span style="color: #008080;">26</span> <span style="color: #000000;">      outstream.Close();
</span><span style="color: #008080;">27</span>       response = request.GetResponse() <span style="color: #0000ff;">as</span><span style="color: #000000;"> HttpWebResponse;
</span><span style="color: #008080;">28</span>       instream =<span style="color: #000000;"> response.GetResponseStream();
</span><span style="color: #008080;">29</span>       sr = <span style="color: #0000ff;">new</span><span style="color: #000000;"> StreamReader(instream, encoding);
</span><span style="color: #008080;">30</span>       <span style="color: #0000ff;">string</span> content =<span style="color: #000000;"> sr.ReadToEnd();
</span><span style="color: #008080;">31</span> <span style="color: #000000;">      Context.Response.Write(content);
</span><span style="color: #008080;">32</span> }接口返回结果:
正确时返回的JSON数据包格式如下:
{"errcode":0,"errmsg":"ok"}
错误时的返回JSON数据包如下(示例为无效菜单名长度):
{"errcode":40018,"errmsg":"invalid button name size"}

Outils d'IA chauds

Undresser.AI Undress
Application basée sur l'IA pour créer des photos de nu réalistes

AI Clothes Remover
Outil d'IA en ligne pour supprimer les vêtements des photos.

Undress AI Tool
Images de déshabillage gratuites

Clothoff.io
Dissolvant de vêtements AI

AI Hentai Generator
Générez AI Hentai gratuitement.

Article chaud
Outils chauds

Bloc-notes++7.3.1
Éditeur de code facile à utiliser et gratuit

SublimeText3 version chinoise
Version chinoise, très simple à utiliser

Envoyer Studio 13.0.1
Puissant environnement de développement intégré PHP

Dreamweaver CS6
Outils de développement Web visuel

SublimeText3 version Mac
Logiciel d'édition de code au niveau de Dieu (SublimeText3)
Sujets chauds
 1359
1359
 52
52

 Windows 11 : le moyen simple d'importer et d'exporter des mises en page de démarrage
Aug 22, 2023 am 10:13 AM
Windows 11 : le moyen simple d'importer et d'exporter des mises en page de démarrage
Aug 22, 2023 am 10:13 AM
Dans Windows 11, le menu Démarrer a été repensé et propose un ensemble simplifié d'applications disposées dans une grille de pages, contrairement à son prédécesseur, qui comportait des dossiers, des applications et des applications dans le groupe du menu Démarrer. Vous pouvez personnaliser la disposition du menu Démarrer, l'importer et l'exporter vers d'autres appareils Windows pour la personnaliser à votre guise. Dans ce guide, nous discuterons des instructions étape par étape pour importer la disposition de démarrage afin de personnaliser la disposition par défaut sur Windows 11. Qu’est-ce qu’Import-StartLayout dans Windows 11 ? Import Start Layout est une applet de commande utilisée dans Windows 10 et les versions antérieures pour importer les personnalisations du menu Démarrer dans
 Comment configurer rapidement un avatar personnalisé dans Netflix
Feb 19, 2024 pm 06:33 PM
Comment configurer rapidement un avatar personnalisé dans Netflix
Feb 19, 2024 pm 06:33 PM
Un avatar sur Netflix est une représentation visuelle de votre identité de streaming. Les utilisateurs peuvent aller au-delà de l'avatar par défaut pour exprimer leur personnalité. Continuez à lire cet article pour savoir comment définir une photo de profil personnalisée dans l'application Netflix. Comment définir rapidement un avatar personnalisé dans Netflix Dans Netflix, il n'y a pas de fonctionnalité intégrée pour définir une photo de profil. Cependant, vous pouvez le faire en installant l'extension Netflix sur votre navigateur. Tout d’abord, installez une photo de profil personnalisée pour l’extension Netflix sur votre navigateur. Vous pouvez l'acheter dans la boutique Chrome. Après avoir installé l'extension, ouvrez Netflix sur votre navigateur et connectez-vous à votre compte. Accédez à votre profil dans le coin supérieur droit et cliquez sur
 Comment personnaliser l'image d'arrière-plan dans Win11
Jun 30, 2023 pm 08:45 PM
Comment personnaliser l'image d'arrière-plan dans Win11
Jun 30, 2023 pm 08:45 PM
Comment personnaliser l’image d’arrière-plan dans Win11 ? Dans le nouveau système win11, il existe de nombreuses fonctions personnalisées, mais de nombreux amis ne savent pas comment utiliser ces fonctions. Certains amis pensent que l'image d'arrière-plan est relativement monotone et souhaitent personnaliser l'image d'arrière-plan, mais ne savent pas comment personnaliser l'image d'arrière-plan. Si vous ne savez pas comment définir l'image d'arrière-plan, l'éditeur a compilé les étapes pour. personnalisez l'image d'arrière-plan dans Win11 ci-dessous. Si vous êtes intéressé, jetez un œil ci-dessous ! Étapes de personnalisation des images d'arrière-plan dans Win11 : 1. Cliquez sur le bouton Win sur le bureau et cliquez sur Paramètres dans le menu contextuel, comme indiqué sur la figure. 2. Entrez dans le menu des paramètres et cliquez sur Personnalisation, comme indiqué sur la figure. 3. Entrez Personnalisation et cliquez sur Arrière-plan, comme indiqué sur l'image. 4. Entrez les paramètres d'arrière-plan et cliquez pour parcourir les images
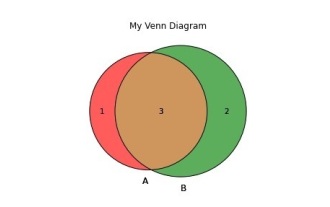 Comment créer et personnaliser des diagrammes de Venn en Python ?
Sep 14, 2023 pm 02:37 PM
Comment créer et personnaliser des diagrammes de Venn en Python ?
Sep 14, 2023 pm 02:37 PM
Un diagramme de Venn est un diagramme utilisé pour représenter les relations entre des ensembles. Pour créer un diagramme de Venn, nous utiliserons matplotlib. Matplotlib est une bibliothèque de visualisation de données couramment utilisée en Python pour créer des tableaux et des graphiques interactifs. Il est également utilisé pour créer des images et des graphiques interactifs. Matplotlib fournit de nombreuses fonctions pour personnaliser les tableaux et graphiques. Dans ce didacticiel, nous illustrerons trois exemples pour personnaliser les diagrammes de Venn. La traduction chinoise de l'exemple est : Exemple Il s'agit d'un exemple simple de création de l'intersection de deux diagrammes de Venn. Nous avons d'abord importé les bibliothèques nécessaires et importé les Venns. Ensuite, nous créons l'ensemble de données en tant qu'ensemble Python, après quoi nous utilisons la fonction "venn2()" pour créer
 Comment définir par défaut « Afficher plus d'options » dans le menu contextuel de Windows 11
Jul 10, 2023 pm 12:33 PM
Comment définir par défaut « Afficher plus d'options » dans le menu contextuel de Windows 11
Jul 10, 2023 pm 12:33 PM
L'un des changements les plus ennuyeux dont nous, les utilisateurs, ne souhaitons jamais est l'inclusion de « Afficher plus d'options » dans le menu contextuel du clic droit. Cependant, vous pouvez le supprimer et récupérer le menu contextuel classique dans Windows 11. Fini les clics multiples et la recherche de ces raccourcis ZIP dans les menus contextuels. Suivez ce guide pour revenir à un menu contextuel complet par clic droit sur Windows 11. Correctif 1 – Ajuster manuellement le CLSID Il s’agit de la seule méthode manuelle de notre liste. Vous ajusterez des clés ou des valeurs spécifiques dans l'Éditeur du Registre pour résoudre ce problème. Remarque – Les modifications du registre comme celle-ci sont très sûres et fonctionneront sans aucun problème. Par conséquent, vous devez créer une sauvegarde du registre avant d’essayer cela sur votre système. Étape 1 – Essayez-le
 Comment créer une pagination personnalisée dans CakePHP ?
Jun 04, 2023 am 08:32 AM
Comment créer une pagination personnalisée dans CakePHP ?
Jun 04, 2023 am 08:32 AM
CakePHP est un framework PHP puissant qui fournit aux développeurs de nombreux outils et fonctionnalités utiles. L'un d'eux est la pagination, qui nous aide à diviser de grandes quantités de données en plusieurs pages, facilitant ainsi la navigation et la manipulation. Par défaut, CakePHP fournit des méthodes de pagination de base, mais vous devrez parfois créer des méthodes de pagination personnalisées. Cet article va vous montrer comment créer une pagination personnalisée dans CakePHP. Étape 1 : Créer une classe de pagination personnalisée Tout d'abord, nous devons créer une classe de pagination personnalisée. ce
 Comment personnaliser les paramètres des touches de raccourci dans Eclipse
Jan 28, 2024 am 10:01 AM
Comment personnaliser les paramètres des touches de raccourci dans Eclipse
Jan 28, 2024 am 10:01 AM
Comment personnaliser les paramètres des touches de raccourci dans Eclipse ? En tant que développeur, la maîtrise des touches de raccourci est l'une des clés pour améliorer l'efficacité du codage dans Eclipse. En tant qu'environnement de développement intégré puissant, Eclipse fournit non seulement de nombreuses touches de raccourci par défaut, mais permet également aux utilisateurs de les personnaliser selon leurs propres préférences. Cet article explique comment personnaliser les paramètres des touches de raccourci dans Eclipse et donne des exemples de code spécifiques. Ouvrez Eclipse Tout d'abord, ouvrez Eclipse et entrez
 fonction de rendu dans Vue3 : fonction de rendu personnalisée
Jun 18, 2023 pm 06:43 PM
fonction de rendu dans Vue3 : fonction de rendu personnalisée
Jun 18, 2023 pm 06:43 PM
Vue est un framework JavaScript populaire qui fournit de nombreuses fonctions et API pratiques pour aider les développeurs à créer des applications frontales interactives. Avec la sortie de Vue3, la fonction de rendu est devenue une mise à jour importante. Cet article présentera le concept et le but de la fonction de rendu dans Vue3 et comment l'utiliser pour personnaliser la fonction de rendu. Qu'est-ce que la fonction de rendu ? Dans Vue, le modèle est la méthode de rendu la plus couramment utilisée, mais dans Vue3, vous pouvez utiliser une autre méthode : r
