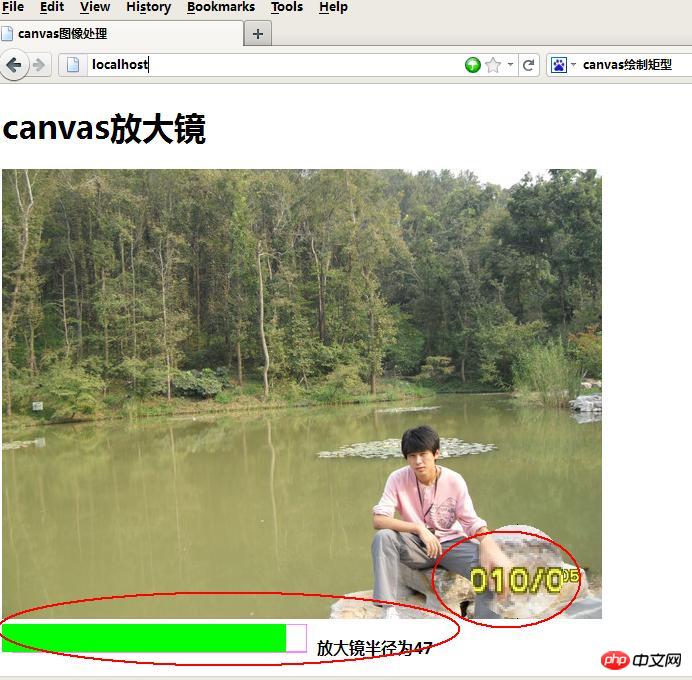
Ce qui suit continue de présenter html5canvascanvas >Magnifying effet verre:
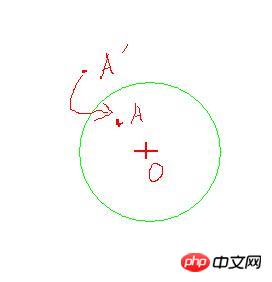
Étapes principales :1) Chargement des images, il y a www.php.cn/html5-tutorial-358646.html dans le blog précédent, vous devez payer attention à la configuration d'Apache, sinon getImageData() aura des problèmes de sécurité et ne pourra pas s'exécuter 2) Core : mappage entre deux matrices d'images,
for (var j=0;j<image.height;j++){
for(var i=0;i<image.width;i++){
var k=4*(image.width*j+i);
var k1=4*(image.width*Math.floor((j+y0)/2)+Math.floor((i+x0)/2));
...
else if(isIn(x0,y0,i,j,r)){//isIn()判定点是否在园内
if(k1>=0&&k1<=4*image.height*image.width){
imagedata2.data[k+0]=imagedata1.data[k1+0];
imagedata2.data[k+1]=imagedata1.data[k1+1];
imagedata2.data[k+2]=imagedata1.data[k1+2];
imagedata2.data[k+3]=255;
// console.log('x:'+x+'y:'+y);
} function isOn(x0,y0,x,y,r){//放大镜边缘
if((x0-x)*(x0-x)+(y0-y)*(y0-y)==r*r)
return true;
else
return false;
} if (isOn(x0,y0,i,j,r)){
imagedata2.data[k+0]=0;
imagedata2.data[k+1]=0;
imagedata2.data[k+2]=0;
imagedata2.data[k+3]=255;
} else{
imagedata2.data[k+0]=imagedata1.data[k+0];
imagedata2.data[k+1]=imagedata1.data[k+1];
imagedata2.data[k+2]=imagedata1.data[k+2];
imagedata2.data[k+3]=255;
}<canvas id="bar" height="30" width="305"></canvas>
 放大镜半径为<span id='r'></span>
<script>
var canvas2=document.getElementById('bar');
var context2=canvas2.getContext('2d');
context2.beginPath();
context2.lineWidth = 1;//边框宽度
context2.strokeStyle = "#ff00ff";//边框颜色
context2.strokeRect(10,0,295,28);//边框坐标及大小
context2.closePath();
canvas2.onclick=function(e){
var x1=e.clientX-e.target.offsetLeft;
context2.clearRect(0,0,305,30);//擦除上次的痕迹
context2.beginPath();
context2.lineWidth = 1;//边框宽度
context2.strokeStyle = "#ff00ff";//边框颜色
context2.strokeRect(10,0,295,28);//边框坐标及大小
context2.fillStyle = "#00ff00";//填充canvas的背景颜色
context2.fillRect(0, 0, x1,28);//参数分别表示 x轴,y轴,宽度,高度
document.getElementById('r').innerHTML=Math.floor(x1/6);
r=Math.floor(x1/6);
}
</script><!DOCTYPE html>
<html>
<head>
<title>canvas图像处理</title>
</head>
<body>
<h1>canvas放大镜</h1>
<canvas id="canvas1" width="600" height="450">是时候更换浏览器了<a href="http://firefox.com.cn/download/">点击下载firefox</a></canvas>
<!--当浏览器不支持html5时,会显示连接提示下载firefox-->
<script>
var canvas1=document.getElementById('canvas1');
var context1=canvas1.getContext('2d');
image=new Image();
image.src="photo.jpg";
context1.drawImage(image,0,0);//绘制原始图像,(0,0)表示图像的左上角位与canvas画布的位置
var imagedata1=context1.getImageData(0,0,image.width,image.height);
var imagedata2=context1.createImageData(image.width,image.height);
r=40;//放大镜半径,原始默认值,可以通过最下面的进度条设置
canvas1.onmousemove=function(e){
var x=e.clientX-e.target.offsetLeft;
var y=e.clientY-e.target.offsetTop;
x0=x;y0=y;
//console.log('x:'+x+'y:'+y);
for (var j=0;j<image.height;j++){
for(var i=0;i<image.width;i++){
var k=4*(image.width*j+i);
var k1=4*(image.width*Math.floor((j+y0)/2)+Math.floor((i+x0)/2));//对应的原始图像上的点
if (isOn(x0,y0,i,j,r)){//放大镜边缘上的点
imagedata2.data[k+0]=0;
imagedata2.data[k+1]=0;
imagedata2.data[k+2]=0;
imagedata2.data[k+3]=255;
}
else if(isIn(x0,y0,i,j,r)){//放大区域的点
if(k1>=0&&k1<=4*image.height*image.width){//放大效果的的时候,这一步其实可以省略
imagedata2.data[k+0]=imagedata1.data[k1+0];
imagedata2.data[k+1]=imagedata1.data[k1+1];
imagedata2.data[k+2]=imagedata1.data[k1+2];
imagedata2.data[k+3]=255;
// console.log('x:'+x+'y:'+y);
}
}
else{//其他剩下不受影响的点
imagedata2.data[k+0]=imagedata1.data[k+0];
imagedata2.data[k+1]=imagedata1.data[k+1];
imagedata2.data[k+2]=imagedata1.data[k+2];
imagedata2.data[k+3]=255;
}
}}
context1.putImageData(imagedata2,0,0);//canvas显示
}
canvas1.onmouseout=function(){context1.drawImage(image,0,0);}//鼠标移出,自动重绘
function isIn(x0,y0,x,y,r){//放大区域
if((x0-x)*(x0-x)+(y0-y)*(y0-y)<r*r)
return true;
else
return false;
}
	function isOn(x0,y0,x,y,r){//放大镜边缘
	    if((x0-x)*(x0-x)+(y0-y)*(y0-y)==r*r)
		  return true;
		else
		  return false;
	}
</script>
<br/>
<canvas id="bar" height="30" width="305"></canvas>
 放大镜半径为<span id='r'></span>
<script>
var canvas2=document.getElementById('bar');
var context2=canvas2.getContext('2d');
context2.beginPath();
context2.lineWidth = 1;//边框宽度
context2.strokeStyle = "#ff00ff";//边框颜色
context2.strokeRect(10,0,295,28);//边框坐标及大小
context2.closePath();
canvas2.onclick=function(e){
var x1=e.clientX-e.target.offsetLeft;
context2.clearRect(0,0,305,30);
context2.beginPath();
context2.lineWidth = 1;//边框宽度
context2.strokeStyle = "#ff00ff";//边框颜色
context2.strokeRect(10,0,295,28);//边框坐标及大小
context2.fillStyle = "#00ff00";//填充canvas的背景颜色
context2.fillRect(0, 0, x1,28);//参数分别表示 x轴,y轴,宽度,高度
document.getElementById('r').innerHTML=Math.floor(x1/6);
r=Math.floor(x1/6);//一个划算,使得最大半径为50px
}
</script>
</body>
</html>
Ce qui précède est le contenu détaillé de. pour plus d'informations, suivez d'autres articles connexes sur le site Web de PHP en chinois!
 Quelles sont les méthodes de production de production d'animation html5 ?
 La différence entre HTML et HTML5
 Introduction aux noms de domaine de premier niveau couramment utilisés
 Qu'est-ce que le quota de disque
 Comment vérifier l'état du port avec netstat
 commande de démarrage mongodb
 Quelles sont les plateformes de e-commerce ?
 Quelles sont les unités de base du langage C ?