
Cette fois, je vais vous apporter une explication détaillée d'un cas pratique de mise en œuvre du paiement WeChat avec PHP Quelles sont les précautions pour la mise en œuvre du paiement WeChat avec PHP Voici un cas pratique, jetons un coup d'œil. .
Préparation anticipée :
1. Compte du service d'authentification WeChat et activation du paiement WeChat
2. adresse : https://pay.weixin.qq.com/wiki/doc/api/jsapi.php?chapter=11_1
3. Connectez-vous à la plateforme de paiement WeChat https://pay.weixin. qq .com/index.php/account/api_certTélécharger le certificat de paiement
Étapes de la méthode :
1.demoTraitement des fichiers
(1) Téléchargez la démo officielle, le nom du fichier est WxpayAPI_php_v3, renommez le fichier en wxpay, pour faciliter l'écriture du répertoire plus tard
(2) Ouvrez le dossier lib In ; le fichier WxPay.Api.php, il y a un code de configuration de requête réseau curl à la ligne 537 :
curl_setopt($ch,CURLOPT_SSL_VERIFYPEER,TRUE);
curl_setopt($ch,CURLOPT_SSL_VERIFYHOST,2);//严格校验
est remplacé par :
curl_setopt($ch,CURLOPT_SSL_VERIFYPEER,FALSE);
curl_setopt($ch,CURLOPT_SSL_VERIFYHOST,2);//严格校验
afin de désactiver cURL de vérifier le certificat de pair).
(3) Ouvrez le fichier WxPay.Config.php dans le dossier lib À partir de la ligne 25, complétez les paramètres d'informations de base en fonction de votre compte
const APPID = '公众账号APPID';
const MCHID = '商户号';
const KEY = '商户支付密钥';
const APPSECRET = '公众帐号secert';
(4) Ouvrir. lib Dans le fichier WxPay.Notify.php sous le dossier, modifiez le code sur la ligne 79 :
if($needSign == true &&
 $this->GetReturn_code($return_code) == "SUCCESS")
{
 $this->SetSign();
}en :
if($needSign == true &&
 $this->GetReturn_code() == "SUCCESS")
{
 $this->SetSign();
}(5) Ouvrez le répertoire du certificat cert et modifiez les deux à l'intérieur Remplacez le certificat par votre propre certificat de paiement.
2. Paramètres d'arrière-plan du compte public
(1) Configurez le nom de domaine autorisé de la page Web, mon nom de domaine est (xy.chuyin.ren) ;
(1) Configurez le répertoire d'autorisation de paiement. Le nom de domaine est (xy.chuyin.ren). J'ai mis la démo dans le dossier weixinopen/ du répertoire pointé par ce nom de domaine. Le fichier de la démo se trouve dans le répertoire example/ Par conséquent, le répertoire d'autorisation de paiement est : xy.chuyin.ren/weixinopen/wxpay/example/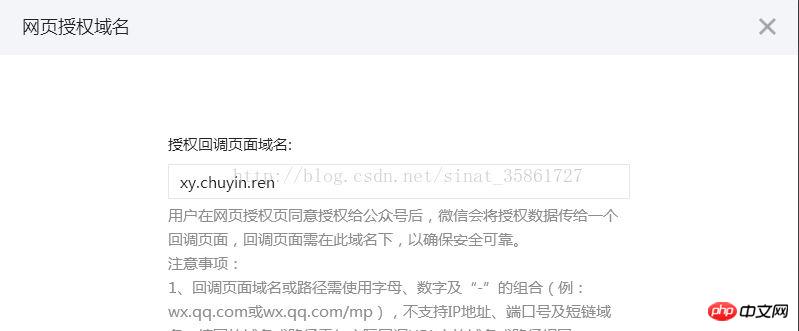
3. processus 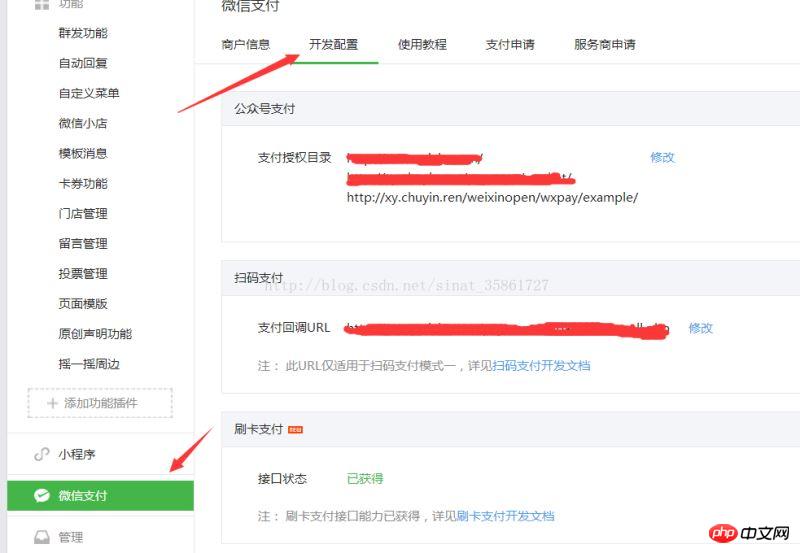
La classe JsApiPay() initialisée ici obtient d'abord un objet. Le fichier correspond à WxPay.JsApiPay.php dans le répertoire example/ L'appel de la méthode GetOpenid() obtiendra automatiquement son propre openID.
//①、获取用户openid
$tools = new JsApiPay();
$openId = $tools->GetOpenid();
Correspond à la méthode unifiedOrder() à la ligne 24 de WxPay.Api.php, configure les informations de commande et le paiement
Fonction de rappel//②、统一下单
$input = new WxPayUnifiedOrder();
$input->SetBody("test");
$input->SetAttach("test");
$input->SetOut_trade_no(WxPayConfig::MCHID.date("YmdHis"));
$input->SetTotal_fee("1");
$input->SetTime_start(date("YmdHis"));
$input->SetTime_expire(date("YmdHis", time() + 600));
$input->SetGoods_tag("test");
$input->SetNotify_url("http://paysdk.weixin.qq.com/example/notify.php");
$input->SetTrade_type("JSAPI");
$input->SetOpenid($openId);
$order = WxPayApi::unifiedOrder($input);
echo '<font color="#f00"><b>统一下单支付单信息</b></font><br/>';
printf_info($order);
$jsApiParameters = $tools->GetJsApiParameters($order);B. Numéro de commande
$input->SetBody("test");C. 🎜 >
D. Le lien de vérification du paiement$input->SetOut_trade_no(WxPayConfig::MCHID.date("YmdHis"));est défini sur l'emplacement de votre fichier notify.php, je l'ai donc défini ici sur : http://xy.chuyin.ren/weixinopen/wxpay/example /notify .php
$input->SetTotal_fee("1");opérations de base de données
. Des paramètres supplémentaires peuvent être renseignés ou non. S'ils sont renseignés, ils le sont. il est préférable de ne pas avoir d'espaces dans la chaîne.$input->SetNotify_url(http://paysdk.weixin.qq.com/example/notify.php);
À ce moment, cliquez sur Payer et le paiement devrait réussir.
$input->SetAttach("test");Cliquer sur le bouton Payer maintenant appelle la fonction callpay(), qui appellera la fonction jsApiCall() pour ouvrir le programme de paiement.
<script type="text/javascript">
//调用微信JS api 支付
function jsApiCall()
{
 WeixinJSBridge.invoke(
  'getBrandWCPayRequest',
  <?php echo $jsApiParameters; ?>,
  function(res){
   WeixinJSBridge.log(res.err_msg);
   alert(res.err_code+res.err_desc+res.err_msg);
  }
 );
}
function callpay()
{
 if (typeof WeixinJSBridge == "undefined"){
  if( document.addEventListener ){
   document.addEventListener('WeixinJSBridgeReady', jsApiCall, false);
  }else if (document.attachEvent){
   document.attachEvent('WeixinJSBridgeReady', jsApiCall);
   document.attachEvent('onWeixinJSBridgeReady', jsApiCall);
  }
 }else{
  jsApiCall();
 }
}
</script>La fonction jsApiCall() surveillera chaque action :
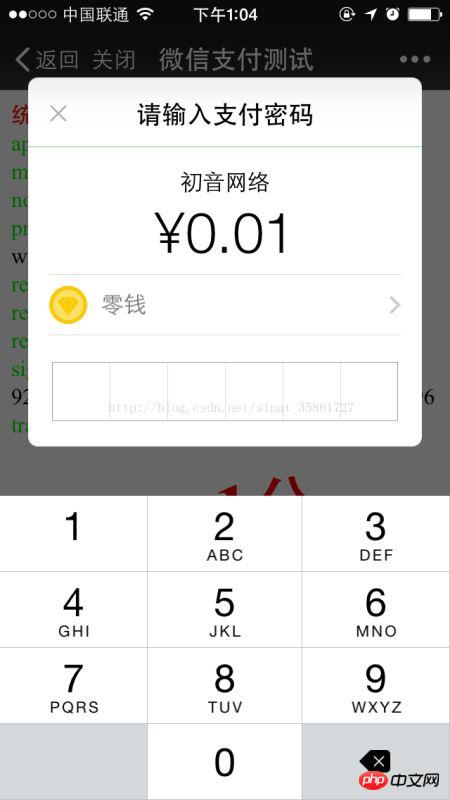
res.err_msg 为get_brand_wcpay_request:cancel 表明前端判断的取消支付,es.err_msg 为get_brand_wcpay_request:ok 表明前端判断的支付成功,我们可以根据这个将支付跳转到成功页面。
(4)支持成功回调
通过前端jsApiCall()函数可以监听支付结果,但是这个并不可信。确认是否支付成功还是应当通过notify.php 处理业务逻辑。前边配置好了支付验证链接SetNotify_url(),支付完成后,微信服务器会根据链接自动请求你的notify.php文件,打开这个文件,其实这个文件最主要的代码就两行:
$notify = new PayNotifyCallBack();
$notify->Handle(false);
由此跟踪到WxPay.Notify.php类文件的Handle()函数:
/**
 *
 * 回调入口
 * @param bool $needSign 是否需要签名输出
 */
final public function Handle($needSign = true)
{
 $msg = "OK";
 //当返回false的时候,表示notify中调用NotifyCallBack回调失败获取签名校验失败,此时直接回复失败
 $result = WxpayApi::notify(array($this, 'NotifyCallBack'), $msg);
 if($result == false){
  $this->SetReturn_code("FAIL");
  $this->SetReturn_msg($msg);
  $this->ReplyNotify(false);
  return;
 } else {
  //该分支在成功回调到NotifyCallBack方法,处理完成之后流程
  $this->SetReturn_code("SUCCESS");
  $this->SetReturn_msg("OK");
 }
 $this->ReplyNotify($needSign);
}主要代码:
$result = WxpayApi::notify(array($this, 'NotifyCallBack'), $msg);
然后来到WxPay.Api.php文件的第411行,notify()函数:
/**
 *
 * 支付结果通用通知
 * @param function $callback
 * 直接回调函数使用方法: notify(you_function);
 * 回调类成员函数方法:notify(array($this, you_function));
 * $callback 原型为:function function_name($data){}
 */
public static function notify($callback, &$msg)
{
 //获取通知的数据
 $xml = $GLOBALS['HTTP_RAW_POST_DATA'];
 //file_put_contents('log.txt',$xml,FILE_APPEND);
 //如果返回成功则验证签名
 try {
  $result = WxPayResults::Init($xml);
 } catch (WxPayException $e){
  $msg = $e->errorMessage();
  return false;
 }

 return call_user_func($callback, $result);
}这里面的$xml=$GLOBALS['HTTP_RAW_POST_DATA'],就是支付成功后用户返回给你的一个结果,他是一个xml格式的字符串。
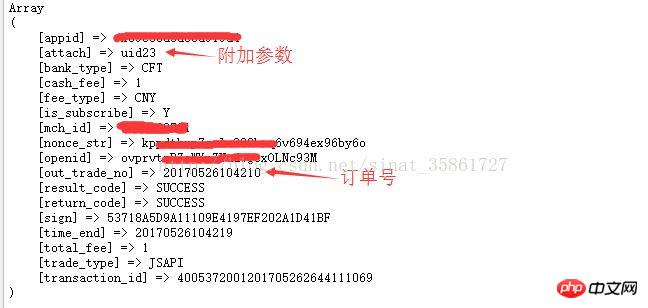
我们可以将这里返回的xml数据记录下来,然后打开看看$out_trade_no就是在支付之前我自己设置的订单号码,$attach就是设置的附加参数。
得到了这个订单号,然后我就直接在下面写支付成功后的逻辑了,比如改变数据库中的数据等等。
这样 微信支付的 JsApi支付就大致分析完成了。
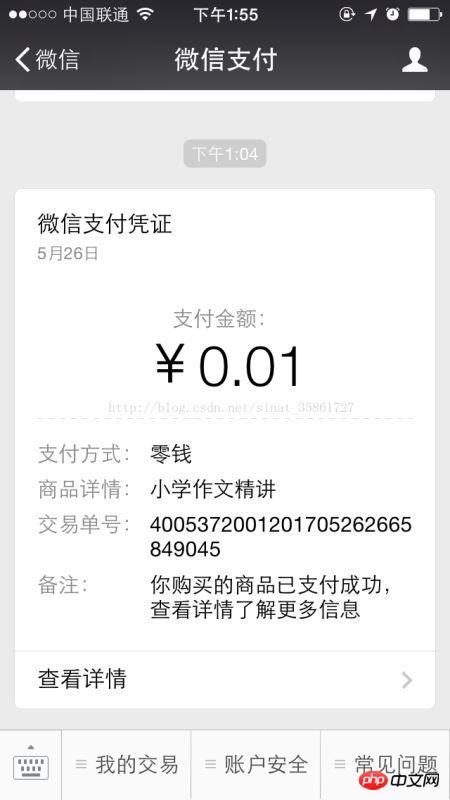
这是集成了官方的SDK实现的,如果不使用SDK,可以使用更简单的方法,见:PHP实现微信支付(jsapi支付)和退款(无需集成支付SDK)
相信看了本文案例你已经掌握了方法,更多精彩请关注php中文网其它相关文章!
推荐阅读:
Ce qui précède est le contenu détaillé de. pour plus d'informations, suivez d'autres articles connexes sur le site Web de PHP en chinois!
 Comment ouvrir le fichier php
 Comment supprimer les premiers éléments d'un tableau en php
 Que faire si la désérialisation php échoue
 Comment connecter PHP à la base de données mssql
 Comment connecter PHP à la base de données mssql
 Comment télécharger du HTML
 Comment résoudre les caractères tronqués en PHP
 Comment ouvrir des fichiers php sur un téléphone mobile