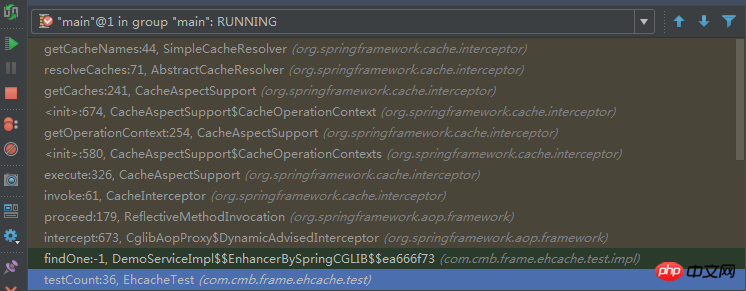
Le contenu de cet article porte sur la compréhension du code source du cache Spring Boot. Il a une certaine valeur de référence. Les amis dans le besoin peuvent s'y référer.
Je souhaite ajouter un cache d'application au projet. J'ai initialement réfléchi à la façon d'intégrer ehcache et springboot, et être prêt à configurer telle ou telle configuration. Au final, je n'ai qu'à faire trois choses :
dépendance pom
Écrivez un fichier de configuration ehcache
Ajoutez l'annotation @EnableCaching à l'application de démarrage
C'est ça, n'est-ce pas magique ?
dépendance pom
<dependency>
            <groupid>net.sf.ehcache</groupid>
            <artifactid>ehcache</artifactid>
            <version>2.10.5</version>
</dependency>
Fichier de configuration
<?xml  version="1.0" encoding="UTF-8"?>
<ehcache>
    <!-- 设定缓存的默认数据过期策略 -->
    <defaultcache></defaultcache>
</ehcache>
Ajouter une annotation EnableCaching à l'application
@SpringBootApplication
@EnableCaching
public class EhCacheApplication {

    public static void main(String[] args) {
        SpringApplication.run(EhCacheApplication.class, args);
    }
}Ensuite, vous pouvez utiliser des annotations de cache dans le code, comme ceci.
@CachePut(value = "fish-ehcache", key = "#person.id")
    public Person save(Person person) {
        System.out.println("为id、key为:" + person.getId() + "数据做了缓存");
        return person;
    }

    @CacheEvict(value = "fish-ehcache")
    public void remove(Long id) {
        System.out.println("删除了id、key为" + id + "的数据缓存");
    }


    @Cacheable(value = "fish-ehcache", key = "#person.id")
    public Person findOne(Person person) {
        findCount.incrementAndGet();
        System.out.println("为id、key为:" + person.getId() + "数据做了缓存");
        return person;
}C'est très pratique, non ? Ensuite, creusons un peu plus et voyons comment le printemps agit. Il est principalement divisé en deux parties, l'une est ce qui est fait au démarrage, la seconde est ce qui est fait lors de l'exécution et la troisième est l'adaptation avec des composants de mise en cache tiers
Ce qui est fait lorsque Starting,
Cela commence par la balise @EnableCaching Lors de l'utilisation de la fonction de mise en cache, l'annotation @EnableCaching doit être ajoutée à la classe de démarrage de l'application Springboot. Cette balise est introduite par
@Target({ElementType.TYPE})
@Retention(RetentionPolicy.RUNTIME)
@Documented
@Import({CachingConfigurationSelector.class})
public @interface EnableCaching {
    boolean proxyTargetClass() default false;
    AdviceMode mode() default AdviceMode.PROXY;
    int order() default 2147483647;
}/**
由CacheOperationSourcePointcut作为注解切面,会解析
SpringCacheAnnotationParser.java
扫描方法签名,解析被缓存注解修饰的方法,将生成一个CacheOperation的子类并将其保存到一个数组中去
**/
protected Collection<cacheoperation> parseCacheAnnotations(SpringCacheAnnotationParser.DefaultCacheConfig cachingConfig, AnnotatedElement ae) {
Collection<cacheoperation> ops = null;
//找@cacheable注解方法
Collection<cacheable> cacheables = AnnotatedElementUtils.getAllMergedAnnotations(ae, Cacheable.class);
if (!cacheables.isEmpty()) {
ops = this.lazyInit(ops);
Iterator var5 = cacheables.iterator();
while(var5.hasNext()) {
Cacheable cacheable = (Cacheable)var5.next();
ops.add(this.parseCacheableAnnotation(ae, cachingConfig, cacheable));
}
}
//找@cacheEvict注解的方法
Collection<cacheevict> evicts = AnnotatedElementUtils.getAllMergedAnnotations(ae, CacheEvict.class);
if (!evicts.isEmpty()) {
ops = this.lazyInit(ops);
Iterator var12 = evicts.iterator();
while(var12.hasNext()) {
CacheEvict evict = (CacheEvict)var12.next();
ops.add(this.parseEvictAnnotation(ae, cachingConfig, evict));
}
}
//找@cachePut注解的方法
Collection<cacheput> puts = AnnotatedElementUtils.getAllMergedAnnotations(ae, CachePut.class);
if (!puts.isEmpty()) {
ops = this.lazyInit(ops);
Iterator var14 = puts.iterator();
while(var14.hasNext()) {
CachePut put = (CachePut)var14.next();
ops.add(this.parsePutAnnotation(ae, cachingConfig, put));
}
}
Collection<caching> cachings = AnnotatedElementUtils.getAllMergedAnnotations(ae, Caching.class);
if (!cachings.isEmpty()) {
ops = this.lazyInit(ops);
Iterator var16 = cachings.iterator();
while(var16.hasNext()) {
Caching caching = (Caching)var16.next();
Collection<cacheoperation> cachingOps = this.parseCachingAnnotation(ae, cachingConfig, caching);
if (cachingOps != null) {
ops.addAll(cachingOps);
}
}
}
return ops;
}</cacheoperation></caching></cacheput></cacheevict></cacheable></cacheoperation></cacheoperation>Que fait-on lorsque la méthode est exécutée ?
Une fois exécutée, la classe CacheInterceptor est principalement utilisée.public class CacheInterceptor extends CacheAspectSupport implements MethodInterceptor, Serializable {
public CacheInterceptor() {
}
public Object invoke(final MethodInvocation invocation) throws Throwable {
Method method = invocation.getMethod();
CacheOperationInvoker aopAllianceInvoker = new CacheOperationInvoker() {
public Object invoke() {
try {
return invocation.proceed();
} catch (Throwable var2) {
throw new ThrowableWrapper(var2);
}
}
};
try {
return this.execute(aopAllianceInvoker, invocation.getThis(), method, invocation.getArguments());
} catch (ThrowableWrapper var5) {
throw var5.getOriginal();
}
}
}/**
CacheAspectSupport.java
执行@CachaEvict @CachePut @Cacheable的主要逻辑代码
**/
private Object execute(final CacheOperationInvoker invoker, Method method, CacheAspectSupport.CacheOperationContexts contexts) {
if (contexts.isSynchronized()) {
CacheAspectSupport.CacheOperationContext context = (CacheAspectSupport.CacheOperationContext)contexts.get(CacheableOperation.class).iterator().next();
if (this.isConditionPassing(context, CacheOperationExpressionEvaluator.NO_RESULT)) {
Object key = this.generateKey(context, CacheOperationExpressionEvaluator.NO_RESULT);
Cache cache = (Cache)context.getCaches().iterator().next();
try {
return this.wrapCacheValue(method, cache.get(key, new Callable<object>() {
public Object call() throws Exception {
return CacheAspectSupport.this.unwrapReturnValue(CacheAspectSupport.this.invokeOperation(invoker));
}
}));
} catch (ValueRetrievalException var10) {
throw (ThrowableWrapper)var10.getCause();
}
} else {
return this.invokeOperation(invoker);
}
} else {
/**
执行@CacheEvict的逻辑,这里是当beforeInvocation为true时清缓存
**/
this.processCacheEvicts(contexts.get(CacheEvictOperation.class), true, CacheOperationExpressionEvaluator.NO_RESULT);
//获取命中的缓存对象
ValueWrapper cacheHit = this.findCachedItem(contexts.get(CacheableOperation.class));
List<cacheaspectsupport.cacheputrequest> cachePutRequests = new LinkedList();
if (cacheHit == null) {
//如果没有命中,则生成一个put的请求
this.collectPutRequests(contexts.get(CacheableOperation.class), CacheOperationExpressionEvaluator.NO_RESULT, cachePutRequests);
}
Object cacheValue;
Object returnValue;
/**
如果没有获得缓存对象,则调用业务方法获得返回对象,hasCachePut会检查exclude的情况
**/
if (cacheHit != null && cachePutRequests.isEmpty() && !this.hasCachePut(contexts)) {
cacheValue = cacheHit.get();
returnValue = this.wrapCacheValue(method, cacheValue);
} else {
returnValue = this.invokeOperation(invoker);
cacheValue = this.unwrapReturnValue(returnValue);
}
this.collectPutRequests(contexts.get(CachePutOperation.class), cacheValue, cachePutRequests);
Iterator var8 = cachePutRequests.iterator();
while(var8.hasNext()) {
CacheAspectSupport.CachePutRequest cachePutRequest = (CacheAspectSupport.CachePutRequest)var8.next();
/**
执行cachePut请求,将返回对象放到缓存中
**/
cachePutRequest.apply(cacheValue);
}
/**
执行@CacheEvict的逻辑,这里是当beforeInvocation为false时清缓存
**/
this.processCacheEvicts(contexts.get(CacheEvictOperation.class), false, cacheValue);
return returnValue;
}
}</cacheaspectsupport.cacheputrequest></object>Adaptation aux composants de mise en cache tiers
Grâce à l'analyse ci-dessus, nous connaissons les tenants et les aboutissants de la fonction de cache Spring. Ce qui doit être analysé ci-dessous, c'est pourquoi. seule la déclaration maven est nécessaire Avec seulement quelques dépendances, spring boot peut s'adapter automatiquement Dans la méthode d'exécution ci-dessus, nous voyonscachePutRequest.apply(cacheValue), qui fera fonctionner le cache. CachePutRequest est la classe interne CacheAspectSupport.
private class CachePutRequest {
        private final CacheAspectSupport.CacheOperationContext context;
        private final Object key;
        public CachePutRequest(CacheAspectSupport.CacheOperationContext context, Object key) {
            this.context = context;
            this.key = key;
        }
        public void apply(Object result) {
            if (this.context.canPutToCache(result)) {
                //从context中获取cache实例,然后执行放入缓存的操作
                Iterator var2 = this.context.getCaches().iterator();
                while(var2.hasNext()) {
                    Cache cache = (Cache)var2.next();
                    CacheAspectSupport.this.doPut(cache, this.key, result);
                }
            }
        }
}protected Collection extends Cache> getCaches(CacheOperationInvocationContext<cacheoperation> context, CacheResolver cacheResolver) {
Collection extends Cache> caches = cacheResolver.resolveCaches(context);
if (caches.isEmpty()) {
throw new IllegalStateException("No cache could be resolved for '" + context.getOperation() + "' using resolver '" + cacheResolver + "'. At least one cache should be provided per cache operation.");
} else {
return caches;
}
}</cacheoperation>
@Configuration
@ConditionalOnClass({Cache.class, EhCacheCacheManager.class})
@ConditionalOnMissingBean({CacheManager.class})
@Conditional({CacheCondition.class, EhCacheCacheConfiguration.ConfigAvailableCondition.class})
class EhCacheCacheConfiguration {
 ......
 static class ConfigAvailableCondition extends ResourceCondition {
        ConfigAvailableCondition() {
            super("EhCache", "spring.cache.ehcache", "config", new String[]{"classpath:/ehcache.xml"});
        }
    }
}Ce qui précède est le contenu détaillé de. pour plus d'informations, suivez d'autres articles connexes sur le site Web de PHP en chinois!