Utilisez CSS3 pour créer dix effets de chargement
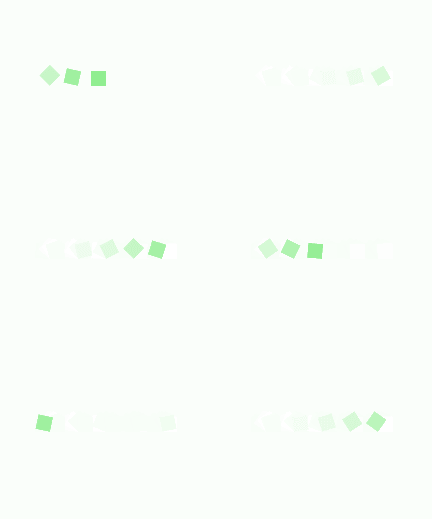
Le premier effet :

Le code est le suivant :
html
<div class="loading">
        <span></span>
        <span></span>
        <span></span>
        <span></span>
        <span></span>
</div>css
.loading{
            width: 80px;
            height: 40px;
            margin: 0 auto;
            margin-top:100px;
        }
        .loading span{
            display: inline-block;
            width: 8px;
            height: 100%;
            border-radius: 4px;
            background: lightgreen;
            -webkit-animation: load 1s ease infinite;
        }
        @-webkit-keyframes load{
            0%,100%{
                height: 40px;
                background: lightgreen;
            }
            50%{
                height: 70px;
                margin: -15px 0;
                background: lightblue;
            }
        }
        .loading span:nth-child(2){
            -webkit-animation-delay:0.2s;
        }
        .loading span:nth-child(3){
            -webkit-animation-delay:0.4s;
        }
        .loading span:nth-child(4){
            -webkit-animation-delay:0.6s;
        }
        .loading span:nth-child(5){
            -webkit-animation-delay:0.8s;
}Le 2ème effet

<div class="loading">
        <span></span>
</div>Le 3ème-5ème effet :

 .0
.0

.loading{
            width: 150px;
            height: 4px;
            border-radius: 2px;
            margin: 0 auto;
            margin-top:100px;
            position: relative;
            background: lightgreen;
            -webkit-animation: changeBgColor 1.04s ease-in infinite alternate;
        }
        .loading span{
            display: inline-block;
            width: 16px;
            height: 16px;
            border-radius: 50%;
            background: lightgreen;
            position: absolute;
            margin-top: -7px;
            margin-left:-8px;
            -webkit-animation: changePosition 1.04s ease-in infinite alternate;
        }
        @-webkit-keyframes changeBgColor{
            0%{
                background: lightgreen;
            }
            100%{
                background: lightblue;
            }
        }
        @-webkit-keyframes changePosition{
            0%{
                background: lightgreen;
            }
            100%{
                margin-left: 142px;
                background: lightblue;
            }
}3
<div class="loading">
        <span></span>
        <span></span>
        <span></span>
        <span></span>
        <span></span>
</div>4
.loading{
            width: 150px;
            height: 15px;
            margin: 0 auto;
            margin-top:100px;
        }
        .loading span{
            display: inline-block;
            width: 15px;
            height: 100%;
            margin-right: 5px;
            border-radius: 50%;
            background: lightgreen;
            -webkit-animation: load 1.04s ease infinite;
        }
        .loading span:last-child{
            margin-right: 0px;
        }
        @-webkit-keyframes load{
            0%{
                opacity: 1;
            }
            100%{
                opacity: 0;
            }
        }
        .loading span:nth-child(1){
            -webkit-animation-delay:0.13s;
        }
        .loading span:nth-child(2){
            -webkit-animation-delay:0.26s;
        }
        .loading span:nth-child(3){
            -webkit-animation-delay:0.39s;
        }
        .loading span:nth-child(4){
            -webkit-animation-delay:0.52s;
        }
        .loading span:nth-child(5){
            -webkit-animation-delay:0.65s;
}5
.loading{
            width: 150px;
            height: 15px;
            margin: 0 auto;
            margin-top:100px;
        }
        .loading span{
            display: inline-block;
            width: 15px;
            height: 100%;
            margin-right: 5px;
            border-radius: 50%;
            background: lightgreen;
            -webkit-animation: load 1.04s ease infinite;
        }
        .loading span:last-child{
            margin-right: 0px;
        }
        @-webkit-keyframes load{
            0%{
                opacity: 1;
                -webkit-transform: scale(1.3);
            }
            100%{
                opacity: 0.2;
                -webkit-transform: scale(.3);
            }
        }
        .loading span:nth-child(1){
            -webkit-animation-delay:0.13s;
        }
        .loading span:nth-child(2){
            -webkit-animation-delay:0.26s;
        }
        .loading span:nth-child(3){
            -webkit-animation-delay:0.39s;
        }
        .loading span:nth-child(4){
            -webkit-animation-delay:0.52s;
        }
        .loading span:nth-child(5){
            -webkit-animation-delay:0.65s;
}Effets 6-8 :


.loading{
            width: 150px;
            height: 15px;
            margin: 0 auto;
            position: relative;
            margin-top:100px;
        }
        .loading span{
            position: absolute;
            width: 15px;
            height: 100%;
            border-radius: 50%;
            background: lightgreen;
            -webkit-animation: load 1.04s ease-in infinite alternate;
        }
        @-webkit-keyframes load{
            0%{
                opacity: 1;
                -webkit-transform: translate(0px);
            }
            100%{
                opacity: 0.2;
                -webkit-transform: translate(150px);
            }
        }
        .loading span:nth-child(1){
            -webkit-animation-delay:0.13s;
        }
        .loading span:nth-child(2){
            -webkit-animation-delay:0.26s;
        }
        .loading span:nth-child(3){
            -webkit-animation-delay:0.39s;
        }
        .loading span:nth-child(4){
            -webkit-animation-delay:0.52s;
        }
        .loading span:nth-child(5){
            -webkit-animation-delay:0.65s;
}<div class="loading">
<span></span>
<span></span>
<span></span>
<span></span>
<span></span>
</div>.loading{
width: 150px;
height: 15px;
margin: 0 auto;
margin-top:100px;
text-align: center;
}
.loading span{
display: inline-block;
width: 15px;
height: 100%;
margin-right: 5px;
background: lightgreen;
-webkit-animation: load 1.04s ease infinite;
}
.loading span:last-child{
margin-right: 0px;
}
@-webkit-keyframes load{
0%{
opacity: 1;
}
100%{
opacity: 0;
}
}
.loading span:nth-child(1){
-webkit-animation-delay:0.13s;
}
.loading span:nth-child(2){
-webkit-animation-delay:0.26s;
}
.loading span:nth-child(3){
-webkit-animation-delay:0.39s;
}
.loading span:nth-child(4){
-webkit-animation-delay:0.52s;
}
.loading span:nth-child(5){
-webkit-animation-delay:0.65s;
}.loading{
width: 150px;
height: 15px;
margin: 0 auto;
margin-top:100px;
}
.loading span{
display: inline-block;
width: 15px;
height: 100%;
margin-right: 5px;
background: lightgreen;
-webkit-transform-origin: right bottom;
-webkit-animation: load 1s ease infinite;
}
.loading span:last-child{
margin-right: 0px;
}
@-webkit-keyframes load{
0%{
opacity: 1;
}
100%{
opacity: 0;
-webkit-transform: rotate(90deg);
}
}
.loading span:nth-child(1){
-webkit-animation-delay:0.13s;
}
.loading span:nth-child(2){
-webkit-animation-delay:0.26s;
}
.loading span:nth-child(3){
-webkit-animation-delay:0.39s;
}
.loading span:nth-child(4){
-webkit-animation-delay:0.52s;
}
.loading span:nth-child(5){
-webkit-animation-delay:0.65s;
}Effets 9-10 :


.loading{
            width: 150px;
            height: 15px;
            margin: 0 auto;
            margin-top:100px;
        }
        .loading span{
            display: inline-block;
            width: 15px;
            height: 100%;
            margin-right: 5px;
            background: lightgreen;
            -webkit-transform-origin: right bottom;
            -webkit-animation: load 1s ease infinite;
        }
        .loading span:last-child{
            margin-right: 0px;
        }
        @-webkit-keyframes load{
            0%{
                opacity: 1;
                -webkit-transform: scale(1);
            }
            100%{
                opacity: 0;
                -webkit-transform: rotate(90deg) scale(.3);
            }
        }
        .loading span:nth-child(1){
            -webkit-animation-delay:0.13s;
        }
        .loading span:nth-child(2){
            -webkit-animation-delay:0.26s;
        }
        .loading span:nth-child(3){
            -webkit-animation-delay:0.39s;
        }
        .loading span:nth-child(4){
            -webkit-animation-delay:0.52s;
        }
        .loading span:nth-child(5){
            -webkit-animation-delay:0.65s;
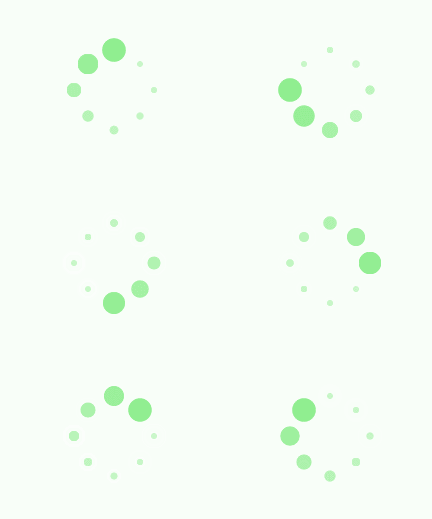
}<div class="loadEffect">
<span></span>
<span></span>
<span></span>
<span></span>
<span></span>
<span></span>
<span></span>
<span></span>
</div>.loadEffect{
width: 100px;
height: 100px;
position: relative;
margin: 0 auto;
margin-top:100px;
}
.loadEffect span{
display: inline-block;
width: 16px;
height: 16px;
border-radius: 50%;
background: lightgreen;
position: absolute;
-webkit-animation: load 1.04s ease infinite;
}
@-webkit-keyframes load{
0%{
opacity: 1;
}
100%{
opacity: 0.2;
}
}
.loadEffect span:nth-child(1){
left: 0;
top: 50%;
margin-top:-8px;
-webkit-animation-delay:0.13s;
}
.loadEffect span:nth-child(2){
left: 14px;
top: 14px;
-webkit-animation-delay:0.26s;
}
.loadEffect span:nth-child(3){
left: 50%;
top: 0;
margin-left: -8px;
-webkit-animation-delay:0.39s;
}
.loadEffect span:nth-child(4){
top: 14px;
right:14px;
-webkit-animation-delay:0.52s;
}
.loadEffect span:nth-child(5){
right: 0;
top: 50%;
margin-top:-8px;
-webkit-animation-delay:0.65s;
}
.loadEffect span:nth-child(6){
right: 14px;
bottom:14px;
-webkit-animation-delay:0.78s;
}
.loadEffect span:nth-child(7){
bottom: 0;
left: 50%;
margin-left: -8px;
-webkit-animation-delay:0.91s;
}
.loadEffect span:nth-child(8){
bottom: 14px;
left: 14px;
-webkit-animation-delay:1.04s;
}Tutoriel CSS recommandé : "Tutoriel CSS"
Ce qui précède est le contenu détaillé de. pour plus d'informations, suivez d'autres articles connexes sur le site Web de PHP en chinois!

Outils d'IA chauds

Undresser.AI Undress
Application basée sur l'IA pour créer des photos de nu réalistes

AI Clothes Remover
Outil d'IA en ligne pour supprimer les vêtements des photos.

Undress AI Tool
Images de déshabillage gratuites

Clothoff.io
Dissolvant de vêtements AI

AI Hentai Generator
Générez AI Hentai gratuitement.

Article chaud

Outils chauds

Bloc-notes++7.3.1
Éditeur de code facile à utiliser et gratuit

SublimeText3 version chinoise
Version chinoise, très simple à utiliser

Envoyer Studio 13.0.1
Puissant environnement de développement intégré PHP

Dreamweaver CS6
Outils de développement Web visuel

SublimeText3 version Mac
Logiciel d'édition de code au niveau de Dieu (SublimeText3)
 Comment utiliser Bootstrap en Vue
Apr 07, 2025 pm 11:33 PM
L'utilisation de bootstrap dans vue.js est divisée en cinq étapes: installer bootstrap. Importer un bootstrap dans main.js. Utilisez le composant bootstrap directement dans le modèle. Facultatif: style personnalisé. Facultatif: utilisez des plug-ins.
 Les rôles de HTML, CSS et JavaScript: responsabilités de base
Apr 08, 2025 pm 07:05 PM
HTML définit la structure Web, CSS est responsable du style et de la mise en page, et JavaScript donne une interaction dynamique. Les trois exercent leurs fonctions dans le développement Web et construisent conjointement un site Web coloré.
 Comment écrire des lignes fendues sur bootstrap
Apr 07, 2025 pm 03:12 PM
Il existe deux façons de créer une ligne divisée bootstrap: en utilisant la balise, qui crée une ligne divisée horizontale. Utilisez la propriété CSS Border pour créer des lignes de fractionnement de style personnalisées.
 Comprendre HTML, CSS et JavaScript: un guide pour débutant
Apr 12, 2025 am 12:02 AM
WebDevelopmentReliesOnHTML, CSS, etjavascript: 1) HTMLSTRUCTURESCONTENT, 2) CSSSTYLESIT, et3) JavascriptAdddsInterActivity, Forming TheasisofmodernweBEBExperiences.
 Comment redimensionner le bootstrap
Apr 07, 2025 pm 03:18 PM
Pour ajuster la taille des éléments dans Bootstrap, vous pouvez utiliser la classe de dimension, qui comprend: ajuster la largeur: .col-, .w-, .mw-ajustement Hauteur: .h-, .min-h-, .max-h-
 Comment configurer le cadre de bootstrap
Apr 07, 2025 pm 03:27 PM
Pour configurer le framework Bootstrap, vous devez suivre ces étapes: 1. Référez le fichier bootstrap via CDN; 2. Téléchargez et hébergez le fichier sur votre propre serveur; 3. Incluez le fichier bootstrap dans HTML; 4. Compiler les sass / moins au besoin; 5. Importer un fichier personnalisé (facultatif). Une fois la configuration terminée, vous pouvez utiliser les systèmes, composants et styles de grille de Bootstrap pour créer des sites Web et des applications réactifs.
 Comment insérer des photos sur bootstrap
Apr 07, 2025 pm 03:30 PM
Il existe plusieurs façons d'insérer des images dans Bootstrap: insérer directement les images, en utilisant la balise HTML IMG. Avec le composant d'image bootstrap, vous pouvez fournir des images réactives et plus de styles. Définissez la taille de l'image, utilisez la classe IMG-FLUID pour rendre l'image adaptable. Réglez la bordure en utilisant la classe IMG-border. Réglez les coins arrondis et utilisez la classe Roundée IMG. Réglez l'ombre, utilisez la classe Shadow. Redimensionner et positionner l'image, en utilisant le style CSS. À l'aide de l'image d'arrière-plan, utilisez la propriété CSS d'image d'arrière-plan.
 Comment utiliser le bouton bootstrap
Apr 07, 2025 pm 03:09 PM
Comment utiliser le bouton bootstrap? Introduisez Bootstrap CSS pour créer des éléments de bouton et ajoutez la classe de bouton bootstrap pour ajouter du texte du bouton


