
Utilisez IDEA pour créer un projet SpringBoot
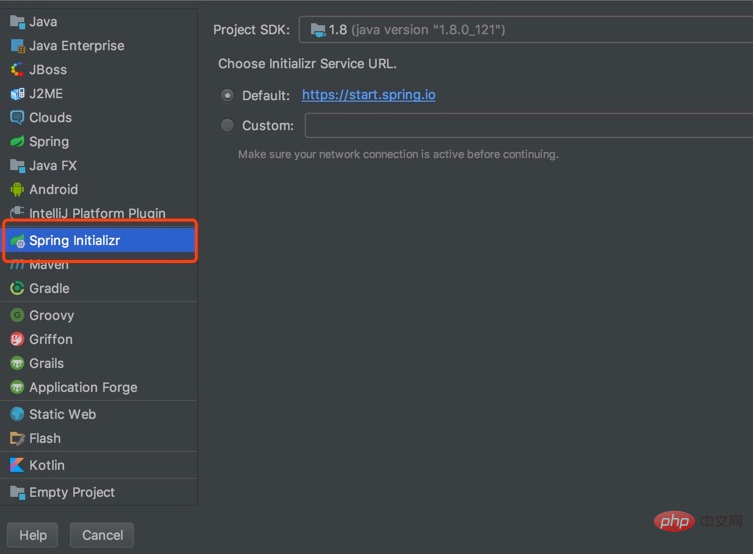
1 Ouvrez IDEA, créez un nouveau projet et sélectionnez Spring Initializr
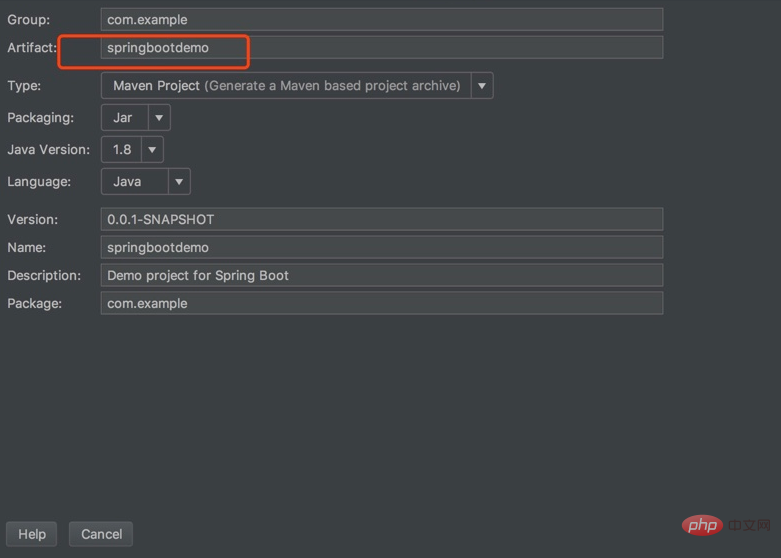
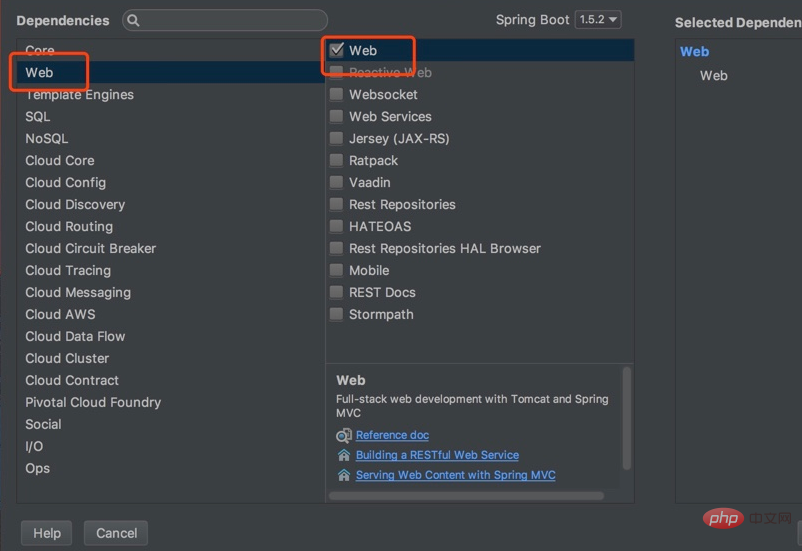 4. Cliquez sur Terminer pour terminer
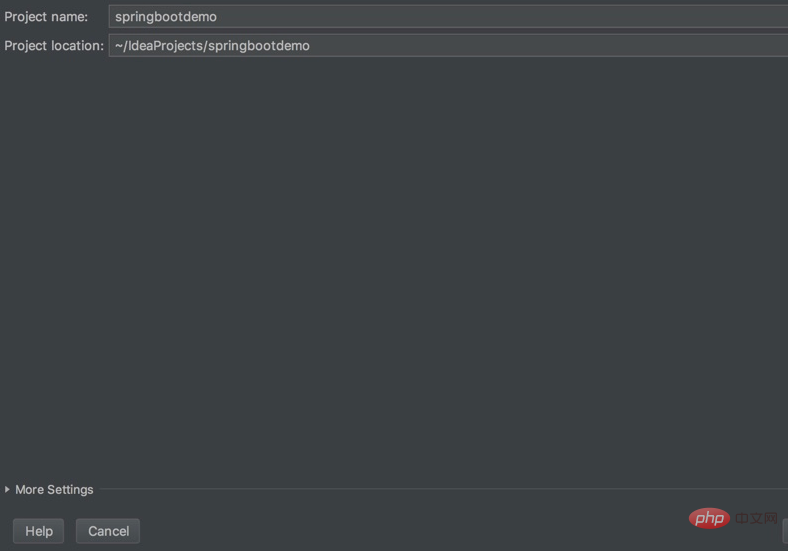 5. Entrez le projet et supprimez le contenu suivant
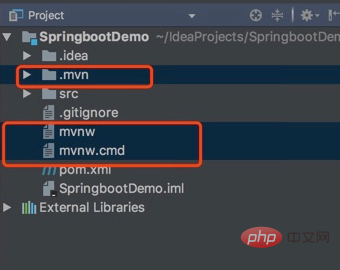 fichier pom.xml :
<?xml version="1.0" encoding="UTF-8"?>
<project xmlns="http://maven.apache.org/POM/4.0.0" xmlns:xsi="http://www.w3.org/2001/XMLSchema-instance"
	xsi:schemaLocation="http://maven.apache.org/POM/4.0.0 http://maven.apache.org/xsd/maven-4.0.0.xsd">
	<modelVersion>4.0.0</modelVersion>

	<groupId>com.example</groupId>
	<artifactId>springbootdemo</artifactId>
	<version>0.0.1-SNAPSHOT</version>
	<packaging>jar</packaging>

	<name>springbootdemo</name>
	<description>Demo project for Spring Boot</description>

	<!--起步依赖-->
	<parent>
		<groupId>org.springframework.boot</groupId>
		<artifactId>spring-boot-starter-parent</artifactId>
		<version>1.5.2.RELEASE</version>
		<relativePath/> <!-- lookup parent from repository -->
	</parent>

	<properties>
		<project.build.sourceEncoding>UTF-8</project.build.sourceEncoding>
		<project.reporting.outputEncoding>UTF-8</project.reporting.outputEncoding>
		<java.version>1.8</java.version>
	</properties>

	<dependencies>
		<!--开发web项目相关依赖-->
		<dependency>
			<groupId>org.springframework.boot</groupId>
			<artifactId>spring-boot-starter-web</artifactId>
		</dependency>
		<!--springboot单元测试-->
		<dependency>
			<groupId>org.springframework.boot</groupId>
			<artifactId>spring-boot-starter-test</artifactId>
			<scope>test</scope>
		</dependency>
	</dependencies>

	<!--maven构建-->
	<build>
		<plugins>
			<plugin>
				<groupId>org.springframework.boot</groupId>
				<artifactId>spring-boot-maven-plugin</artifactId>
			</plugin>
		</plugins>
	</build>


</project>
6. Créez un HelloController
package com.example;

import org.springframework.web.bind.annotation.RequestMapping;
import org.springframework.web.bind.annotation.RestController;

@RestController
public class HelloController {

    @RequestMapping("/hello")
    public String hello() {
        return "hello,this is a springboot demo";
    }
}7. La SpringbootdemoApplication générée automatiquement par le programme aura une annotation @SpringBootApplication. le point d'entrée du programme
package com.example;

import org.springframework.boot.SpringApplication;
import org.springframework.boot.autoconfigure.SpringBootApplication;

//入口
@SpringBootApplication
public class SpringbootdemoApplication {

	public static void main(String[] args) {
		SpringApplication.run(SpringbootdemoApplication.class, args);
	}
}@SpringBootApplication active l'analyse des composants de Spring et la fonction de configuration automatique de Springboot, ce qui équivaut à combiner les trois annotations suivantes ensemble
(1) @Configuration : Nom de la table Cette classe utilise une configuration basée sur Java, utilisez cette classe comme classe de configuration
(2) @ComponentScan : Activer l'analyse des annotations
(3) @EnableAutoConfiguration : Activer la fonction de configuration automatique de Springboot
8. Exécutez la classe SpringbootdemoApplication
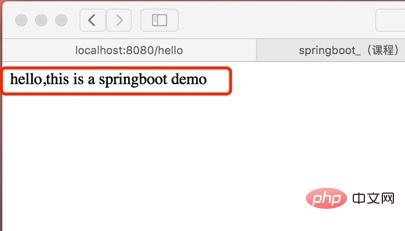
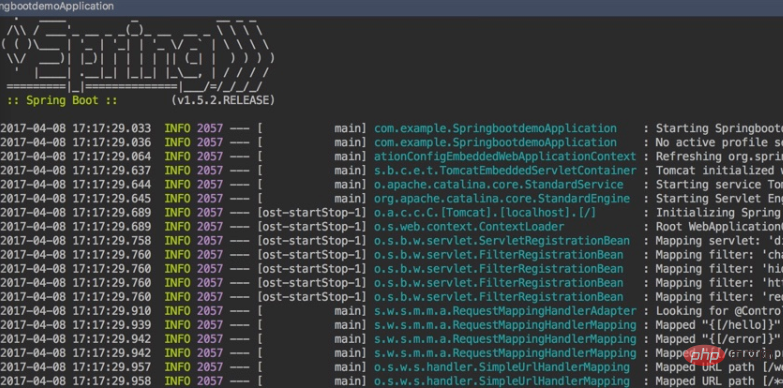 9. Test :
Entrez http://localhost:8080/hello dans la barre d'adresse
9. Utilisez la méthode de démarrage du package jar pour démarrer
(1) Entrez d'abord le répertoire où se trouve le projet. est un système Mac, faites un clic droit sur le projet et sélectionnez Révéler dans le Finder. Pour les systèmes Windows, faites un clic droit sur le projet et sélectionnez Afficher dans l'Explorateur pour ouvrir le répertoire du projet
(2) Ouvrez le terminal et entrez dans le répertoire du projet
cd /Users/shanml/IdeaProjects/SpringbootDemo
Entrez mvn install pour construire le projet
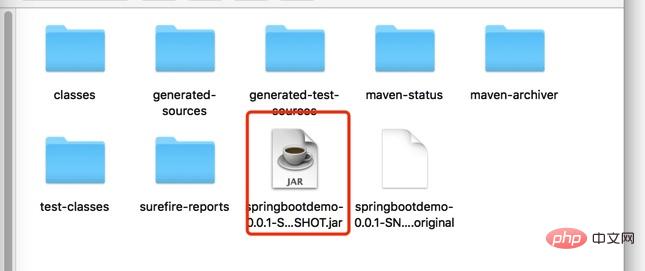
(3) Une fois la construction réussie, il y aura un package jar supplémentaire
(4) Utilisez java -jar springbootdemo-0.0.1 -SNAPSHOT.jar
Démarrez le package jar
Tutoriel recommandé : "
Ce qui précède est le contenu détaillé de. pour plus d'informations, suivez d'autres articles connexes sur le site Web de PHP en chinois!
 Une liste complète des touches de raccourci d'idées
 Étapes de création du projet SpringBoot
 Comment intégrer l'idée avec Tomcat
 Comment configurer Maven dans Idea
 Quelle est la différence entre éclipse et idée ?
 Quelle est la différence entre webstorm et idée ?
 Quelle est la différence entre j2ee et springboot
 Pourquoi la page Web de l'espace QQ ne peut-elle pas être ouverte ?