

Recommandé (gratuit) : Tutoriel de développement d'uni-app
Répertoire d'articles
Avant-propos
Le contenu de cet article comprend principalement trois parties : déclarer et rendre les variables, y compris le rendu conditionnel ; définir les styles via la classe et le style et les lier dynamiquement, y compris la transmission des paramètres d'événement ; Les trois parties ont des caractéristiques de liaison dynamique.1. Syntaxe du modèle et liaison de données
1. Déclarer et restituer les variables
Avant d'utiliser des variables, vous devez Commencez pardéclarez , généralement dans le bloc de données. Par exemple, la variable de titre définie dans index.vue dans le projet hello uniapp est la suivante :
data() {
    return {
        title: 'Hello'
}}, pour appeler des variables dans la vue du bloc de langage modèle, et peut lier plusieurs types de variables, y compris les types de données de base, les tableaux, etc. {<!-- -->{}}
<template>
	<view class="content">
		<image class="logo" src="/static/logo.png"></image>
		<view class="text-area">
			<text class="title">{{title}}</text>
		</view>
		<view class="red">
			hello-{{name}}		</view>
	</view></template><script>
	export default {
		data() {
			return {
				title: 'Hello',
				name: 'Corley'
			}
		},
		onLoad() {
			console.log('index onload')
		},
		onShow() {
			console.log('index onshow')
		},
		onHide() {
			console.log('index onhide')
		},
		methods: {

		}
	}</script><style>
	.content {
		display: flex;
		flex-direction: column;
		align-items: center;
		justify-content: center;
	}

	.logo {
		height: 200rpx;
		width: 200rpx;
		margin-top: 200rpx;
		margin-left: auto;
		margin-right: auto;
		margin-bottom: 50rpx;
	}

	.text-area {
		display: flex;
		justify-content: center;
	}

	.title {
		font-size: 36rpx;
		color: #8f8f94;
	}</style>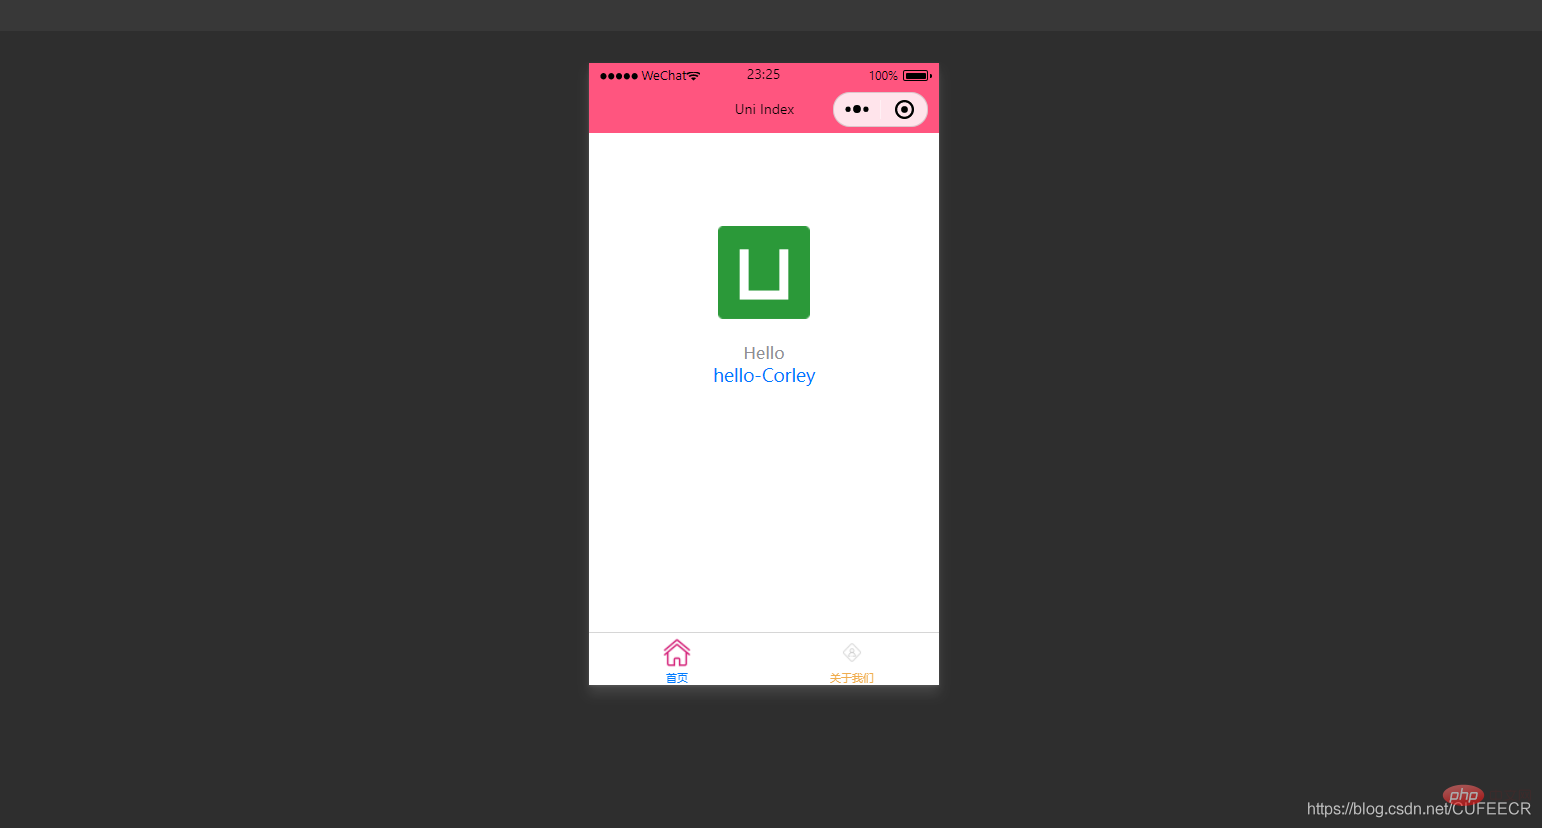
responsive, c'est-à-dire que le résultat rendu dans la vue est lié à la variable elle-même et changera de manière synchrone , index. vue est le suivant :
<template>
	<view class="content">
		<image class="logo" src="/static/logo.png"></image>
		<view class="text-area">
			<text class="title">{{title}}</text>
		</view>
		<view class="red">
			hello-{{name}}-{{age}}		</view>
	</view></template><script>
	var _self;
	export default {
		data() {
			return {
				title: 'Hello',
				name: 'Corley',
				age: 18
			}
		},
		onLoad() {
			_self = this;
			setTimeout(function(){
				_self.age = 20
			}, 3000);
		},
		onShow() {
			console.log('index onshow')
		},
		onHide() {
			console.log('index onhide')
		},
		methods: {

		}
	}</script><style>
	.content {
		display: flex;
		flex-direction: column;
		align-items: center;
		justify-content: center;
	}

	.logo {
		height: 200rpx;
		width: 200rpx;
		margin-top: 200rpx;
		margin-left: auto;
		margin-right: auto;
		margin-bottom: 50rpx;
	}

	.text-area {
		display: flex;
		justify-content: center;
	}

	.title {
		font-size: 36rpx;
		color: #8f8f94;
	}</style>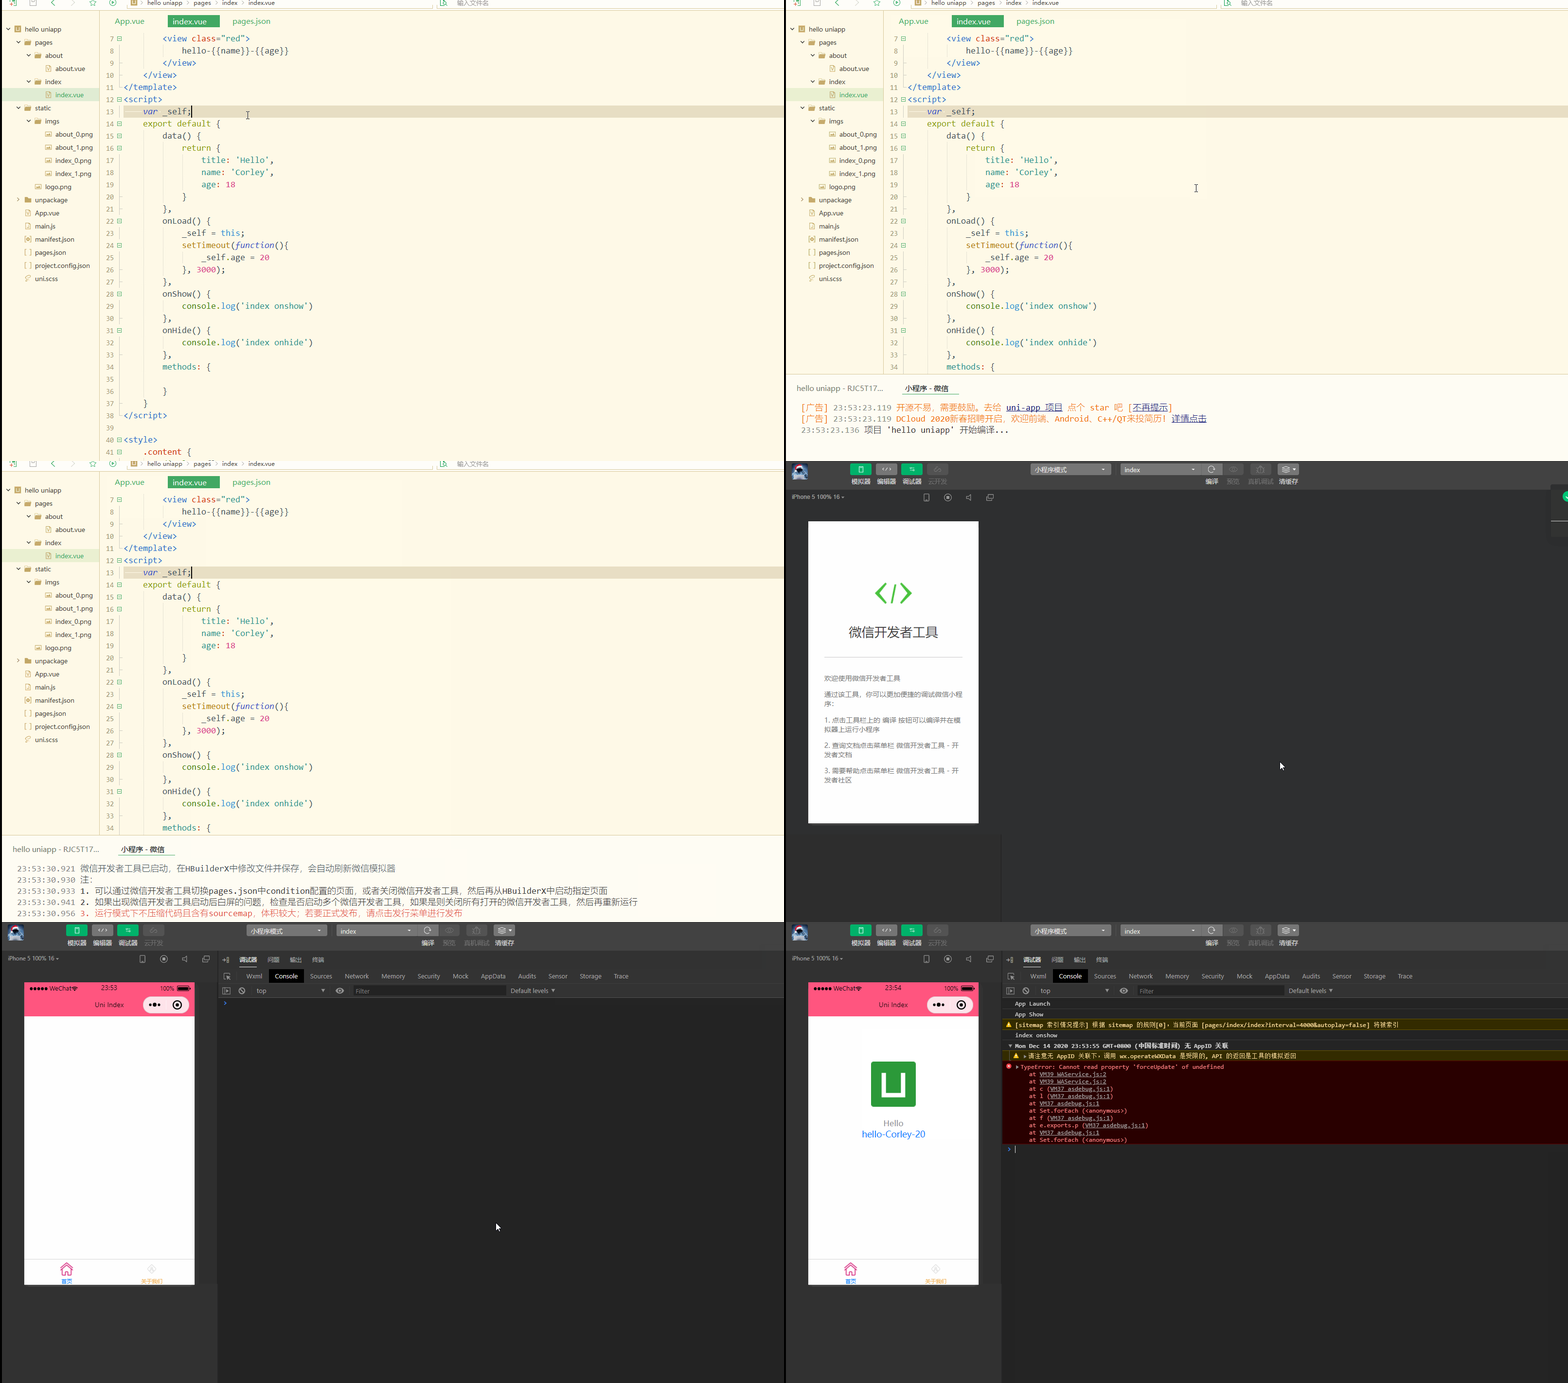
, la variable d'âge rendue change également et devient 20. . onLoad
<template>
	<view class="content">
		<image class="logo" src="/static/logo.png"></image>
		<view class="text-area">
			<text class="title">{{title}}</text>
		</view>
		<view class="red">
			{{students[0]}}<br>
			{{students[0].name}}		</view>
	</view></template><script>
	var _self;
	export default {
		data() {
			return {
				title: 'Hello',
				name: 'Corley',
				age: 18,
				students: [{
						name: "张三",
						age: 18
					},
					{
						name: "李四",
						age: 20
					}
				]
			}
		},
		onLoad() {
			_self = this;
			setTimeout(function() {
				_self.age = 20
			}, 3000);
		},
		onShow() {
			console.log('index onshow')
		},
		onHide() {
			console.log('index onhide')
		},
		methods: {

		}
	}</script><style>
	.content {
		display: flex;
		flex-direction: column;
		align-items: center;
		justify-content: center;
	}

	.logo {
		height: 200rpx;
		width: 200rpx;
		margin-top: 200rpx;
		margin-left: auto;
		margin-right: auto;
		margin-bottom: 50rpx;
	}

	.text-area {
		display: flex;
		justify-content: center;
	}

	.title {
		font-size: 36rpx;
		color: #8f8f94;
	}</style>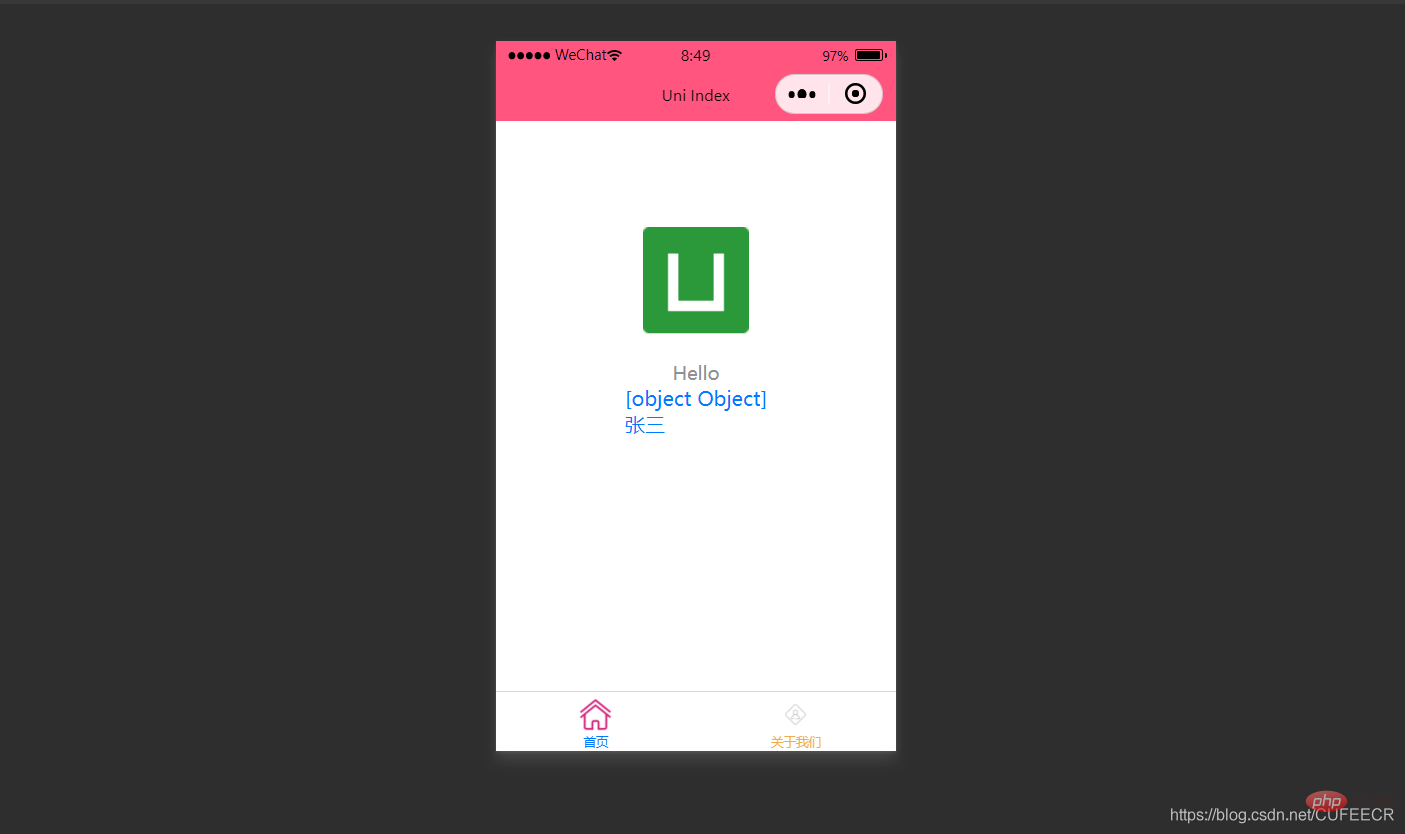
pour parcourir. v-for index.vue est le suivant :
<template>
	<view class="content">
		<image class="logo" src="/static/logo.png"></image>
		<view class="text-area">
			<text class="title">{{title}}</text>
		</view>
		<view v-for="(item, index) in students">
			{{index}} - {{item.name}} : {{item.age}}		</view>
	</view></template><script>
	var _self;
	export default {
		data() {
			return {
				title: 'Hello',
				name: 'Corley',
				age: 18,
				students: [{
						name: "张三",
						age: 18
					},
					{
						name: "李四",
						age: 20
					}
				]
			}
		},
		onLoad() {
			_self = this;
			setTimeout(function() {
				_self.age = 20
			}, 3000);
		},
		onShow() {
			console.log('index onshow')
		},
		onHide() {
			console.log('index onhide')
		},
		methods: {

		}
	}</script><style>
	.content {
		display: flex;
		flex-direction: column;
		align-items: center;
		justify-content: center;
	}

	.logo {
		height: 200rpx;
		width: 200rpx;
		margin-top: 200rpx;
		margin-left: auto;
		margin-right: auto;
		margin-bottom: 50rpx;
	}

	.text-area {
		display: flex;
		justify-content: center;
	}

	.title {
		font-size: 36rpx;
		color: #8f8f94;
	}</style>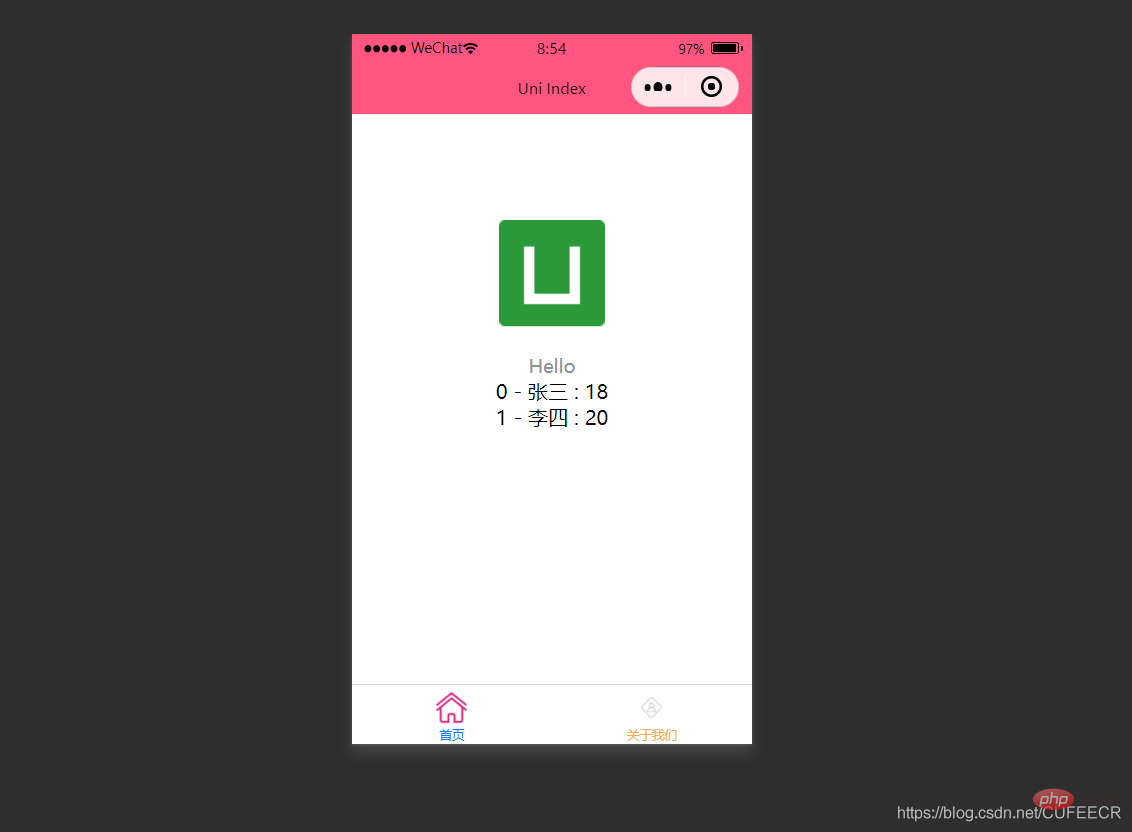
2. Rendu conditionnel
Le rendu conditionnel signifie le rendu d'un élément uniquement lorsqu'une certaine condition est remplie, utilisez. v-if
<template>
	<view class="content">
		<image class="logo" src="/static/logo.png"></image>
		<view class="text-area">
			<text class="title">{{title}}</text>
		</view>
		<view v-if="show1">
			show1...		</view>
		<view v-if="show2">
			show2...		</view>
	</view></template><script>
	var _self;
	export default {
		data() {
			return {
				title: 'Hello',
				name: 'Corley',
				age: 18,
				show1: true,
				show2: false
			}
		},
		onLoad() {
			_self = this;
			setTimeout(function() {
				_self.age = 20
			}, 3000);
		},
		onShow() {
			console.log('index onshow')
		},
		onHide() {
			console.log('index onhide')
		},
		methods: {

		}
	}</script><style>
	.content {
		display: flex;
		flex-direction: column;
		align-items: center;
		justify-content: center;
	}

	.logo {
		height: 200rpx;
		width: 200rpx;
		margin-top: 200rpx;
		margin-left: auto;
		margin-right: auto;
		margin-bottom: 50rpx;
	}

	.text-area {
		display: flex;
		justify-content: center;
	}

	.title {
		font-size: 36rpx;
		color: #8f8f94;
	}</style>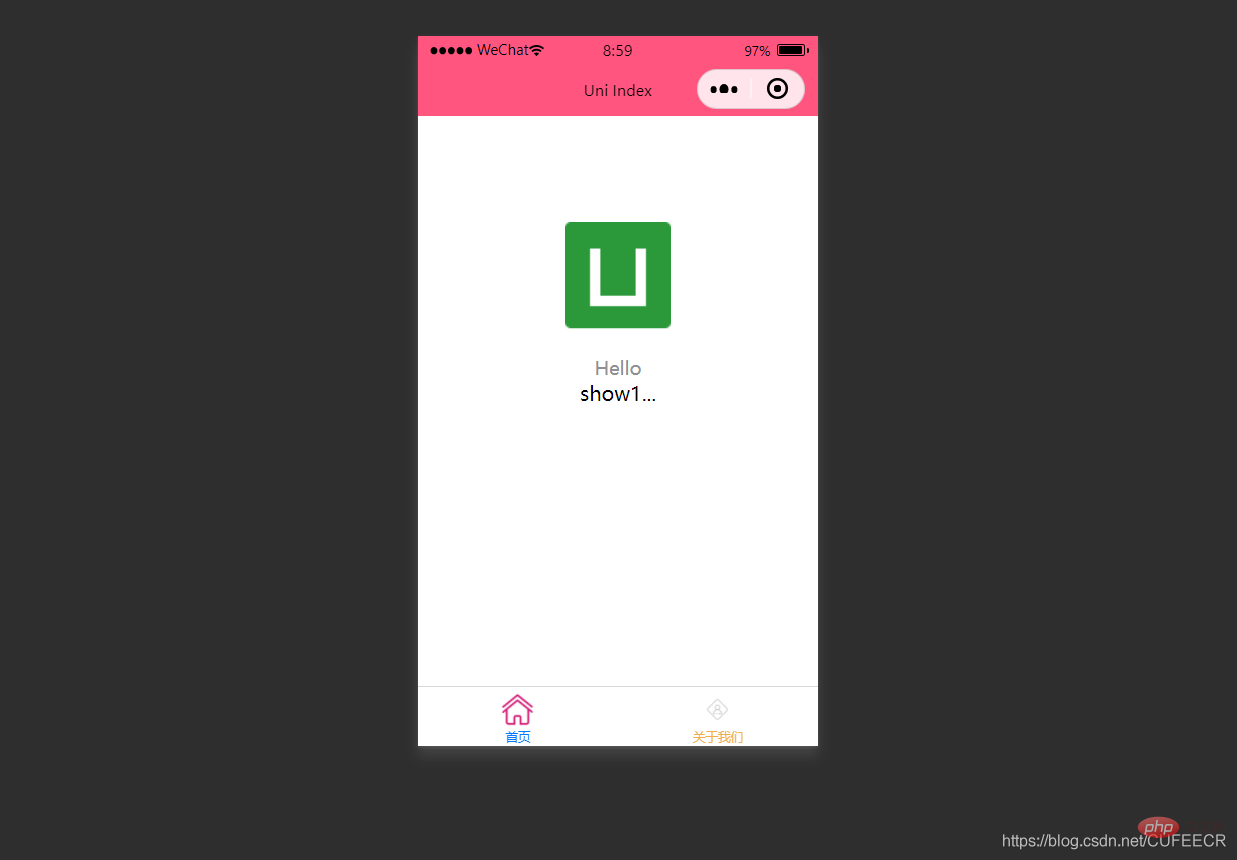
. L'attribut v-if
permet de définir s'il faut masquer un élément, de la manière suivante : :hidden
<template>
	<view class="content">
		<image class="logo" src="/static/logo.png"></image>
		<view class="text-area">
			<text class="title">{{title}}</text>
		</view>
		<view :hidden="show1">
			show1...		</view>
		<view :hidden="show2">
			show2...		</view>
	</view></template><script>
	var _self;
	export default {
		data() {
			return {
				title: 'Hello',
				name: 'Corley',
				age: 18,
				show1: true,
				show2: false
			}
		},
		onLoad() {
			_self = this;
			setTimeout(function() {
				_self.age = 20
			}, 3000);
		},
		onShow() {
			console.log('index onshow')
		},
		onHide() {
			console.log('index onhide')
		},
		methods: {

		}
	}</script><style>
	.content {
		display: flex;
		flex-direction: column;
		align-items: center;
		justify-content: center;
	}

	.logo {
		height: 200rpx;
		width: 200rpx;
		margin-top: 200rpx;
		margin-left: auto;
		margin-right: auto;
		margin-bottom: 50rpx;
	}

	.text-area {
		display: flex;
		justify-content: center;
	}

	.title {
		font-size: 36rpx;
		color: #8f8f94;
	}</style>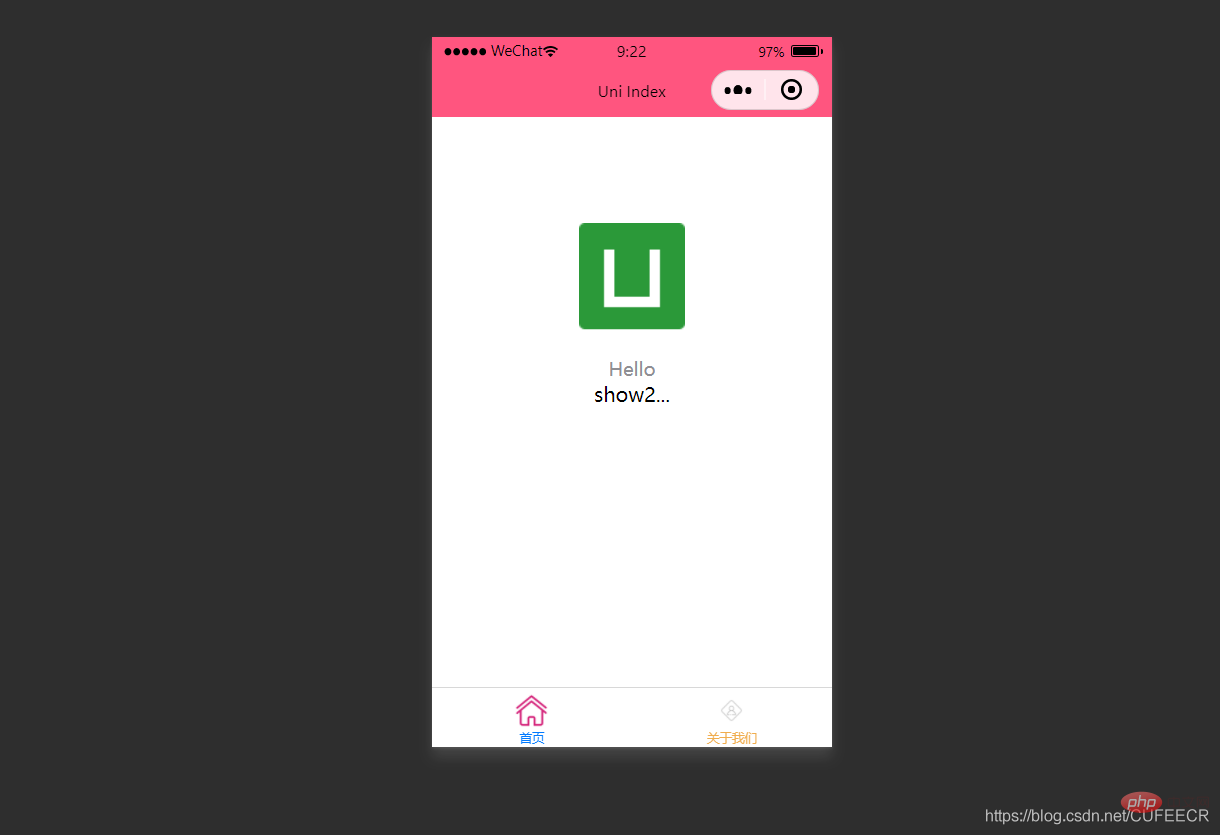
et v-if ont l'effet inverse, mais il y a quand même une certaine différence de principe : :hidden
détermine si v-if rendra en fonction des conditions, rendra mais détermine si :hidden s'affichera , vous pourrez choisir en fonction de vos besoins spécifiques.
Comme mentionné précédemment, vous pouvez définir directement le style via l'attribut style dans une balise du bloc de langue du modèle, ou vous pouvez Définissez le style via le sélecteur dans le bloc de langue de style, puis utilisez-le dans le bloc de langue du modèle.
Afin d'économiser les performances, les expressions de classe et de style peuvent être codées en dur
dans l'uni-app via le compilateur, et un jugement conditionnel peut être utilisé pour déterminer s'il faut afficher un certain style .
Syntaxe 1.classLa syntaxe supportée par la classe est la suivante :
<!-- 1 --><view class="static" v-bind:class="{ active: isActive, 'text-danger': hasError }">111</view><!-- 2 --><view class="static" v-bind:class="[isActive ? activeClass : '', errorClass]">222</view><!-- 3 --><view class="static" v-bind:class="[{ active: isActive }, errorClass]">333</view><!-- 4 --><view :class="{ active: isActive }">444</view><!-- 5 --><view class="static" :class="[activeClass, errorClass]">555</view>Parmi eux, les trois premiers sont des formulaires complets, et le les deux derniers sont des abréviations Forme
est l'
opérateur ternaireisActive ? activeClass : ''. index.vue est le suivant :
<template>
<view class="content">
<image class="logo" src="/static/logo.png"></image>
<view class="text-area">
<text class="title">{{title}}</text>
</view>
<view :class="{'red' : isRed}">
class bind 2... </view>
<view :class="[isBlue ? 'blue' : 'red']">
class bind 3... </view>
</view></template><script>
export default {
data() {
return {
title: 'Hello',
name: 'Corley',
age: 18,
isRed: true,
isBlue: true
}
},
onLoad() {
},
onShow() {
console.log('index onshow')
},
onHide() {
console.log('index onhide')
},
methods: {
}
}</script><style>
.content {
display: flex;
flex-direction: column;
align-items: center;
justify-content: center;
}
.logo {
height: 200rpx;
width: 200rpx;
margin-top: 200rpx;
margin-left: auto;
margin-right: auto;
margin-bottom: 50rpx;
}
.text-area {
display: flex;
justify-content: center;
}
.title {
font-size: 36rpx;
color: #8f8f94;
}
.blue {
color: #007AFF;
}</style>Affichage :
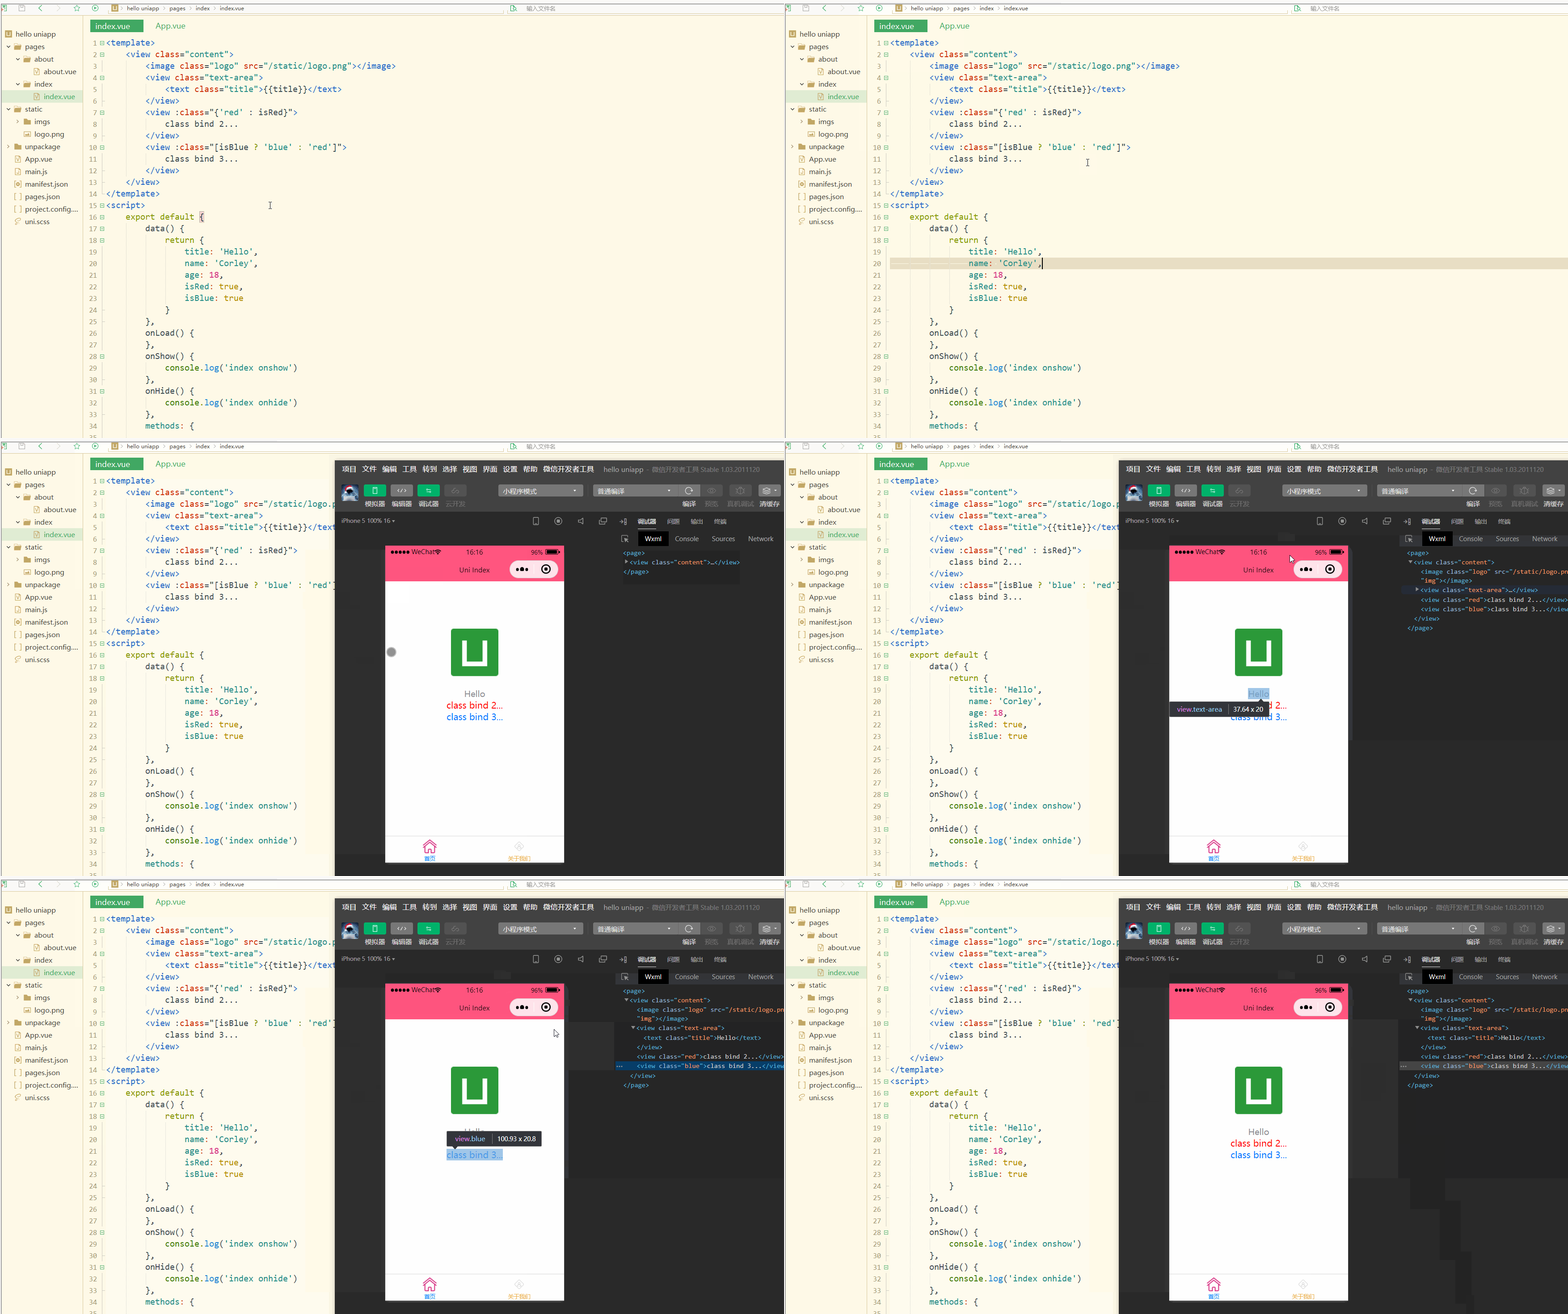 Vous pouvez voir qu'après compilation et sélection, le wxml affiché dans le développeur WeChat tools Est la valeur de classe rendue.
style prend en charge la syntaxe suivante :
<!-- 1 --><view v-bind:style="{ color: activeColor, fontSize: fontSize + 'px' }">111</view><!-- 2 --><view v-bind:style="[{ color: activeColor, fontSize: fontSize + 'px' }]">222</view><!-- 3 --><view :style="{ color: activeColor, fontSize: fontSize + 'px' }">333</view><!-- 4 --><view :style="[{ color: activeColor, fontSize: fontSize + 'px' }]">444</view>Parmi eux, les deux premiers sont des formulaires complets, et les deux derniers sont formes abrégées.
index.vue est le suivant :
<template>
<view class="content">
<image class="logo" src="/static/logo.png"></image>
<view class="text-area">
<text class="title">{{title}}</text>
</view>
<view style="font-size: 10px;">
style static... </view>
<view :style="{fontSize: fontSize+'px'}">
class dynamic... </view>
</view></template><script>
var _self;
export default {
data() {
return {
title: 'Hello',
name: 'Corley',
age: 18,
fontSize: 20
}
},
onLoad() {
_self = this;
setTimeout(function(){
_self.fontSize = 30;
}, 3000)
},
onShow() {
console.log('index onshow')
},
onHide() {
console.log('index onhide')
},
methods: {
}
}</script><style>
.content {
display: flex;
flex-direction: column;
align-items: center;
justify-content: center;
}
.logo {
height: 200rpx;
width: 200rpx;
margin-top: 200rpx;
margin-left: auto;
margin-right: auto;
margin-bottom: 50rpx;
}
.text-area {
display: flex;
justify-content: center;
}
.title {
font-size: 36rpx;
color: #8f8f94;
}
.blue {
color: #007AFF;
}</style>affiche :
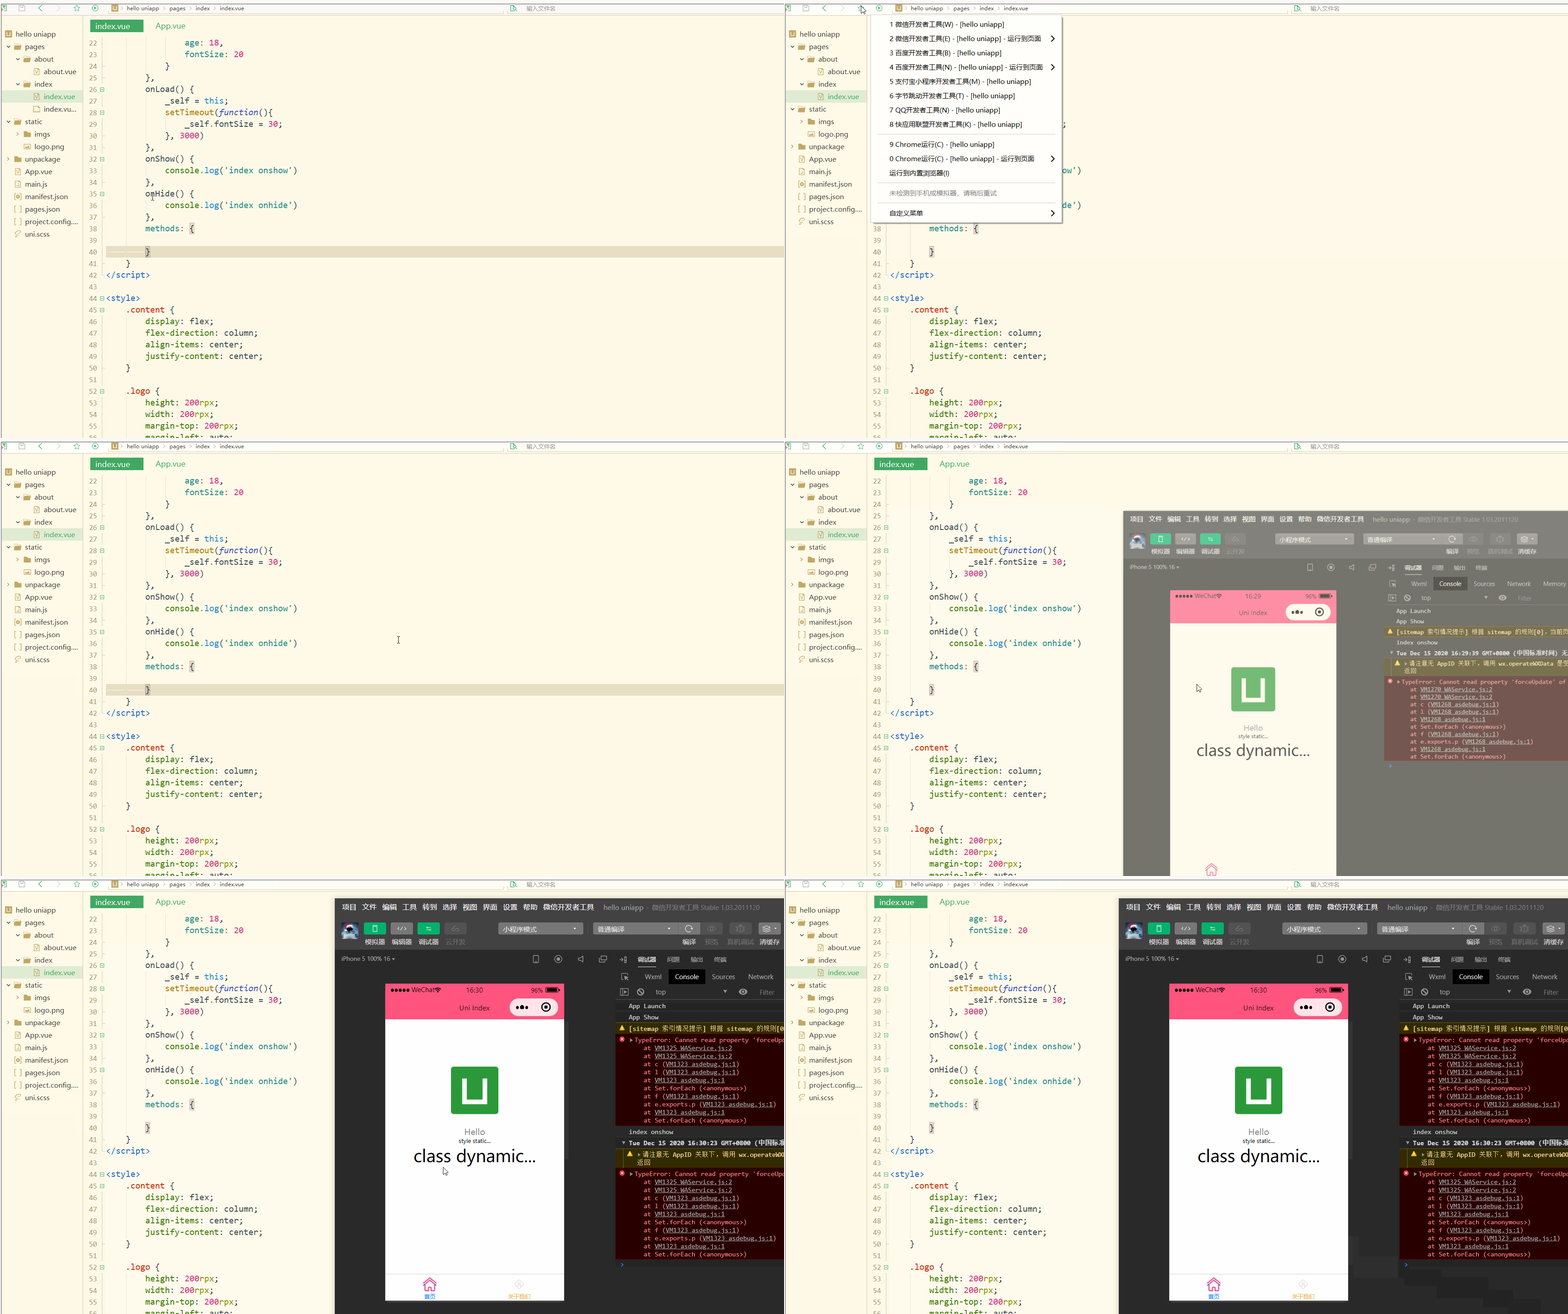 Évidemment, les styles peuvent changer de manière dynamique.
需要注意,uni-app不支持 Vue官方文档中Class 与 Style 绑定 中的 classObject 和 styleObject 语法,但是可以用 computed 方法生成 class 或者 style 字符串,插入到页面中,如下:
<template>
	<view>
		<!-- 支持 -->
		<view class="container" :class="computedClassStr"></view>
		<view class="container" :class="{active: isActive}"></view>
		<!-- 不支持 -->
		<view class="container" :class="computedClassObject"></view>
</view> </template>3.案例–动态菜单切换
本案例实现动态切换导航栏。
先展示横向排列的导航栏,index.vue如下:
<template>
	<view>
		<view v-for="(item, index) in menus" class="menu">
			{{item}}		</view>
	</view></template><script>
	var _self;
	export default {
		data() {
			return {
				menus: [
					'新闻', '汽车', '读书'
				]
			}
		},
		onLoad() {

		},
		onShow() {
			console.log('index onshow')
		},
		onHide() {
			console.log('index onhide')
		},
		methods: {

		}
	}</script><style>
	.menu {
		padding: 10px;
		float: left;
		margin: 5px;
		line-height: 36px;
}</style>显示: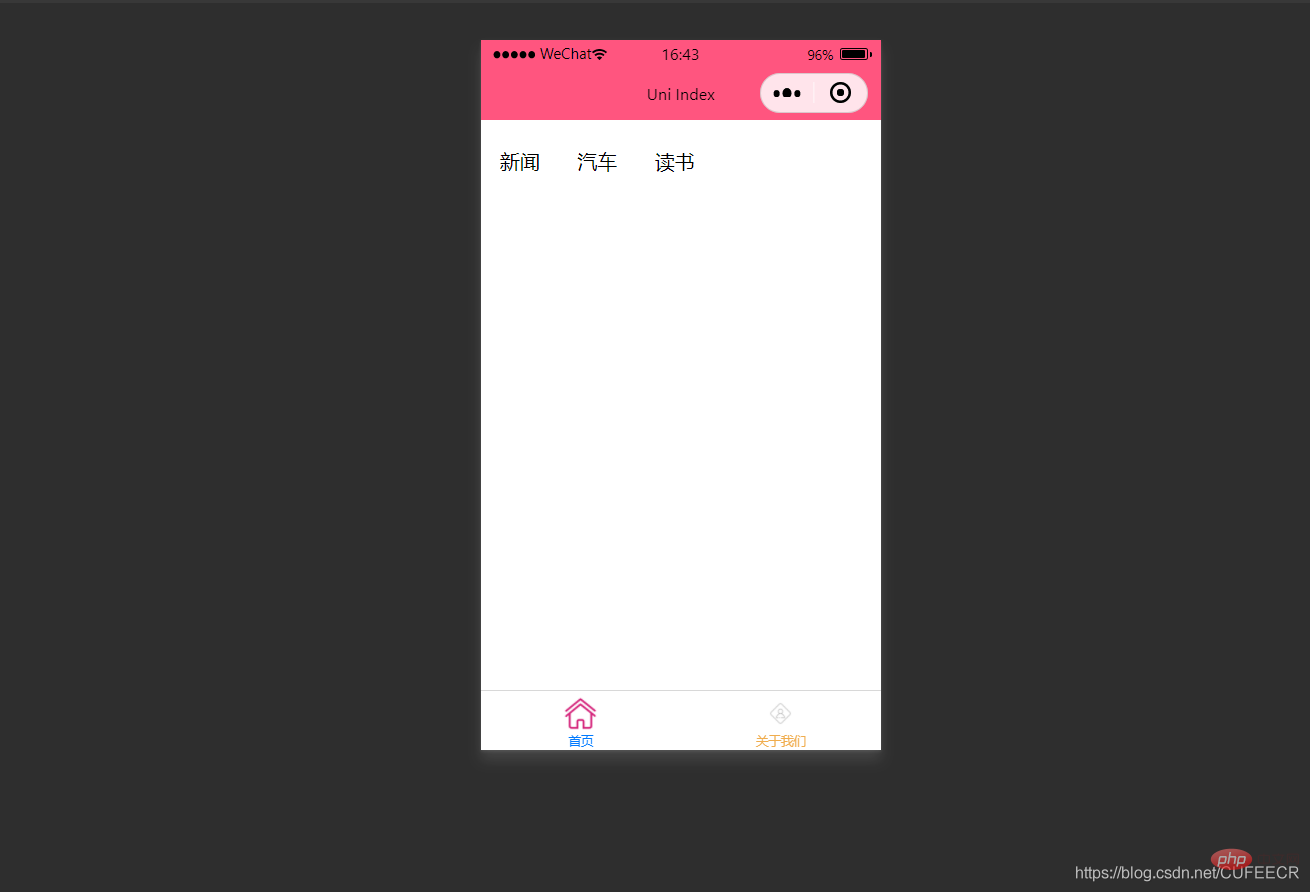
此时已经可以将导航栏横向展示了。
再实现当前的导航栏显示不一样的颜色,如下:
<template>
<view>
<view v-for="(item, index) in menus" class="menu" :class="[activeIndex==index?'menuActive':'']">
{{item}} </view>
</view></template><script>
var _self;
export default {
data() {
return {
menus: [
'新闻', '汽车', '读书'
],
activeIndex: 0
}
},
onLoad() {
},
onShow() {
console.log('index onshow')
},
onHide() {
console.log('index onhide')
},
methods: {
}
}</script><style>
.menu {
padding: 10px;
float: left;
margin: 5px;
line-height: 36px;
}
.menuActive {
color: #FF0000 !important;
}</style>显示: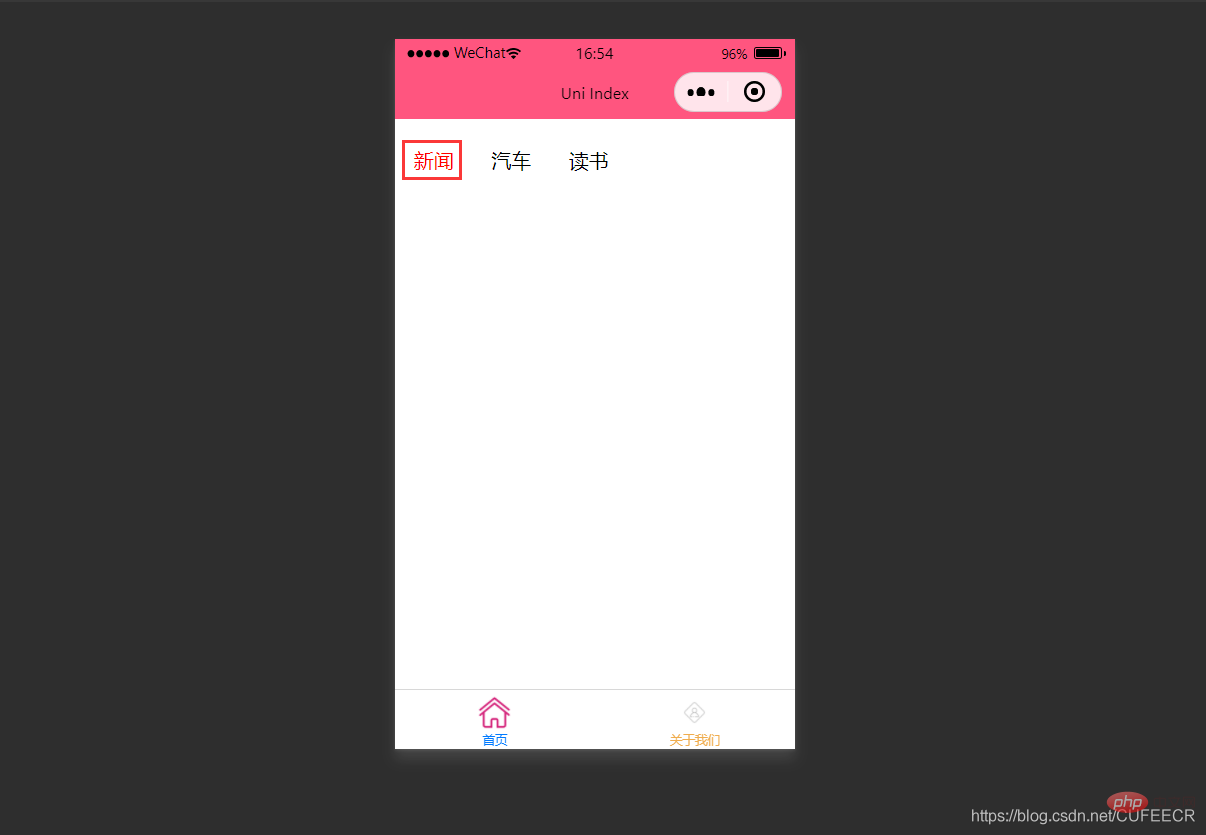
此时,第1个导航栏变为红色。
进一步实现点击时,颜色动态变化,如下:
<template>
<view>
<view v-for="(item, index) in menus" class="menu" :class="[activeIndex==index?'menuActive':'']" @click="menuClick" :id="index">
{{item}} </view>
</view></template><script>
var _self;
export default {
data() {
return {
menus: [
'新闻', '汽车', '读书'
],
activeIndex: 0
}
},
onLoad() {
_self = this
},
onShow() {
console.log('index onshow')
},
onHide() {
console.log('index onhide')
},
methods: {
menuClick: function(e){
var aid = e.target.id;
console.log(aid);
_self.activeIndex = aid;
}
}
}</script><style>
.menu {
padding: 10px;
float: left;
margin: 5px;
line-height: 36px;
}
.menuActive {
color: #FF0000 !important;
}</style>使用了事件来达到动态切换的效果。
显示: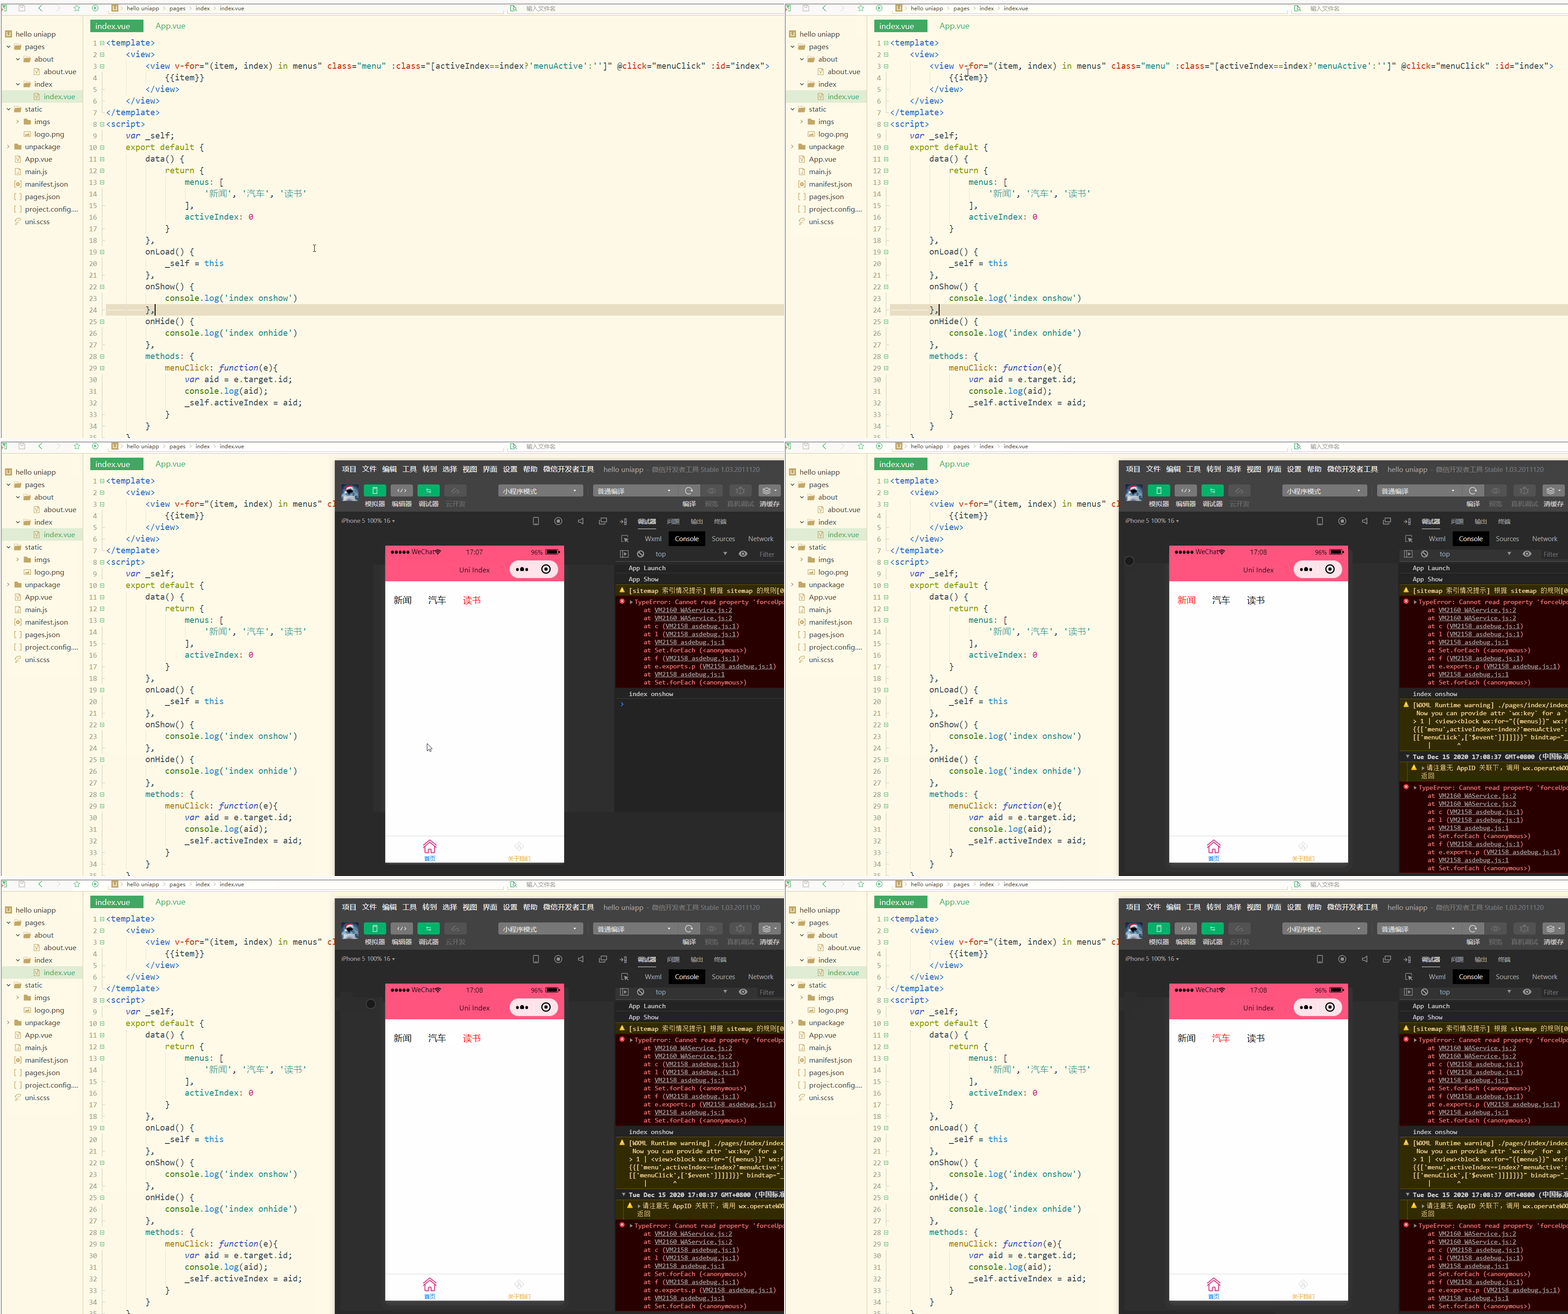
可以看到,点击不同的导航栏实现了颜色同步变化的效果。
三、事件和事件绑定
1.uni-app事件
事件映射表定义了WEB事件和uni-app事件之间的对应关系,具体如下:
| Web事件 | uni-app事件 | 说明 |
|---|---|---|
| click | ‘tap’ | 被点击 |
| touchstart | ‘touchstart’ | 手指开始在元素上触摸时 |
| touchmove | ‘touchmove’ | 移动 |
| touchcancel | ‘touchcancel’ | 取消 |
| touchend | ‘touchend’ | 结束 |
| tap | ‘tap’ | 单机 |
| longtap | ‘longtap’ | 长按 |
| input | ‘input’ | 输入 |
| change | ‘change’ | 改变 |
| submit | ‘submit’ | 表单提交 |
| blur | ‘blur’ | 失焦 |
| focus | ‘focus’ | 聚焦 |
| reset | ‘reset’ | 表单重置 |
| confirm | ‘confirm’ | 确认 |
| columnchange | ‘columnchange’ | 字段变化 |
| linechange | ‘linechange’ | 行比那花 |
| error | ‘error’ | 错误 |
| scrolltoupper | ‘scrolltoupper’ | 滚动到顶部 |
| scrolltolower | ‘scrolltolower’ | 滚动到底部 |
| scroll | ‘scroll’ | 滚动 |
说明:
(1)在 input 和 textarea 中 change 事件会被转为 blur 事件;
(2)列表中没有的原生事件也可以使用,例如map组件的regionchange 事件直接在组件上添加@regionchange修饰即可,同时这个事件也非常特殊,它的 event type 有 begin 和 end 两个,导致我们无法在handleProxy 中区分到底是什么事件,所以在监听此类事件的时候同时监听事件名和事件类型,即<map @regionchange="functionName" @end="functionName" @begin="functionName"><map>;
(3)由于平台的差异,bind 和 catch 事件同时绑定时,只会触发 bind,catch 不会被触发,使用时需要注意。
(4)件修饰符:
(5)按键修饰符:
uni-app运行在手机端,没有键盘事件,所以不支持按键修饰符。
2.事件绑定
使用@对元素进行事件绑定,当事件被触发时,会导致相应的操作。
index.vue如下:
<template>
	<view>
		<view class="demo" @click="clickTest" @longtap="longtap"></view>
	</view></template><script>
	var _self;
	export default {
		data() {
			return {
			}
		},
		onLoad() {
			_self = this
		},
		onShow() {
			console.log('index onshow')
		},
		onHide() {
			console.log('index onhide')
		},
		methods: {
			clickTest : function(e){
				console.log("click")
			},
			longtap : function(e){
				console.log("longtap")
			},
		}
	}</script><style>
	.demo {
		width: 600rpx;
		height: 600rpx;
		background: #DD524D;
}</style>显示: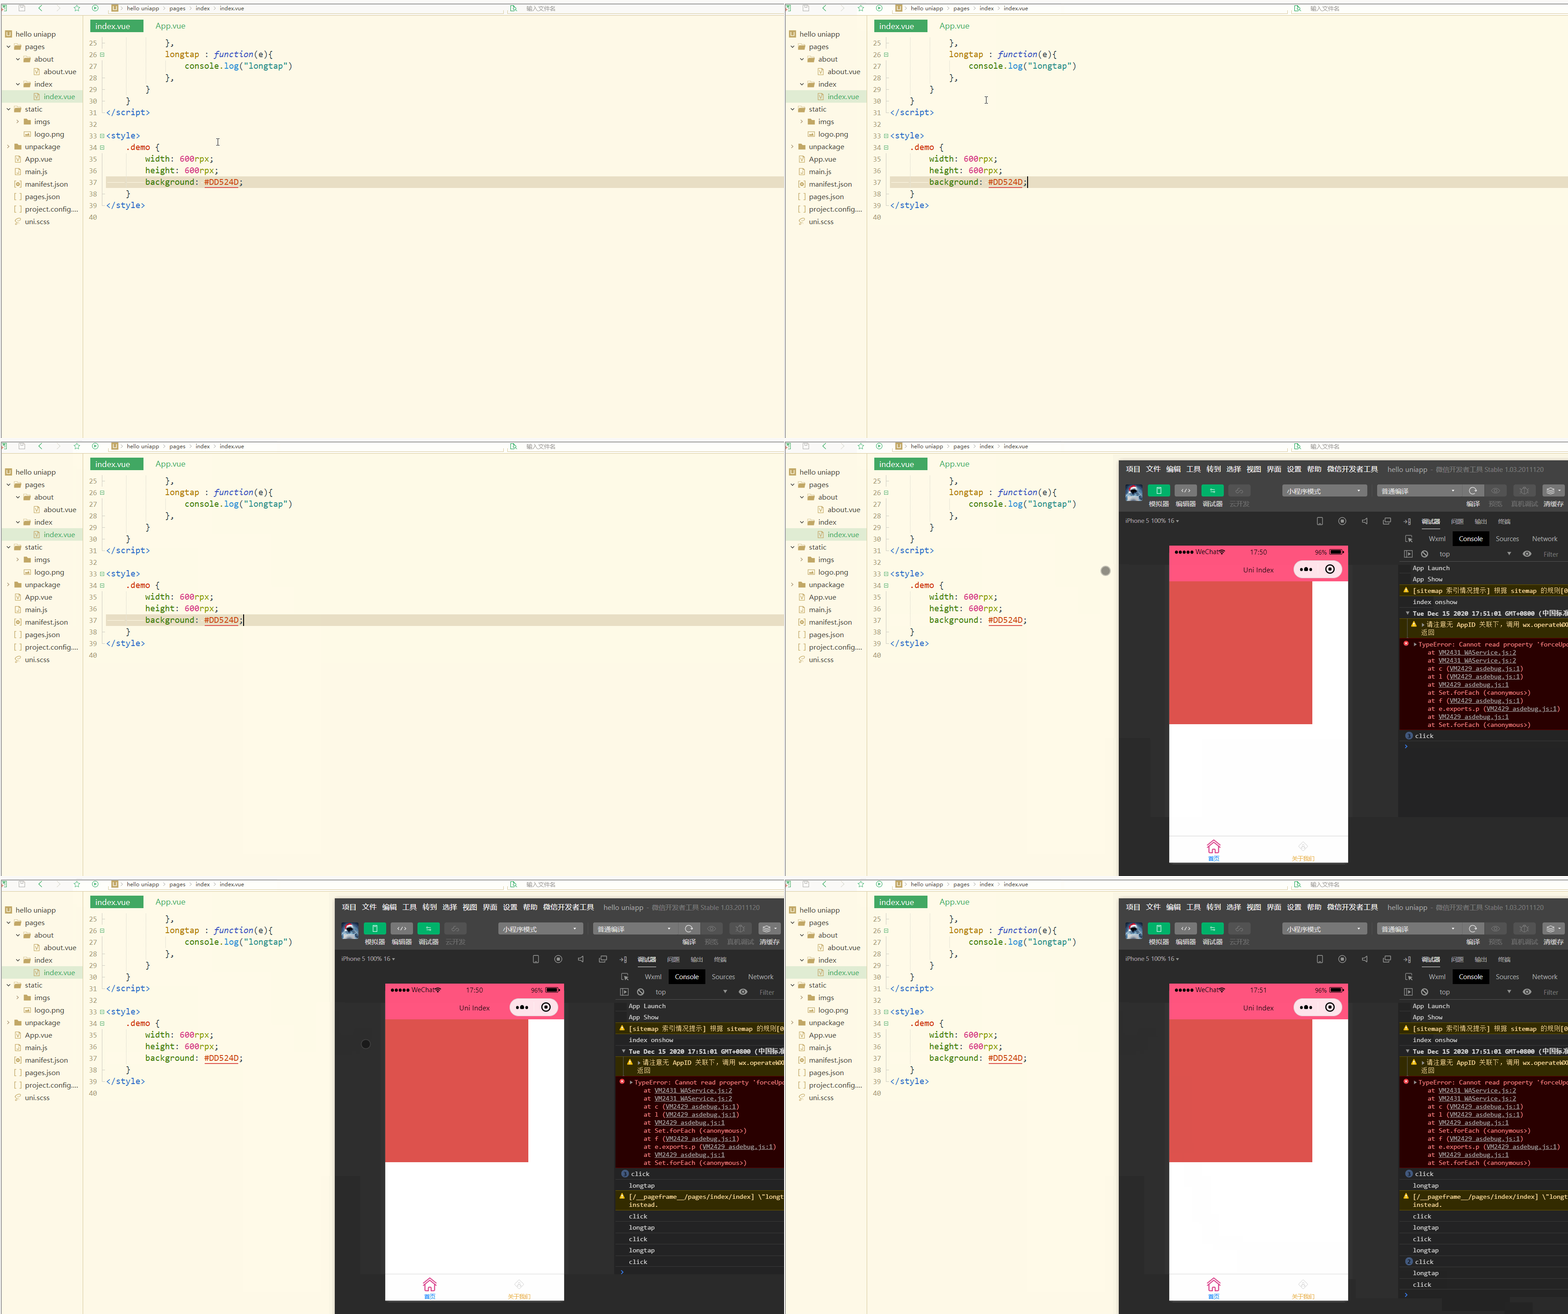
可以看到,在进行点击和长按时,会触发不同的事件、执行不同的操作。
可以在小程序中观察对应事件对象,并利用此对象获取更多信息。
3.事件传参
在触发事件时,还可以传入动态参数。
如下:
<template>
	<view>
		<view v-for="(item, index) in students" class="persons" @click="menuClick" v-bind:id="index">{{index}} - {{item.name}}</view>
	</view></template><script>
	var _self;
	export default {
		data() {
			return {
				students: [{
						name: "张三",
						age: 18
					},
					{
						name: "李四",
						age: 20
					}
				]
			}
		},
		onLoad() {
			_self = this
		},
		onShow() {
			console.log('index onshow')
		},
		onHide() {
			console.log('index onhide')
		},
		methods: {
			menuClick: function(e) {
				console.log(e);
				console.log(e.target.id);
			},
		}
	}</script><style>
	.demo {
		width: 600rpx;
		height: 600rpx;
		background: #DD524D;
}</style>显示: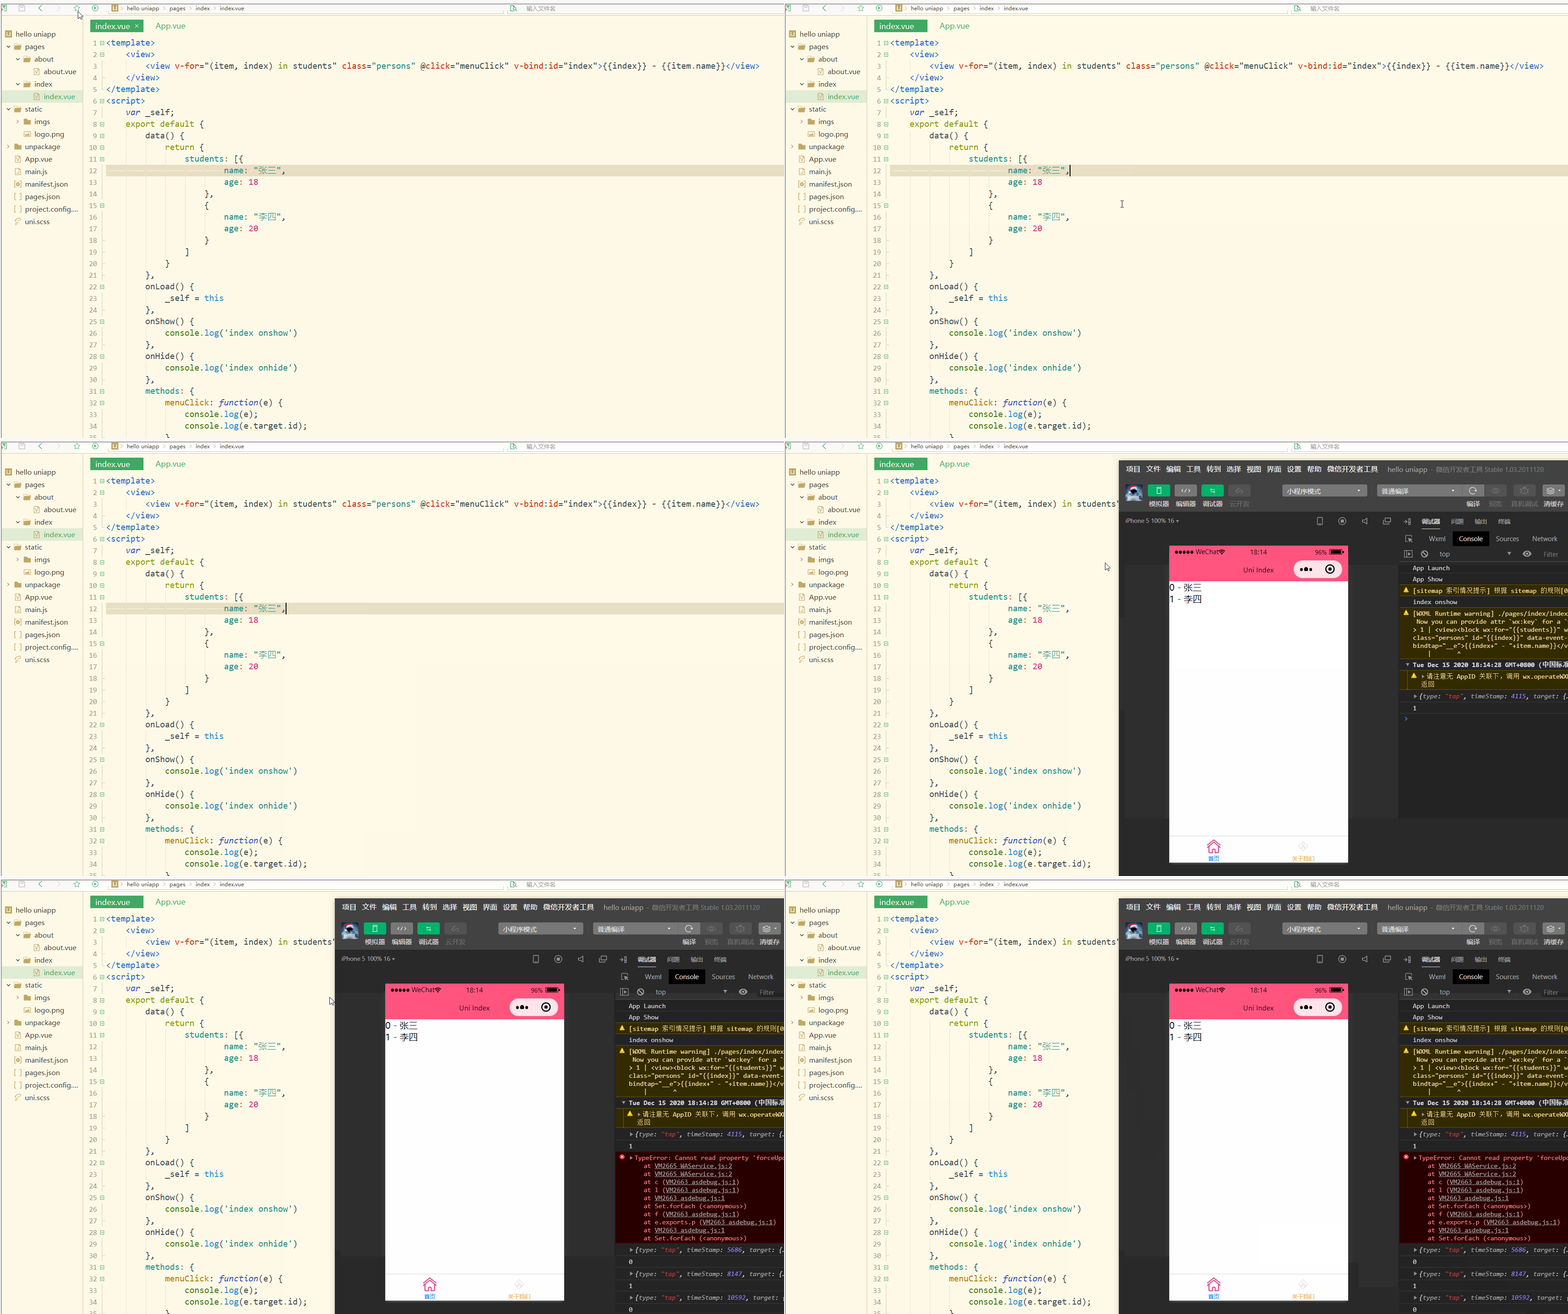
可以看到,在进行点击时,控制台打印出了事件对象和e.target.id的值。
再如:
<template>
	<view>
		<view class="demo" id="outid" @click="clickTest" @longtap="longtap">
			<view id="inid" style="width: 400rpx;height: 400rpx;background: #007AFF;"></view>
		</view>
	</view></template><script>
	var _self;
	export default {
		data() {
			return {
			}
		},
		onLoad() {
			_self = this
		},
		onShow() {
			console.log('index onshow')
		},
		onHide() {
			console.log('index onhide')
		},
		methods: {
			clickTest : function(e){
				console.log(e.currentTarget.id)
				console.log(e.target.id)
			},
			longtap : function(e){
				console.log("longtap")
			},
		}
	}</script><style>
	.demo {
		width: 600rpx;
		height: 600rpx;
		background: #DD524D;
}</style>显示: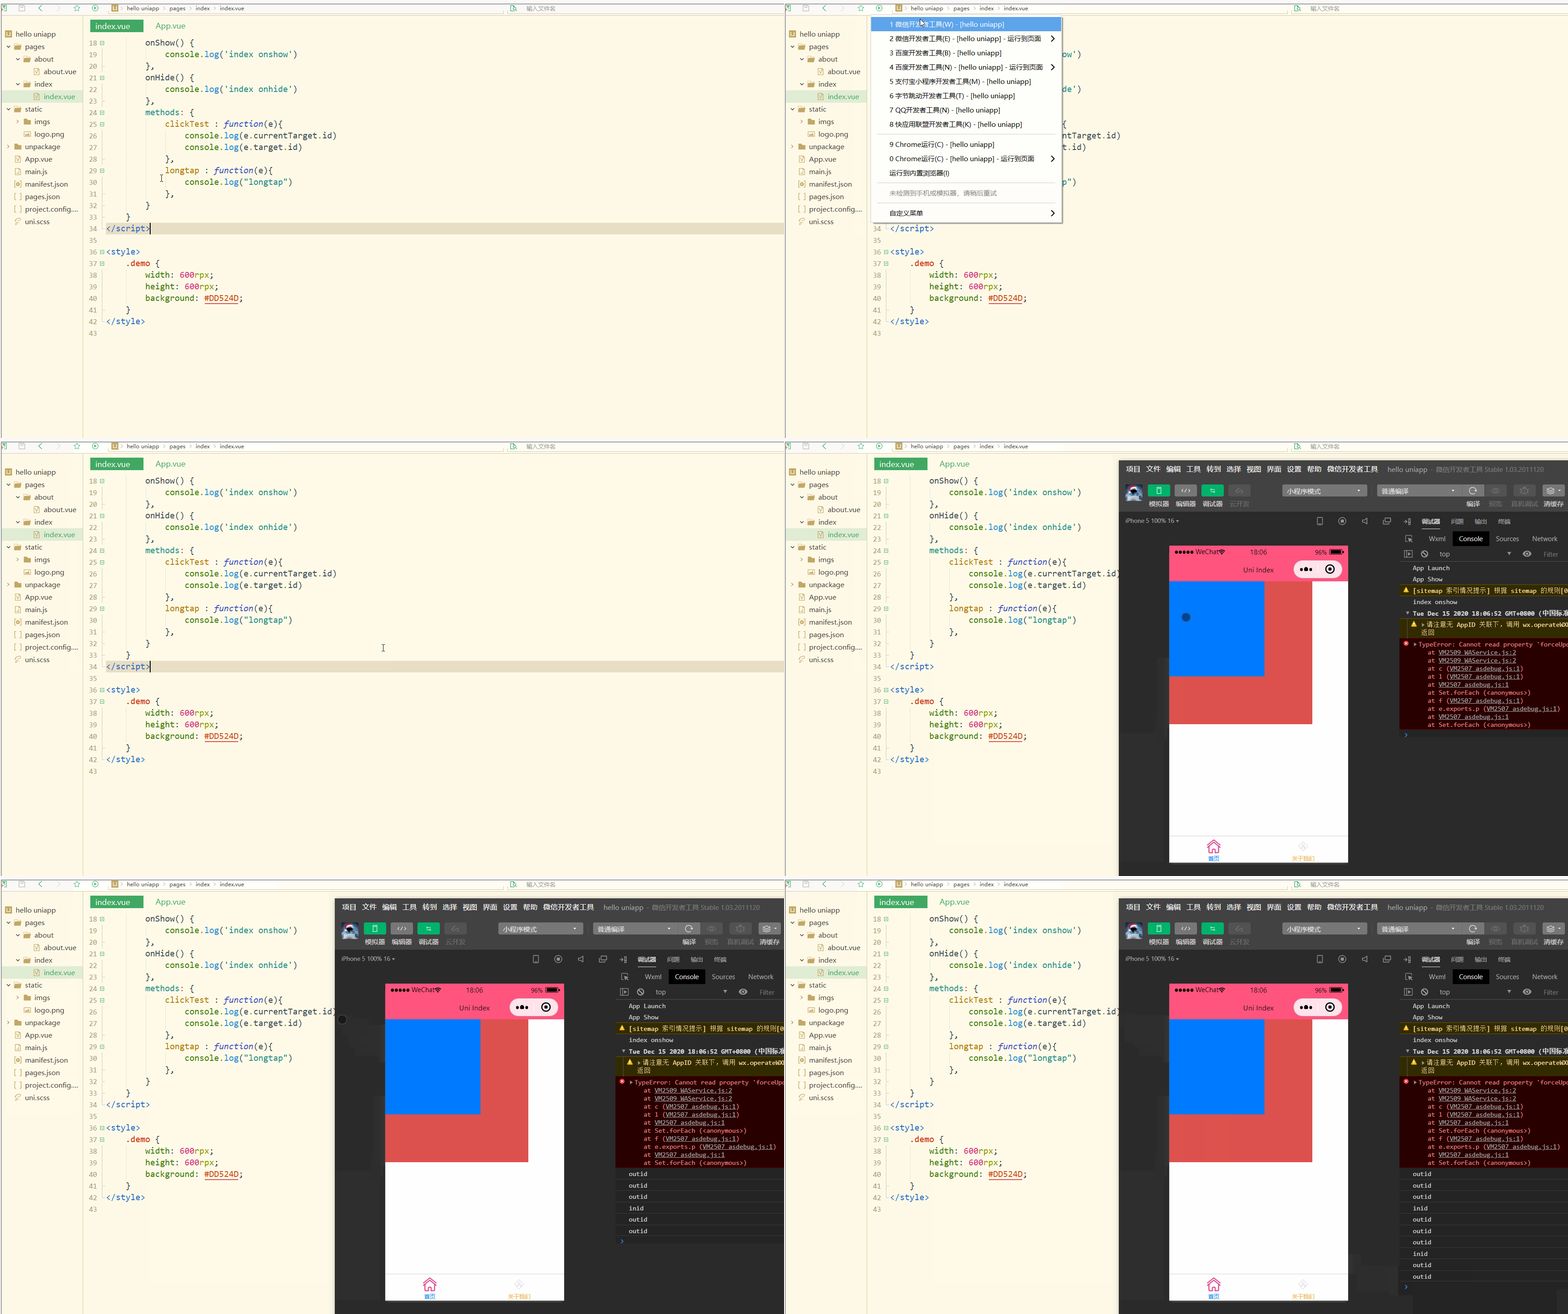
可以看到,在点击外部红色区域时,打印的两个id值相同;
而在点击内部蓝色区域时,e.target变为内部的view元素,所以打印出的也是inid,所以在使用属性传参时尽量使用e.currentTarget。
总结
在uni-app中,不论是对于数据(变量),还是对于以class或style定义的样式,亦或定义的事件,都可以进行动态绑定、同步变化,这些特性有利于更高效地开发出所需功能,大大降低了开发成本。
Ce qui précède est le contenu détaillé de. pour plus d'informations, suivez d'autres articles connexes sur le site Web de PHP en chinois!
 Quels sont les outils du serveur de fichiers réseau ?
 Comment implémenter la fonction de chat en ligne de Vue
 Comment restaurer des vidéos qui ont été officiellement supprimées de Douyin
 Pourquoi l'ordinateur continue de redémarrer automatiquement
 Comment récupérer des fichiers vidés de la corbeille
 Comment résoudre le statut http 404
 L'expression régulière ne contient pas
 Quelles sont les méthodes de tri ?